Microsoft’s Windows 11 is a pretty operating system on almost any PC. But if you have a monitor that’s capable of running in high dynamic range (HDR) mode, you’ll get a brighter, more vivid experience–whether you’re mousing around the desktop, watching your favorite HDR movies, or hunkered down with your favorite HDR game. So you’ll want to make sure it’s enabled.
And if your monitor can display HDR, you’ll want to make sure it’s switched on as soon as you boot Windows 11, so that you get to experience the OS’ vivid wallpapers and visual design improvements in the best possible light.
If you
upgrade to Windows 11
on an existing PC,
download a Windows 11 ISO
for a clean install, or buy a new laptop or desktop with it preloaded, the HDR setting may be enabled by default. That seemed to be the case when I first installed Windows 11 on my desktop using my LG C1 OLED TV. But then once I rebooted for the first time, I found that HDR had been disabled for some reason, lending Windows 11 a duller, flatter image.
So whether you’re looking to enable HDR on Windows 11 for the first time, or you had it enabled and it went away, we’ll show you how to turn on HDR (or just make sure it’s enabled) in Microsoft’s latest OS below. Don’t worry, it’s a simple process that only takes a couple of steps.
And as is often the case with Windows, there are a couple ways to enable HDR in Windows 11, either via the desktop or the Start menu.
1. Right-click on the desktop and click Display settings. Avoiding the new Start menu for now, clicking Display settings from the desktop’s right-click menu brings up a newly redesigned window for most of your monitor adjustment needs.
2. Flip the switch labeled Use HDR. One item down on the Windows 11 Display settings window, you should see a Use HDR item. To the right of the label is a toggle switch. If your monitor is capable of HDR, you’ll be able to switch it and bathe in the glow of extra colors, contrast and brightness.
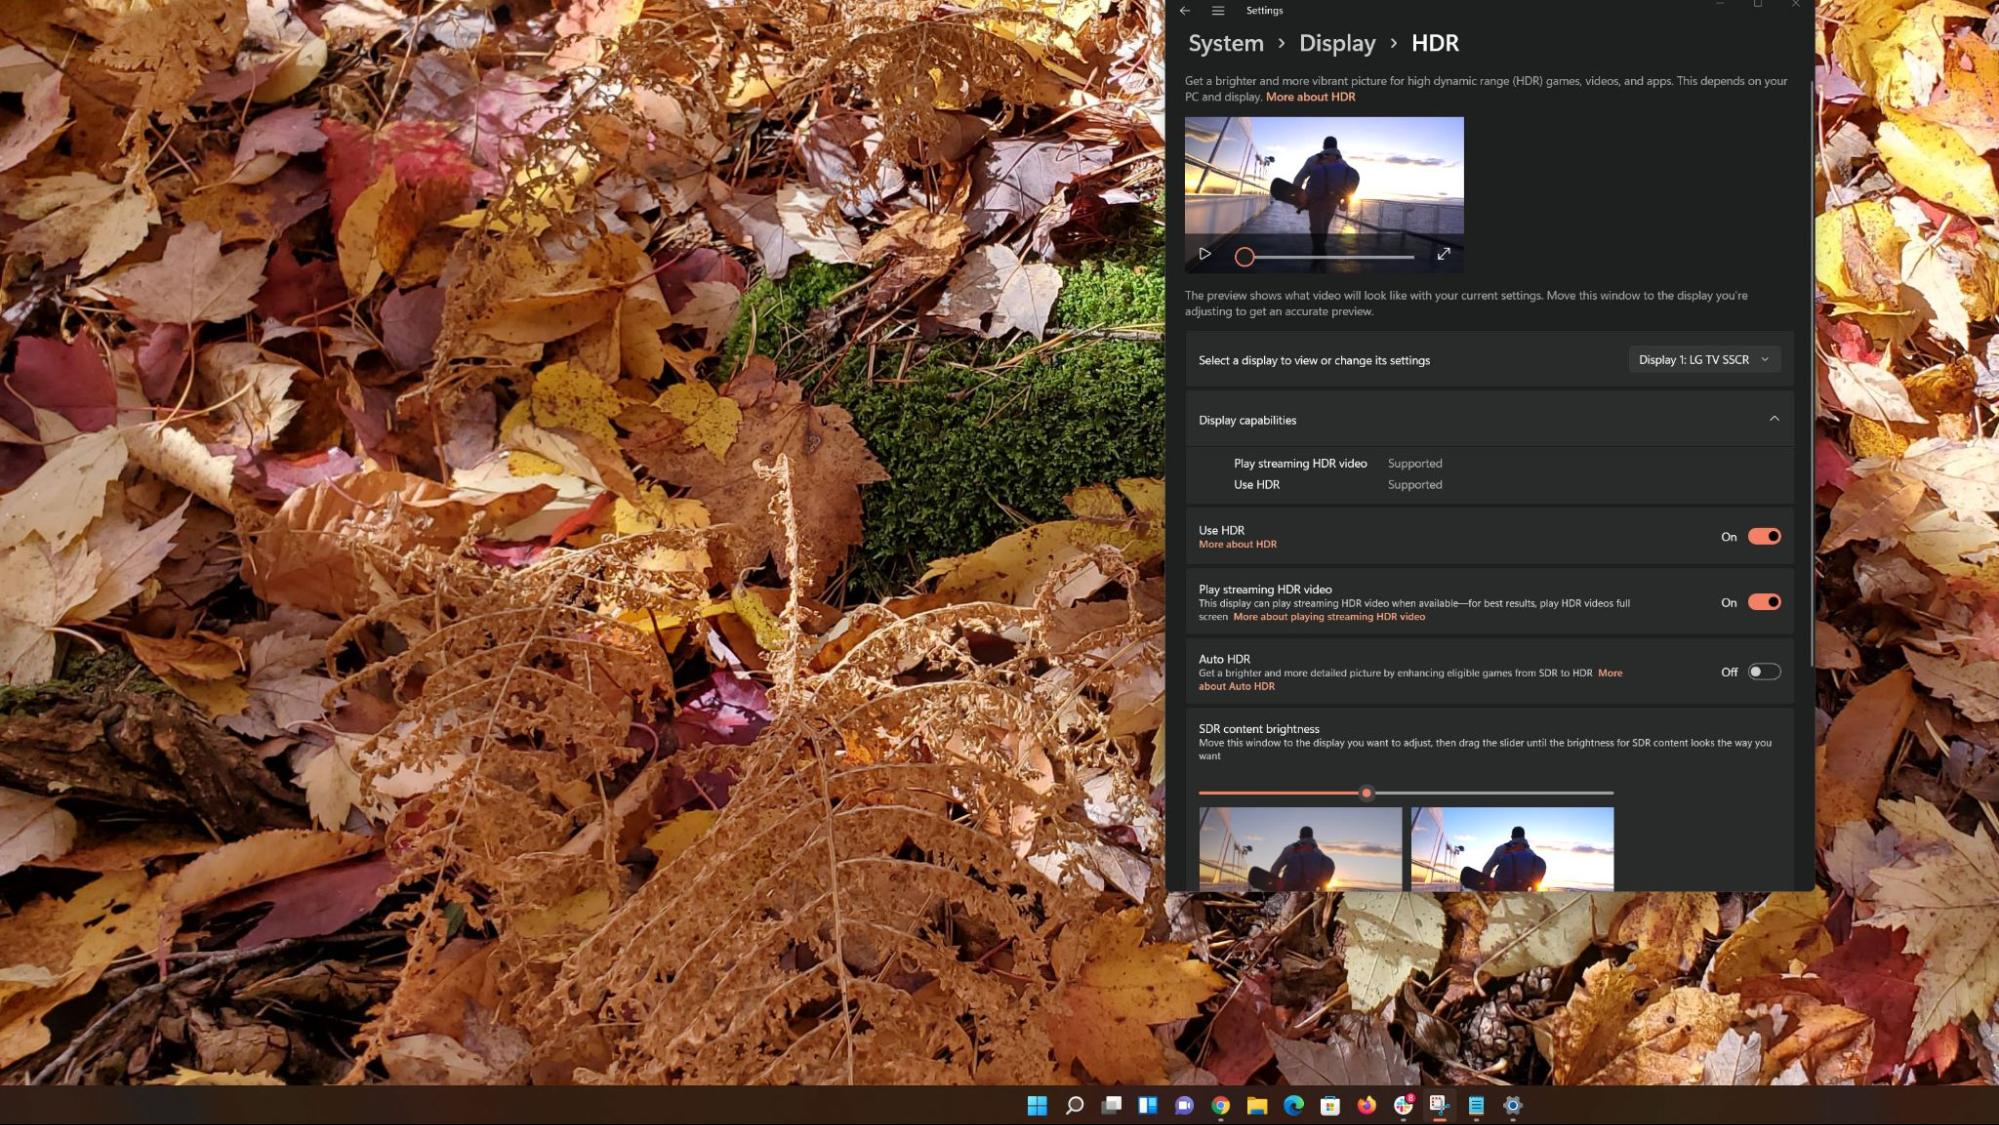
If you’d like to play with Windows 11’s HDR settings, rather than just turning HDR on, there’s also a more advanced HDR menu. You can get to by clicking the Windows logo (or pressing the Windows key) to open the Start menu, typing HDR and pressing Enter.
From this HDR settings window, you can enable or disable HDR, and change the HDR settings on all of your available HDR-capable monitors. You can also select which type of content you want to play in HDR, turn on Auto HDR (which attempts to make SDR games look more like HDR), and more.
More Windows 11 Tutorials:
- How to Get a Windows 11 ISO File and Do a Clean Install
- How to Enable God Mode in Windows 11 or 10
- How to Uninstall Windows 11 and Return to 10
- How to Clean Install Windows 11, No Product Key Required
- How to Install Windows 11 in a Virtual Machine
