One of the big draws of mechanical keyboards is the sound. That resonant, thocky, clacky rhythm can only come from the movement of plastic against plastic, and it’s one of the big things separating mechanical keyboards from their membrane-centric brethren. Compared to a cheap keyboard, the sound of just about any mech is heavenly.
But maybe you’re not so satisfied anymore. Perhaps you’ve started to notice other sounds–the pinging of little springs, or a scratching scrape-y sort of plastic sound that you don’t enjoy. Or maybe you caught your favorite streamer with a new custom mechanical keyboard that sounds absolutely stunning. How can yours measure up? Is there a way to make it sound better, or is it time to just buy a new board?
There is a way: you can lubricate your switches. Lubing switches is one of the most common and immediately effective aftermarket modifications done by mechanical keyboard enthusiasts, and it’s easy to see why: the process can make your switches sound better, deepening and clearing up those clacks and thocks; it can make them feel better, too, getting rid of any internal scratchiness and making the whole typing experience that much smoother. Lubing can also make the best gaming keyboards even better.
In case you’ve not seen this before, though, here’s an example. First, here’s a quick video of me typing on some stock, unlubed Cherry MX Red switches:
And now here’s another video, on the same keyboard, except now those Reds are lubed with Krytox 205g0 lube (and the springs with Krytox 105):
Lubing switches is delicate work, but it’s not hard to learn, and the rewards are huge. In this tutorial, we’ll walk you through it. My biggest recommendation, though, is to approach this with an experimental spirit, testing out switches as you work, seeing how they sound and feel. The right way to lube switches is, ultimately, the way that feels best to you.
What You’ll Need to Lube Switches
- Switch Opener (I strongly recommend a metal one, the plastic and 3D-printed ones just aren’t stable enough in my testing)
- Switch lube (The standard recommendation is Krytox 205g0 for linear switches and Tribosys 3203 for tactile, with some Krytox 105 grease for springs)
- Switches
- Small paint brush, preferentially 0 or 00 brush size
- Plastic baggy
- Jeweler’s Tool
- Lube Station (these are optional, but handy)
Steps
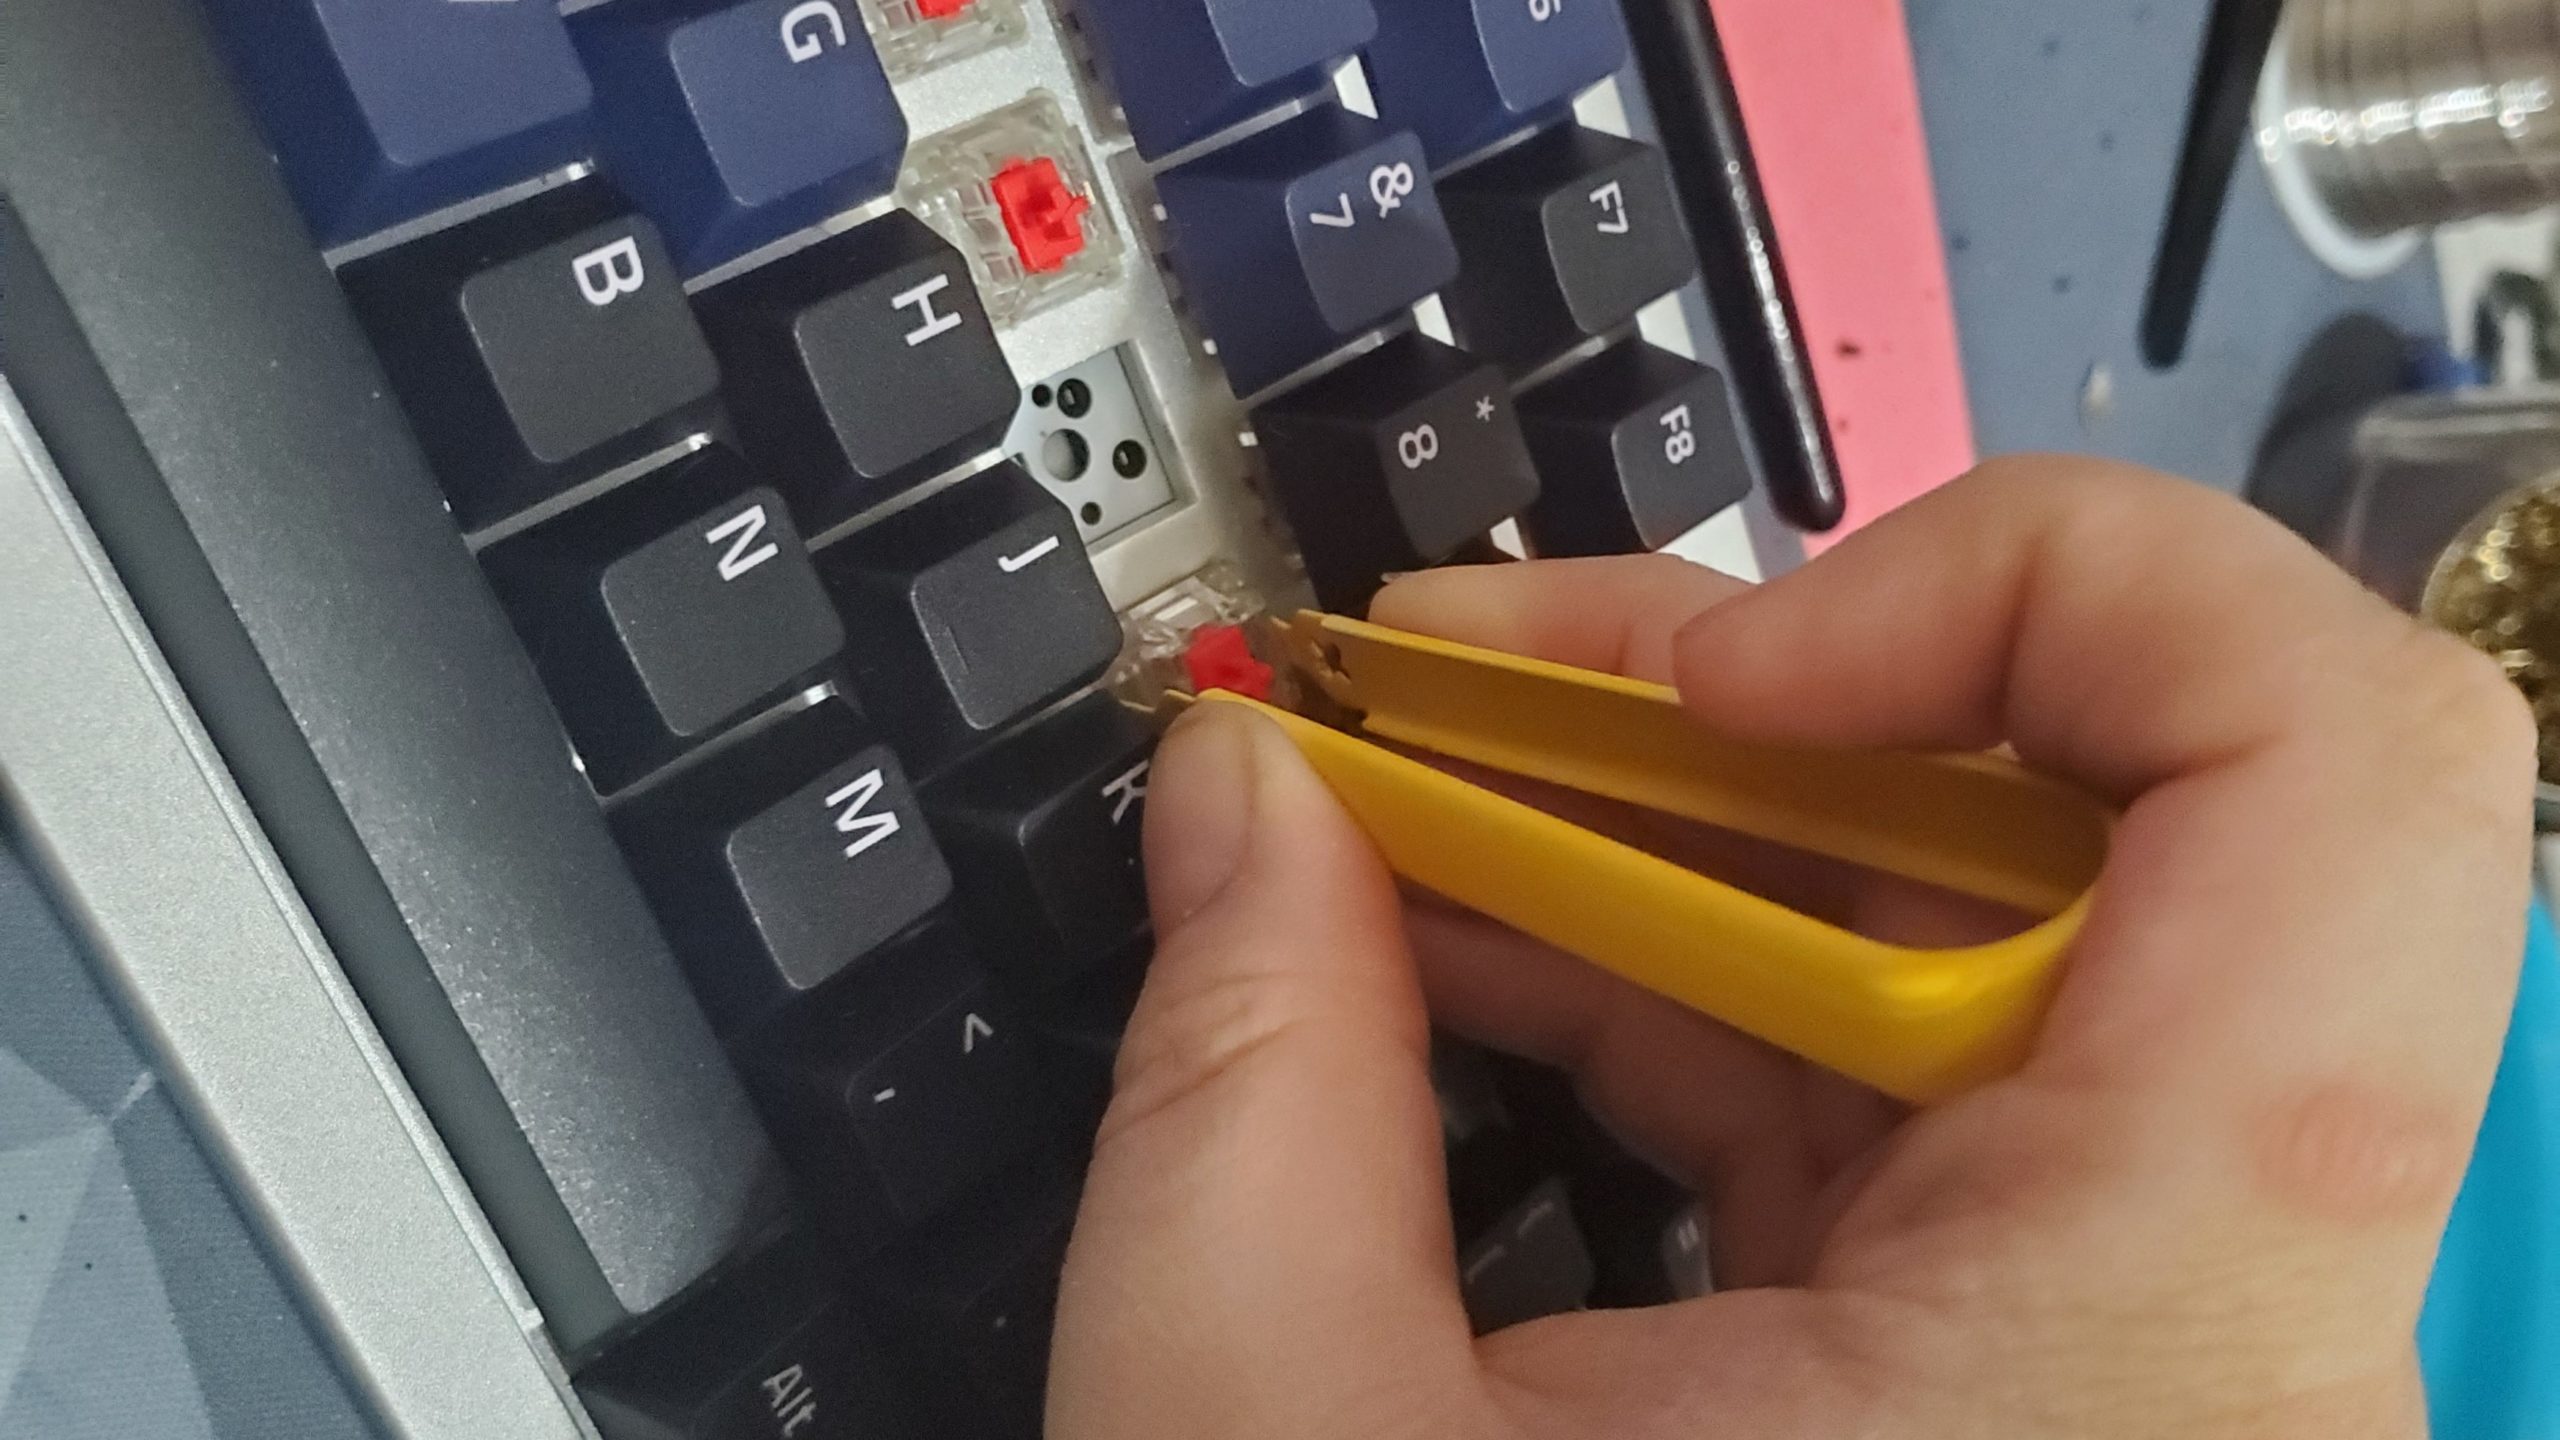
1. Remove your switches from the keyboard. If you have a hot-swappable keyboard like the Hexgears Impulse, you can pull the switches out with a simple puller. Otherwise, you’ll need to desolder your switches. Or, if you’re feeling ambitious, you can desolder your switches from a more traditional soldered mechanical keyboard.
Either way, these need to be loose switches–you could technically try to open up and lube switches while they’re installed in the keyboard, but you run the risk of breaking a lot of things.
Image 1 of 2
Image 2 of 2
2. Take the switches apart. To do this, grab your trusty switch opener. Now, if you look at your switches, you’ll notice tabs slotted into the sides of the switch, from the top housing into the bottom. On Cherry-style switches, these are two tabs, like a fork; on Kailh’s switches, they’re two big thick tabs that cover the entire sides of the bottom housing. And if you look at your switch opener, it should have two interior surfaces, corresponding to each style–one with two tabs facing upward, and one with four.
Place the switch, right-side up, on the switch opener on the corresponding part, lining the tabs up with the tabs on the switch opener. Then, just press down on the stem and the top housing. This should press the tabs against the switch opener, causing the switch to pop open. It shouldn’t take a massive amount of force, but you might have to push a bit. Then, just pull the top of the switch housing off, and separate out all the components–the stem, the spring, the top housing, and the bottom housing. If you have a lubing station, put them in their corresponding spots.
Note that this probably should not be done with clicky switches, as lubing clicky switches tends to remove their, well, click. But linears and tactiles will work just fine.
Image 1 of 3
Image 2 of 3
Image 3 of 3
3. Lube the springs. I always like to do this first, because the process with springs is different than with the rest of the switch. There are two ways to lube springs: the painstaking way or the simple way. The painstaking way is to take your paint brush, lightly dip it into your lube of choice, and brush lube on your spring until it has a light, shiny coat.
Or, you can bag lube them. This is my strong personal preference, as the results are good without being horribly tedious. To do this, place all the springs in a small plastic baggie. Then drip in a few drops of Krytox 105 grease, maybe 5 drops per 10-20 springs in my experience, though you can experiment to see what works for you. As with all lubing, the goal is to have a very light coating as even as possible.
Now, close the baggie most of the way. When it’s mostly closed, blow into the opening, inflating the bag. Then close it up and shake it vigorously until all the springs are coated, 1-2 minutes. After that, you can empty the bag and place them in your lube station, or a bowl, or wherever you want. Often, you’ll have to untangle the springs, which you can do by gently turning them until they come apart, the way you take a key off a keychain.
Image 1 of 2
Image 2 of 2
4. Lube the bottom housing. Once the springs are lubed, it’s time to get to the rest of the switches. You can do this in any order you want, but I prefer to start with the bottom housing. To do this, dip the tip of the brush gently in your lube — Krytox 205g0 for linears and Trybosis 3203 for tactiles is my go-to– and then wipe away the excess on the rim of the container. You want a light sheen of lube–if you can see the white globs of lube on there, you probably have too much.
Now, brush one end of your brush along one of the interior sliders on the sides. Then, brush the other side on the other slider. Brush on each slider one or two more times, until the coating seems even — which means you’ll barely be able to see it. Always start with less lube than you think you might need, as you’ll be amazed what a little bit can do. And it’s a lot easier to add more lube than to clean it off.
Finally, take what’s left on your brush — without dipping again — and swirl it around the reset of the plastic interior of the bottom housing, avoiding the metal leaf spring. I usually do this just once, as it’s not the most necessary place to lube carefully.
5. Lube the stem. Now, you want to set the bottom housing aside, in your lube station if you have it. Take the switch’s stem, holding the cross-shaped part with your jewelry tool if you have it. Then, get some more lube on your brush, the same way you did last time. Apply a gentle coating and wipe off the excess.
When that’s done, it’s time to lube the stem. Gently brush lube on the flat face of the stem, smoothing it out like you did before. Then use the same side of the brush to lube one of the slider sides. After that, you need to lube the face with the stem’s legs.
These legs are what comes into contact with the switch’s leaf mechanism, actuating it. On a linear switch, these legs are smooth. On a tactile switch, they have bumps on them which provide the switch’s tactility. This means that, on a linear switch, you do want to lube the legs; on tactile switches, you absolutely don’t want to lube the legs, as doing so will reduce or outright eliminate the tactility.
So, on a linear switch, gently brush lube on the legs and the flat space between them, brushing a couple more times to smooth the lube out. On a tactile, just lube that flat space, or avoid lubing that side of the stem entirely. Like all of this, it’s up to preference. After that, use the remaining lube on the remaining slider side.
You can also, after this, run the brush over the pole at the base of the stem.
Image 1 of 2
Image 2 of 2
6. Lube the top housing, if you want. Some people recommend lubing the interior of the top housing to reduce any plasticky sound or feeling you might get from the stem or leaf spring rubbing against the top housing. But in my experience, this is a pretty negligible problem and I usually don’t bother.
If you do want to bother, do the same thing you’ve been doing — gently coat the brush with lube, remove the excess, and put a light clear sheen of lube on the plastic.
7. Reassemble your switches. Congrats, you did it! Time to put those babies back together. Take the bottom housing, put the spring in its place, then put the stem in the spring, with the legs facing toward the leaf spring. Finally, snap the top housing back into place — the side with the writing on it usually goes over the leaf spring.
8. Put your switches back in your keyboard. Send those switches home, either by snapping them into a hot swappable or soldering them in if not.
Now your switches should have a smoother feel and a different sound. Enjoy.