The Raspberry Pi Pico is a fantastic piece of technology, but it does have one flaw: there is no reset button. How important is this omission? Sometimes our code can go awry, or we need to flash new firmware to our Pico.
When this happens we have to unplug the Pico and plug it back in again in order to reset it. If we pull out the micro USB lead, a mechanical connection which is rated for a finite number of insertions, too many times, we could wear it out. If we have the Pico connected to a powered USB hub with on / off buttons, we can press the button on that, but what if we don’t.
With very little equipment, and zero code we can build a simple button to reset our Pico ready for the next project.
For this you will need
- A Raspberry Pi Pico
- 2 x Male to male jumper wires
- Half size breadboard
- Pushbutton
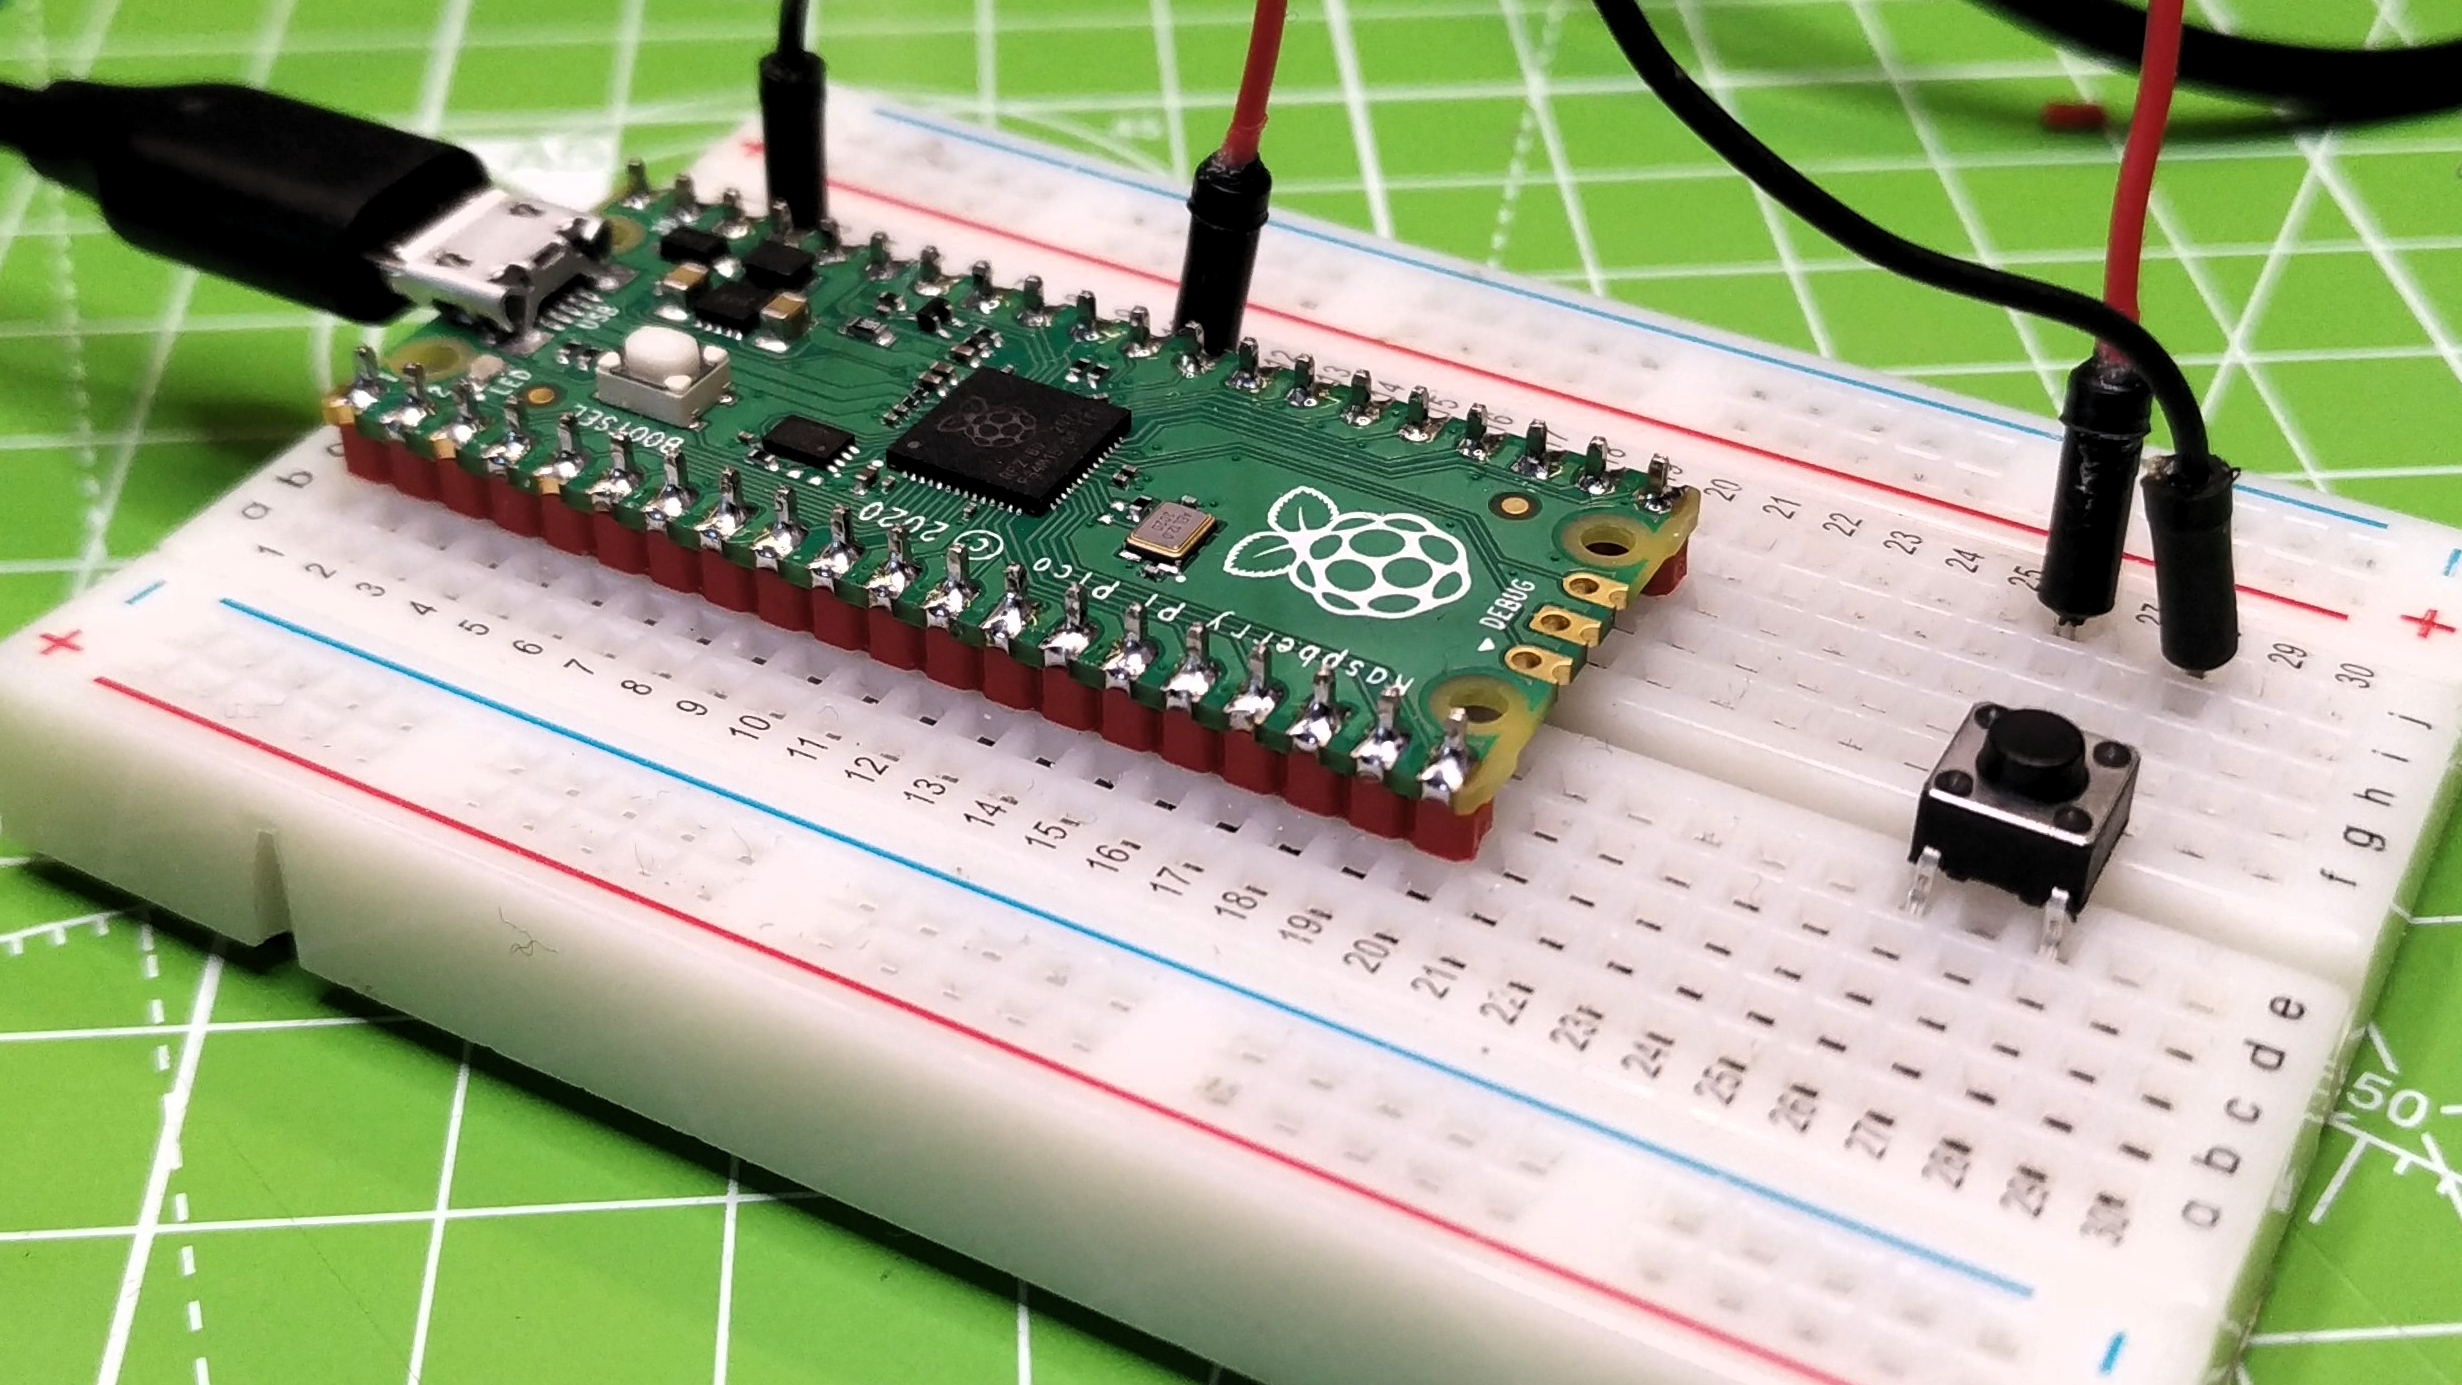
1. Place the Raspberry Pi Pico into the breadboard so that the micro USB port hangs over the end of the breadboard.
2. Insert a push button so that it sits over the central break in the breadboard.
3. Insert a jumper wire so that it is inline with the RUN pin, connect the other end of the wire so that it is inline with the top left of the button.
4. Insert a jumper wire so that it is inline with GND, connect the other end of the wire so that it is inline with the top right of the button.
5. Connect your Raspberry Pi Pico to your computer and open the Thonny application. The Shell, located at the bottom of the window will autostart MicroPython.
If we press the button on the breadboard it will pull the RUN pin down to 0V, forcing the Pico to reset. Press the Stop button to reconnect to the MicroPython shell. If your code ever locks up then this trick will help get you back to work.
Flashing a new MicroPython firmware or C/C++ project is made easier with this button.
1. Press and hold the push button and BOOTSEL.
2. Release the push button and wait for the RPI-RP2 drive to appear before releasing the BOOTSEL button.
3. Copy your MicroPython firmware / C/C++ project UF2 file to the drive. It will auto reboot.