Every model of Raspberry Pi needs some form of output and typically this takes the form of a screen. You can forgo a monitor and set up a headless Raspberry Pi, but having a screen is better where possible because you don’t need a network connection and using VNC for remote viewing makes watching videos or the camera feed slow and tedious.
Over the years there have been many projects and hacks to include a portable screen. From Motorola Atrix Lapdocks, to CrowPi2 there are many different ways to have a portable Pi. But after reading a Reddit thread, we wondered if we could make our own portable Raspberry Pi setup by using an Android tablet (or phone) as the screen.
For this project you will need
- Any Raspberry Pi, we used a Raspberry Pi 400
- Keyboard / Mouse and power for your Raspberry Pi
- An old Android tablet, we used a Nexus 7 2013
- A USB to HDMI adapter
- USB to micro USB / USB C adaptor
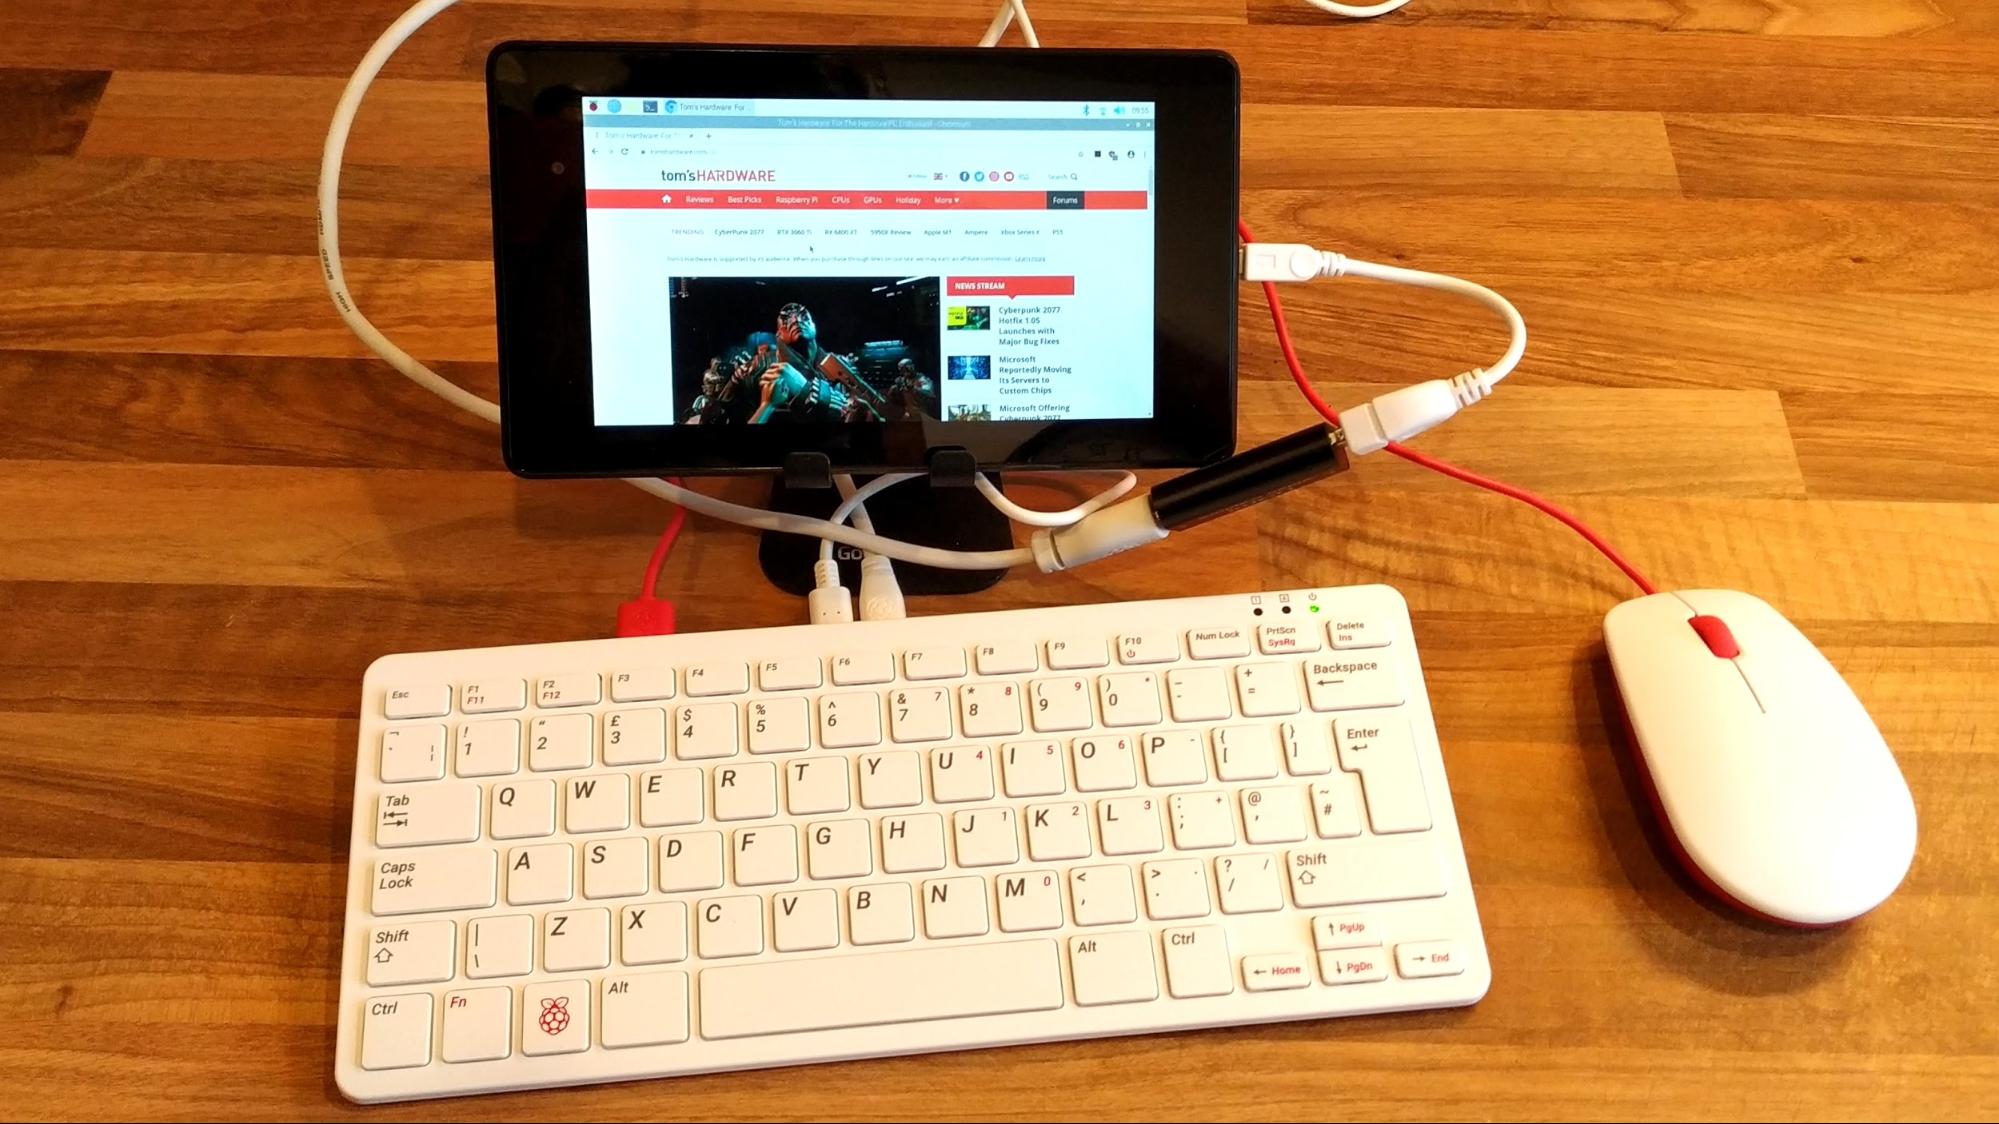
This project will see the HDMI output from our Raspberry Pi converted into a USB “webcam” input via a USB HDMI video capture device, which sells for around $15. Using a free app we “trick” the tablet into displaying the Raspberry Pi desktop. All of this kit will fit easily into a bag for easy transport and it can be used with a USB power bank.
How to connect the Raspberry Pi to the tablet
1. Insert a micro HDMI lead into the first micro HDMI port of the Raspberry Pi 4 / Raspberry Pi 400. Other models of Raspberry Pi will require either a mini (Raspberry Pi Zero) or full size HDMI lead.
2. Insert the other end of the HDMI lead into the USB video capture dongle. Connect the dongle to your tablet using the appropriate adaptor.
Image 1 of 3
Image 2 of 3
Image 3 of 3
3. Connect your keyboard / mouse and power to the Raspberry Pi and power up.
4. On your android device, open the Google Play store and install the USB Camera Standard. This free app will be used to see the Raspberry Pi desktop on our device.
5. Open the app and you are prompted to allow the app to access the USB HDMI dongle. In a few seconds, you will see the Raspberry Pi desktop.
6. By default the desktop is shown in windowed mode. Pressing on any part of the tablet / phone screen will show the menu. Click on the three dots, and select full screen.
How to Enable Pixel Doubling
By default the resolution is set to 1920 x 1080 and it may be a little uncomfortable to see. A quick fix is to enable pixel doubling, effectively giving us the same screen resolution, but doubling the size of text and UI elements.
To enable pixel doubling.
1. Go to the main menu, navigate to Preferences and then open Raspberry Pi Configuration.
2. Click on the Display tab and then Enable Pixel Doubling. Click Ok and Reboot for the changes to take effect.
How to Change the Resolution
If the resolution is not to your liking it can be changed to match that of your device.
1. Go to the main menu, navigate to Preferences and then select Screen Configuration.
2. Click Configure, Screens > HDMI-1 > Resolution and then choose your desired resolution.
3. Click the green arrow to make the change.
How to Capture Screenshots and Video with Your Android Device
The USB Camera Standard application has tools to take screenshots and record video.
1. To take a screenshot, press any area of the screen and a camera icon will appear in the top right.
2. To record video, press any area of the screen and click on the video camera icon (third icon from the left). The icon changes to a square when recording, press this icon to stop.
But why not use VNC?
Image 1 of 3
Image 2 of 3
Image 3 of 3
VNC is great and it works really well, but there are some limitations with the Raspberry Pi. The biggest of which is any video which is directly rendered to the screen, bypassing the X server, cannot be seen by VNC and this includes any output from the Raspberry Pi Cameras.
The next limitation is that VNC requires a network connection. So one would need to use a phone as an access point, or carry a travel router. You could directly connect by manually setting the IP addresses of the devices, but that would be tricky depending on your device settings.