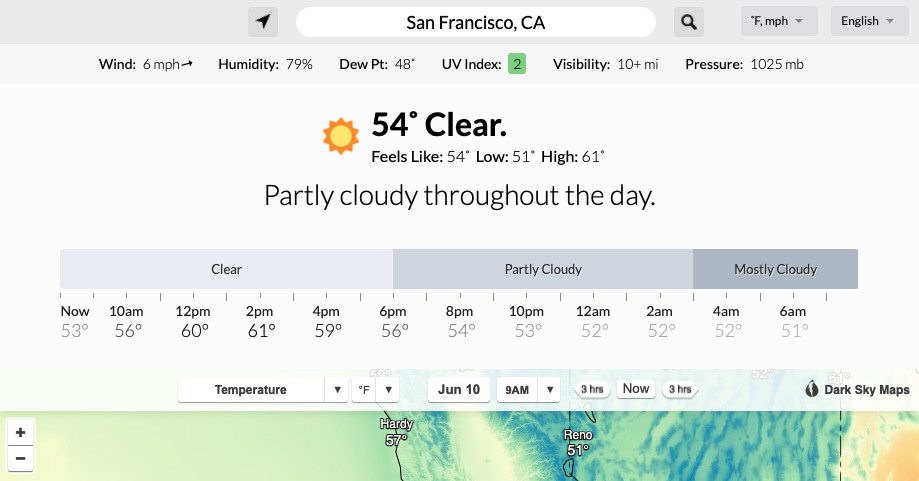
Following Apple’s acquisition of popular weather app Dark Sky in March 2020, Dark Sky’s iOS app and website will be available until the end of 2022, co-founder Adam Grossman said in a Monday update to Dark Sky’s blog (via 9to5Mac).
The update about the 2022 shutdown hit the same day that Apple announced new weather features coming to iOS 15 as part of its WWDC keynote presentation. The stock Weather app is getting a new design, full-screen weather maps, next-hour precipitation notifications, and even new animated backgrounds.
Dark Sky shut down the Android and Wear OS versions of its apps on August 1st, 2020. But the iOS app is still available for $3.99 on the App Store, if you’re interested in buying it ahead of next year’s shutdown.
The Dark Sky API will also continue to work for existing customers until the end of 2022. Previously, the API was set to stop working at the end of this year; now, it will work for a little while longer.
Virtual private networks (VPNs) can offer an additional layer of security and privacy for your online activity. Whether you’re working on a public Wi-Fi network and want to escape prying eyes, or you’re worried about privacy in general, a VPN can offer a lot of benefits.
In a nutshell, a VPN establishes a secure, encrypted connection between your device and a private server, hiding your traffic from being seen by others. Of course, the VPN itself can still see your traffic, which is why you should choose a VPN from a company you trust. (A good rule of thumb is to avoid free VPNs, because if they’re not charging you a fee, they may be monetizing in some less desirable way.) In addition, law enforcement can get its hands on your information through the VPN company. However, for the most part, a VPN offers you a way to hide your online activity from others.
Note that getting a VPN is only one of the measures you can take to make your web browsing more secure. Others include enabling two-factor authentication and using a password manager.
In addition to their security benefits, VPNs can be handy when you’re trying to access sensitive information, or if you’re traveling in Europe and want to stream Netflix or Amazon Prime titles only allowed in the US. Some even claim they can allow you to jump firewalls in heavily regulated countries such as China.
At home, you can set up your VPN through your router, which takes a few more steps, but then any devices connected to your router won’t need to be configured individually; this can also slow down all traffic that goes through. However, for this article, we’re going to concentrate on VPN apps that you can load on your laptop or phone so you can use the internet safely while away from your home base.
Most VPN apps these days support the OpenVPN protocol, making setup a simple matter of allowing the app access to configure the settings for you. But whether your device uses macOS, Chrome OS, Windows 10, iOS, or Android, if you’d like a quick overview of what’s involved before selecting a service, or if you prefer to do a manual setup, we’ve broken down the steps into straightforward instructions for you.
Setting up a VPN in Windows 10
The first step is to create a VPN profile, which you’ll fill out with details from your particular VPN service.
Add a VPN profile in Windows 10.
Click on the Windows button, then head into “Settings” > “Network & Internet” > “VPN.” Click on “Add a VPN connection.”
In the fields on the menu, select “Windows (built-in)” for your VPN provider. Give your VPN a name under “Connection name.” Enter the server name or address, the VPN type, and the type of sign-in info, such as a username and password.
Click “Save.”
To connect to your VPN, go back to “Settings” > “Network & Internet” > “VPN.” Click on your VPN name.
If you want, you can select “Advanced Options” to edit the connection properties, clear your sign-in info, or set up a VPN proxy. You can also add a username and password in this section for extra security (optional, but recommended).
Select “Connect” and enter a password if you’ve set one.
Setting up a VPN in Chrome OS
While using a VPN with a Chromebook used to be a problem, these days, there are several (like ExpressVPN or NordVPN) that have versions specifically for Chrome OS. To get started, you can head to the Google Play store and get the VPN app from there, or download one from the VPN’s website. No matter which you choose, after opening your VPN app, it should prompt you with instructions on how to fully set it up.
If you need to do it manually, you can. Chrome has native support for L2TP / IPsec and OpenVPN. To install a VPN that works with one of these formats:
Chrome OS has native support for L2TP / IPsec.
Click on the time in the lower-right corner of your screen, then click on “Settings.”
Click on “Add connection” and then on “OpenVPN / L2TP.” (You may also find the name of your VPN in the “Add connection” list, which will make things easier.)
Add all of the necessary information, which may include server hostname, service name, provider type, pre-shared key, username, and password. You can save your identity and password if you like. When finished, click on “Connect.”
Some VPNs, especially those issued from a workplace, demand a certificate, which you will need to import first. If that’s required:
Enter chrome://settings/certificates into the address bar.
Go to the “Authorities” tab. Find the correct certificate in the list and click “Import.”
Then follow the instructions above for setting up the VPN.
Setting up a VPN in macOS
As with the other formats here, there are apps that automatically guide you through the setup process, but you can also do it yourself manually.
Open the drop-down menu and choose “VPN” so you can enter your VPN’s details.
To start, head into “System Preferences” and then choose “Network.”
From there, the process is straightforward. Click the Plus-symbol button on the bottom left, and use the Interface drop-down menu to choose your VPN. You’ll need the details from your VPN of choice to fill out “VPN Type” and “Service Name.”
Click on “Create.” Fill out the server address, remote ID, and local ID in the appropriate fields. Then click on “Authentication Settings.”
Enter the username and password for your VPN, which you can set through your VPN app.
Click “OK” and then “Connect.”
Setting up a VPN in iOS
Setting up a VPN on an iOS device is fairly simple. Again, if you download an app from the App Store, select it and it should guide you through configuration. Here’s how to do it manually, though:
Just head into “Settings” and tap on “General.”
Scroll down to select “VPN.” (The iPhone will indicate whether you are currently connected to one or not.)
Tap on “Add VPN Configuration” and then on “Type” to select a security protocol. (Follow the instructions provided by your chosen app.)
Go back to the “Add Configuration” screen, where you will add the VPN’s description, server, remote ID, and local ID.
Enter your username and password. You can also use a proxy if you like.
Tap “Done.” You will then be brought back to the VPN screen. Toggle the “Status” switch to on.
Setting up a VPN in Android
As with iOS, setting up a VPN on an Android device shouldn’t be too difficult. Here’s the manual process if you’re not letting an app automatically configure things for you. (Keep in mind that, because some vendors like Samsung tweak their Android versions, your process may vary slightly.)
Head into “Settings” > “Network & Internet” > “Advanced” > “VPN.” If you don’t see “Network & Internet” in the Settings menu (which may depend on your Android overlay), then do a search within Settings for VPN. Press the “Add” button.
If you happen to be setting this up on a new phone, or if you haven’t yet set a screen lock or password, Google will prompt you to set one for your phone first. Do so.
Now create your VPN profile. Add the VPN name, type, and server address. Click on “Save.”
You’ll be taken back to the VPN screen, where you should now see the name of your VPN. Tap on it, and put in your name and password for the VPN. You can also choose to save your account information, and you can optionally set the VPN to be always on. When finished, tap “Connect.”
Enter the VPN name, type, server address, username, and password.
Then tap “save.” You’re done!
Once you’ve got your VPN up and running, you might notice that web browsing isn’t as fast as it used to be, especially if you’ve configured traffic to go through another country. Stronger encryption, or more users connected to one VPN, can also slow down your internet speeds. Downloads might slow to snail speed, and your League of Legends screen lag might be absurd. But those aren’t big problems compared to the security that you’ve added.
And anyway, now that you know how to set up a VPN, toggling it off is easy in comparison. You just have to remember to do it.
Update June 1st, 2021, 10:20AM ET: This article was originally published on March 1st, 2019, and now features a few updates related to changes in the Windows 10 interface.
Apple had its WWDC keynote on Monday, where it showed off the big new features coming to its platforms, but it didn’t have time to show off everything coming to the new versions of iOS, iPadOS, and macOS. So we’ve combed through the preview pages, Twitter, and a good chunk of the internet to see what interesting features got left out of the presentation.
The big features in iOS and iPadOS were the updates to notifications, FaceTime, and multitasking, but it appears Apple may have been really focusing on the platforms themselves, too. There are a ton of quality-of-life improvements including:
More Memoji options with new outfits and accessibility options
FaceTime will let you know when you’re muted but trying to talk.
FaceTime will also let you zoom with the back camera so you can finally show people things across the room without standing up.
The Announce Messages feature found in AirPods is coming to CarPlay, so your phone can automatically read texts out loud while you’re driving.
Wary iPhone users will be able to put off upgrading to iOS 15 but still get security updates.
Find My will be able to track your iPhone when it’s off (or even after it’s been factory reset). It’s currently unclear what phones will support this feature.
There’s an improved print dialog with more options.
You’ll get free temporary iCloud storage when you transfer to a new device, but it will only last for three weeks.
Leaving and arrival times are coming to Apple Maps, letting you better plan trips in the future.
iPhone apps for iPad will be able to run in landscape. No more flipping your iPad around when you need to check the one app that is still iPhone only.
There will be push notifications to tell you when it’s going to rain.
You’ll have the ability to schedule HomeKit devices with Siri (for example, asking it to turn on your bedroom lights at 7PM).
Safari is getting the pull-to-refresh mechanism found in Mail and many social network apps.
Accessibility settings like text size and contrast will be able to be set on a per-app basis.
EXIF data will be available in Photos, including camera and lens info.
You’ll also be able to adjust a photo’s date and time.
There’s a redesigned software Apple TV remote, which looks more like the new hardware version.
Panoramas taken on iPhone 12s should have less distortion, and moving subjects should look better.
You’ll be able to suggest to Photos that specific subjects shouldn’t show up in places like the Photos widget or Memories.
Spotlight will be accessible from the lock screen and Notification Center.
Filtering for spam texts… if you live in Brazil, that is. It’s likely rolling out there because of rampant spamming of SMS in the country — India got the feature last year.
You’ll be able to drag and drop files across apps on iPhone.
Spanish speakers will be able to choose whether their devices refer to them using masculine, feminine, or neutral words.
Mail is getting a widget, and there’s also a widget to show you how poorly you slept.
iPads are getting the ability to tab through text fields and buttons in apps, as can be done with Macs and in Safari.
iPads will support eye-tracking hardware to improve accessibility by letting people control a cursor using just their eyes.
The Monterey portion of the keynote was dominated by an incredibly impressive demo that showed off Apple’s new Universal Control feature, but Apple also took the time to discuss Shortcuts, which are coming to macOS. Macs are complex machines, though, and there are a few more fun and useful things that will be coming in the fall:
The ability to use your Memoji as your user profile picture (it’ll even shake its head if you try to log in with the wrong password).
A software microphone indicator light in the menu to show when an application is listening to you
A better file copy interface, with the ability to pause and resume transfers
The easy ability to erase user data, settings, and apps without re-installing the OS (great for if you’re selling your Mac)
The ability to manage your saved passwords in System Preferences. You can also import them from other password managers or export them.
You can customize the mouse cursor’s outline and fill color.
Windows will resize when you move them to another monitor.
Shortcuts will let you integrate shell commands.
An improved Go To Folder dialog in Finder
Of course, Apple is running an ecosystem here, so many of the features that got announced will be coming to all of its computers. Here are a few more that will also be coming to iPhones, iPads, and Macs:
A built-in one-time password generator, similar to Google Authenticator or Authy
Safari will detect if websites can support HTTPS and will automatically use it if they do (similar to the HTTPS Everywhere extension).
A low power mode for macOS and iPad (I can’t wait to see how far I can stretch an M1 MacBook Pro)
Reminders are also getting a tags feature, similar to the one found in Notes.
The Photos info pane will tell you about what Visual Look Up sees in the picture.
The ability to turn on DownTime whenever, if you really need to focus on something
An extension for Edge on Windows that lets you use your iCloud Passwords
Well, Apple showed off pretty much everything for WatchOS onstage — it looks like it’s not a big year for the wearable (but I’ll be very happy to get better always-on display support and multiple timers). There are some new time complications, though!
Just noticed there is a new set of Time complications in watchOS 8. While a slight bit of ‘Sherlocking’ for Watchsmith, I’m honestly super glad it’s here. A good number of my gray hairs came from supporting time based complications…glad I can focus elsewhere now. pic.twitter.com/q44aVDMoZh
— David Smith (@_DavidSmith) June 9, 2021
If you want to know if you’ll be getting these features, we’ve laid out which devices the new OSs will be coming to here:
Apple has spent considerable time championing itself as a protector of user privacy. Its CEO Tim Cook has repeatedly stated that privacy is “a fundamental human right,” the company has based multiple ad campaigns around its privacy promises, and it’s had high profile battles with authorities to keep its users’ devices private and secure.
The pitch is simple: our products protect your privacy. But this promise has shifted very subtly in the wake of this week’s iCloud Plus announcement, which for the first time bundled new security protections into a paid subscription service. The pitch is still “our products keep you safe,” but now one of those “products” is a monthly subscription that doesn’t come with the device in your box — even if those devices are getting more built-in protections as well.
iCloud has always been one of Apple’s simplest services. You get 5GB of free storage to backup everything from images, to messages and app data, and you pay a monthly subscription if you want more (or just want to silence Apple’s ransom note when you inevitably run out of storage). Apple isn’t changing anything about the pricing or storage options as part of the shift to iCloud Plus. Prices will still range from $0.99 a month for 50GB of storage up to $9.99 for 2TB. But what is changing is the list of features you’re getting, which is expanding by three.
The first change sits more within iCloud’s traditional cloud storage remit, and is an expansion of Apple’s existing HomeKit Secure Video offering. iCloud Plus now lets you securely stream and record from an unlimited number of cameras, up from a previous maximum of five.
With the new Private Relay and Hide My Mail features, however, iCloud Plus is expanding its remit from a storage-based service into a storage and privacy service. The privacy-focused additions are minor in the grand scheme of the protections Apple offers across its ecosystem, and Apple isn’t using them as justification for increasing the cost of iCloud. But they nevertheless open the door to so-called “premium” privacy features becoming a part of Apple’s large and growing services empire.
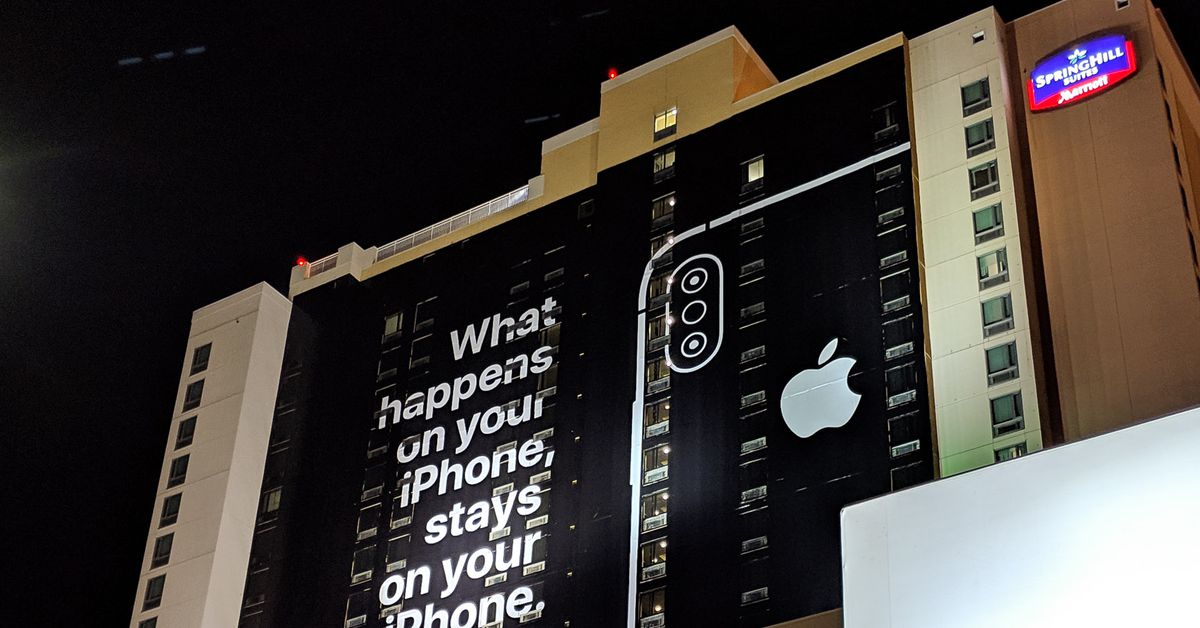
The features appear as an admission from Apple about the limits of what privacy protections can do on-device. “What happens on your iPhone stays on your iPhone” was how the company put its promise in a 2019 ad, but when your iPhone needs to connect to the internet to browse the web, receive email, and generally earn the “i” in “iPhone,” inevitably some of its privacy rests on the infrastructure serving it.
The most interesting of these new features is Apple’s Private Relay, which aims to shield your web traffic from prying eyes in iOS 15 and macOS Monterey. It hides your data from both internet service providers as well as advertisers that might build a detailed profile on you based on your browsing history. While it sounds a bit like a VPN, Apple claims the Private Relay’s dual-hop design means even Apple itself doesn’t have a complete picture of your browsing data. Regular VPNs, meanwhile, require a level of trust that means you need to be careful about which VPN you use.
Image: Apple
As Craig Federighi, Apple’s senior vice president of software engineering explains, VPNs can protect your data from outsiders, but they “involve putting a lot of trust in a single centralized entity: the VPN provider. And that’s a lot of responsibility for that intermediary, and involves the user making a really difficult trust decision about exposing all of that information to a single entity.”
“We wanted to take that completely out of the equation by having a dual-hop architecture,” Federighi told Fast Company.
Here’s how it works. When using Private Relay your internet traffic is being sent via two proxy servers on its way to its destination. First, your traffic gets encrypted before it leaves your device. Then, once it hits the initial, Apple-operated server, it gets assigned an anonymous IP that hides your specific location. Next up, the second server, which is controlled by a third-party, decrypts the web address and forwards the traffic to its destination.
Apple can’t see which website you’re requesting, only the IP address you’re requesting it from, and third-parties can’t see that IP address, only the website you’re requesting. (Apple says it also uses Oblivious DNS over HTTPS.) That’s different from most “double VPN” and “multi-hop” VPN services you can subscribe to today, where a provider may control both servers. You could perhaps combine a VPN and a proxy server to do something similar, though. Apple says Private Relay won’t impact performance, which can be a concern with these other services.
While Private Relay is theoretically more private than a regular VPN, Apple’s offering is also more limited. You can’t use it to trick websites into thinking you’re accessing them from a different location, so you’re not going to be able to use Private Relay to get around geographical limitations on content blocked by a government or a service like Netflix. And it only seems to cover web browsing data through Safari, not third-party browsers or native apps. In a WWDC developer session about the feature, Apple says that Private Relay will also include DNS queries and a “small subset of traffic from apps,” specifically insecure HTTP traffic. But there was no mention of other browsers, and Apple clarified to The Verge that it’s only handling app traffic when your app technically happens to be loading the web inside a browser window.
Hide my Email provides a slick interface for making burner email addresses.Image: Apple
In addition to Private Relay, iCloud Plus also includes Hide my Email, a feature designed to protect the privacy of your email address. Instead of needing to use your real email address for every site that requests it (increasing the risk of an important part of your login credentials becoming public, not to mention getting inundated with spam), Hide My Email lets you generate and share unique random addresses which will then forward any messages they receive back to your true email address. It’s another privacy-focused feature that sits outside of iCloud’s traditional area of focus, and could be useful even if similar options have been available for years.
Gmail, for example, lets you use a simple “+” symbol to add random extra characters to your email address. Even Apple’s own “Sign In with Apple” service pulls a similar trick, handing out random email addresses to each service you use it with. But the advantage of Apple’s new service is that it gives you an easily-accessible shortcut to generate them right in its Mail app and Safari, putting the feature front and center in a way that seems likely to boost its mainstream appeal.
Apple might be charging for Private Relay and Hide My Email by bundling them into iCloud subscriptions, but these iCloud Plus additions are still dwarfed by the array of privacy protections already built into Apple’s hardware and software. There’s no sign that any of these existing privacy features will be locked behind a monthly subscription fee anytime soon. Indeed, the list of built-in protections Apple offers continues to grow.
This includes a new Mail Privacy Protection feature in the Mail app in iOS 15, which sends your emails through a relay service to confuse any tracking pixels that might be hiding in them (read more about tracking pixels here). There’s also a new App Privacy Report feature coming to iOS 15 that will show how often apps are accessing your location, camera, microphone, and other data.
The iPhones’ list of built-in privacy features continues to expand with iOS 15.Image: Apple
But with iCloud Plus, Apple now offers two privacy protections that are distinct from those that are included for free with the purchase of a device, and the division between the two seems arbitrary to some extent. Apple justifies charging for features like Private Relay and Hide My Email because of the incremental costs of running those services, but Mail Privacy Protection also relies on a relay server, which presumably isn’t free to run.
Regardless of its rationale, choosing to charge for these services means that Apple has opened the door to premium privacy features becoming part of its increasingly important services business, beyond just its hardware business. Adherence to privacy was already part of the company’s attempt to lock you into its devices; now it could become part of the attempt to lock you into its services. All the while, those walls around Apple’s garden creep higher and higher.
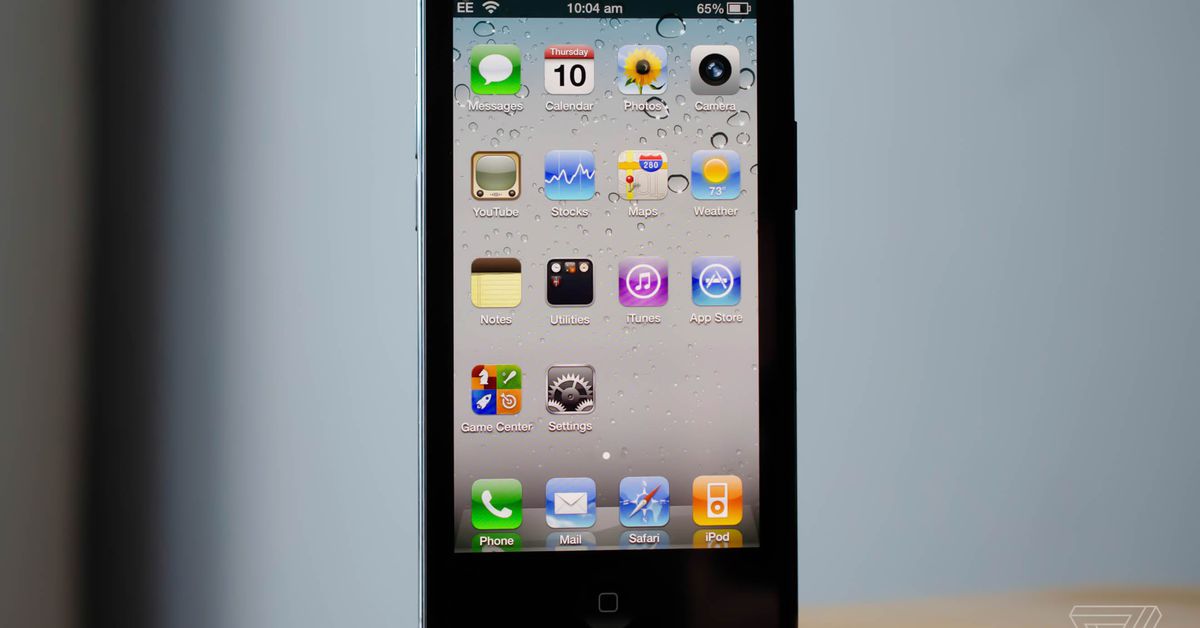
iOS 4 originally appeared nearly 10 years ago as Apple’s first mobile operating system to drop the iPhone OS naming convention. An 18-year-old developer has now lovingly recreated iOS 4 as an iPhone app, and it’s a beautiful blast from the past. If you never got the chance to use iOS 4, or you’re a fan of the iPhone 3G, OldOS almost flawlessly pulls off the experience of using an iPhone from a decade ago.
OldOS is “designed to be as close to pixel-perfect as possible,” says Zane, the developer behind the app. It’s all built using Apple’s SwiftUI, so it includes buttery smooth animations and even the old iPhone home button that vibrates with haptic feedback to make it feel like a real button.
Apple’s built-in iOS 4 apps have also been recreated here, and it’s a real flashback to the skeuomorphic days of the iPhone whenever they launch. Photos lets you view your existing camera roll as you would have 10 years ago, while Notes transports you back to the yellow post-it notes of yesteryear.
Today is Launch Day
Introducing OldOS — iOS 4 beautifully rebuilt in SwiftUI.
* Designed to be as close to pixel-perfect as possible. * Fully functional, perhaps even usable as a second OS. * ️ Fully open source for all to learn, modify, and build on. pic.twitter.com/K0JOE2fEKM
— Zane (@zzanehip) June 9, 2021
The only apps that don’t work as you might expect are Messages and YouTube. Apple used to bundle YouTube directly into its operating system, and the developer behind OldOS says there are “still some major issues with YouTube” and Messages that they’re working to fix.
Everything else is mostly flawless. and you can even browse the web in the old UI of Safari. The App Store also list apps that will redirect you to the modern store to download and install. There are some things that simply don’t work, including folders and no jiggling to rearrange home screen apps.
We’ve seen this type of nostalgic app appear on the iPhone before. Rewound launched in the App Store back in December 2019, turning an iPhone into an iPod. Apple quickly pulled the app a few days later, citing store violations.
This latest OldOS app is available on Apple’s TestFlight service, which is typically used to distribute beta versions of apps. That means it probably won’t last long before Apple takes exception, so grab it while you can. Zane has also published the source code for the entire project on GitHub, so if you’re willing to compile it in Xcode then it will live forever.
Sony is now fully revealing its Airpeak S1 drone, which it teased at CES 2021 in January. The announcement contains a lot more detail on the drone’s capabilities, features, and reveals a $9,000 pricetag for the drone sans gimbal or camera, all of which cements the idea that this drone will be aimed squarely at the professional video market.
The Airpeak with an A7S and 24mm lens attached to the sold-separately gimbal.Image: Sony
The Airpeak S1 is built to work with Sony’s mirrorless cameras, including the A7S Mark III, FX3, or even the 8K-capable Alpha 1. They’ll be attached to a special version of the Gremsy T3 gimbal that’s been designed specifically for the Airpeak and that you’ll have to buy separately. With a camera, the drone will have around 12 minutes of flight time (though it can achieve 22 minutes without any load). It’s also worth noting that the camera needs its own batteries — it isn’t being provided power by the drone.
Sony’s already released a preview of the types of shots you can pull off with the drone, which you can see below. You can also get a shot of the retracting landing gear in motion.
One of the drone’s biggest selling points is its stability and wind-resistance. According to Sony, it can stay stable in winds of up to 44.7 miles per hour (that’s 20m/s, double what DJI quotes for the Inspire 2), and it has five sets of stereo cameras that let the drone and an infrared rangefinder that should help the drone stop before it hits obstacles and stay steady even without satellite reception. Sony even enlisted JAXA, the Japanese space agency, to help it do some of the tests for the drone:
The Airpeak is also quick — it can do 0-50 (which is close to its top speed of 55.9 miles per hour) in 3.5 seconds. It is worth noting, though, that’s without any sort of attachments — Sony hasn’t said what kind of speed or acceleration can be achieved when the drone is flying a camera. That said, Sony showed me and other journalists a video of the drone doing figure-eights in the air, which it pulled off with impressive speed and agility.
For comparison, DJI’s Matrice 600 Pro, which costs around $7,000 without a gimbal or camera, has a top speed of 40 miles per hour and a quoted battery life of 32 minutes alone or 16 minutes with a 13-pound payload, using its stock batteries.
The Airpeak S1 can be operated with just the included controller, but Sony has an app called Airpeak Flight to help make things easier. The app is iOS/iPadOS-only for now, but it will allow for control of the camera and gimbal. The Airpeak can be operated by a single person, but also allows for dual-operator mode, where one person controls flight and the other controls the camera. Sony says the controller’s range is still being tested.
The controller with an iPad running Airpeak Flight.Image: Sony
While you won’t get a camera or gimbal for the Airpeak S1’s $9,000 price, it does come with two pairs of propellers, the controller, two batteries, and a charger. Sony expects to ship it in the fall, and will be offering a service plan to cover damage that could occur from crashes.
In light of all the legislation and controversy around drones from China, Sony is making it clear that the Airpeak S1 is designed and made in Japan; it came up repeatedly in a press briefing and again in the press release.
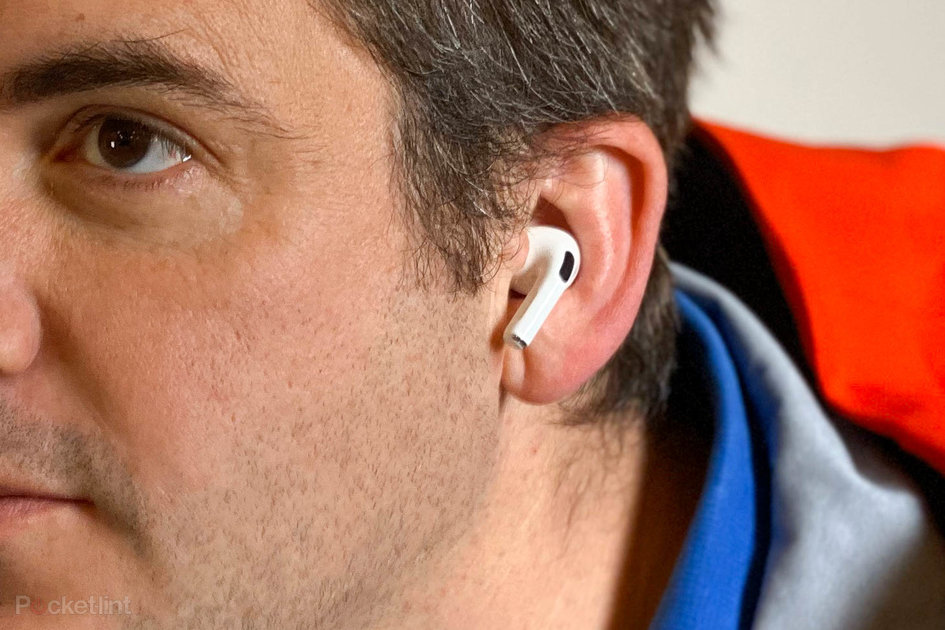
(Pocket-lint) – Whether you agree with the polarising design or not, Apple’s AirPods became an overnight phenomenon back in 2017. Since then those in-ear wireless buds have gone on to become the number one sellers in the world – and you only have to head to any city street to see how many people are wearing a pair.
Following the launch of a tweaked second-gen AirPods earlier in 2019, Apple has deemed the headphone popular enough to expand the range with the AirPods Pro. But this isn’t just about offering tweaks; no, it’s a completely redesigned experience, adding active noise-cancellation (ANC) and more.
But with so many in-ear headphone choices on the market, do the AirPods Pro offer a decent package or are you better off going with Bose, Sony, or a myriad of other options? We’ve be wearing them since launch.
A pro design
Each bud: Measures 30.9 x 21.8 x 24mm maximum / Weighs 5.4g
Wireless charging case included (45.2 x 60.6 21.7mm / 45.6g)
There are two elements to the AirPods Pro that you need to worry about: in the ear and in the pocket.
The carry case, which doubles as the charging case, is shorter in height but wider in design than the one you’ll find with the original AirPods. It’s still very much just as pocketable, in fact one of the most pocketable in-ear headphones cases on the market, and comes in a gloss white finish. It’s also included as standard.
Pocket-lint
The AirPods Pro headphones slot into the case and instantly drawn in by magnets and start charging immediately. Charging can be done via a Lightning cable or by putting the case on a wireless charging pad, even the newer MagSafe charging pucks.
The Pro design is considerably different to the AirPods. The most noticeable difference is the inclusion of silicone tips to improve the fit or ‘seal’, while the thin rod that hangs out of your ear isn’t especially long. This short length will certainly appeal to those who thought the originals’ design just looked odd.
Finding your fit
Three silicone tip sizes; small, medium, large
Vent system for pressure equalization
Ear Tip Fit test via iOS 13.2
Uses Apple H1 chip
Connecting the AirPods Pro for the first time is incredibly simple. You simply open the case near your iPhone (running iOS 13.2) and press ‘connect’ on the screen. It’s as simple as that thanks to the use of Apple H1 chip – as also found in the AirPods and Beats Powerbeats Pro.
Unlike AirPods, the Pro requires a secondary step, which involves running an Ear Tip Fit Test. Using both the internal and external microphones within the headphones, iOS 13.2 analyses the sound and tweaks its profile to sound better for you.
Pocket-lint
The process, which involves playing some music, takes about five seconds. It’s during this time that it will determine whether you’ve got a good fit, and if not recommend you change the silicone tip to another size – there is a small, medium, and large options included. For us the medium worked perfectly and we were up and running with a minute.
The silicone tips feel a little tight in the ear – more so than the standard AirPods, but not that they’re uncomfortable – so Apple has included air vents to try and reduce potential pressure and isolation build up. It calls this a “vent system for pressure equalization”, and in all the time we’ve been wearing them they’ve been fine. It doesn’t hurt wearing them for a long period of time, and if you have concerns over whether or not they would be as easy to put in and out as the standard AirPods, they aren’t.
Active Noise Cancelling (ANC)
Internal and external microphones actively listen for noise changes
Adaptive EQ and Transparency Mode
One of the main features of the AirPod Pro is ANC, or active noise-cancelling technology. This uses the in-built microphones to check the ambient noise around you over 200 times a second and react accordingly, dumbing down external sound. This is the same process as other noise-cancelling headphones, designed to negate wind tear and other real-time sounds around you as best as possible.
You can also dial-down the feature if you want to hear more around you – a feature called Transparency – which allows you to hear people talking, given the frequency cut-off. This is all controlled via a squeeze of the AirPods Pro, via your iPhone volume control settings, or using the Apple Watch.
We’ve used them on the London Underground, the train, by the sea side, cutting the grass, and on a plane, and in all cases the Pro earbuds cut out the majority of the noise. Classical music fans will no doubt love the Pros, as will those that want to really immerse themselves in the music.
Pocket-lint
Switching between the two modes with that squeeze will take a little getting used to, as there’s a specific indented area where you need to squeeze. Precision is key; as is speed: do it too quickly and you’ll stop the track. It’s yet another new control mechanism that you’ve got to learn. Overtime it has become second nature.
Another interesting side effect is wearing the AirPods Pro while talking. Because of the microphones both internally and externally that are trying to cancel the noise, your own voice is amplified when in Transparency mode. The best way to describe it is akin to speaking into a microphone while wearing headphones to hear yourself. You don’t get that experience when you’re on a call with ANC on, although the silence is somewhat alien if you’re used to hearing lots of noise around you all the time when on a call, and if the environment you are in is loud, we’ve found your voice is cancelled out, according to the person at the other end. Our advice is not to use ANC when talking to people on the phone.
Music sounds better with you
5 hours battery life / 4.5 hours with ANC enabled
Custom high dynamic range amplifier
Custom high-excursion Apple driver
We’ve tested the new AirPods Pro with a range of music, from dance tracks from Ministry of Sound, to the Interstellar soundtrack by Hans Zimmer, and everything inbetween from Pink Floyd to Billie Eilish.
Pocket-lint
What is clear is that the AirPods Pro are considerably better than the standard AirPods and certainly hold their own compared to the competition.
The originals focus of the AirPods was on ease of use rather than amazing sound quality, whereas the AirPods Pro address that latter point espeically when you factor in support for Apple’s Spatial Audio technology that’s now rolled out on Apple Music and is available on both the AirPods Pro and AirPods Max and will be coming to more apps and services later this year with iOS 15.
Following the launch we’ve been listening to a number of tracks in Spatial Audio. Some tracks are clearly enhanced by the new experience, while others are barely noticeable. When you do notice it though, the results are amazing. The best way we can describe it, is that It’s a bit like 4K on your TV. Some can see the changes instantly and refuse to watch anything else, while others will be more than happy with the HD footage and wonder what the fuss is about. Apple has big plans for Spatial Audio bringing it to everything from FaceTime calls to games. All that’s left is to see whether the industry embraces it and then runs with it. That’s where things will really start to get interesting.
The Spatial Audio feature also works with movies and that really sings when connected to an iPad or iPhone, especially when it’s been recorded in Dolby Atmos.
But you don’t need Spatial Audio to enjoy the AirPods Pros. They work perfect well in standard stereo whether that’s listening to music, watching a movie or TV show, or taking a voice call. Sure, the Pro doesn’t come as bass-focused as the PowerBeats Pro, for example, but still certainly delivers a decent sound for what they are. For many they will be more than good enough for commuting, especially once you factor in the ANC performance and when available Spatial Audio.
Best USB-C headphones for Android phones 2021
By Dan Grabham
·
Verdict
We are incredibly impressed with the ease of setup and quality of sound that the AirPods Pro deliver. Active noise-cancellation makes a huge difference to ambient noise, making these in-ears far more capable than the originals, and Spatial Audio enhances the music experience to the “next level”.
The Pro is more comfortable to wear and better sounding than we were expecting from Apple, too, given the previous AirPods experience.
But with Beats offering the Powerbeats Pro for a smidgen less cash, the AirPods Pro isn’t the only H1 chip-touting in-ear wireless headphones in town. They will be better if you want to be more “active” or are worried that the AirPods Pro will fall out – they shouldn’t but we also know that some people’s ears just aren’t suited to this type of headphone.
And falling out, or should we say taking out, is one of the big advantages here. Popping them in and out of our ears for the last two years has been easy, and if you make a lot of calls, that’s almost worth it on its own.
The ease of use and great sound, make this a great buy.
This article was originally published on 29 October 2019 and has been updated to reflect its full review status
Also consider
Pocket-lint
Beats Powerbeats Pro
squirrel_widget_148688
Like the sound of active noise-cancellation but want more bass and bigger sound? That’s where Beats comes into play, if you’re willing to pay the extra for the improved quality.
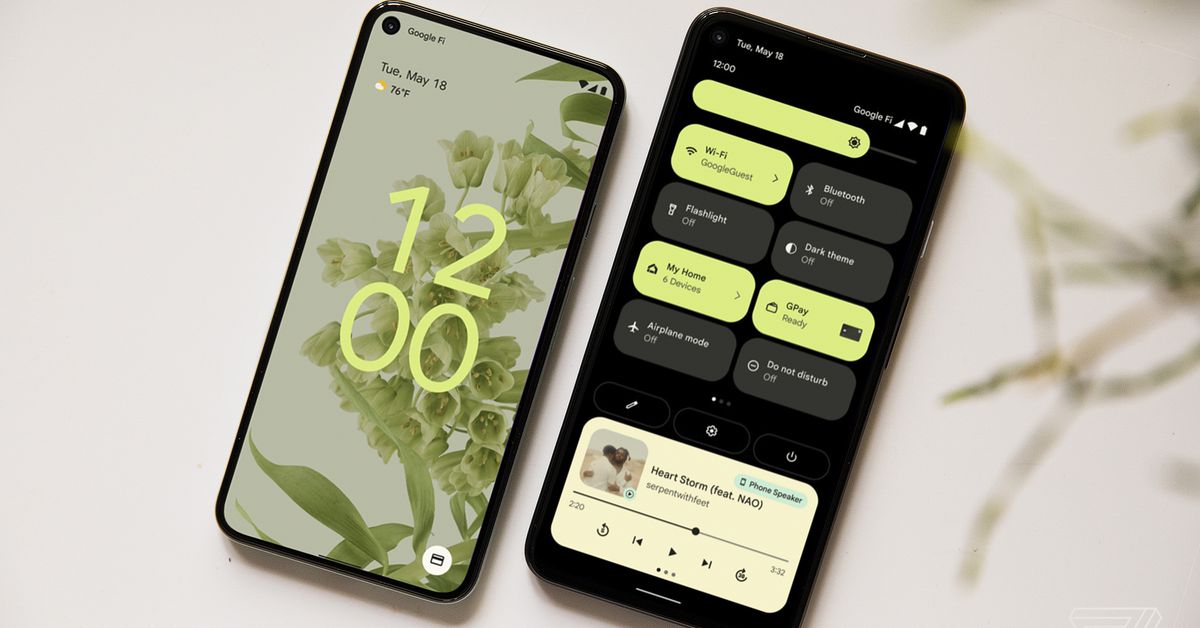
Google has announced that it is rolling out the second beta for Android 12 to Pixel phones today. It adds a few more of the Android 12 features that were announced at Google I/O last month but weren’t included in the first beta. But it also has a couple of newer features, including a new way to manage your internet connection.
In Quick Settings, Android 12 now has a new button called “Internet” that replaces the old Wi-Fi button. Tap it and you’ll get a screen that will let you switch between Wi-Fi networks and also shows your current cellular connection (which you can also toggle).
The new Internet settings in Android 12.Image: Google
Google says the idea is to help users “switch between their Internet providers and troubleshoot network connectivity issues more easily.” Google’s post asks readers to “Let us know what you think,” a sign that maybe this UX might not be a sure thing. Google often introduces and then backtracks on new user interface ideas during Android betas.
Android 12 is also picking up a “Clipboard read notification,” which will appear any time an app reads the current clipboard. It shows up when one app reads the clipboard from something you’ve copied in another app. In other words, it won’t annoyingly pop up if you copy and paste within the same app. Unlike other notifications, this one will apparently appear from the bottom of the screen. It’s similar to a feature that arrived first on the iPhone, as more people realized that apps were asking for clipboard content when they really shouldn’t be.
Those are the two new features, but there are a few more that Google announced but didn’t include in the first beta. The first is the Privacy Dashboard, which lets a user see how often apps request to use a phone’s microphone, camera, and location. Apple, by the way, just announced a similar dashboard for iOS 15 — though it includes a few more data points than Android’s.
The Privacy Dashboard on Android 12.Image: Google
Google is also turning on previously announced privacy features related to the microphone and camera. When either is on, an indicator will be displayed in the upper right of the status bar. Android 12 will also now have toggles in Quick Settings to turn those sensors off.
It’s a neat system. If you disable either the mic or the camera in quick settings, the next time an app tries to access one, the system will ask if you want to turn them back on. If you decline, then the app will think it has camera or mic access, but all it actually sees is darkness and all it hears is silence. It is, as I noted in my original Android 12 preview, a mood.
With this release, Google is keeping pace with its roadmap to release Android 12 this fall. Expect a couple more betas to land before the final release. This beta is available on Pixel phones now, and when the final update is released, it’ll hit Pixel phones first. When other phones will get updated remains an open — and vexing — question. Since this version of Android has the biggest redesign in years, don’t be surprised if other smartphone makers need a little more time to figure out how to apply their own styles to the new “Material You” design system.
People with smartphones and wearable devices regularly show up to the doctor’s office with readouts from apps detailing everything from their heart rate to sleep patterns. Now, with the new iOS 15 update this fall, some iPhone users will be able to send data directly from their Health app to their doctors’ electronic medical records systems.
That type of integration could make it easier for patients to share information with their doctors, said Libo Wang, a cardiology fellow at the University of Utah School of Medicine who studies wearables. “The current workflow is mildly laborious, and requires the patient to email the pdf, and a clinician manually uploading that file to create a permanent record in the official electronic medical record,” he said in an email to The Verge.
Users could already pull in data from the other direction: since 2018, Apple has allowed people to add records from dozens of clinics and hospitals to their Health app.
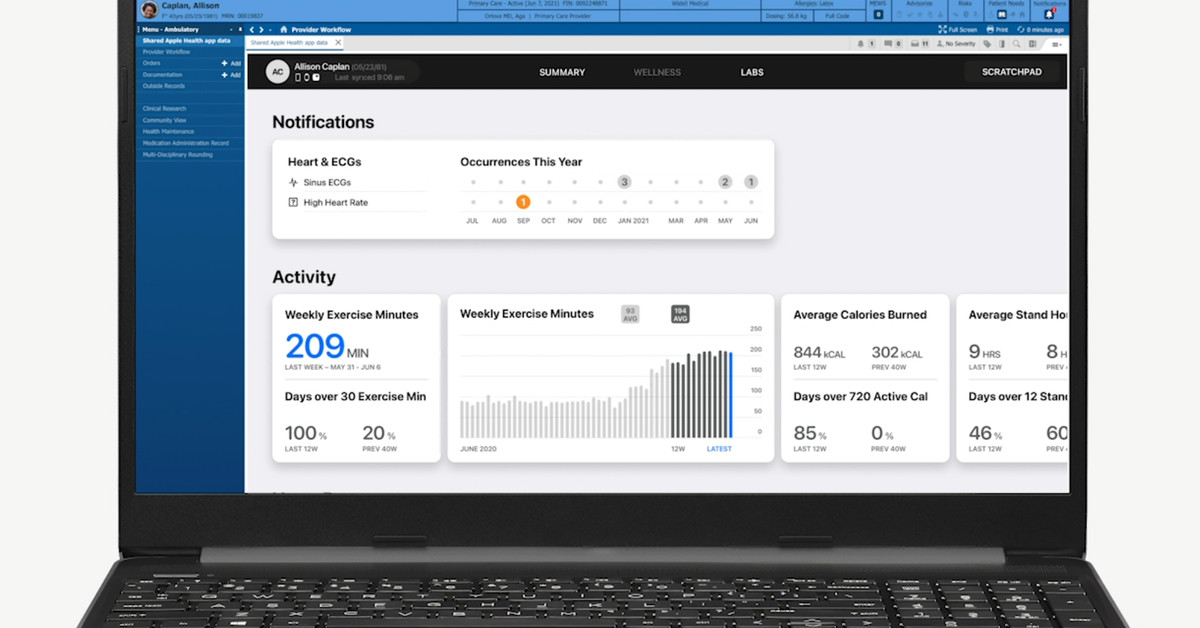
The new integration will work with six electronic medical records companies in the United States. That includes Cerner, which controls around a quarter of the market, and five smaller groups. Apple says it could continue to add more. Doctors who use the records from those companies would be able to open any shared data within a patient’s health record. The dashboard opens as a web view directly inside the record; it doesn’t take providers to another outside app. The design is similar within the records for each of the six companies, Apple says.
The Health app data isn’t directly transferred into the electronic health record. Doctors can see a window with the data, but the information isn’t permanently added to the record. If an iPhone user decides to stop sharing their health data, none remains within the health record. The system is built using a framework called SMART on FHIR, an open interface for third-party applications that can work within electronic health records. Any group can create an app using the platform.
For physicians — and particularly cardiologists — direct access to iPhone data within health records could help them make more meaningful use of the information, Wang said. One 2020 study found that when physicians directly reviewed the strip generated by the Apple Watch that visually shows a user’s heart rate, they were able to flag more cases of abnormal heart rhythms than the Watch’s algorithm flagged. If the rhythm strips are shared directly to someone’s doctor, the doctor might be able to identify any concerning patterns.
The downside, though, is the potential for information overload, Wang said. More data isn’t necessarily better, particularly if doctors don’t trust its accuracy. While the data collected by wearables and smartphones may seem helpful to patients, it’s still not entirely clear if it actually helps people feel better or gives them better care, he said.
Cerner, one of the electronic health record companies participating in the initial rollout, was able to test the new Apple feature at its onsite clinic for employees. “Having secure ways to view and share this information in a clinical context has been helpful,” said Sam Lambson, vice president of interoperability at the company.
It’s more and more common for patients to bring health data from their personal devices to health visits, and Lambson said Cerner is focused on efforts to incorporate that into its systems even outside of the new Apple program. One advantage of the Apple system is that it’s easy for doctors to use, said Jessica Oveys, director of product management at Cerner.
“I think the key to it is certainly empowering and making the patient feel at the center and secure, and making it easy for them to share. But also, it’s really presenting the data in a way that’s actionable and relevant to the clinician,” she said.
If you buy something from a Verge link, Vox Media may earn a commission. See our ethics statement.
Late on Monday night, Apple flipped the switch on two new features for its Apple Music subscription service: immersive Dolby Atmos spatial audio and lossless-quality streaming. It feels like the company is really only excited about one of them, though, and it’s not the latter.
Eddy Cue is Apple’s senior vice president of services and the person who oversees Apple Music. He didn’t mince words when he told Billboard that the sudden proliferation of lossless audio isn’t going to significantly evolve or change how we listen to music. “There’s no question it’s not going to be lossless,” he said when asked about what technologies will bring about the “next-gen” of music streaming. Cue firmly stands on the side of the crowd that argues most people can’t hear any difference between CD-quality or hi-res tracks and the AAC or MP3 files that’ve been filling their ears for so long now. He did acknowledge that the higher-bit rate tracks might matter to music lovers with particularly sharp hearing or premium audio equipment, but he was also direct about how niche that group is.
“The reality of lossless is: if you take 100 people and you take a stereo song in lossless and you take a song that’s been in Apple Music that’s compressed, I don’t know if it’s 99 or 98 can’t tell the difference.” Cue revealed that he has regularly done blind tests with the Apple Music team, and they confirm how rare it is for anyone to be able to consistently recognize lossless audio. “You can tell somebody, ‘Oh, you’re listening to a lossless [song],’ and they tell you, ‘Oh, wow. That sounds incredible.’ They’re just saying it because you told them it’s lossless and it sounds like the right thing to say, but you just can’t tell.”
If you go by the message that Cue and Apple are pushing, the Dolby Atmos-powered spatial audio feature is where the true breakthrough is. “When I look at Dolby Atmos, I think it’s going to do for music what HD did for television,” Cue said in the Billboard interview. And then he really went in:
“I think this is going to take over everything. It’s the way I want to listen to music when I’m in my car. It’s going to be the way I listen to music immediately with my AirPods. It’s going to be the way I listen to music in my house. In a way, it won’t feel very good when I’m listening to something that’s not Dolby Atmos because it’s so good. It’s like when I’m watching HD, it’s hard to go back.”
“This requires somebody who’s a sound engineer, and the artist to sit back and listen, and really make the right calls and what the right things to do are,” Cue told Billboard about mixing for spatial audio. “It’s a process that takes time, but it’s worth it.”
Problem is, with much of the Dolby Atmos content on Apple Music I’ve sampled so far, it doesn’t seem like everyone is making those right calls. It’s a hit-or-miss game of exploration, and songs that truly showcase the immersive potential of Atmos are more often the exception than the rule. In many cases, spatial audio tracks have an artificial wideness to them, unfamiliar placement of vocals and instrumentation, and just sound… off. Distant? Too reverb-y? Pick your preferred interpretation. Yet, Apple is so confident in Apple Music’s spatial audio that essentially overnight it became the default for millions of customers listening with AirPods.
But let’s back up a bit.
What is spatial audio supposed to do for music?
In a word, it’s all about immersion. Here’s how Cue hyped it: “it makes you feel like you’re onstage, standing right next to the singer, it makes you feel like you might be to the left of the drummer, to the right of the guitarist.” On its website, Apple says “music created in Dolby Atmos is freed from channels, allowing artists to place individual sounds all around you.”
Whoa there. Like all of Apple’s senior executives, Eddy Cue knows how to pitch something. But if you slap on your AirPods and expect to feel like an invisible person standing in the middle of a recording session, you’ll probably be underwhelmed.
When it’s done well, spatial audio does indeed give music a unique feeling of breadth. And it’s in a different way than a high-end pair of headphones might bring the most out of a stereo track’s soundstage. In particular, vocals often have a very distinct placement in the mix and cut through better than on traditional stereo tracks. That’s the most consistent advantage I’ve noticed with spatial audio music. But because of the different mix, you’ll very likely also pick up on details or sounds that ordinarily don’t stand out in the regular version of a song. And on the best Atmos tracks, everything has a lot more room to breathe.
But when engineers don’t put much care into an Atmos mix, it really shows. Sometimes giving everything so much space can take the impact or crunch out of guitars. Or other aspects of a track fall flat. I’ve included just a few samples below where the spatial audio version of a song is an obvious downgrade from the original. But there are many, and when you hit a few in a row where the vocals sound weird or something’s amiss, it can detract from the listening experience.
How many songs are available in Dolby Atmos spatial audio?
Apple currently isn’t providing a hard number, and is instead only saying that “thousands” of tracks are available with spatial audio at launch, with many more on the way.
How do I know when I’m hearing spatial audio on Apple Music?
You’ll see either a Dolby Atmos or Dolby Audio logo appear on the Now Playing screen beneath the album artwork.
A few random, good examples of Apple Music spatial audio:
“Don’t Know Why” by Norah Jones— This is one where I nearly buy into Cue’s description. Close your eyes, and you could almost transport yourself to a small club where the spread of this mix feels like a live version of Jones’ career-making hit. Stereo doesn’t take you to the same place.
“Paparazzi” by Lady Gaga — With a very surround sound-esque mix (skip to the second verse at 1:23 for the best examples), this is a great example of an old pop hit with an excellent spatial audio treatment.
“Boom” by Tiësto and Sevenn — A fun, lively track that does give off a nice surround sound effect.
“Black Skinhead” by Kanye West — This one is another good example of the “beyond two-channel” openness that spatial audio can provide.
A whole lot of jazz and classical — If there are two genres that naturally lend themselves to spatial audio and Dolby Atmos, it’s jazz and classical. Orchestras can sound truly massive, and it’s a captivating way to listen to jazz ensembles where it’s easy to hear even the quietest notes.
Other examples where it just sounds wrong
“Buddy Holly” by Weezer — The guitars basically lose all life in this mix and vocals dominate the entire thing in a way that just sounds strange and bad. And yet this song is on Apple’s own playlist meant to showcase Atmos.
“Follow Your Arrow” by Kacey Musgraves— Apple mentioned Musgraves as an artist to check out with Atmos. And while her most recent album Golden Hour sounds… fine… her breakthrough Same Trailer Different Park is pretty rough in spatial audio format. “Follow Your Arrow” seems to lose most of its background vocals, and even the main guitar melody is way quieter here than in the regular mix. It almost comes off like a demo recording.
“What’s My Age Again?” by Blink 182 — This is another song that Apple seems to think makes spatial audio sound good, but I’d strongly argue it does the opposite. Mark Hoppus’ muffled vocals legitimately sound like they were recorded through a phone.
“Alex Chilton” by The Replacements — Is that enough cowbell for you during the chorus? It overpowers everything else and makes me feel like I’m in the old Christopher Walken SNL skit, only with a different band.
I’m curious to hear some of your examples that sound great, and others you’ve found that are a disappointment with Atmos.
Do I need AirPods or Beats headphones for Apple Music spatial audio?
No. Apple Music’s spatial audio works on:
All headphones and earbuds
The loudspeakers on supported iPhones, iPads, and Macs
Apple TV 4K
If you set Dolby Atmos to “always on” in settings for the Music app, you’ll see a pop-up advising that it probably won’t sound right on all speakers, but Apple Music will still play the spatial audio mix if that’s your preference. In fact, Apple clearly states that you can “listen on any headphones” to Apple Music’s spatial audio.
How do I turn off Apple Music spatial audio if I don’t like it?
iOS and iPadOS: Go to Settings > Music > Dolby Atmos (under “audio”), and there you can pick between automatic, always on, and off.
If you’d prefer to leave Atmos on by default but want to quickly switch to a regular stereo version of any song that’s playing, just pull down Control Center, press and hold on the volume slider, and toggle off spatial audio. Apple Music will switch over to stereo. If you turn spatial audio back on, you’ll return to the Atmos track.
macOS: In the Music app, open preferences and select the “playback” tab. Halfway down you’ll see an “audio quality” section and Atmos is in there. You get the same three automatic / always on / off choices as on Apple’s mobile devices.
Head tracking is coming to Apple Music spatial audio this fall
Apple Music’s spatial audio is currently much different than the spatial audio experience you get when watching movies and TV shows on an iPhone or iPad. For videos, Apple includes a head-tracking feature that adjusts the sound placement as you turn your head to keep it anchored to the source device. This trick is exclusive to the AirPods lineup, but it’s a very impressive effect.
Apple has said it plans to bring this sound-changes-as-you-turn-your-head feature to Apple Music in the fall — likely with iOS 15.
Is this just a gimmick?
That’s really the question that remains to be answered. But Apple isn’t alone in hyping multidimensional music (nor is it the first to do so). Amazon, Tidal, and others are also increasingly pushing the experience. I recently reviewed an extravagant Sony speaker that positions 360-degree audio as its main selling point.
Are people like Eddy Cue and Zane Lowe right in their insistence that spatial audio will revolutionize how we consume music in the same way that stereo did? Or is this a gimmick like 3D TVs that will fizzle out and be forgotten within a few years? If it’s going to be the former, it’ll take a lot of work and creativity from artists, producers, and mixers to make this format shine.
Because right now, for every Atmos spatial audio track that’s a standout on Apple Music, there are a dozen others that are quite meh — or worse than in stereo. We’re still in the early days, and now that Atmos is officially part of Apple Music, hopefully the consistency will improve. When you do find those mixes where they totally nail it, it’s something special.
Apple should make it easier to switch between Atmos and stereo
But in the meantime, and to avoid turning people off from Atmos when they land on a lackluster mix, Apple Music should make it easier to go back and forth between spatial audio and regular stereo tracks on a per-song basis. One solution could be displaying a choice when you tap on the Dolby icon, similar to the “go to artist / album” options that appear when tapping on an artist’s name.
In its much-anticipated WWDC session on Monday, June 7th, Apple introduced a load of new features for its upcoming update of its iOS mobile operating system: iOS 15. The developer’s beta is now available for anyone who’d like to download it — and who is a registered developer.
First, the obligatory warning: this version of iOS 15 is going to be very new and very beta. If you’re a developer, you know all this, but it’s worth repeating: it’s best to install this on a phone that isn’t the one that you rely on. In addition, remember that Backups Are Your Friend.
You can find the developers beta of iOS 15 on Apple’s Developers Website. You will, of course, have to sign in (we’re assuming you’ve paid your $99 for a developer’s account). You may be asked to register your device if it isn’t registered already.
Find the iOS 15 profile by choosing Downloads (either from the button on the upper right corner, or by using the two-line drop-down menu on the upper left).
Look for the iOS profile, and allow the download.
Once the profile is downloaded, go to the Settings on your device, find “Profile Downloaded,” and follow the instructions. You will eventually be told to reboot, and then should be able to install the update that is available in Settings > General > Software Update.
If you’re not enrolled as an Apple developer, don’t be downhearted — there will be a public beta available for download sometime in July. When it’s available, we’ll let you know where to find it and how to install it.
Today, let’s talk about one of Apple’s many announcements this week at its Worldwide Developer Conference, which some see as a possible threat to the rise of journalism distributed by email. If that sounds self-indulgent, given that it’s coming from a journalist who distributes his work via email, I apologize. But it touches on so many of the subjects of interest to us here — a tech giant’s ability to reshape markets to its liking; how journalism will navigate the platform era; what we mean when we talk about privacy — that I hope I can pique your interest at least a little.
I.
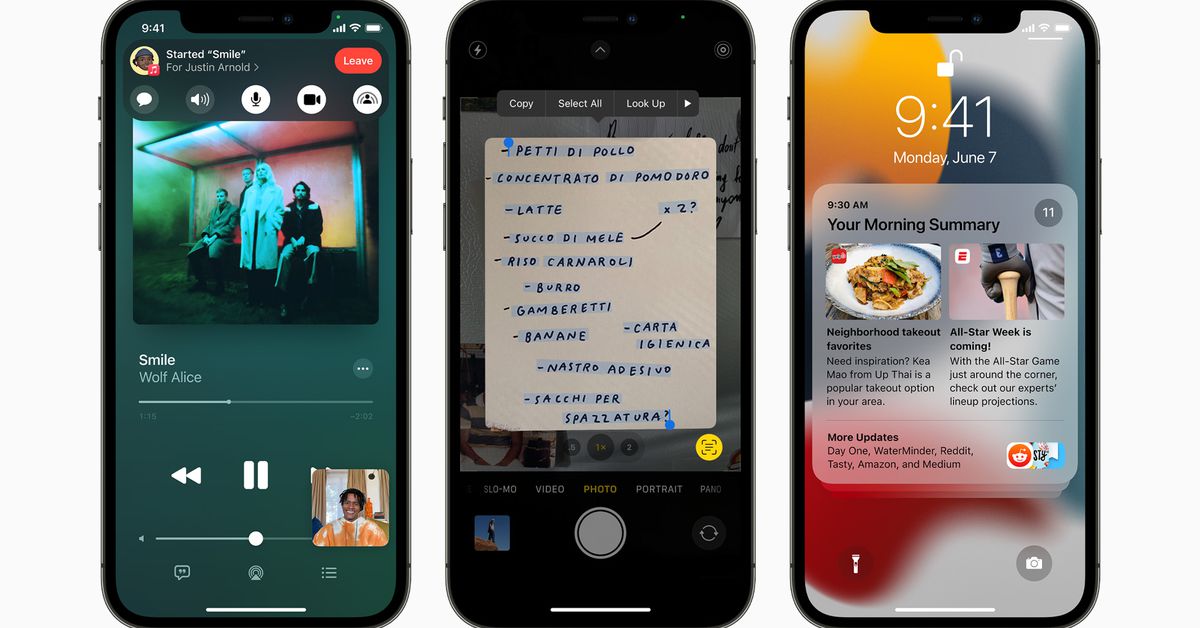
Start with the announcement. On Monday at WWDC, Apple announced Mail Privacy Protection, which will limit the amount of data that people who send you emails can collect about you. Here’s how the company describes it:
In the Mail app, Mail Privacy Protection stops senders from using invisible pixels to collect information about the user. The new feature helps users prevent senders from knowing when they open an email, and masks their IP address so it can’t be linked to other online activity or used to determine their location.
When you eventually update your iPhone to iOS 15 this fall, you’ll see a screen at launch that invites you to opt in.
Let’s assume most Apple Mail users opt in. How necessary is this data to building email-based businesses? Over the past day I’ve read and heard lots of disagreement.
Some quick background for the non-email obsessives. Long ago, email marketers began including invisible pixels in the emails they send you; when you open their messages, those pixels load, telling the sender that you read their message, and might also infer your location from your IP address.
Collectively, the percentage of people that actually open emails is known as the open rate, and it’s one of the most important metrics that senders measure to gauge the effectiveness of what they’re doing. It gives you a sense of how engaged your audience is, and how that engagement is changing over time.
At the same time, there is a fairly long tradition of people finding this creepy. The email startup Superhuman had to apologize in 2019 after a viral blog post explained how the company tracked when, where, and how often people opened emails sent through its service. The Markup, a nonprofit newsroom that often focuses on issues of data privacy, turned down eight potential email providers before finding one that would agree to turn off tracking capabilities.
Last year, when Basecamp launched the email service Hey, it made the blocking of tracking pixels a marquee feature. In a blog post today, Basecamp cofounder David Heinemeier Hansson — no fan of Apple in general! — declared victory against tracking pixels. He wrote:
Given Apple’s monopoly advantage with their preinstalled Mail app, we don’t need much of an uptake from what they’re calling Mail Privacy Protection to break the dam on spy pixels. You can’t really say anything authoritatively about open rates if 5-10-30-50% of your recipients are protected against snooping, as you won’t know whether that’s why your spy pixel isn’t tripping, or it’s because they’re just not opening your email.
There’s also simply no way users are going to willingly accept the premise of spy pixels if Apple presents the privacy dangers as clearly and as honestly as we’ve done in HEY. Apple already showed that with their drive to block unique ad identifiers for cross-app tracking in iOS 14.5: 96% of users in the US have declined to let apps track them like that! And email spy pixels are far worse and much creepier.
II.
Let’s stipulate a few things up front. One, most people still don’t know that these spy pixels exist. Two, if they did, most people probably wouldn’t allow them if given the choice. Three, the majority of these spy pixels are used for marketing purposes — efforts to target you better for e-commerce. I do not think it is at all irrational to look at the state of affairs the way Apple did, and say to hell with it.
At the same time, email-based publishing has been of the few bright spots for journalism in recent years. (Certainly it has been a bright spot for me!) Media companies from Facebook to Twitter to the New York Times are now investing heavily in newsletter strategies; new email-based publishers are popping up seemingly every week. Much of this has come in the wake of the success of Substack, which I use to publish Platformer (see disclosure).
And so it’s no surprise that some observers look at Mail Privacy Protection and see a threat. “This is another sign that Apple’s war against targeted advertising isn’t just about screwing Facebook,” Joshua Benton wrote in Nieman Lab. “They’re also coming for your Substack.”
Benton brings some powerful numbers to buttress his worries: “The most recent market-share numbers from Litmus, for May 2021, 93.5% of all email opens on phones come in Apple Mail on iPhones or iPads,” he writes. “On desktop, Apple Mail on Mac is responsible for 58.4% of all email opens.”
It seems clear that Apple’s move to cut off granular customer data from email senders will affect the email economy. But after conversations with newsletter writers and media executives today, I’m not sure that people doing email-based journalism have all that much to worry about from the shift.
“The advertising industry has addicted itself to tracking, prioritizing bottom of the funnel metrics at the expense of great content and creative. It’s tragic,” said Alex Kantrowitz, author of the free, ad-supported newsletter Big Technology. (He previously covered the industry for Ad Age.) “And it’s why people hate advertising and ad companies.”
Kantrowitz told me that his ad inventory was sold out for the first half of the year, thanks to a premium audience he identified not by pixel-based tracking but by a good old-fashioned reader survey. (The Markup, too, has used reader surveys to build a picture of its user base.)
“Pixel blocking makes placements like this more valuable and gives quality email newsletters a leg up on the junk clogging most people’s inboxes,” Kantrowitz said.
For ad-based newsletters, then, Mail Privacy Protection is likely to spur publishers to find other ways to understand their audiences. But what about paid newsletters, like the one this column is syndicated from?
Apple’s move may affect reader-supported newsletters even less, publishing industry executives told me today. Writers can triangulate reader engagement by plenty of metrics that are still available to them, including the views their stories get on the web, the overall growth of their mailing list, and — most meaningful of all — the growth of their revenue.
The media business changes so quickly that I don’t find it at all irrational to read about a move like the one Apple made this week and assume it will be bad for journalism. But in this case, it mostly strikes me as a false alarm. There are any number of changes that major email providers including Apple, Google, and Microsoft could make that would make life more difficult for newsletter-based businesses. In the end, though, I don’t think blocking spy pixels is one of them.
III.
All that said, I can’t end without pointing out the ways in which Apple itself benefits from cracking down on email data collection. The first one is obvious: it further burnishes the company’s privacy credentials, part of an ongoing and incredibly successful public-relations campaign to build user trust during a time of collapsing faith in institutions.
Taken together, the numerous iOS 15 features focused on user privacy combine to place more pressure on the digital ad ecosystem. Perhaps most notably, “Private Relay” — available to paying subscribers of Apple’s iCloud+ service — will encrypt all traffic leaving a user’s device, making them harder for advertisers to track.
One of my more cynical friends views all this as a way to funnel more businesses to building apps, offering in-app purchases, and promoting them with Apple’s advertising products. Marketing emails not working as well as they used to? Sounds like it’s time to buy some keywords in the App Store!
And what of creators who want to move away from the ad model? Apple will be there, ready and waiting to take a 30 percent cut of Twitter Super Follows, paid podcasts, and ticketed Facebook events.
It’s sometimes said that Amazon’s ultimate goal is to take a cut of all economic activity. Looking at Apple’s privacy moves this week, I’m mostly willing to take them at face value — as a necessary counter-balance to the inexorable rise of tracking technologies around the web. But it also seems clear that the value to Apple goes far beyond customer satisfaction — and as its revenues from ads and in-app purchases grow, we’d do well to keep an eye on how its policies are gradually reshaping the economy.
This column was co-published with Platformer, a daily newsletter about Big Tech and democracy.
Apple’s text selection magnifying glass has reappeared in the iOS 15 beta, and Apple’s own site confirms its return by listing it as a feature. Bringing the feature back is a reversal from when Apple made the decision to dump it in iOS 13, which is a bit of a rare occurrence: Apple doesn’t usually go back after it’s done away with something (bringing back scissor switches in its keyboards after years of butterfly switches is a notable exception). The return of the little pop-up is welcome, though: I can only speak for myself, but since iOS 13’s release, I’ve constantly been struggling without the helpful little magnifier.
The new version of the text magnifier seems to be a bit smaller than the old one (in case you’ve forgotten what it used to look like, you can see a great demonstration here), but it’s at least better than the nothing that appears in iOS 13 and 14.
The feature listing on Apple’s iOS 15 page. Did we not want to select exactly the text we wanted before?
It will, at the very least, solve the biggest problem with the current selection system: that your thumb is covering the text you’re trying to select, which makes it a little difficult to see what’s being selected until you pick your thumb up from the screen. Then, if you’re like me, you’ll probably sigh seeing that the wrong thing is selected, then struggle with the text selection handles to try to highlight what you were actually going for (squinting at the small screen the whole time).
It isn’t always this bad, but iOS 14’s text selection leaves something to be desired (and that something is a magnifier).
iOS 15 is currently in early beta, so anything we see now is subject to change — Apple could always make the magnifying glass more prominent based on feedback, if it seems like a lot of people are still struggling. While this feature isn’t quite enough for me to risk downloading the first developer beta, I think it may be what gets me to immediately grab the first public beta when it comes out.
We all spend a lot of time on our phones, and it’s possible — just possible — that some of us spend too much time. In 2018, we ran an article explaining how to use what was then Apple’s brand-new Screen Time feature, which was built in order to help people keep their on-screen time in some sort of sane proportion.
At the time (which was when iOS 12 came out), you could use Screen Time to check how much time you spent on your phone, use an App Limits feature to limit your (or your kids’) daily time spent on various apps or types of apps, or use its Downtime feature to cut off access to all (except a few) apps.
Since then, and especially since iOS 13 came out, Screen Time has been expanded, making it easier to lock down apps and / or limit your screentime. (There have been no additional features announced so far for the upcoming iOS 15, but we’ll add them here if there are.)
To begin using Screen Time, go to “Settings” > “Screen Time.” Here are some of the things you can do.
Daily Average
At the top of the Screen Time app, you can see an accounting of your activity over the course of the day. Click on “See All Activity” to see a breakdown of which specific apps you used and how long you used them.
Downtime
Downtime lets you set periods when you want to force yourself to give your eyes a rest and avoid staring at the screen. It does this by locking down the apps with which you are most likely to spend time. These lockdowns are not absolute — as you’ll see later, you can cancel Downtime when you need to.
Begin by choosing when you want to start your time away from your phone.
Tap on “Downtime” and toggle it on.
Select the days (it can be every day or just on specific days) and times that you want to avoid getting swallowed by your favorite iPhone apps. During those times, only specified apps that you pre-selected (along with phone calls) will be allowed through. For example, you can disable Facebook and Twitter during working hours, but keep the Messages app going for texts. (We’ll go over how to choose which apps to disable in a moment.)
You’ll get a warning before Downtime kicks in. If you need to keep working on an app, don’t worry — you’ll be given the chance to ask for one more minute, to be reminded in another 15 minutes, or to ignore the limit for today.
Keep in mind that Downtime, and the other Screen Time features, can be applied to all your devices that use iCloud. So if you set it on your iPhone, for example, it can apply to your Mac or iPad as well. To share your settings across your devices, go to the Screen Time main screen and toggle “Share Across Devices” on.
Now that you’ve chosen when you want some downtime, you’ll probably want to select which apps should be allowed to remain active.
Back in the Screen Time main screen, select “Always Allowed.” Here you can choose which apps you will still have access to during downtime.
You’ll see two sets of apps: Allowed Apps and Choose Apps.
To select an app you’ll always want access to, even during downtime, tap on the app’s name in Choose Apps and it will appear in the Allowed Apps list.
If you want to disallow any of the Allowed Apps, tap on the minus sign next to the app, and then on “Remove.”
There are more ways to personalize Downtime. Let’s say you want to get alerted about text messages from specific people — you’re planning to concentrate on a project and don’t want to hear from any of your friends, but you still want to get texts from family members. You can do that.
On the same “Always Allowed” page, tap on “Contacts” at the top of the page.
Under “Allowed Communication,” select “Specific Contacts” and choose which contacts you want to allow through, even during downtime.
Note that the “Allowed Communication” page is also accessible from the main Screen Time page.
App Limits
Another way to keep your app use in check is to limit the amount of time you use an app (rather than setting what time of day you can use it). For example, if Twitter tends to be your personal black hole, you can decide not to spend more than, say, two hours on Twitter each day.
To set your app limits:
In the Screen Time screen, select “App Limits” > “Add Limit.” Toggle “App Limits” on and tap on “Add Limit.”
You’ll see a list of categories, such as “Social,” “Games,” and “Entertainment.” Tap on a specific category, and it will open up to show a list of all your apps that are in that category.
Select the apps that you want to limit — or select an entire category to choose all the apps in that category.
Tap on “Next” in the upper right corner.
Select the maximum amount of time you can use the app(s) on a daily basis. When you reach your limit, you’ll be interrupted by a screen that lets you either apply the limit (just tap on the “OK” button), or shrug and select “Ignore Limit.”
If you choose the latter, you can get one more minute, ask to be reminded in 15 minutes, or decide to ignore the limit for today.
Note: if for any reason you don’t want to use an app at all, except for on rare occasions, you can set the Screen Time to 23 hours and 59 minutes. The app will then be out of reach unless you go back into “Settings” > “Screen Time” > “App Limits” and disable the limit.
Screen Time Passcode
If you want to keep certain apps out of the reach of your kids — or your roommate — then you can create a passcode that will be needed to make any changes to Screen Time. The passcode is also useful if you feel you need an extra barrier before you undo one of your limitations.
Go to Screen Time and tap on “Use Screen Time Passcode.”
Set a four-digit passcode, and then reenter it when asked.
Enter your Apple ID and password so that you can use it if you’ve forgotten your passcode.
And that’s it. If you want to change or delete your passcode, go back to Screen Time and select “Change Screen Time Passcode.”
Content & Privacy Restrictions
The last selection in Screen Time isn’t as much concerned with when you use your iPhone as with what you see or hear on it. Select “Content & Privacy Restrictions” if you want to allow or restrict explicit content, keep TV shows or movies to certain ratings, set an age limit for apps, limit which websites are allowed, and set a number of different limits on games (such as multiplayer games, connecting with friends, or private messaging).
Most of this is geared toward parents who want to oversee what their kids see and hear online, but if you’d rather avoid accidentally crashing into any “adult” websites, it could be useful. There are also a number of privacy features, such as stopping Apple advertising, or not allowing apps to change the settings of your microphone, Bluetooth sharing, and other features.
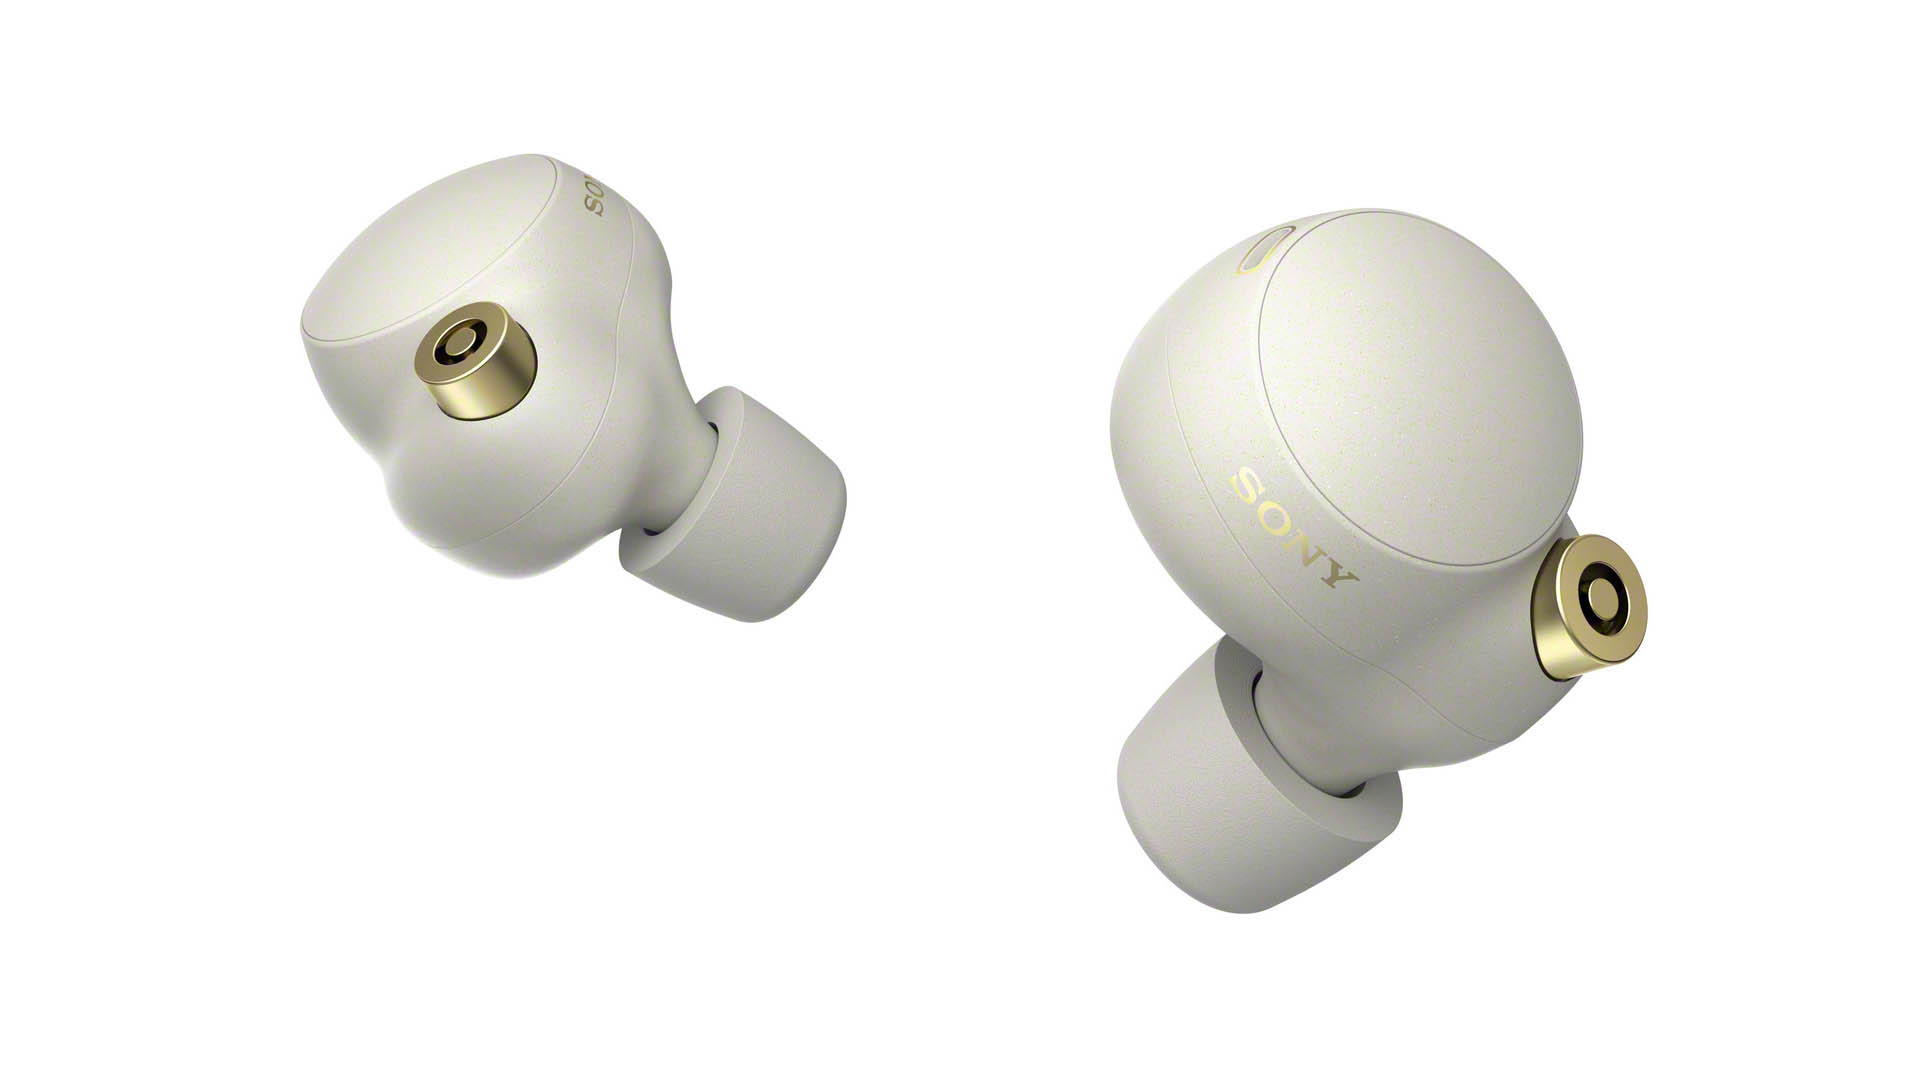
You won’t find many true wireless earbuds that come close to matching the all-round brilliance of the Sony WF-1000XM4
For
Clear, detailed bass performance
Wonderful sense of musicality
Comfortable
Class-leading battery life
Against
Missing Sony’s Multipoint feature
Lacking ear tip choices
No aptX HD
How do you improve on arguably the best all-round true wireless earbuds on the market? Sony has gone back to the drawing board and designed a brand new pair that look nothing like their predecessors – and the result is the WF-1000XM4. Is it a brave move? Definitely. Crazy? Quite possibly.
Sony’s WF-1000X range of wireless earbuds has been a dominant force in this category over the last few years, and the last pair to emerge from its stable, the WF-1000XM3, are two-time What Hi-Fi? Award-winners.
But instead of making the odd refinement here and there, Sony’s engineers have gone to town on the WF-1000XM4 with an all-new design, a new charging case and a new audio processor. They have even found time to develop a new eartip material, which here is appearing on a pair of Sony earbuds for the first time. What could possibly go wrong?
Luckily for Sony, very little does. In fact, the WF-1000XM4 are one of the most feature-packed, user-friendly and sonically gifted pair of wireless earbuds we’ve tested.
Pricing
Unsurprisingly, the Sonys sit at the premium end of the market, coming in at £250 ($280, AU$500). That places them right in the firing line of other five-star rivals such as the Sennheiser Momentum True Wireless 2 (£279, $299, AU$499), Bose QuietComfort Earbuds (£249, $280, AU$399) and, of course, the Apple AirPods Pro, which at the time of writing range in price between £199 ($199, AU$300) and £249 ($249, AU$329).
Build
(Image credit: Sony)
Your initial contact with the WF-1000XM4 is a surprising one. Sony has ditched the usual glossy box for recycled packaging made from a special blend of paper. This makes for a more compact box (34 per cent smaller than the WF-1000XM3’s), and one that’s plastic-free. That’s great news for the environment, though it doesn’t really give off the vibe that you’ve just bought a pair of premium noise-cancelling headphones.
Sony WF-1000XM4 tech specs
(Image credit: Sony)
Bluetooth version 5.2
Noise-cancelling Yes
Battery life 8 hours (BT + ANC), 24 hours (total)
Voice control Google Assistant, Amazon Alexa
Finishes x2
Weight 7.3g (x2)
Once you’ve liberated the WF-1000XM4 from their packaging, you’re greeted by a small, black charging case. It’s smaller than the case that comes with the Bose Quiet Comfort Earbuds, and positively tiny (40 per cent smaller) compared with the charging case that comes with their predecessors.
The case charges via USB-C and also introduces wireless charging to the WF-1000X range for the first time – all you need is a compatible Qi charging pad. You can even battery share with compatible smartphones and piggyback off their power supply, too.
You shouldn’t have to worry too much about the battery life. Sony’s new buds might come with a smaller case, but the XM4’s battery life is actually up compared with the XM3. You now get eight hours of play from the earbuds with noise-cancelling and Bluetooth turned on, and Sony claims the case can supply a further 16 hours of charge. That places their battery life from a single charge above all major rivals. The AirPods Pro can only manage five hours, the Sennheiser Momentum True Wireless seven hours and the Bose QuietComfort Earbuds six hours. Turn off noise-cancelling and the Sony’s life is extended to 12 hours from a single charge and 24 hours with the case. A five-minute quick charge is good for one hour of playtime, too.
You can see the life remaining in both the buds and the case through Sony’s Headphones Connect app, which will also give you a reminder when the case drops below 30 per cent charge.
As with all wireless earbuds, battery life can vary due to a number of different factors, such as the quality of files you’re listening to, how hard the internal processor is working, and the volume you’re listening at. During our testing, we found the battery life consistently good enough to get us through a day of mixed use.
Comfort
(Image credit: Sony)
Flip open the magnetic case and you’ll see the all-new earbud design of the WF-1000XM4. Based on a combination of customer feedback about the XM3 and research about the human ear, Sony has settled on a rounder body that sits more inside the ear opening.
The matte finish on each earbud gives the headphones a premium feel, while the small accents around the microphone and sensor holes add a tiny splash of colour. Speaking of colour, the XM4 come in a choice of black or silver.
If you want your XM4 to double as sports or running headphones you’ll be pleased to know they boast an IPX4 rating, making them resistant to “splashing from any angle” – a big improvement on the old model.
Besides the new-look earpieces, the XM4 also have brand new eartips. Made from polyurethane, which feels like a cross between silicone and foam, Sony claims they help secure a tighter, more stable fit. The thousands of tiny bubbles in the tips are also supposed to help reduce and dissipate noise.
The only downside here is that you only get a single set of small, medium and large-sized tips to choose from. Sony says you will get years of use out of one pair, and naturally extra tips should be available to purchase if you need them.
We don’t have any major problems sliding the earbuds in and twisting them into place. If you are struggling for a seal, you can pinch the tips and slide them into your ear canal, until they expand. We find they sit snugly in your ear opening, but they are comfortable over longer listening sessions.
To make sure you have the perfect fit, Sony has introduced a new air-tightness test, accessible through its Headphones Connect app. The app fires out a test tone and reports back on whether or not you need to make any adjustments. It’s worth trying out, especially if you feel the sound is lacking bass or there is outside noise leaking in.
In fact, we’d recommend installing the Headphones Connect app when you first connect the XM4. It gives you direct access to all the key features and functions of the earbuds so you can choose which ones to enable and disable. It also helps you get set up for listening to music in Sony’s 360 Reality Audio format from compatible streaming services such as Tidal and Deezer.
Features
(Image credit: Sony)
The circular outer surface of each earpiece is a touchpad and, by using the Headphones Connect app, you can customise the functionality of each one. They can control volume and playback or switch between noise-cancelling and ambient sound modes through the usual combination of taps, presses and long holds – and the headphones are quick to respond to these actions. Switching between sound modes, changing volume and activating and deactivating features such as Quick Attention (which drops the volume of what you’re listening to, so you can have a quick conversation without having to remove the earbuds from your ears) happen with minimal fuss.
The Sony WF-1000XM4 borrow the Speak-to-Chat function that debuted in the WH-1000XM4 wireless headphones. This feature allows you to talk to someone while the earbuds are still in place and is triggered when you start talking. It works well, although as is the case with the over-ears, it’s only triggered a second or so after you start talking.
This slight delay can be frustrating, as can the tendency for the feature to be triggered by a cough or an impromptu karaoke session while sat at your desk. You can reduce the sensitivity of the feature, or you can turn it off completely and either use Quick Attention or remove an earbud completely (which pauses playback automatically).
On the inside of the XM4 is plenty of new technology. The earbuds feature an improved DAC and analogue amplifier and are powered by a new Integrated Processor V1. Sony claims it provides a clearer sound and even better noise-cancelling than their predecessor. The new model also gets Sony’s DSEE Extreme audio processor with Edge-AI, which we have already experienced in the WH-1000XM4 over-ear headphones, and is designed to upscale low-bitrate music files to near hi-res quality.
The 6mm driver used inside the XM4 is similar in size to the one used in the previous model, but it’s made from a new material and features a bigger magnet, which Sony claims helps improve sound quality and noise-cancelling, especially with certain low frequencies.
There’s no aptX HD support onboard, but the XM4 support Sony’s LDAC file format, which, streamed over Bluetooth from a compatible source, allows hi-res audio files up to 24-bit/96kHz to be transmitted at data rates of up to 990kbps.
(Image credit: Sony)
Sony has also aimed to deliver clearer call quality with new features, including beam-forming and the use of a bone conduction sensor that stops the mics from picking up distracting ambient sounds while you’re talking. There’s even an automatic wind noise reduction mode which attempts to cut out swirls of noise passing through the headset and into your ears.
All of this works with Sony’s Precise Voice Pickup technology, originally introduced in the WH-1000XM4. The net effect is an impressive call quality for a pair of wireless earbuds. The technologies all combine to do a solid job of dampening down outside noise and interference, especially for the person on the other end of the line.
The general level of noise-cancelling is excellent, especially for a pair of wireless earbuds. Not everyone likes that ‘vacuum’ feeling you get when it’s turned on, but it’s extremely effective through the Sonys and you’ll struggle to find better noise cancellation at this level.
Android users will be pleased to hear the Sonys are compatible with Fast Pair so you can get up and running with minimal fuss. You receive a battery notification pop-up on your smartphone when they power up and you can even track their location down using the Google Find My Device app.
Unfortunately, iOS users don’t get any such pairing perks, but all you need to do to start pairing is open the case and take the headphones out. It’s a shame Sony hasn’t carried across the ‘Multipoint’ feature enabled on the WH-1000XM4 over-ears. This allows you to connect the headphones to two different Bluetooth devices simultaneously, which can come in handy if you’re working on a laptop but still want to be connected to your phone. Here’s hoping it can be added at a later date.
In terms of stability, we use an Apple iPhone 12 and Macbook for the bulk of our testing and find the connection to be rock solid with no dropouts, even in more built-up areas.
Sound
(Image credit: Sony)
Before we get to the WF-1000XM4’s immense musicality and expressive dynamics, we should note the way the headphones handle bass. The quality of bass and the clarity of low frequencies is stunning. There’s such a fantastic level of detail on display that it makes rival headphones, such as the Bose QuietComfort Earbuds, sound congested in comparison.
We’re keen to hear how the earbuds handle one of our favourite bass-heavy test tracks, Massive Attack’s Angel – and we’re blown away by the confidence with which the song is dispatched. Every element of that pulsing bassline is precisely deployed and dripping in texture. It’s the clarity around the notes that really grabs you – it allows the WF-1000XM4 to communicate intricacies in the bass notes that other headphones struggle to uncover.
But it’s not a sound that purely favours low frequencies. There’s clarity across the board and a sense of rhythmic precision that allows the Sony’s to switch pace effortlessly. They sound as at home keeping up with, and succeeding in not being tripped up by, Radiohead’s 15 Step as they are dispatching the slow, deliberate swagger of Nina Simone’s Feeling Good.
Simone’s effortless vocal oozes class and sophistication, with every nuance in her delivery laid bare for the listener. Combine the emotion in her voice with the impact of the piano, percussion and wind section and the Sony’s create a captivating sound you can’t help but be swept away by.
If you were wondering whether the WF-1000XM4 would be a step up from the WF-1000XM3, we can confirm that they are. The newer model sounds more informative and uncovers more subtle detail. Bass notes are better defined and the overall sound is better balanced. Even the much-admired Sennheiser Momentum True Wireless 2 struggle to match the Sonys for tonality and refinement.
You can hear that refinement and natural tone shine through as we listen to Ludovico Einaudi’s Experience. From the delicate, deliberate piano strokes at the start to the soaring strings at the song’s climax, the Sonys bring the individual personalities to life and mix them together like the ingredients of a fine cocktail.
Verdict
We’re quite taken by the Sony WF-1000XM4. Given all the design changes and new features in these wireless earbuds, it must have been a real challenge to get them right. But Sony has absolutely nailed it. The headphones deliver a satisfying user experience, class-leading battery life, some of the best noise-cancelling we’ve heard in this category, and absolutely stunning sound quality. Put simply, this is a new benchmark for premium true wireless earbuds.
This website uses cookies to improve your experience while you navigate through the website. Out of these, the cookies that are categorized as necessary are stored on your browser as they are essential for the working of basic functionalities of the website. We also use third-party cookies that help us analyze and understand how you use this website. These cookies will be stored in your browser only with your consent. You also have the option to opt-out of these cookies. But opting out of some of these cookies may affect your browsing experience.
Necessary cookies are absolutely essential for the website to function properly. This category only includes cookies that ensures basic functionalities and security features of the website. These cookies do not store any personal information.
Any cookies that may not be particularly necessary for the website to function and is used specifically to collect user personal data via analytics, ads, other embedded contents are termed as non-necessary cookies. It is mandatory to procure user consent prior to running these cookies on your website.