Update February 18th, 2:10PM ET: Google released the first of its Android 12 developer previews, so we’ve updated the info in this post to be relevant if you want to install it on your phone. The instructional photos might include a mention of Android 11, but we’ve ensured the steps are still accurate.
You can try out the Android 12 developer preview software right now if you have a Pixel 3 or later, but it’s understandable if the idea of flashing your device to install the OS is intimidating. It can be a tricky process, and the steps differ slightly depending on what phone you have and what kind of computer you’re going to use to download the software. But Google itself makes this process much more streamlined.
Google’s Android Flash Tool is a web application that handles most of the steps of flashing for you. There are a few steps that you’ll need to do yourself before the new software can be installed, which we’ll walk you through below, but Google’s tool basically eliminates most of the hassle and complexity that makes it easy to mess up.
There are a few important notes to make up here at the top. First, once you flash your phone with the developer preview, your device will get all future developer preview and beta updates over the air. In other words, you won’t need to flash your phone again when new builds of Android 12 are released. Just head to your system settings and fetch an update.
The second note is just your standard disclaimer that you do this at your own risk. This is unfinished software, and installing it could lead to malfunctions with your device or to software that you usually use. And depending on settings that you adjust in the Android Flash Tool, you might have to wipe all of the data from your phone. So proceed with caution.
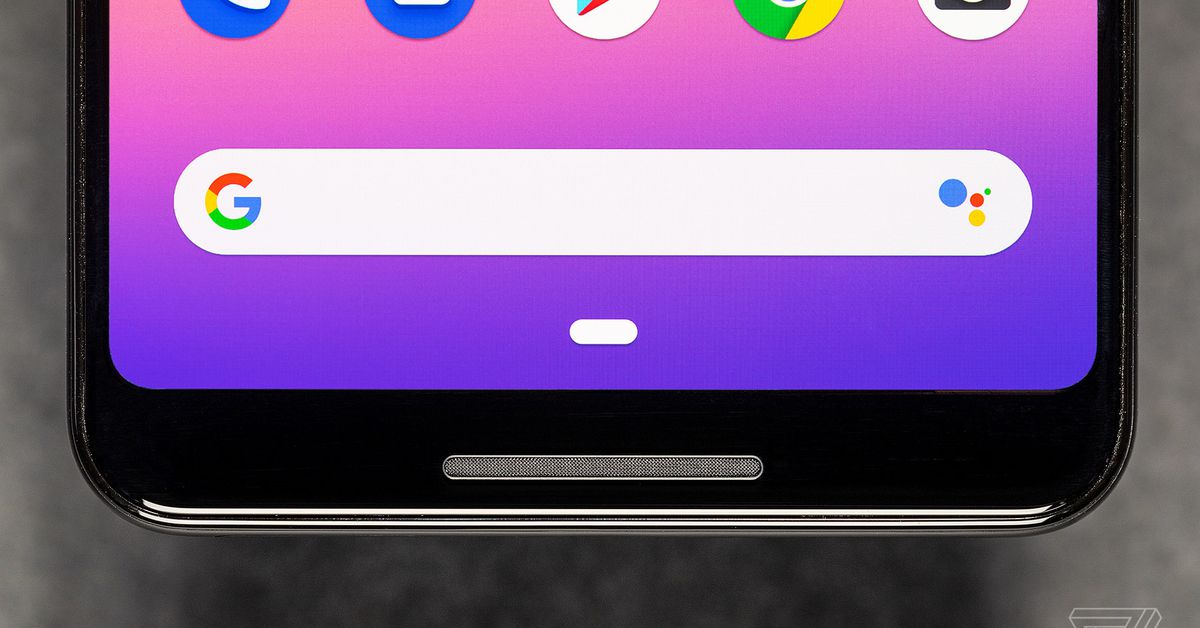
Photo by Vjeran Pavic / The Verge
Is my phone compatible with Android 12?
The Android 12 developer preview is compatible with the Pixel 3, Pixel 3 XL, Pixel 3A, Pixel 3A XL, Pixel 4, Pixel 4 XL, Pixel 4A, Pixel 4A 5G, and the Pixel 5. It’s possible that Google will broaden the list of devices supported by Android 12 in the upcoming beta, but for now, you’ll need one of those phones to get the software.
What browser do I need to use to flash my phone?
Google says that you can use any browser that supports the WebUSB API, which is supported by Chrome as well as Microsoft Edge version 79 and later. The Android Flash Tool works with all the major operating systems, including Linux, macOS, Chrome OS, and Windows 10, though browser compatibility may vary depending on your OS.
Step 1: Activate these three settings on your Android phone
Enable the Developer Options menu in your phone. First, open the Settings app. For phones running Android 8 (Oreo), click System. Otherwise, if your phone has Android 7 (Nougat) or later, scroll down to About Phone, then find Build Number. Tap Build Number seven times to enable Developer Options.
Turn on USB debugging (this lets your phone and computer communicate via USB) within the Developer Options menu. To do this, head to Settings > System > Advanced > Developer Options. You’ll find USB debugging with just a little scrolling down.
Enable OEM unlocking. This option is also part of the Developer Options menu, further up the page than where you found USB debugging. If that option isn’t available for you to enable, that might be because it’s already enabled.
Photo by Vjeran Pavic / The Verge
Step 2: Connect your phone to your computer and get started
If you use Windows 10, you’ll need to install this driver first for your phone to be recognized. People using macOS or Linux don’t need a driver.
Connect your phone to your computer with a USB cable. Then visit this page to proceed.
The Android Flash Tool will ask for permission to access ADB keys in a pop-up window, which is necessary to install software on your phone. You’ll need to tap “OK” to proceed with this process.
You’ll need to hit OK to proceed with the installation.
Click “Select device.” Your device should appear in a pop-up window on your computer, so go ahead and click it.
Once you do that, you should now see a request on your phone that says “Allow USB debugging?” You’ll also see a long string of numbers and letters that should match up with what your PC shows if you click the gear icon on the Android Flash Tool page. On your phone, check the box next to “Always allow from this computer,” then tap Allow.
After that, your device should show up on the Android Flash Tool as being connected. Click on the box with the name of your device to proceed.
Once your device shows up as being connected, click into it.
You’ll want to pay attention to what appears in the “Selected build” section of the Flash Tool (see below). It should say “Android 12 Developer Preview 1.” Before you hit the blue “Install” button at the bottom of the page, I recommend tapping the pencil icon next to “Selected build” and checking the “Lock Bootloader” box. This will lock the bootloader after this process is complete, leaving you with a more secure device than if it remained unlocked.
Select the “Lock Bootloader” option, which will lock your bootloader after the software installation is complete.
The next window basically tells you to stop interacting with your phone during the rest of this process unless asked to do so and to not unplug your device. If you’re in a position to proceed, go ahead.
Make sure your data is backed up before you proceed.
One more prompt before getting started: a license agreement. You need to agree to the terms of the Android Software Development Kit License Agreement, which you can find here.
After you hit “I accept,” your phone will reboot into its bootloader screen. If nothing happens for a few seconds, don’t worry. You may also see a window pop up on your computer that says “Reselect your device.” In that case, leave your phone alone and select “Reselect device” on the computer. According to Google, your phone might be renamed “Android,” though it might just be identified with the model name (e.g., Pixel 3).
If you haven’t flashed software before, Google will probably need to unlock your bootloader to proceed with the installation. Keep in mind that doing this will trigger a factory reset on your phone. If you haven’t backed up your data, you’ll lose everything. Once you agree, you’ll need to allow the bootloader to unlock on your phone. To do this, use the volume keys to navigate to the option that says “Unlock the bootloader,” then hit the power button once to confirm.
After that, the Android Flash Tool will begin to download and install the software. You can continue to watch along, but don’t touch your phone at this point, even though it will restart several times. Just keep an eye on the progress using the Android Flash Tool page on your computer.
At this point, you can just sit and wait for the Android Flash Tool to wrap things up.
Once you’re all done, the phone will reboot one last time, and over on your PC, you’ll be met with a celebratory screen. You’re all done! And thankfully, you won’t have to go through this process again for the next Android 12 update — easy as this was. You’ll automatically receive updates to the developer preview over the air.
Google is releasing a developer preview for the next version of Android, Android 12, for Pixel devices today. As is the norm for Google, the very first previews of Android are full of a lot of developer-facing changes. Android 12 has updates to how the OS handles images, video, and future security updates.
It’s also the norm for Google to hold some of the major UI changes in reserve for its Google I/O conference, typically held in May. Although this developer preview does include some changes to the UI for notifications, until we install it we won’t know how closely it will map to the leak we saw earlier this month.
It’s available for Pixel 3 and newer phones but needs to be manually installed by flashing your device. It’s likely nowhere near ready for day-to-day use, but Google is promising that it will continue its beta program for regular users later this year.
Although the point of this first preview is to give developers a jump-start on getting their apps ready for the new version of Android, there are still features that should make a tangible difference to users. Specifically, Android is going to become more adept at handling different types of media.
Google did not provide images of Android 12’s user interface ahead of time. We will update this post with more details and images as soon as we are able.
New media formats in Android 12
There will be a new transcoding layer that will automatically make the HEVC video format work in apps that don’t natively support them. Currently, choosing to shoot in HEVC on an Android phone may mean that third-party apps won’t be able to natively use that video. The new transcoding layer for those apps should let users make the switch with more confidence.
Android 12 will support spatial audio, support MPEG-H, and be optimized for up to 24 channels of audio (up from eight before). It will also make it easier for developers to tie rumble effects to audio.
Google appears to be throwing its weight behind the AV1 Image File Format — otherwise known as AVIF. AVIF is meant to replace JPGs as the de facto image format, offering much better and cleaner compression with fewer artifacts. Netflix in particular has been a big proponent of the format. If AV1 sounds familiar, that’s because it’s an offshoot of the AV1 video format that major tech companies proposed some years back and both Netflix and Google have partially adopted. AVIF also isn’t to be confused with the similar HEIF, which Apple’s cameras have been shooting for some time.
Google says that it does not intend to make AVIF the default image format for the camera app, so this is still just a first step.
Sticking with multimedia, Android 12 will simply do a better job moving different kinds of media between apps. It’s creating a new “Rich content insertion” API that will let you cut and paste or drag and drop multiple kinds of content, including “plain and styled text to markup, images, videos, audio files, and more.”
A leaked look at Android 12. As of publication we don’t know precisely how accurate this is, but it lines up with Google’s description in its blog post.Image: XDA-Developers
Android 12 interface changes
We will need to install the developer preview ourselves to get a closer look at the changes Google is introducing right now. Its blog post describes what’s new in somewhat general terms. It’s a safe bet that what Google is showing today will be a hint to larger changes due later in the year. Whether those changes really will match up with the leaked screenshots you see above remains to be seen.
Here’s how Google describes the changes it is making to notifications:
We’re refreshing notification designs to make them more modern, easier to use, and more functional. In this first preview you’ll notice changes from the drawer and controls to the templates themselves. We’re also optimizing transitions and animations across the system to make them more smooth. As part of the updates, for apps targeting Android 12 we’re decorating notifications with custom content with icon and expand affordances to match all other notifications.
The app icons do line up with the leaked screenshot above, though, again, that doesn’t necessarily mean that’s what the final version will look like. The “expand affordances” also line up — the downward-pointing caret you can see in the screenshot above would be easier to tap than the current system. Google also notes that it is asking developers to use an API that makes apps open up more quickly in the right spot when a user taps a notification.
Finally, Google says that it is changing how Android 12 will behave when you’re in a full-screen app like a video, a Kindle book, or a video game. Currently, it often takes two gestures to exit out of those apps — one to bring up the UI, another to actually exit out. With Android 12, Google says that it is “changing the default to allow users to navigate their phone with one swipe.”
Changes under the hood
In 2019, Google started updating certain components deep inside the Android OS directly, rather than waiting for carriers to push through a major update. Dubbed “Project Mainline,” it meant Google could issue security updates for critical parts of Android using the Google Play infrastructure. Ever since, it’s been adding more pieces of Android to the Mainline system. Android 12’s big addition to this system is the Android Runtime (ART), a fundamental subsystem for making Android apps run. The aforementioned media transcoder will also become a Mainline module.
Android 12 will have a few privacy and security updates, but they won’t be as prominently visible to users. The WebView engine that third-party apps use will adopt one of Chrome’s more recent cookie settings called “SameSite,” which could help mitigate some tracking. Google says that “more privacy and security features [will be] coming in later preview releases.”
Android recently began requiring apps to pop a notification when it needs to run a background activity — which turns out to be really distracting. In Android 12, Google says it “will be blocking foreground service starts from the background,” redirecting developers to a new API. If one of these background activities can finish up in less than 10 seconds, it may not need to display a notification at all.
Google is also releasing an Android 12 preview for Android TV right away, including giving developers the chance to test their apps on Google’s own Google TV platform.
What’s next for Android 12
Google is releasing the developer preview today, but again, it requires that you flash your device’s system image, so really it’s meant for developers only right now. Google says it will work on a “Pixel 3 / 3 XL, Pixel 3a / 3a XL, Pixel 4 / 4 XL, Pixel 4a / 4a 5G, or Pixel 5 device” or developers can simply run it inside the Android emulator.
There will be a public beta at some point, but expect it to take a few months. And if Google follows its past habits, there will be a more comprehensive look at what’s coming in Android 12 in May (or possibly June).
Last year, Android’s “platform stability” release came in early July, but this year Google is targeting August — the official release usually comes shortly thereafter. That could mean that Android 12 will arrive just a little later in the year than usual.
In the meantime, we and others will be digging in to the developer preview to see what other details we can find. More often than not there are enough hints scattered throughout the code to give us a good idea of Google’s final plans for Android.
Google has announced that a built-in screen recorder is coming to Chrome OS in March. Google hopes the tool will make it easier for students and teachers to record virtual lessons. “Teachers have long recorded lessons to help students do homework and study for tests, but in the past year it’s become downright critical for virtual learning,” reads Google’s blog post.
It looks pretty simple. Once you’ve pressed the appropriate button on your Chromebook, you’ll see a countdown in the center of your screen. While your Chromebook is recording, a red circle will appear on the right side of the shelf.
A few other tools for Chromebook learners are in the works as well, and some have already arrived. Chrome OS’s screen reader, ChromeVox, has some new features: The voice now changes based on the language of the text it’s reading, and you can now search its menus.
Additionally, parents can now use Family Link (Google’s parental-control app) to manage their children’s school accounts in addition to their personal accounts. This means screen-time limits, bedtimes, and other restrictions parents place on their children’s personal accounts can apply to their school accounts as well.
On the hardware side, Google has announced that it’s launching over 40 new Chromebooks this year. It claims every model is “equipped to deliver exceptional Google Meet and Zoom experiences”.
To help schools navigate the new releases, the company has put out a list of available Chromebooks, which includes configurations from Samsung, Lenovo, HP, Dell, Asus, and Acer, and tips for selecting the right one. The company recommends a number of basic models, such as Acer’s Chromebook Spin 511 and Lenovo’s 300e, as well as fancier devices like the Chromebook Spin 713 (The Verge’s top Chromebook pick) and Samsung’s $1,000 Galaxy Chromebook.
A number of these units include LTE connectivity — Google is referring to these as “Always Connected” devices, and emphasizes their importance for students with limited internet access (though buying a device with LTE can bump the price up).
Chromebooks are big sellers in the education market, due in part to their affordability and districts’ widespread use of Google Classroom, Google’s online education portal. 2020 was the Chromebook’s best year ever, due largely to increased demand from schools providing at-home instruction for the first time.
Google has been building out its services for remote school and meetings since the start of the COVID-19 pandemic. In the early months of remote schooling, Google made Meet meetings with up to 100 participants available to anyone with a Google account. It’s added a number of features to Meet as well, in an effort to keep up with large competitors Zoom and Microsoft Teams. The company has rolled out custom backgrounds, blur effects, real-time captioning, low-light mode, and hand-raising in recent months.
If you ever wanted a zombie game where you played as the undead instead of fending off against it, you’ll have another chance soon. Stubbs the Zombie in Rebel Without a Pulse is being rereleased on March 16th for PC, PS4, Switch, and Xbox One and will be playable on PS5 and Xbox Series X / S via backwards compatibility.
Aspyr Media, the company that originally published Stubbs the Zombie, is handling the port. The studio recently worked on porting Star Wars Episode I: Racer to modern consoles, so it’s safe to say this remaster is in good hands.
Originally released in 2005 on the Xbox, Stubbs the Zombie has players control the titular character with the main goal of wreaking havoc and devouring human brains. It’s a third-person action title developed by the now-defunct Wideload Games. The game also came to Windows and Mac OS X roughly a month after its original release date, with a release on Steam coming nearly two years later, which was later removed from the platform.
The announcement is good news for fans who played the 2005 original. In recent years, Stubbs the Zombie has become one of the rarest games to own on the original Xbox. Microsoft made the game available digitally for the Xbox 360 in 2008 as an Xbox Originals title, but the company pulled it from the Xbox Live Marketplace in late 2012. With no other ways to play the game in nearly a decade, your only option was to own an original Xbox console and a physical copy, which is pretty pricey.
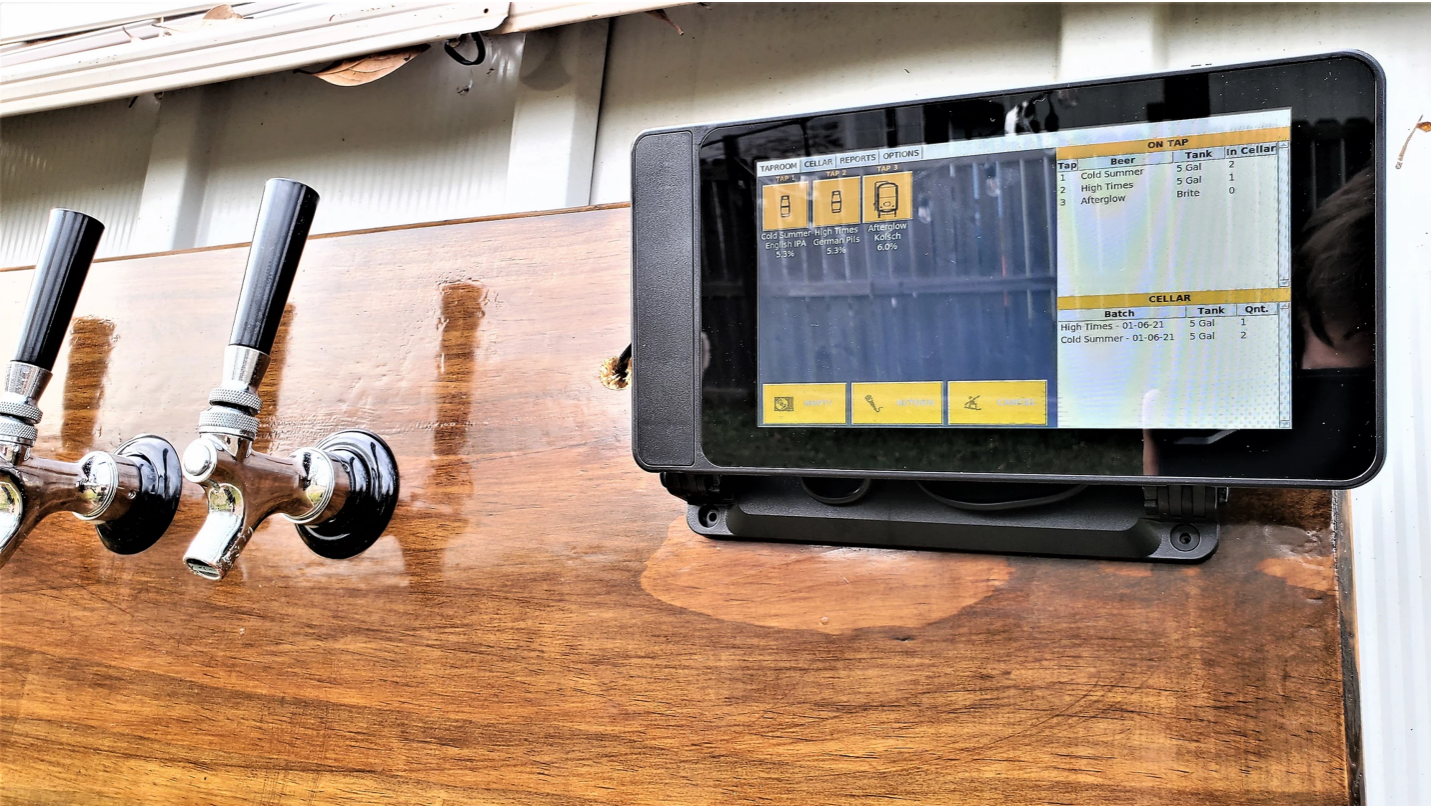
New Orleans-based Danger Shed wanted to know how much beer they had in their inventory, so with the help of a Raspberry Pi 4 and some Python code, they developed their own inventory application, Keg Punk!
Image 1 of 4
(Image credit: Arithmech Analytics)
Image 2 of 4
(Image credit: Arithmech Analytics)
Image 3 of 4
(Image credit: Arithmech Analytics)
Image 4 of 4
(Image credit: Arithmech Analytics)
Written in over two thousand lines of Python, Keg Punk is the project of craft brewery manager Patrick Murphy. It comes in three forms: A $200 complete kit including the official Raspberry Pi Display and a Raspberry Pi 4, a $19 pre-loaded micro SD card, or a $15 download for brewers to build themselves should they already have the official screen and a spare Raspberry Pi. Despite the kit coming with a Raspberry Pi 4, it is equally at home with older Raspberry Pi models, but sadly not the Raspberry Pi Zero because it doesn’t have a DSI connector.
No matter the version you choose, the base Python application is written on top of Raspberry Pi OS (formerly Raspbian), and Keg Punk supports up to 10 taps. The system has a simple touchscreen interface designed for brewers to quickly input their brews via the Cellar screen.
The home screen for Keg Punk is the Taproom, and here we can track overall cellar inventory and manage which beer is on which virtual ‘tap,’ handy when there are multiple beers in your stock room.
Right now, Keg Punk does not show current levels in kegs, but the team is already hard at work on Keg Punk 2.0, which aims to have this functionality via a series of sensors providing input, along with a second screen that updates the available list of beers for the public to order.
This could be a ‘refreshing’ project for the eager brewer and Raspberry Pi fan.
In this tutorial, we will train our Raspberry Pi to identify other Raspberry Pis (or other objects of your choice) with Machine Learning (ML). Why is this important? An example of an industrial application for this type of ML is identifying defects in circuit boards. As circuit boards exit the assembly line, a machine can be trained to identify a defective circuit board for troubleshooting by a human.
We have discussed ML and Artificial Intelligence in previous articles, including facial recognition and face mask identification. In the facial recognition and face mask identification projects, all training images were stored locally on the Pi and the model training took a long time as it was also performed on the Pi. In this article, we’ll use a web platform called Edge Impulse to create and train our model to alleviate a few processing cycles from our Pi. Another advantage of Edge Impulse is the ease of uploading training images, which can be done from a smartphone (without an app).
We will use BalenaCloudOS instead of the standard Raspberry Pi OS since the folks at Balena have pre-built an API call to Edge Impulse. The previous facial recognition and face mask identification tutorials also required tedious command line package installs and Python code. This project eliminates all terminal commands and instead utilizes an intuitive GUI interface.
What You’ll Need
Raspberry Pi 4, Raspberry Pi 400, or Raspberry Pi 3
8 GB (or larger) microSD card
Raspberry Pi Camera, HQ Camera, or USB webcam
Power Supply for your Raspberry Pi
Your smartphone for taking photos
Windows, Mac or Chromebook
Objects for classification
Notes:
If you are using a Raspberry Pi 400, you will need a USB webcam as the Pi 400 does not have a ribbon cable interface.
You do NOT need a monitor, mouse, or keyboard for your Raspberry Pi in this project.
Timing: Please plan for a minimum 1-2 hours to complete this project.
Create and Train the Model in Edge Impulse
1. Go to Edge Impulse and create a free account (or login), from a browser window on your desktop or laptop (Windows, Mac, or Chromebook).
Data Acquisition
2. Select Data Acquisition from the menu bar on the left.
3. Upload photos from your desktop or scan a QR code with your smartphone and take photos. In this tutorial we’ll opt for taking photos with our smartphone.
4. Select “Show QR code” and a QR code should pop-up on your screen.
(Image credit: Tom’s Hardware)
5. Scan the QR code with your phone’s camera app.
(Image credit: Tom’s Hardware)
6. Select Open in browser and you’ll be taken to a data collection website. You will not need to download an app to collect images.
7. Accept permissions on your smartphone and tap “Collecting images?” in your phone’s browser screen.
(Image credit: Tom’s Hardware)
8. If prompted for permissions, tap the “Give access to the camera” button and allow access on your device.
(Image credit: Tom’s Hardware)
9. Tap “Label” and enter a tag for the object you will take photos of.
(Image credit: Tom’s Hardware)
10. Take 30-50 photos of your item at various angles. Some photos will be used for training and other photos will be used for testing the model. Edge Impulse automatically splits photos between training and testing.
(Image credit: Tom’s Hardware)
11. Repeat the process of Entering a label for the next object and taking 30-50 photos per object until you have at least 3 objects complete. We recommend 3 to 5 identified objects for your initial model. You will have an opportunity to re-train the model with more photos and/or types of objects later in this tutorial.
(Image credit: Tom’s Hardware)
From your “Data Acquisition” tab in the Edge Impulse browser window, you should now see the total number of photos taken (or uploaded) and the number of labels (type of objects) you have classified. (You may need to refresh the tab to see the update.) Optional: You can click on any of the collected data samples to view the uploaded photo.
(Image credit: Tom’s Hardware)
Impulse Design
12. Click “Create impulse” from “Impulse design” in the left column menu.
13. Click “Add a processing block” and select “Image” to add Image to the 2nd column from the left.
14. Click “Add a learning block” and select “Transfer Learning.”
(Image credit: Tom’s Hardware)
15. Click the “Save Impulse” button on the far right.
16. Click “Image” under “Impulse design” in the left menu column.
17. Select “Generate features” to the right of “Parameters” near the top of the page.
18. Click the “Generate features” button in the lower part of the “Training set” box. This could take 5 to 10 minutes (or longer) depending on how many images you have uploaded.
(Image credit: Tom’s Hardware)
19. Select “Transfer learning” within “Impulse design,” set your Training settings (keep defaults, check “Data augmentation” box), and click “Start training.” This step will also take 5 minutes or more depending on your amount of data.
(Image credit: Tom’s Hardware)
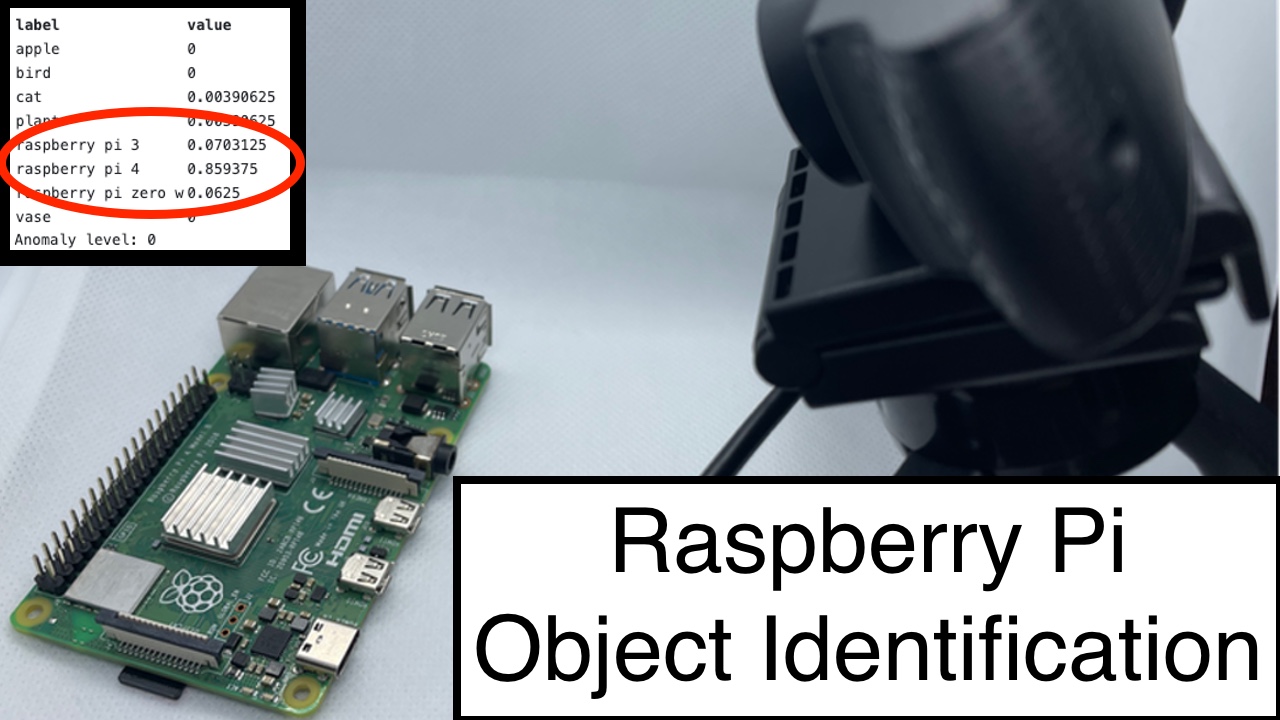
After running the training algorithm, you’ll be able to view the predicted accuracy of the model. For example, in this model, the algorithm can only correctly identify a Raspberry Pi 3 – 64.3% of the time and will misidentify a Pi 3 as a Pi Zero 28.6% of the time.
(Image credit: Tom’s Hardware)
Model Testing
20. Select “Model testing” in the left column menu.
21. Click the top check box to select all and press “Classify selected” to test your data. The output of this action will be a percent accuracy of your model.
(Image credit: Tom’s Hardware)
If the level of accuracy is low, we suggest going back to the “Data Acquisition” step and adding more images or removing a set of images.
(Image credit: Tom’s Hardware)
Model Testing
22. Select “Deployment” in the left menu column.
23. Select “WebAssembly” for your library.
24. Scroll down (“Quantized” should be selected by default) and click the “Build” button. This step may also take 3 minutes or more depending on your amount of data.
(Image credit: Tom’s Hardware)
Setting Up BalenaCloud
Instead of the standard Raspberry Pi OS, we will flash BalenaCloudOS to our microSD card. The BalenaCloudOS is pre-built with an API interface to Edge Impulse and eliminates the need for attaching a monitor, mouse, and keyboard to our Raspberry Pi.
25. Create a free BalenaCloud account here. If you already have a BalenaCloud account, login to BalenaCloud.
26. Deploy a balena-cam-tinyxml application here. Note: You must already be logged into your Balena account for this to automatically direct you to creating a balena-cam-tinyml application.
27. Click “Deploy to Application.”
(Image credit: Tom’s Hardware)
After creating your balena-cam-tinyml application, you’ll land on the “Devices” page. Do not create a device yet!
28. In Balena Cloud, select “Service Variables” and add the following 2 variables.
Variable 1:
Service: edgeimpulse-inference
Name: EI_API_KEY
Value: [API key found from your Edge Impulse Dashboard].
(Image credit: Tom’s Hardware)
To get your API key, go to your Edge Impulse Dashboard, select “Keys” and copy your API key.
(Image credit: Tom’s Hardware)
Go back to Balena Cloud and paste your API key in the value field of your service variable.
Click “Add”.
(Image credit: Tom’s Hardware)
Variable 2:
Service: edgeimpulse-inference
Name: EI_PROJECT_ID
Value: [Project ID from your Edge Impulse Dashboard].
(Image credit: Tom’s Hardware)
To get your Project ID, go to your Edge Impulse Dashboard, select “Project Info,” scroll down, and copy your “Project ID.”
(Image credit: Tom’s Hardware)
Go back to Balena Cloud and paste your Project ID in the value field.
Click Add.
(Image credit: Tom’s Hardware)
27. Select “Devices” from the left column menu in your BalenaCloud, and click “Add device.”
28. Select your Device type, (Raspberry Pi 4, Raspberry Pi 400, or Raspberry Pi 3).
(Image credit: Tom’s Hardware)
29. Select the radio button for Development.
30. If using Wifi, select the radio button for “Wifi + Ethernet” and enter your Wifi credentials.
(Image credit: Tom’s Hardware)
31. Click “Download balenaOS” and a zip file will start downloading.
32. Download, install, and open the Balena Etcher app to your desktop (if you don’t already have it installed). Raspberry Pi Imager also works, but Balena Etcher is preferred since we are flashing the BalenaCloudOS.
33. Insert your microSD card into your computer.
34. Select your recently-downloaded BalenaCloudOS image and flash it to your microSD card. Please note that all data will be erased from your microSD card.
(Image credit: Tom’s Hardware)
Connect the Hardware and Update BalenaCloud
35. Remove the microSD card from your computer and insert into your Raspberry Pi.
36. Attach your webcam or Pi Camera to your Raspberry Pi.
(Image credit: Tom’s Hardware)
37. Power up your Pi. Allow 15 to 30 minutes for your Pi to boot up and BalenaOS to update. Only the initial boot requires the long update. You can check the status of your Pi Balena Cloud OS in the BalenaCloud dashboard.
(Image credit: Tom’s Hardware)
(Image credit: Tom’s Hardware)
Object Identification
38. Identify your internal IP address from your BalenaCloud dashboard device.
(Image credit: Tom’s Hardware)
39. Enter this IP address in a new browser Tab or Window. Works great in Safari, Chrome, and Firefox.
40. Place an object in front of the camera.
(Image credit: Tom’s Hardware)
You should start seeing a probability rating for your object in your browser window (with your internal IP address).
(Image credit: Tom’s Hardware)
41. Try various objects that you entered into the model and perhaps even objects you didn’t use to train the model.
(Image credit: Tom’s Hardware)
(Image credit: Tom’s Hardware)
Refining the Model
If you find that the identification is not very accurate, first check your model’s accuracy for that item in the Edge Impulse Model Testing tab.
You can add more photos by following the Data Acquisition steps and then selecting “Retrain model” in Edge Impulse.
You can also add more items by labeling and uploading in Data Acquisition and retraining the model.
After each retraining of the model, check for accuracy and then redeploy by running x “WebAssembly” within Deployment.
Facebook is building a smartwatch as part of its ongoing hardware efforts, according to a new report from The Information. The device is said to be an Android-based smartwatch, though the report does not say Facebook intends for the device to run Google’s Wear OS. It also says Facebook is working on building its own operating system for hardware devices and that future iterations of the wearable may run that software instead.
The smartwatch would have messaging, health, and fitness features, the report says, and would join Facebook’s Oculus virtual reality headsets and Portal video chat devices as part of the social network’s growing hardware ecosystem. Facebook is also working on branded Ray-Ban smart glasses to come out later this year as part of its ongoing Project Aria initiative, an augmented reality project the company has been working on for some time now. Facebook did not immediately respond to a request for comment.
The social networking giant’s hardware ambitions are no secret. The company has more than 6,000 employees working on various augmented and virtual reality projects and as part of existing hardware divisions like Oculus and Portal, as well as on experimental initiatives under its Facebook Reality Labs division, Bloomberg reported last month. And although Facebook has not expressed a strong interest in health and fitness devices in the past, the company does have a track record in wearables with its Oculus headsets and its forthcoming smart glasses.
Facebook also acquired the neural interface startup CTRL-Labs in 2019. CTRL-Labs specialized in building wireless input mechanisms, including devices that could transmit electrical signals from the brain to computing devices without the need for traditional touchscreen or physical button inputs. The startup’s intellectual property and ongoing research may factor into whatever wearables Facebook builds in the future — including a smartwatch, smart glasses, or future Oculus headsets.
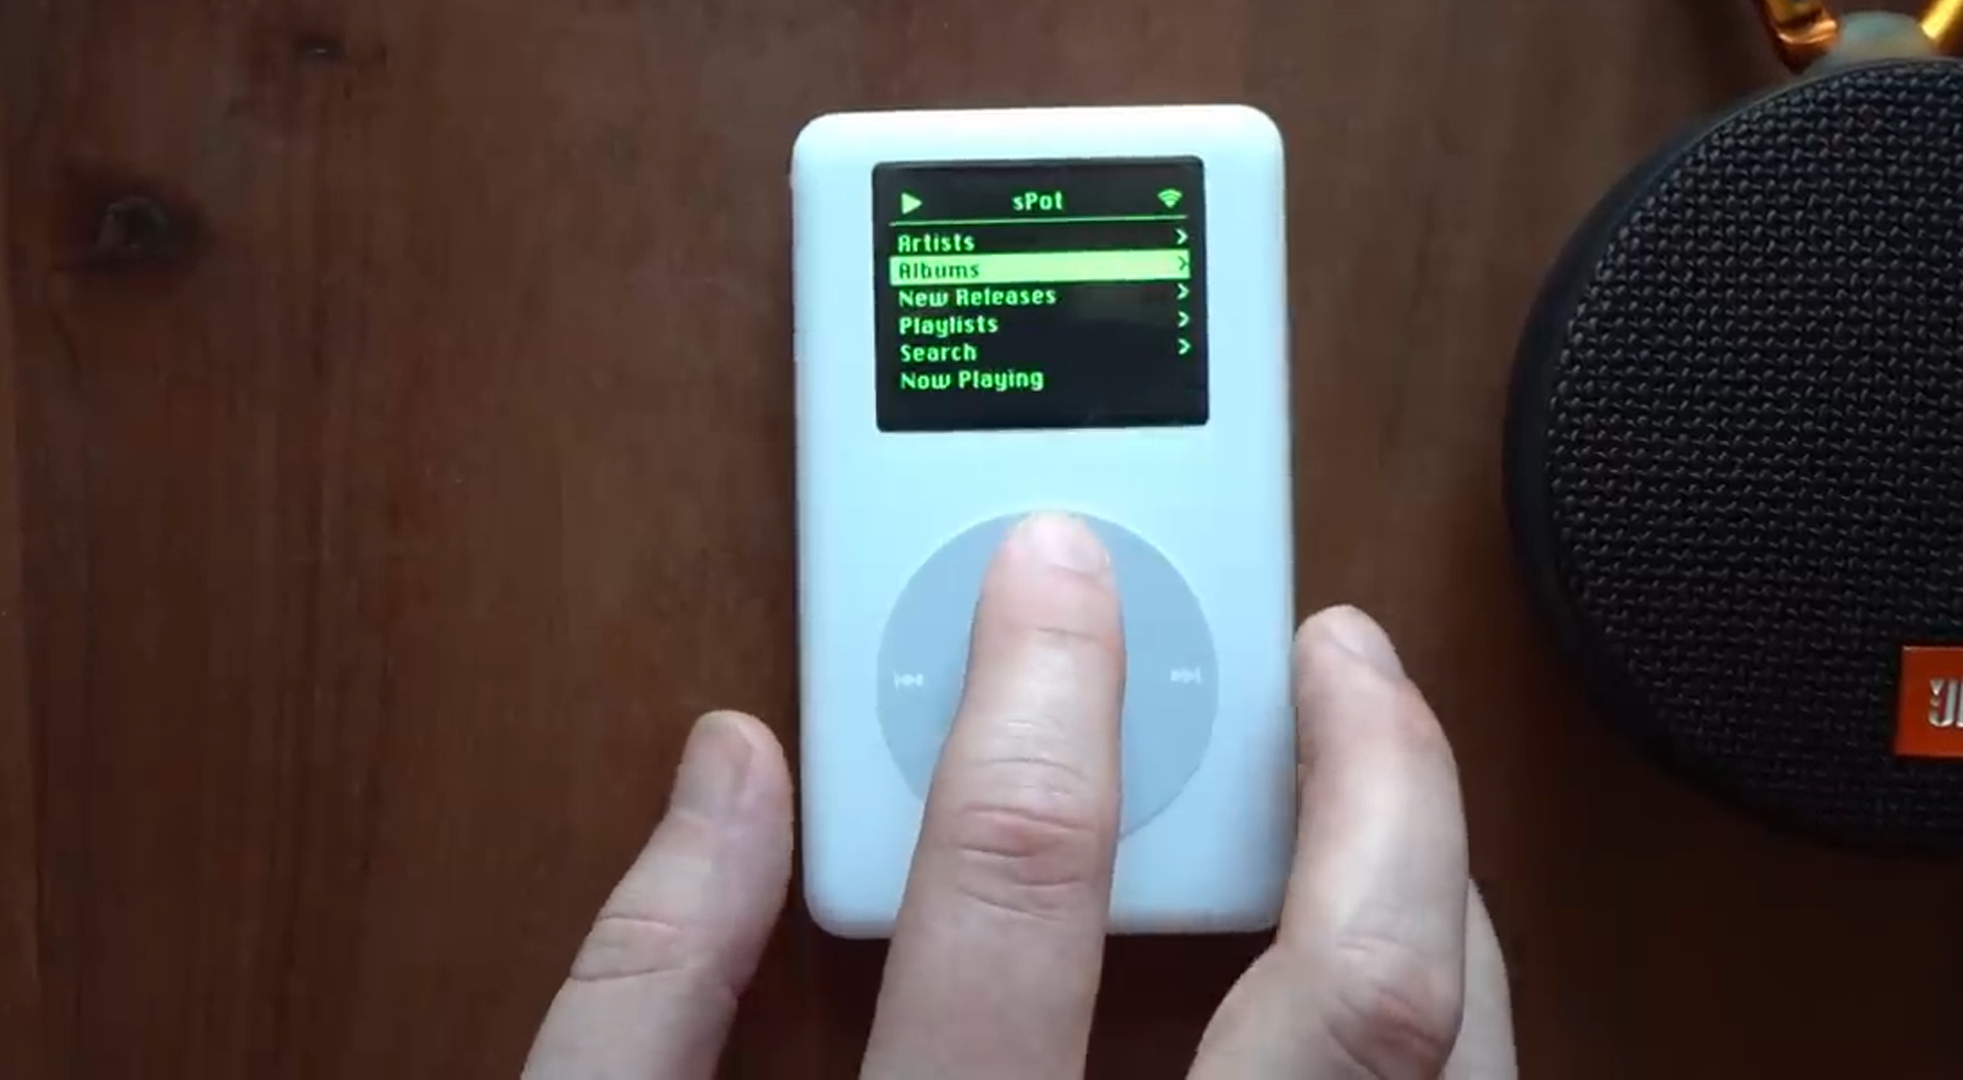
When maker Guy Dupont came into possession of a few classic iPods, he knew he had a potential Raspberry Pi project on his hands. This led to the development of sPot—a Raspberry Pi-powered Spotify streaming device housed inside of a 2004, 4th gen iPod.
The project uses elements from the iPod like the screen and original scroll wheel to operate the Spotify menu. It also comes with a slew of new features like Bluetooth support—necessary for integrating the device with modern systems and speakers.
(Image credit: Guy Dupont)
Inside the 4th gen iPod is a Raspberry Pi Zero W which provides the wireless access necessary to stream using Spotify. The Pi is running the official Raspberry Pi OS to interface with the Spotify API.
The user interface was built using Python and designed to mimic the original iPod menu. This edition, however, has a few new features like real-time streaming through Spotify, rather than accessing list of locally stored files, and a custom search function. The unit is totally portable thanks to a 1000mAh battery which can be recharged using a micro USB port.
You can find a full video breaking down the project on Dupont’s official YouTube channel. Check out our list of Best Raspberry Pi Projects for more cool Pi projects from the maker community.
(Pocket-lint) – Welcome to our guide to the best 65-inch TVs. As manufacturers find new ways to harness their technology and take leaps forward technically, the sets that almost always get those innovations first are the bigger ones in their ranges.
Best 4K TV: Premium Ultra HD smart TVs to buy today
If you’re used to smaller TVs, the jump to a 65-inch television can feel like a really big one, but trust us that it’s worth it if you can fit one in. You’ll be transported into the content you’re watching or playing and will be able to plan movie nights that really are like going to the theatre. So, to that end, we’ve gathered some of the very best 65-inch TVs on the market right now for you to choose from.
Our pick of the best 65-inch 4K TVs to buy today
LG
LG OLED CX
squirrel_widget_272813
LG is sort of the kind of OLED TVs at the moment – it’s got the display tech down to a tee, and the CX is another in a long line of hits for the manufacturer.
It’s nicely designed with a stand that’s attractive without being too big, and bezels that are practically non-existant. On top of that you get stunning picture-quality on a really well-made OS, making it a joy to use. Of course, you’ll pay handsomely for the privilege.
LG OLED CX 4K TV review: Superb picture quality
Samsung
Samsung Q80T
squirrel_widget_234212
Samsung’s Q80T is a real stormer of a release – it’s still pretty pricey, but by Samsung’s standards brings the pricing down nicely, and has a range of sizes to pick from.
The 65-inch version, like the others, is a really superb display that uses Samsung’s trademark QLED technology to get deep blacks and impressive colour range without using OLED tech.
Samsung Q80T 4K QLED TV review: A 4K sensation
LG
LG NANO90 65-inch
squirrel_widget_231755
LG’s got another ace up its sleeve in the form of this NANO90 TV, which is perfect if you’re a big gamer and want to guarantee low lag to give you every possible advantage.
It might look like any old TV nowadays, but the picture quality is great and by cutting on the cost of OLED, using standard LED, LG’s been able to make sure the TV is super-fast, perfect for games.
LG NANO90 4K NanoCell TV review: Can it outshine OLED?
TCL
TCL 5-Series S535
squirrel_widget_3956184
This is a high-quality 4K QLED TV but it isn’t outrageously expensive. TCL’s Natural Motion 240 tech is designed to reduce motion blur, especially when watching sports or other fast-moving scenes.
As you’d expect the TV is HDR compatible (HDR10, HLG, and Dolby Vision) while there are all the smart TV apps you’ll need, four HDMI ports and Google Assistant/Alexa integration.
TCL’s 5-Series is also available in 55, 75 and 50-inch sizes.
Samsung
Samsung Q65T
squirrel_widget_305557
If you like the look of Samsung’s televisions, but don’t want to fork out the money needed for the Q80T, the Q65T is a fabulous compromise.
You still get a brilliant QLED panel that’s gorgeous to watch 4K content on, and it’s a dab hand at upscaling, too. Sound quality could be better, we feel, but that’s not exactly the top concern when you buy a TV.
Samsung Q65T 4K QLED TV review: Punchy picture at an attractive price
Insignia
Insignia NS-65DF710NA21
squirrel_widget_3956205
This is a stunningly good value 65-inch 4K Ultra HD TV that’s based around Amazon’s Fire TV interface. if you’ve used an Amazon Fire TV Stick or similar you’ll know that it’s easy to use.
Fire TVs have an Alexa remote, so there’s full voice control, too.
And you can be safe in the knowledge that your TV will support all the latest streaming apps and services, too.
There’s full HDR support, too.
This model is also available in 43, 50, 55 and 70-inch sizes.
Sony
Sony XH95
squirrel_widget_273473
Sony comes in swinging with this huge TV that specialises in colour – its HDR is as good as you’ll find out there, making for amazing contrast and depths.
This isn’t an OLED or QLED display, instead representing the best of what an LCD display can offer with a bunch of refinements and improvements, and we’re suitably impressed. At this price, though, we wonder if OLED would be a better investment.
Sony XH95 4K TV review: Punchy pictures
Writing by Max Freeman-Mills. Editing by Dan Grabham.
Last year AMD significantly overhauled its StoreMi software that’s designed to speed up storage performance on its consumer platforms. This week the company continued to polish off its StoreMi suite by enabling support for its ultra-high-end Threadripper Pro workstations, as well as the ability to use SSD partitions for caching.
Introduced in 2018, AMD’s StoreMi was AMD’s way to improve its platforms’ storage performance, therefore responding to Apple’s Fusion Drive and Intel’s Optane Memory caching. Just like Apple’s Fusion Drive (and unlike Intel’s caching-based algorithm), AMD’s StoreMi used to be a file-based tiered storage solution, which has a clear advantage over caching as far as capacity is concerned, but which may not be the most optimal solution when it comes to reliability. In Q2 2020, AMD re-introduced its StoreMi suite and basically re-invented it as a storage caching software that mirrors frequently used data on a faster drive. Since then, the company has been perfecting the StoreMi V2 software.
The latest version of AMD’s StoreMi can work with AMD’s Ryzen Threadripper Pro CPUs on WRX80 motherboards. Hybrid storage subsystems are not exactly common in crème-de-la-crème professional workstations that are usually equipped with high-capacity SSDs and connected to even higher-capacity NAS, but since AMD now offers its Ryzen Threadripper Pro with WRX80 platform at retail, adding support for StoreMi makes sense.
Another improvement of the StoreMi suite is designed for more widespread systems. The update can use SSD petitions for caching. For example, if a system is equipped with a 1 TB SSD, half of its capacity may be used for the OS and frequently used software, whereas the other half can be used for caching data.
(Image credit: AMD)
AMD’s StoreMi V2 suite is now compatible with the company’s X570, B550, 400, X399, TRX40, or WRX80-series platforms. You can download the software here.
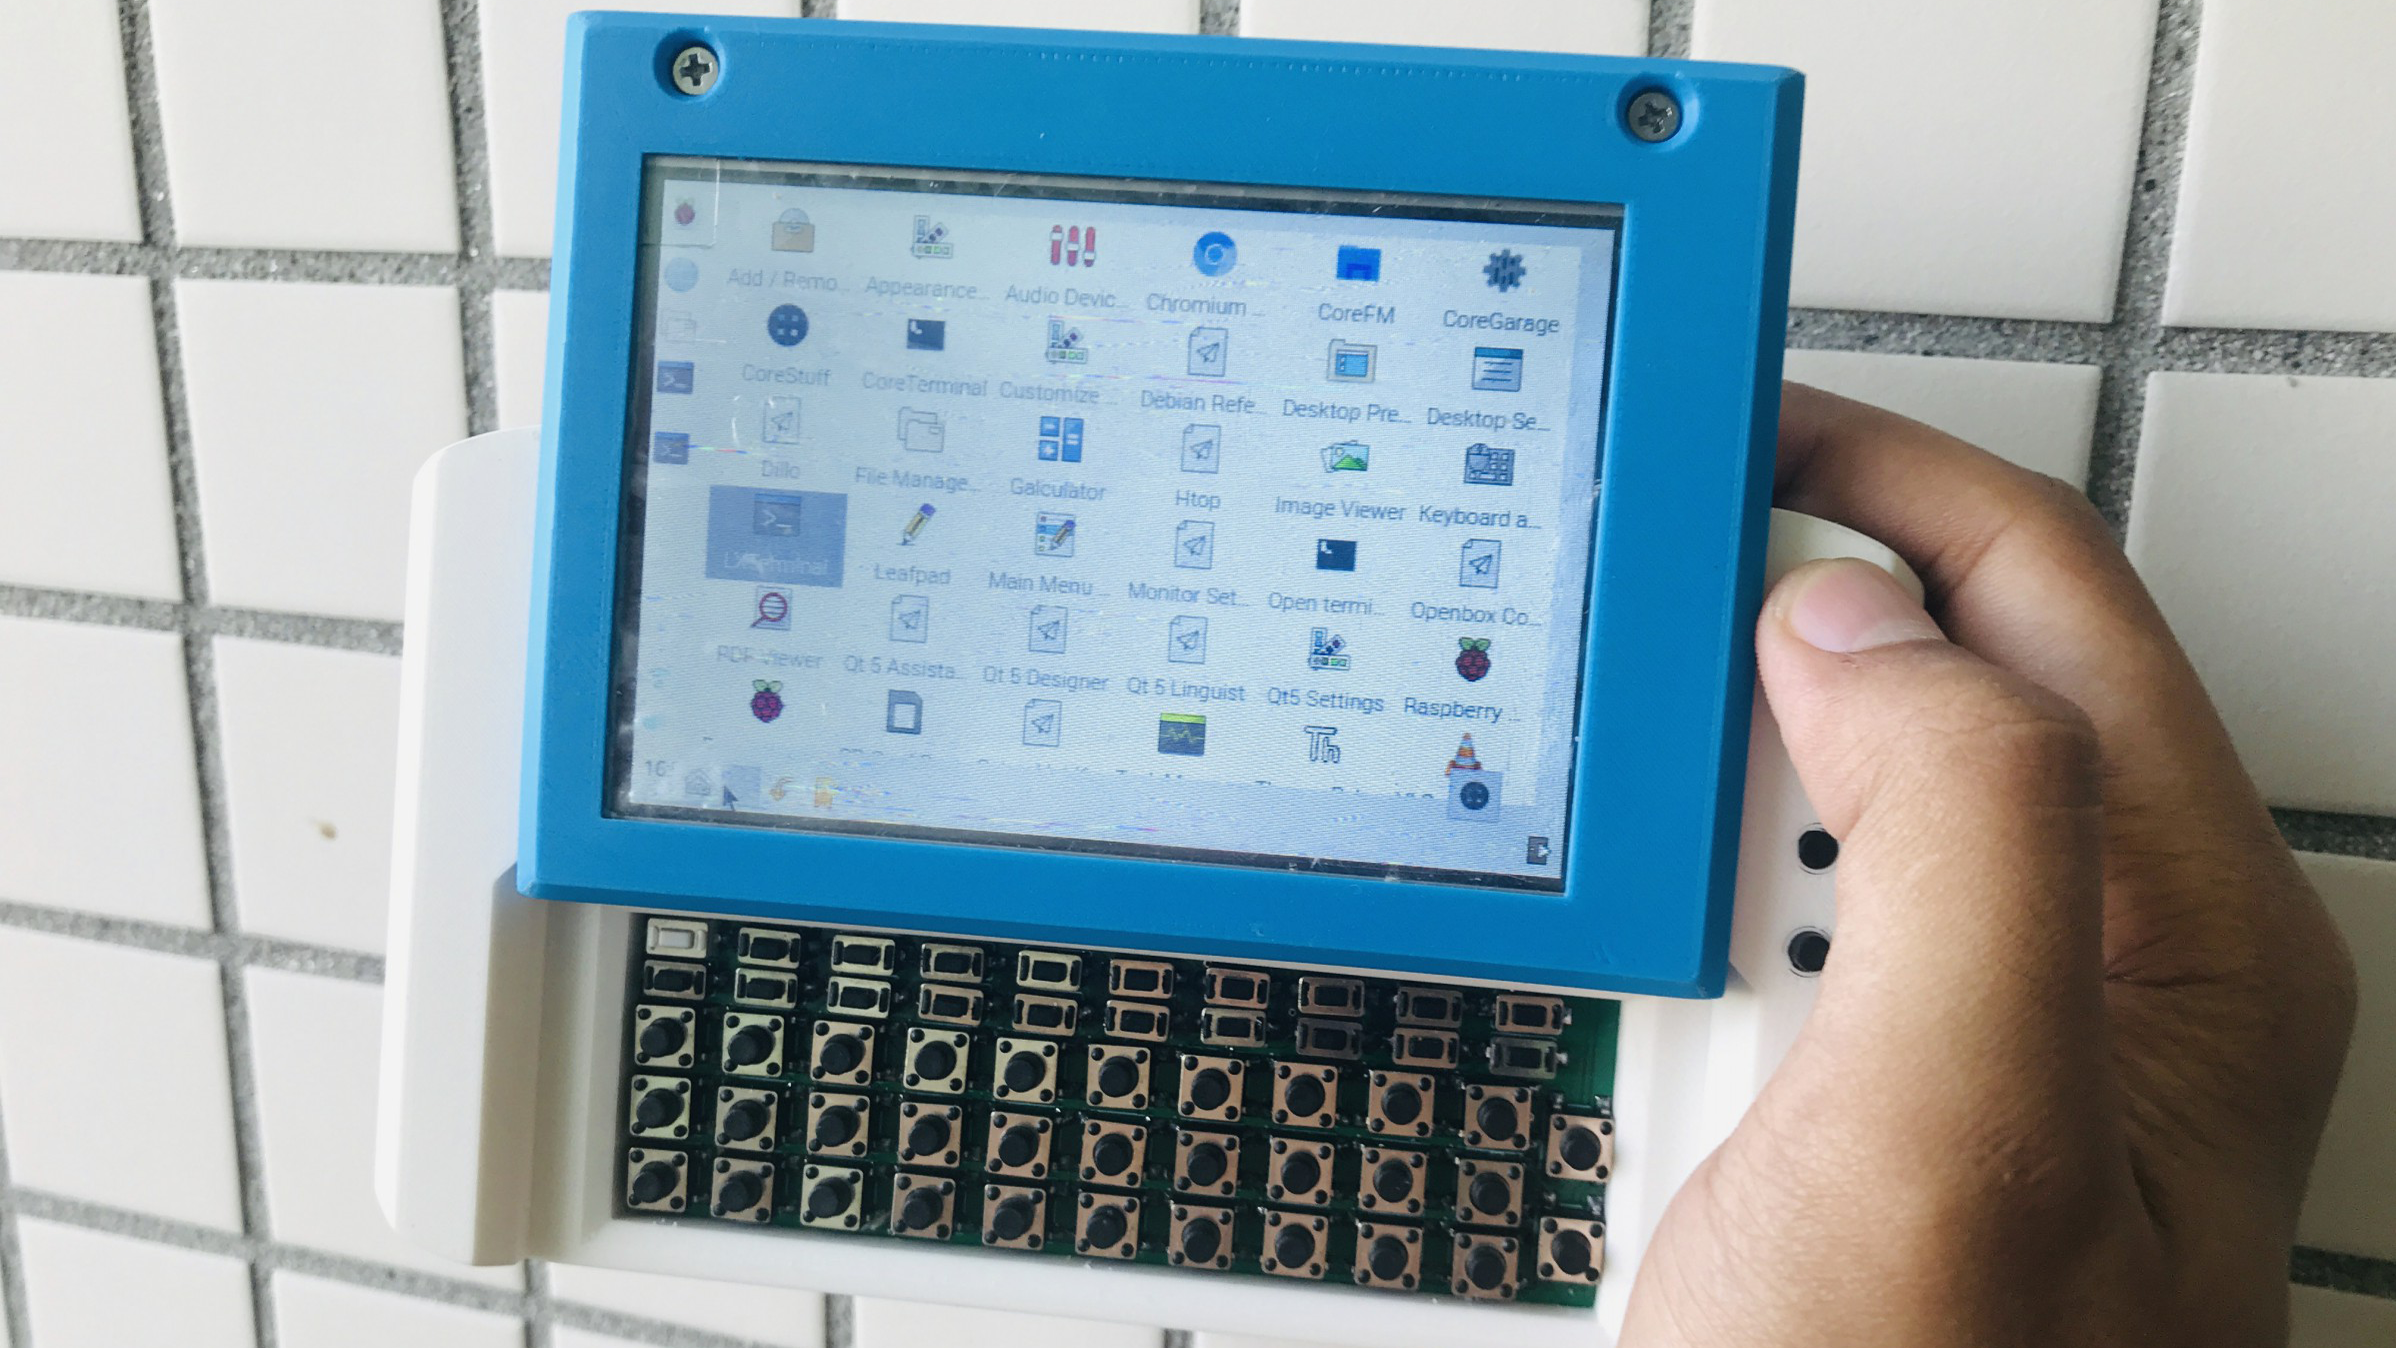
Do you miss phones with slide-out keyboards? Can you pretend you miss them long enough to hear about a cool Raspberry Pi project? Ok, great, because there’s a new open-source handheld computer project that basically turns your Raspberry Pi (or similar board like the Pine H64 Model B or the ASUS Tinker Board S) into a Motorola Droid.
It’s called the MutantC v3, and it’s actually the latest iteration of a concept that’s been around since its creator, Rahmanshaber, debuted the MutantC v1 back in 2019.
Essentially, what the MutantC v3 does is fit your Raspberry Pi into a tiny case with a thumb-friendly keyboard on top and a slide-out touch display fitted over it. In other words, you can either use it like a tablet, or slide the display up to reveal the keyboard for physical typing. The Mutant C v3 adds a trackpoint on the case’s right-hand side (along with buttons for both left and right-click), plus support for a buzzer, a real-time clock, a gyroscope, and a humidity/pressure/temperature sensor. The keyboard also uses less power, and there’s space for a 12-pin UART/12C/GPIO docking port, though there’s no official dock design yet.
Of course, being an open-source project, there’s not much official anything. It’s up to you to buy all the cables, transistors, and modules this project requires, and you’ll also need a 3D printer to get your hands on the enclosure.
Luckily, there’s also a parts list and multiple build guides over on the MutantC v3’s Gitlab page. Of note is that there are three display size options, ranging from 2.8-inch to 3.5-inch to a full 4 inches.
You won’t need any custom software or coding skill for this project, though, since it just runs off Raspberry Pi OS (or whatever equivalent OS your board uses). The most you’ll need to know is how to solder and how to install the drivers for your hardware.
Be sure to check out our list of Best Raspberry Pi Projects for more cool creations from the maker community.
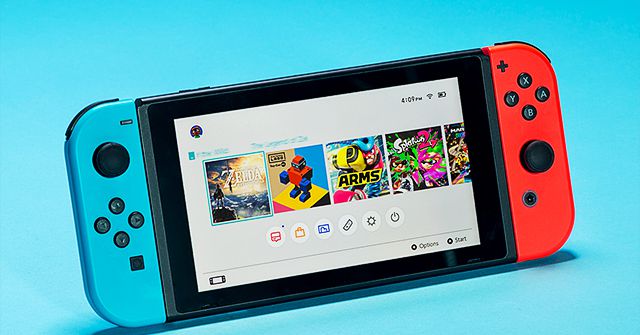
The same people who originally brought Android to the Nintendo Switch, the Switchroot team, are back with an Android 10 update, according to XDA-Developers. While the mod is only available for certain Switch models, it allows users who install it to run apps from the Google Play Store, like games, emulators, and streaming services like Netflix and Twitch.
The update also brings some more polish to the mod, letting the Joy-Con sticks work as proper analog sticks instead of eight-way D-pads, deep sleep support that the devs say “can last for weeks,” over-the-air updates, and better Wi-Fi support that promises fewer disconnections.
Of course, the real reason for adding Android to a Switch is so you can play games that aren’t Switch games, likes the ones made playable by the Game Boy Advance, Nintendo DS, and PSP emulators on the Play Store. You can see how those perform on the Switch in the video below. Of course, you can also get other Play Store games like Genshin Impact or apps like Spotify. But you’re also not giving up the ability to play Switch games, as Android is installed on a microSD card instead of being flashed to the console itself.
It’s worth noting that Android on the Switch is extraordinarily unofficial. The LineageOS team isn’t officially supporting the port, and it’s more or less a modified build of the OS that was meant for Nvidia’s Shield TV. The exploit to get Android running also only works on Switches that came out before Nintendo’s chipset and battery upgrades, which completely excludes the Switch Lite. Even if you own one of the moddable Switches, which you can check with an online tool, some of the guides on how to get into the Android bootloader say it’s possible to brick your Switch if you make a mistake. Extreme caution is advised.
There are also caveats, like the fact that the games built for the Nvidia Shield don’t work, according to the XDA forum post that acts as a guide on how to install the mod. However, the list of bummers is way smaller than it was last time when the version of Android was LineageOS 15.1, which was based on Android 8.1 Oreo. The new version is based on LineageOS 17.1, which is a build of Android 10.
It’s nice to see this Switch mod get some love and become improved over the years. The changelog below includes a solid number of updates, so it’s worth checking out if you’re running a previous version.
* Android 10 based on Lineage 17.1 * OTA updates. * Full Joy-Con and Pro Controller support with analog sticks and rails. * Hori Joy-Con support. * Deep sleep that can last for weeks. * An Android TV based build. * Reworked fan profiles for quieter operation. * Optimised dock support with resolution scaling. * A rewritten charger driver supporting USB-PD and third party docks. * Optimised touch screen driver. * Easier install via hekate partition tool. * Reworked, simpler, power profiles. * Much improved WiFi driver with less dropouts. * Shield TV remote app support for easy docked control. * Reboot to payload support. * Improved Bluetooth accessory support. * Auto rotation support.
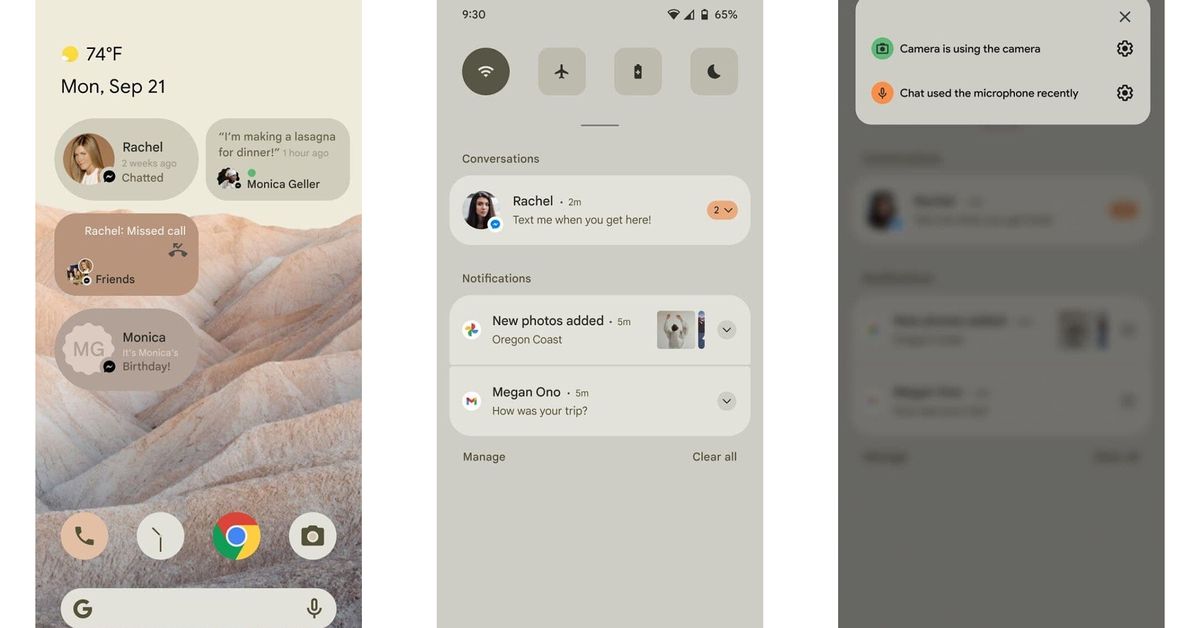
A series of leaked images may offer a first look at Google’s Android 12 update. XDA-Developers has published screenshots from what is said to be from an “early draft” of documents Google distributes to Android partners. The screenshots, which XDA-Developers says haven’t been fully confirmed, include what appears to be new UI changes, alongside a new privacy indicator and conversation widget.
If accurate, the UI changes include an emphasis on rounded corners, with a reduction in the number of Quick Settings available from the unexpanded notification panel. Google also appears to be using a beige color scheme, which could be part of the rumored new native theme system for Android 12.
Beyond the UI changes, the screenshots show a new privacy indicator that’s similar to what’s found in iOS. It acts as a warning in the status bar to show when an app is accessing the camera or microphone. XDA-Developers also reports there is an alleged overhaul of the privacy settings in Android 12, with the ability to fully toggle the camera and microphone on / off.
Other screenshots show what could be a new conversations widget for Android 12. It appears to surface recent messages and calls, and XDA-Developers claims it could be a “mandatory feature for all Android 12 devices.”
Google hasn’t officially confirmed any new UI or feature changes to Android 12 yet. The company has committed to making third-party app stores easier to use in Android 12, though. Google typically previews the upcoming version of Android in March. Last year, Google surprised everyone with an early Android 11 developer preview in February, so we could be just weeks away from seeing what’s in store for Android 12.
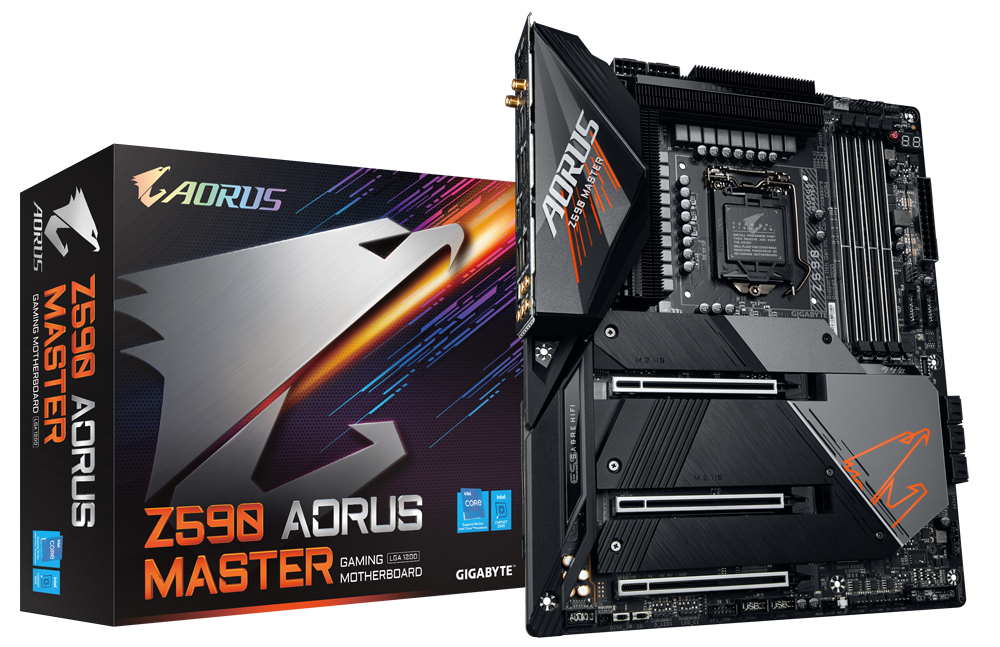
While we still don’t have an Intel Rocket Lake-S Core i9-11900K CPU to use for testing, the Intel Z590 motherboards are arriving in our labs and on store shelves. So while we await the ability to talk benchmarks, we’ll be walking in detail through the features of these brand-new boards. First up on our bench was the ASRock Z590 Steel Legend 6E Wi-Fi, and now we have the Gigabyte Z590 Aorus Master to dive into.
The latest version of this premium motherboard line includes an incredibly robust VRM, ultra-fast Wi-Fi and wired networking, premium audio, and more. While we don’t have exact pricing information at the time of this writing, the Z490 version came in just under $400, which is around where we expect the Z590 version to land, if not slightly higher.
Gigabyte’s current Z590 product stack consists of 13 models. There are familiar SKUs and a couple of new ones. Starting with the Aorus line, we have the Aorus Xtreme (and potentially a Waterforce version), Aorus Master, Aorus Ultra, and the Aorus Elite. Gigabyte brings back the Vision boards (for creators) and their familiar white shrouds. The Z590 Gaming X and a couple of boards from the budget Ultra Durable (UD) series are also listed. New for Z590 is the Pro AX board, which looks to slot somewhere in the mid-range. Gigabyte will also release the Z590 Aorus Tachyon, an overbuilt motherboard designed for extreme overclocking.
We’re not allowed to list any performance metrics for Rocket Lake (not that we have a CPU at this time) as the embargo wasn’t up when we wrote this article. All we’ve seen at this point are rumors and a claim from Intel of a significant increase to IPC, but the core count was lowered from 10 cores/20 threads in Comet Lake (i9-10900K) to 8 cores/16 threads in the yet-to-be-released i9-11900K. To that end, we’ll stick with specifications and features, adding a full review that includes benchmarking, overclocking and power consumption shortly.
The Z590 Aorus Master looks the part of a premium motherboard, with brushed-aluminum shrouds covering the PCIe/M.2/chipset area. The VRM heatsink and its NanoCarbon Fin-Array II provide a nice contrast against the smooth finish on the board’s bottom. Along with Wi-Fi 6E integration, it also includes an Aquantia based 10GbE, while most others use 2.5 GbE. The Aorus Master includes a premium Realtek ALC1220 audio solution with an integrated DAC, three M.2 sockets, reinforced PCIe and memory slots and 10 total USB ports, including a rear USB 3.2 Gen2x2 Type-C port. We’ll cover those features and much more in detail below. But first, here are full the specs from Gigabyte.
Specifications – Gigabyte Z590 Aorus Master
Socket
AM4
Chipset
Z590
Form Factor
ATX
Voltage Regulator
19 Phase (18+1, 90A MOSFETs)
Video Ports
(1) DisplayPort v1.2
USB Ports
(1) USB 3.2 Gen 2×2, Type-C (20 Gbps)
(5) USB 3.2 Gen 2, Type-A (10 Gbps)
(4) USB 3.2 Gen 1, Type-A (5 Gbps)
Network Jacks
(1) 10 GbE
Audio Jacks
(5) Analog + SPDIF
Legacy Ports/Jacks
✗
Other Ports/Jack
✗
PCIe x16
(2) v4.0 x16, (x16/x0 or x8/x8
(1) v3.0 x4
PCIe x8
✗
PCIe x4
✗
PCIe x1
✗
CrossFire/SLI
AMD Quad GPU Crossfire and 2-Way Crossfire
DIMM slots
(4) DDR4 5000+, 128GB Capacity
M.2 slots
(1) PCIe 4.0 x4 / PCIe (up to 110mm)
(1) PCIe 3.0 x4 / PCIe + SATA (up to 110mm)
(1) PCIe 3.0 x4 / PCIe + SATA (up to 110mm)
U.2 Ports
✗
SATA Ports
(6) SATA3 6 Gbps (RAID 0, 1, 5 and 10)
USB Headers
(1) USB v3.2 Gen 2 (Front Panel Type-C)
(2) USB v3.2 Gen 1
(2) USB v2.0
Fan/Pump Headers
(10) 4-Pin
RGB Headers
(2) aRGB (3-pin)
(2) RGB (4-pin)
Legacy Interfaces
✗
Other Interfaces
FP-Audio, TPM
Diagnostics Panel
Yes, 2-character debug LED, and 4-LED ‘Status LED’ display
Opening up the retail packaging, along with the board, you’re greeted by a slew of included accessories. The Aorus Master contains the basics (guides, driver CD, SATA cables) and a few other things that make this board a complete package. Below is a full list of all included accessories.
Installation Guide
User’s Manual
G-connector
Sticker sheet / Aorus badge
Wi-Fi Antenna
(4) SATA cables
(3) Screws for M.2 sockets
(2) Temperature probes
Microphone
RGB extension cable
Image 1 of 3
(Image credit: Gigabyte)
Image 2 of 3
(Image credit: Gigabyte)
Image 3 of 3
(Image credit: Gigabyte)
After taking the Z590 Aorus Master out of the box, its weight was immediately apparent, with the shrouds, heatsinks and backplate making up the majority of that weight. The board sports a matte-black PCB, with black and grey shrouds covering the PCIe/M.2 area and two VRM heatsinks with fins connected by a heatpipe. The chipset heatsink has the Aorus Eagle branding lit up, while the rear IO shroud arches over the left VRM bank with more RGB LED lighting. The Gigabyte RGB Fusion 2.0 application handles RGB control. Overall, the Aorus Master has a premium appearance and shouldn’t have much issue fitting in with most build themes.
(Image credit: Gigabyte)
Looking at the board’s top half, we’ll first focus on the VRM heatsinks. They are physically small compared to most boards, but don’t let that fool you. The fin array uses a louvered stacked-fin design Gigabyte says increases surface area by 300% and improves thermal efficiency with better airflow and heat exchange. An 8mm heat pipe also connects them to share the load. Additionally, a small fan located under the rear IO shroud actively keeps the VRMs cool. The fan here wasn’t loud, but was undoubtedly audible at default settings.
We saw a similar configuration in the previous generation, which worked out well with an i9-10900K, so it should do well with the Rocket Lake flagship, too. We’ve already seen reports indicating the i9-11900K has a similar power profile to its predecessor. Feeding power to the VRMs is two reinforced 8-pin EPS connectors (one required).
To the right of the socket, things start to get busy. We see four reinforced DRAM slots supporting up to 128GB of RAM. Oddly enough, the specifications only list support up to DDR4 3200 MHz, the platform’s limit. But further down the webpage, it lists DDR4 5000. I find it odd it is listed this way, though it does set up an expectation that anything above 3200 MHz is overclocking and not guaranteed to work.
Above the DRAM slots are eight voltage read points covering various relevant voltages. This includes read points for the CPU Vcore, VccSA, VccIO, DRAM, and a few others. When you’re pushing the limits and using sub-ambient cooling methods, knowing exactly what voltage the component is getting (software can be inaccurate) is quite helpful.
Above those on the top edge are four fan headers (next to the EPS connectors is a fifth) of 10. According to the manual, all CPU fan and pump headers support 2A/24W each. You shouldn’t have any issues powering fans and a water cooling pump. Gigabyte doesn’t mention if these headers use auto-sensing (for DC or PWM control), but they handled both when set to ‘auto’ in the BIOS. Both a PWM and DC controlled fan worked without intervention.
The first two (of four) RGB LED headers live to the fan headers’ right. The Z590 Aorus Master includes two 3-pin ARGB headers and two 4-pin RGB headers. Since this board takes a minimal approach to RGB lighting, you’ll need to use these to add more bling to your rig.
We find the power button and 2-character debug LED for troubleshooting POST issues on the right edge. Below is a reinforced 24-pin ATX connector for power to the board, another fan header and a 2-pin temperature probe header. Just below all of that are two USB 3.2 Gen1 headers and a single USB 3.2 Gen2x2 Type-C front-panel header for additional USB ports.
(Image credit: Tom’s Hardware)
Gigabyte chose to go with a 19-phase setup for the Vcore and SOC on the power delivery front. Controlling power is an Intersil ISL6929 buck controller that manages up to 12 discrete channels. The controller then sends the power to ISL6617A phase doublers and the 19 90A ISL99390B MOSFETs. This is one of the more robust VRMs we’ve seen on a mid-range board allowing for a whopping 1,620A available for the CPU. You won’t have any trouble running any compatible CPU, including using sub-ambient overclocking.
(Image credit: Gigabyte)
The bottom half of the board is mostly covered in shrouds hiding all the unsightly but necessary bits. On the far left side, under the shrouds, you’ll find the Realtek ALC1220-VB codec along with an ESS Sabre ESS 9118 DAC and audiophile-grade WIMA and Nichicon Fine Gold capacitors. With the premium audio codec and DAC, an overwhelming majority of users will find the audio perfectly acceptable.
We’ll find the PCIe slots and M.2 sockets in the middle of the board. Starting with the PCIe sockets, there are a total of three full-length slots (all reinforced). The first and second slots are wired for PCIe 4.0, with the primary (top) slot wired for x16 and the bottom maxes out at x8. Gigabyte says this configuration supports AMD Quad-GPU Cand 2-Way Crossfire. We didn’t see a mention of SLI support even though the lane count supports it. The bottom full-length slot is fed from the chipset and runs at PCIe 3.0 x4 speeds. Since the board does without x1 slots, this is the only expansion slot available if you’re using a triple-slot video card. Anything less than that allows you to use the second slot.
Hidden under the shrouds around the PCIe slots are three M.2 sockets. Unique to this setup is the Aorus M.2 Thermal Guard II, which uses a double-sided heatsink design to help cool M.2 SSD devices with double-sided flash. With these devices’ capacities rising and more using flash on both sides, this is a good value-add.
The top socket (M2A_CPU) supports up to PCIe 4.0 x4 devices up to 110mm long. The second and third sockets, M2P_SB and M2M_SB, support both SATA and PCIe 3.0 x3 modules up to 110mm long. When using a SATA-based SSD on M2P_SB, SATA port 1 will be disabled. When M2M_SB (bottom socket) is in use, SATA ports 4/5 get disabled.
To the right of the PCIe area is the chipset heatsink with the Aorus falcon lit up with RGB LEDs from below. There’s a total of six SATA ports that support RAID0, 1, 5 and 10. Sitting on the right edge are two Thunderbolt headers (5-pin and 3-pin) to connect to a Gigabyte Thunderbolt add-in card. Finally, in the bottom-right corner is the Status LED display. The four LEDs labeled CPU, DRAM, BOOT and VGA light up during the POST process. If something hangs during that time, the LED where the problem resides stays lit, identifying the problem area. This is good to have, even with the debug LED at the top of the board.
Across the board’s bottom are several headers, including more USB ports, fan headers and more. Below is the full list, from left to right:
Front-panel audio
BIOS switch
Dual/Single BIOS switch
ARGB header
RGB header
TPM header
(2) USB 2.0 headers
Noise sensor header
Reset button
(3) Fan headers
Front panel header
Clear CMOS button
(Image credit: Gigabyte)
The Z590 Aorus Master comes with a pre-installed rear IO panel full of ports and buttons. To start, there are a total of 10 USB ports out back, which should be plenty for most users. You have a USB 3.2 Gen2x2 Type-C port, five USB 3.2 Gen2 Type-A ports and four USB 3.2 Gen1 Type-A ports. There is a single DisplayPort output for those who would like to use the CPU’s integrated graphics. The audio stack consists of five gold-plated analog jacks and a SPDIF out. On the networking side is the Aquantia 10 GbE port and the Wi-Fi antenna. Last but not least is a Clear CMOS button and a Q-Flash button, the latter designed for flashing the BIOS without a CPU.
Firmware
The Z590 Aorus Master BIOS theme doesn’t look any different from the Z490 versions. The Aorus board still uses the black and orange theme we’re familiar with. We’ve captured a majority of the BIOS screens to share with you. Like other board partners, Gigabyte includes an Easy Mode for high-level monitoring and adjustments, along with an Advanced section. The BIOS is well organized, with many of the more commonly used functions easily accessible without drilling down multiple levels to find them. In the end, the BIOS works well and is easy to navigate and read.
Image 1 of 17
(Image credit: Tom’s Hardware)
Image 2 of 17
(Image credit: Tom’s Hardware)
Image 3 of 17
(Image credit: Tom’s Hardware)
Image 4 of 17
(Image credit: Tom’s Hardware)
Image 5 of 17
(Image credit: Tom’s Hardware)
Image 6 of 17
(Image credit: Tom’s Hardware)
Image 7 of 17
(Image credit: Tom’s Hardware)
Image 8 of 17
(Image credit: Tom’s Hardware)
Image 9 of 17
(Image credit: Tom’s Hardware)
Image 10 of 17
(Image credit: Tom’s Hardware)
Image 11 of 17
(Image credit: Tom’s Hardware)
Image 12 of 17
(Image credit: Tom’s Hardware)
Image 13 of 17
(Image credit: Tom’s Hardware)
Image 14 of 17
(Image credit: Tom’s Hardware)
Image 15 of 17
(Image credit: Tom’s Hardware)
Image 16 of 17
(Image credit: Tom’s Hardware)
Image 17 of 17
(Image credit: Tom’s Hardware)
Software
Gigabyte includes a few applications designed for various functions, including RGB lighting control, audio, system monitoring, and overclocking. Below, we’ve captured several screenshots of the App Center, @BIOS, SIV, RGB Fusion and Easy Tune.
Image 1 of 14
(Image credit: Tom’s Hardware)
Image 2 of 14
(Image credit: Tom’s Hardware)
Image 3 of 14
(Image credit: Tom’s Hardware)
Image 4 of 14
(Image credit: Tom’s Hardware)
Image 5 of 14
(Image credit: Tom’s Hardware)
Image 6 of 14
(Image credit: Tom’s Hardware)
Image 7 of 14
(Image credit: Tom’s Hardware)
Image 8 of 14
(Image credit: Tom’s Hardware)
Image 9 of 14
(Image credit: Tom’s Hardware)
Image 10 of 14
(Image credit: Tom’s Hardware)
Image 11 of 14
(Image credit: Tom’s Hardware)
Image 12 of 14
(Image credit: Tom’s Hardware)
Image 13 of 14
(Image credit: Tom’s Hardware)
Image 14 of 14
(Image credit: Tom’s Hardware)
Future Tests and Final Thoughts
With the release of Z590, we’re in a bit of a pickle in that we have boards in our hands, but not the Rocket Lake CPU designed for it. We know most of these boards should perform similarly to our previous Z490 motherboard reviews. And while there are exceptions, they are mostly at the bottom of the product stack. To that end, we’re posting these as detailed previews until we get data using a Rocket Lake processor.
Once we receive a Rocket Lake CPU and as soon as any embargos have expired, we’ll fill in the data points, including the benchmarking/performance results, as well as overclocking/power and VRM temperatures.
We’ll also be updating our test system hardware to include a PCIe 4.0 video card and storage. This way, we can utilize the platform to its fullest using the fastest protocols it supports. We will also update to the latest Windows 10 64-bit OS (20H2) with all threat mitigations applied, as well as updating the video card driver and use the newest release when we start this testing. We use the latest non-beta motherboard BIOS available to the public unless otherwise noted.
While we do not have performance results from the yet-to-be-released Rocket Lake CPU, we’re sure the 90A VRMs will handle the i9-11900K processor without issue. We quickly tested the i9-10900K and found the board quite capable with that CPU, easily allowing the 5.2 GHz overclock we set. For now, we’ll focus on features, price, and appearance until we gather performance data from the new CPU.
(Image credit: Gigabyte)
The Gigabyte Z590 Aorus Master is a well-rounded solution, bringing a lot of premium features to the table. Baked into the chipset is USB 3.2 Gen2x2 support, and on the network side, a 10 GbE port and Intel’s Wi-Fi 6E AX210 card are basically the best you can get out of the box. The 90A 18-phase VRM for the processor does not have any issues with an overclocked Comet-Lake CPU, so the new Rocket-Lake CPUs at the same TDP shouldn’t have a problem. This board can be used for sub-ambient overclocking (though the Gigabyte Z590 Tachyon is the purpose-built board by Gigabyte for such a thing).
Since Z590 added native PCIe 4.0 support (with Rocket Lake CPUs only) and additional PCIe lanes, we’ll see more boards with up to three M.2 sockets, just like the less-expensive Steel Legend has. The Aorus Master sports one PCIe 4.0 x4 (64 Gbps) slot and two PCIe 3.0 x4 (32 Gbps) slots. Add to that the six SATA ports and nearly everyone’s storage needs should be covered. The 10 USB ports on the rear IO include a USB 3.2 Gen2x2 Type-C port and should be plenty for most users.
If I had to pick out something that needs improvement, I would like to see more expansion slots. As it stands, there is only one full-length PCIe slot. The $400-plus price tag will also likely put off budget users. While Gigabyte hasn’t listed an exact price for the Aorus Master, the Z490 version came in at just under $400. We expect the Z590 version to be at that point or a little higher.
Compared to similarly priced peers (think ASRock Z590 Taichi, MSI MEG Z590 Unify and the Asus ROG Strix Z590-E Gaming WiFi ), the Gigabyte Aorus Z590 Master covers all the bases. If you prefer the latest audio codec and four M.2 sockets, instead of three, the Asus Z590-E Gaming has you taken care of. If you need ultra-fast networking, Gigabyte has you covered with its 10 GbE. All of the comparable boards are certainly capable and include quite a bit of features at this price point, so it comes down to the price, appearance, and features you need.
In the end, The Gigabyte Aorus Z590 Master is, like most Z590 motherboards, an iterative update from Z490. You get Rocket Lake support out of the box, superior power delivery, ultra-fast networking, and a premium appearance. If you’re looking for a Z590 motherboard around the $400 price point, The Z590 Aorus Master should be on your shortlist. Stay tuned for benchmarking, overclocking, and power results using the new Rocket Lake CPU short list.
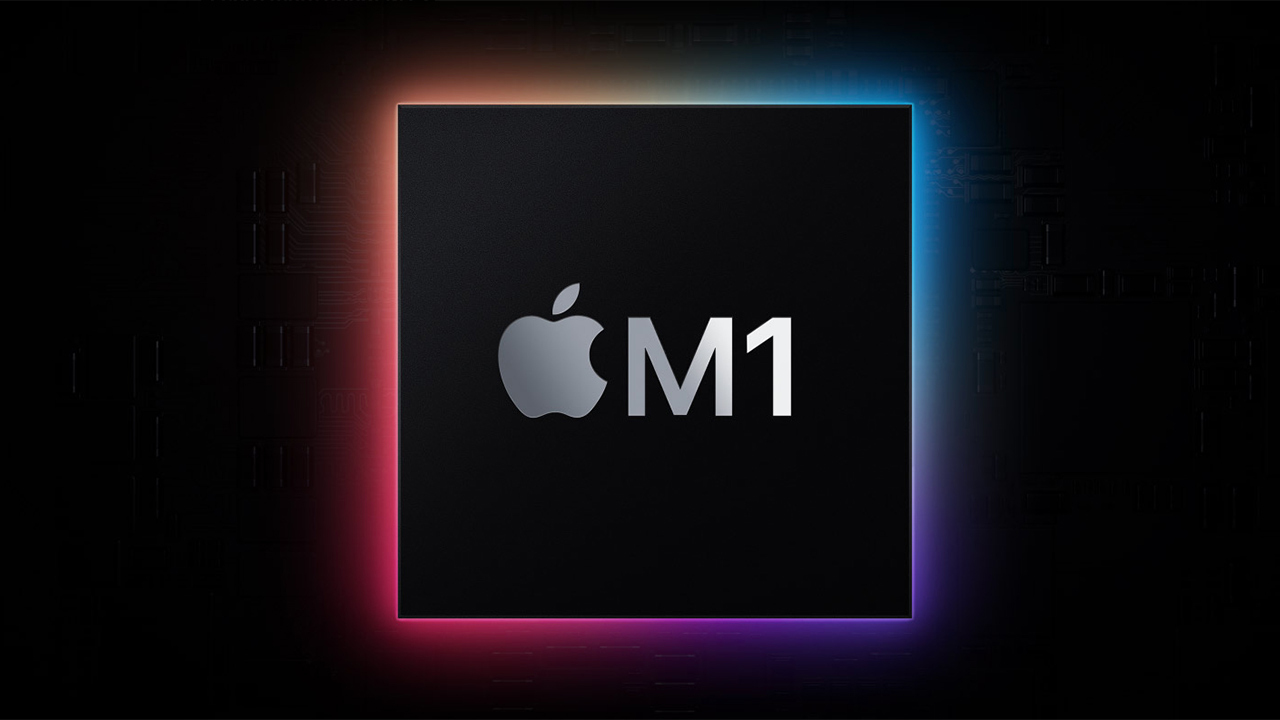
Corellium, a software company specializing in virtualization solutions, has managed to port Linux to an Apple M1-based PC and even succeeded in making almost all the system peripherals work. In the process, Corellium discovered several interesting details about Apple’s M1 processor and the system architecture.
A couple of weeks ago, we reported that a startup called Corellium had managed to run Linux on an Apple M1-based computer. Back then, the operating system ran, but it did not support many things, essentially making the PC unusable to a large degree. Recently the company finally managed to make most of the things (including Wi-Fi) work, which means that Linux can now be used on the latest Macs. But the whole project of running a non-Apple OS on such computers has an interesting side effect as it reveals how different Apple’s SoCs are compared to other Arm-based architectures.
Loads of Proprietary Technologies
It’s no secret that Apple has focused on building its own Arm-based microarchitectures to offer unbeatable performance with its iPhones and iPads for quite a while now. Unlike its rivals, the company did not throw in more cores, instead improving its cores’ single-core/single-thread performance. In addition to custom cores, Apple apparently uses a highly custom system architecture too, according to Corellium.
(Image credit: Apple)
When virtually all 64-bit Arm-based systems bootup, they call firmware through an interface called PSCI, but in the case of the M1, the CPU cores start at an address specified by an MMIO register and then start to run the kernel. Furthermore, Apple systems also use a proprietary Apple Interrupt Controller (AIC) that is not compatible with Arm’s standards. Meanwhile, the timer interrupts are connected to the FIQ, an obscure architectural feature primarily used on 32-bit Arm systems that is not compatible with Linux.
To make various processors in an M1-powered PC interact with each other, the OS has to provide a set of inter-processor interrupts (IPIs). Previously IPIs were handled just like traditional IRQs using MMIO accesses to the AIC, but in the case of the M1, Apple uses processor core registers to dispatch and acknowledge IPIsas they rely on FIQs.
Apple’s oddities do not end there. For example, Apple’s Wi-Fi/Bluetooth controller connects to the SoC using a non-standard PCIe-based protocol (which fortunately was supported by Corellium virtualization software). To make matters more complicated, Apple’s PCIe and the integrated Synopsys DWC3 USB controller use the company’s proprietary input–output memory management unit (IOMMU) called device address resolution table (DART). Furthermore, Apple’s I2C has a custom firmware that uses an exclusive protocol, which thwarted using the USB Type-A ports.
Complications
Using a proprietary system architecture is not something new for Apple, but it will make it much harder to port other operating systems to its platforms as well as running those OSes in virtualization mode. Recently a developer managed to make Microsoft’s upcoming Windows 10X run on an Apple M1-based system using QEMU virtualization, but this OS is not yet final, and it is unclear how stable it is. Furthermore, Windows 10X does not run Win32 apps, making it less valuable for some users.
Running Windows 10 or Linux on an Apple Mac may not be crucially important for most Mac owners. But a complicated system architecture featuring multiple proprietary technologies will likely make it harder to develop certain kinds of software and hardware for Arm-based Macs.
We use cookies on our website to give you the most relevant experience. By clicking “Accept”, you consent to the use of ALL the cookies.
This website uses cookies to improve your experience while you navigate through the website. Out of these, the cookies that are categorized as necessary are stored on your browser as they are essential for the working of basic functionalities of the website. We also use third-party cookies that help us analyze and understand how you use this website. These cookies will be stored in your browser only with your consent. You also have the option to opt-out of these cookies. But opting out of some of these cookies may affect your browsing experience.
Necessary cookies are absolutely essential for the website to function properly. This category only includes cookies that ensures basic functionalities and security features of the website. These cookies do not store any personal information.
Any cookies that may not be particularly necessary for the website to function and is used specifically to collect user personal data via analytics, ads, other embedded contents are termed as non-necessary cookies. It is mandatory to procure user consent prior to running these cookies on your website.