apple-music’s-spatial-audio-is-sometimes-amazing-but-mostly-inconsistent

Apple Music’s spatial audio is sometimes amazing but mostly inconsistent

If you buy something from a Verge link, Vox Media may earn a commission. See our ethics statement.

Late on Monday night, Apple flipped the switch on two new features for its Apple Music subscription service: immersive Dolby Atmos spatial audio and lossless-quality streaming. It feels like the company is really only excited about one of them, though, and it’s not the latter.

Eddy Cue is Apple’s senior vice president of services and the person who oversees Apple Music. He didn’t mince words when he told Billboard that the sudden proliferation of lossless audio isn’t going to significantly evolve or change how we listen to music. “There’s no question it’s not going to be lossless,” he said when asked about what technologies will bring about the “next-gen” of music streaming. Cue firmly stands on the side of the crowd that argues most people can’t hear any difference between CD-quality or hi-res tracks and the AAC or MP3 files that’ve been filling their ears for so long now. He did acknowledge that the higher-bit rate tracks might matter to music lovers with particularly sharp hearing or premium audio equipment, but he was also direct about how niche that group is.

“The reality of lossless is: if you take 100 people and you take a stereo song in lossless and you take a song that’s been in Apple Music that’s compressed, I don’t know if it’s 99 or 98 can’t tell the difference.” Cue revealed that he has regularly done blind tests with the Apple Music team, and they confirm how rare it is for anyone to be able to consistently recognize lossless audio. “You can tell somebody, ‘Oh, you’re listening to a lossless [song],’ and they tell you, ‘Oh, wow. That sounds incredible.’ They’re just saying it because you told them it’s lossless and it sounds like the right thing to say, but you just can’t tell.”

If you go by the message that Cue and Apple are pushing, the Dolby Atmos-powered spatial audio feature is where the true breakthrough is. “When I look at Dolby Atmos, I think it’s going to do for music what HD did for television,” Cue said in the Billboard interview. And then he really went in:

“I think this is going to take over everything. It’s the way I want to listen to music when I’m in my car. It’s going to be the way I listen to music immediately with my AirPods. It’s going to be the way I listen to music in my house. In a way, it won’t feel very good when I’m listening to something that’s not Dolby Atmos because it’s so good. It’s like when I’m watching HD, it’s hard to go back.”

“This requires somebody who’s a sound engineer, and the artist to sit back and listen, and really make the right calls and what the right things to do are,” Cue told Billboard about mixing for spatial audio. “It’s a process that takes time, but it’s worth it.”

Problem is, with much of the Dolby Atmos content on Apple Music I’ve sampled so far, it doesn’t seem like everyone is making those right calls. It’s a hit-or-miss game of exploration, and songs that truly showcase the immersive potential of Atmos are more often the exception than the rule. In many cases, spatial audio tracks have an artificial wideness to them, unfamiliar placement of vocals and instrumentation, and just sound… off. Distant? Too reverb-y? Pick your preferred interpretation. Yet, Apple is so confident in Apple Music’s spatial audio that essentially overnight it became the default for millions of customers listening with AirPods.

But let’s back up a bit.

What is spatial audio supposed to do for music?

In a word, it’s all about immersion. Here’s how Cue hyped it: “it makes you feel like you’re onstage, standing right next to the singer, it makes you feel like you might be to the left of the drummer, to the right of the guitarist.” On its website, Apple says “music created in Dolby Atmos is freed from channels, allowing artists to place individual sounds all around you.”

Whoa there. Like all of Apple’s senior executives, Eddy Cue knows how to pitch something. But if you slap on your AirPods and expect to feel like an invisible person standing in the middle of a recording session, you’ll probably be underwhelmed.

When it’s done well, spatial audio does indeed give music a unique feeling of breadth. And it’s in a different way than a high-end pair of headphones might bring the most out of a stereo track’s soundstage. In particular, vocals often have a very distinct placement in the mix and cut through better than on traditional stereo tracks. That’s the most consistent advantage I’ve noticed with spatial audio music. But because of the different mix, you’ll very likely also pick up on details or sounds that ordinarily don’t stand out in the regular version of a song. And on the best Atmos tracks, everything has a lot more room to breathe.

But when engineers don’t put much care into an Atmos mix, it really shows. Sometimes giving everything so much space can take the impact or crunch out of guitars. Or other aspects of a track fall flat. I’ve included just a few samples below where the spatial audio version of a song is an obvious downgrade from the original. But there are many, and when you hit a few in a row where the vocals sound weird or something’s amiss, it can detract from the listening experience.

How many songs are available in Dolby Atmos spatial audio?

Apple currently isn’t providing a hard number, and is instead only saying that “thousands” of tracks are available with spatial audio at launch, with many more on the way.

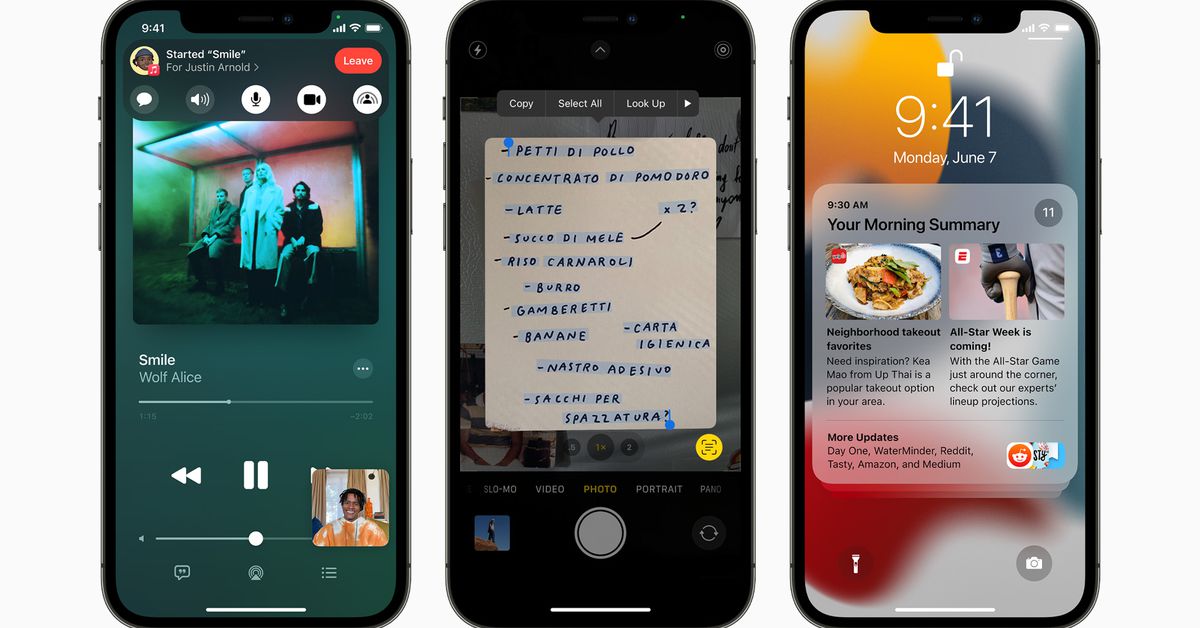
How do I know when I’m hearing spatial audio on Apple Music?

You’ll see either a Dolby Atmos or Dolby Audio logo appear on the Now Playing screen beneath the album artwork.

A few random, good examples of Apple Music spatial audio:

“Don’t Know Why” by Norah Jones — This is one where I nearly buy into Cue’s description. Close your eyes, and you could almost transport yourself to a small club where the spread of this mix feels like a live version of Jones’ career-making hit. Stereo doesn’t take you to the same place.

“Paparazzi” by Lady Gaga — With a very surround sound-esque mix (skip to the second verse at 1:23 for the best examples), this is a great example of an old pop hit with an excellent spatial audio treatment.

“Boom” by Tiësto and Sevenn — A fun, lively track that does give off a nice surround sound effect.

“Black Skinhead” by Kanye West — This one is another good example of the “beyond two-channel” openness that spatial audio can provide.

A whole lot of jazz and classical — If there are two genres that naturally lend themselves to spatial audio and Dolby Atmos, it’s jazz and classical. Orchestras can sound truly massive, and it’s a captivating way to listen to jazz ensembles where it’s easy to hear even the quietest notes.

Other examples where it just sounds wrong

“Buddy Holly” by Weezer — The guitars basically lose all life in this mix and vocals dominate the entire thing in a way that just sounds strange and bad. And yet this song is on Apple’s own playlist meant to showcase Atmos.

“Follow Your Arrow” by Kacey Musgraves — Apple mentioned Musgraves as an artist to check out with Atmos. And while her most recent album Golden Hour sounds… fine… her breakthrough Same Trailer Different Park is pretty rough in spatial audio format. “Follow Your Arrow” seems to lose most of its background vocals, and even the main guitar melody is way quieter here than in the regular mix. It almost comes off like a demo recording.

“What’s My Age Again?” by Blink 182 — This is another song that Apple seems to think makes spatial audio sound good, but I’d strongly argue it does the opposite. Mark Hoppus’ muffled vocals legitimately sound like they were recorded through a phone.

“Alex Chilton” by The Replacements — Is that enough cowbell for you during the chorus? It overpowers everything else and makes me feel like I’m in the old Christopher Walken SNL skit, only with a different band.

I’m curious to hear some of your examples that sound great, and others you’ve found that are a disappointment with Atmos.

Do I need AirPods or Beats headphones for Apple Music spatial audio?

No. Apple Music’s spatial audio works on:

  • All headphones and earbuds
  • The loudspeakers on supported iPhones, iPads, and Macs
  • Apple TV 4K

If you set Dolby Atmos to “always on” in settings for the Music app, you’ll see a pop-up advising that it probably won’t sound right on all speakers, but Apple Music will still play the spatial audio mix if that’s your preference. In fact, Apple clearly states that you can “listen on any headphones” to Apple Music’s spatial audio.

How do I turn off Apple Music spatial audio if I don’t like it?

iOS and iPadOS: Go to Settings > Music > Dolby Atmos (under “audio”), and there you can pick between automatic, always on, and off.

If you’d prefer to leave Atmos on by default but want to quickly switch to a regular stereo version of any song that’s playing, just pull down Control Center, press and hold on the volume slider, and toggle off spatial audio. Apple Music will switch over to stereo. If you turn spatial audio back on, you’ll return to the Atmos track.

macOS: In the Music app, open preferences and select the “playback” tab. Halfway down you’ll see an “audio quality” section and Atmos is in there. You get the same three automatic / always on / off choices as on Apple’s mobile devices.

Head tracking is coming to Apple Music spatial audio this fall

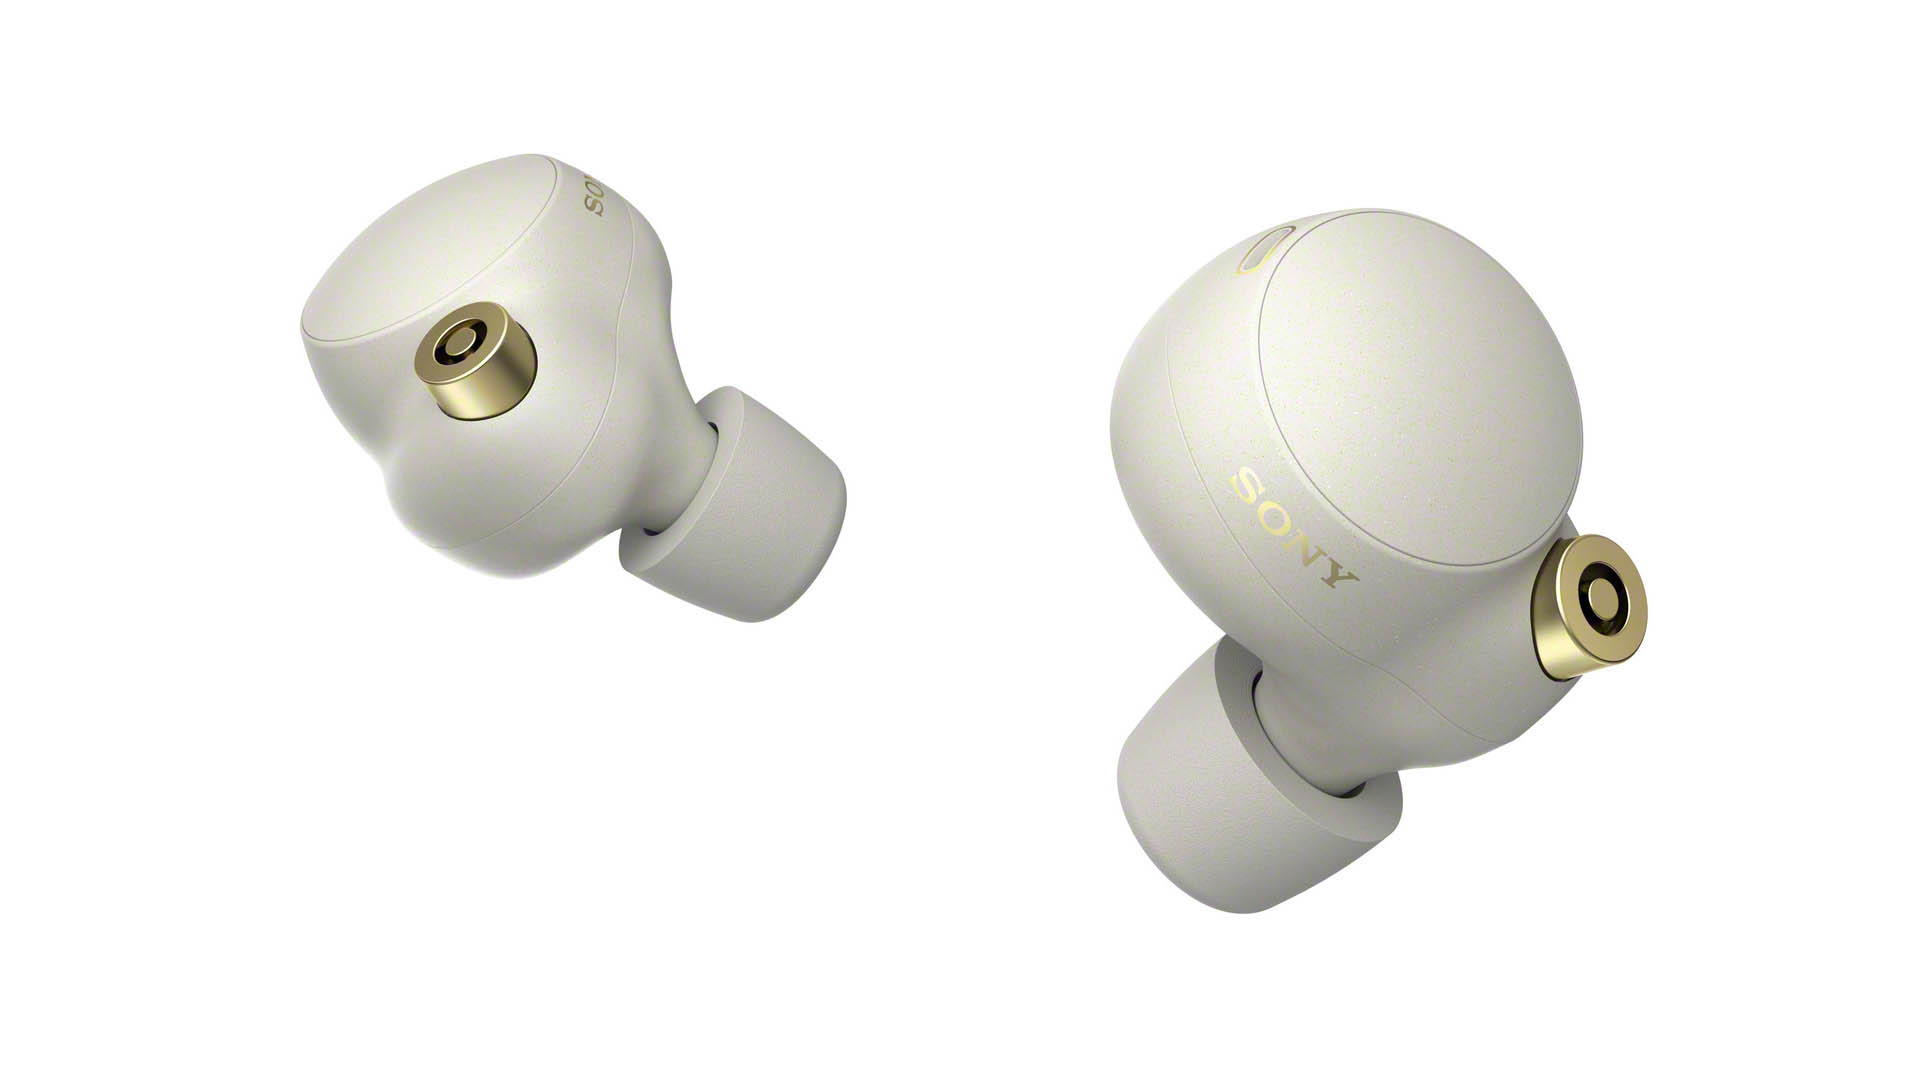
Apple Music’s spatial audio is currently much different than the spatial audio experience you get when watching movies and TV shows on an iPhone or iPad. For videos, Apple includes a head-tracking feature that adjusts the sound placement as you turn your head to keep it anchored to the source device. This trick is exclusive to the AirPods lineup, but it’s a very impressive effect.

Apple has said it plans to bring this sound-changes-as-you-turn-your-head feature to Apple Music in the fall — likely with iOS 15.

Is this just a gimmick?

That’s really the question that remains to be answered. But Apple isn’t alone in hyping multidimensional music (nor is it the first to do so). Amazon, Tidal, and others are also increasingly pushing the experience. I recently reviewed an extravagant Sony speaker that positions 360-degree audio as its main selling point.

Are people like Eddy Cue and Zane Lowe right in their insistence that spatial audio will revolutionize how we consume music in the same way that stereo did? Or is this a gimmick like 3D TVs that will fizzle out and be forgotten within a few years? If it’s going to be the former, it’ll take a lot of work and creativity from artists, producers, and mixers to make this format shine.

Because right now, for every Atmos spatial audio track that’s a standout on Apple Music, there are a dozen others that are quite meh — or worse than in stereo. We’re still in the early days, and now that Atmos is officially part of Apple Music, hopefully the consistency will improve. When you do find those mixes where they totally nail it, it’s something special.

Apple should make it easier to switch between Atmos and stereo

But in the meantime, and to avoid turning people off from Atmos when they land on a lackluster mix, Apple Music should make it easier to go back and forth between spatial audio and regular stereo tracks on a per-song basis. One solution could be displaying a choice when you tap on the Dolby icon, similar to the “go to artist / album” options that appear when tapping on an artist’s name.

how-to-use-a-two-factor-security-key

How to use a two-factor security key

Two-factor authentication is a good way to add an extra layer of security to online accounts. It requires the use of your smartphone, however, which is not only inconvenient, but can be a problem if your phone is lost or breached. Hardware security keys can offer an additional layer of security to password-protected online accounts and, in turn, your identity. They’re also not hard to install. Here’s how to set them up for your Google account, Facebook, and Twitter.

Security keys can connect to your system using USB-A, USB-C, Lightning, or NFC, and they’re small enough to be carried on a keychain (with the exception of Yubico’s 5C Nano key, which is so small that it’s safest when kept in your computer’s USB port). They use a variety of authentication standards: FIDO2, U2F, smart card, OTP, and OpenPGP 3.

When you insert a security key into your computer or connect one wirelessly, your browser issues a challenge to the key, which includes the domain name of the specific site you are trying to access. The key then cryptographically signs and allows the challenge, logging you in to the service.

Many sites support U2F security keys, including Twitter, Facebook, Google, Instagram, GitHub, Dropbox, Electronic Arts, Epic Games, Microsoft account services, Nintendo, Okta, and Reddit. The best thing to do is to check the website of your security key of choice and see which services are supported — for example, here’s a link to the apps supported by YubiKeys.

A setup process is necessary before you can use a security key. After that, securely accessing your online profile on a site is a simple matter of entering your password, inserting the key, and tapping the button.

Keep in mind that you can’t copy, migrate, or save security-key data between keys (even if the keys are the same model). That is by design, so keys can’t be easily duplicated and used elsewhere. If you lose your security key, you can use two-factor authentication on your cellphone or an authenticator app. Then, if you want to use a new key, you will have to go through the process of reauthorizing your accounts all over again.

Which security key should I use?

Several brand choices are available. Yubico, one of the developers of the FIDO U2F authentication standard, sells several different versions. Google sells its own U2F key, called the Titan, which comes in three versions: USB-C, USB-A / NFC, or Bluetooth / NFC / USB. Other U2F keys include Kensington’s USB-A fingerprint-supporting key, and the Thetis USB-A key.

For this how-to, we used the YubiKey 5C NFC security key, which fits into a USB-C port but also works with phones via NFC. The process is pretty similar for all hardware security keys, though.

Pairing a key with your Google account

In order to use a security key with your Google account (or any account), you need to have already set up two-factor authentication.

  • Log in to your Google account, and select your profile icon in the upper-right corner. Then choose “Manage your Google Account.”
  • In the left-hand menu, click on “Security.” Scroll down until you see “Signing in to Google.” Click on the “2-step Verification” link. At this point, you may need to sign in to your account again.

“Signing in to Google” > “2-step Verification.”” data-upload-width=”1422″ src=”https://rondea.com/wp-content/uploads/2021/06/echo/Google_setup_for_security_key.png60c0c868c6c9e.jpg” >

Go to “Security” > “Signing in to Google” > “2-step Verification.”

  • Scroll down until you see the “Add more second steps to verify it’s you” heading. Look for the “Security Key” option and click on “Add Security Key.”
  • A pop-up box will list your options, which include devices that have built-in security keys and the option to use an external security key. Select “USB or Bluetooth / External security key.”
  • You’ll see a box telling you to make sure the key is nearby but not plugged in. You’ll also see an option to use only the security key as part of Google’s Advanced Protection Program (which is for users with “high visibility and sensitive information”). Assuming you don’t fall into that category, click “Next.”
  • The next box lets you register your security key. Insert your key into your computer port. Press the button on the key, then click “Allow” once you see the Chrome pop-up asking to read the make and model of your key.
  • Give your key a name.
  • Now you’re set! You can come back to your Google account’s 2FA page to rename or remove your key.

Pairing a key with your Twitter account

  • Log in to your Twitter account and click on “More” in the left-hand column. Select “Settings and privacy” from the menu.
  • Under the “Settings” heading, select “Security and account access” > “Security” > “Two-factor authentication.”
  • You’ll see three choices: “Text message,” “Authentication app,” and “Security key.” Click on “Security key.” You’ll probably be asked for your password at this point.
  • Select “Start.”

Once your security key is registered, you receive a just-in-case backup code (deleted here).

  • Insert your security key into your computer’s port, then press the key’s button.
  • The window should refresh to say, “Security key found.” Type in a name for your key and click “Next.”
  • The window will now read “You’re all set.” It will also give you a single-use backup code to use if you don’t have access to any of your other log-in methods. Copy that code and put it somewhere safe.
  • If you’ve changed your mind and want to remove the security key, go back to the “Two-factor authentication” page and select “Manage security keys.”
  • Click on the name of the key, and then choose “Delete key.” You’ll need to enter your password and verify that you want to delete the key.

Pairing a key with your Facebook account

  • Log in to your Facebook account. Click on the triangle icon on the upper-right corner and select “Settings & Privacy” > “Settings.”
  • Now you’re at “General Account Settings.” Select the “Security and Login” link from the left sidebar.
  • Scroll down until you see the section labeled “Two-Factor Authentication.” Click “Edit” on the “Use two-factor authentication” option. You may be asked for your password.
  • If you don’t have 2FA set up, you’ll be given three choices: “Authentication App,” “Text Message (SMS),” and “Security Key.” It’s recommended that you use an authenticator app as your primary security, but if you prefer, you can just click on “Security Key.”

You can use a security key as your main authentication method.

  • If you do have 2FA set up, then you’ll find the “Security Key” option under “Add a Backup Method.”
  • Either way, you’ll get a pop-up box; click on “Register Security Key.” You’ll be instructed to insert your security key and press its button.
  • And that’s it. If you don’t use 2FA, you’ll now be asked for the security key if you log in from an unrecognized device or browser. If you do, you can use your key if you don’t have access to your authentication app.
  • If you no longer want to use the key, go back to “Two-Factor Authentication,” find “Security Key” under “Your Security Method,” and click on “Manage my keys.”
the-moto-g-stylus-5g-is-a-step-up-version-of-our-favorite-budget-stylus-phone

The Moto G Stylus 5G is a step-up version of our favorite budget stylus phone

Motorola has announced the Moto G Stylus 5G, a new version of its very good, non-5G budget-friendly stylus phone. It offers broadly similar hardware to the 4G version, with notable exceptions in the new Snapdragon 480 5G chipset with sub-6GHz 5G connectivity and a bigger 5,000mAh battery. Priced at $399, it’s at the higher end of the budget range and will go on sale June 14th.

Like its 4G peer, the G Stylus 5G features a large 6.8-inch 1080p screen, ready for your notes and doodles courtesy of a built-in stylus. It includes 4GB of RAM, 128GB of storage, and ships with Android 11. There’s a 3.5mm headphone jack, and a charging brick is included in the box. The Stylus 5G is a little bigger and heavier than the 4G version, but not by much — it’s about four grams heavier and 0.3mm thicker.

The G Stylus 5G offers a rear triple-camera array that’s very similar to the 4G G Stylus’, with a 48-megapixel f/1.7 standard wide, 8-megapixel ultrawide, and 5-megapixel macro, plus a 2-megapixel depth sensor. Around front, there’s a 16-megapixel selfie camera.

The G Stylus 5G isn’t the most aggressively priced 5G phone in the budget market. OnePlus says its upcoming N200 5G will cost less than $250, and Samsung’s Galaxy A32 5G is currently selling for $279. It’s also surprising to see the Snapdragon 480 5G chipset used here, since it’s intended for more affordable 5G devices well under the Stylus 5G’s $400 price.

On the other hand, the G Stylus 5G is quite a bit cheaper than the other prominent 5G phone with a built-in stylus, the $999 Galaxy Note 20, if you want to look at things that way.

how-to-install-the-developer-beta-of-ios-15

How to install the developer beta of iOS 15

In its much-anticipated WWDC session on Monday, June 7th, Apple introduced a load of new features for its upcoming update of its iOS mobile operating system: iOS 15. The developer’s beta is now available for anyone who’d like to download it — and who is a registered developer.

First, the obligatory warning: this version of iOS 15 is going to be very new and very beta. If you’re a developer, you know all this, but it’s worth repeating: it’s best to install this on a phone that isn’t the one that you rely on. In addition, remember that Backups Are Your Friend.

  • You can find the developers beta of iOS 15 on Apple’s Developers Website. You will, of course, have to sign in (we’re assuming you’ve paid your $99 for a developer’s account). You may be asked to register your device if it isn’t registered already.
  • Find the iOS 15 profile by choosing Downloads (either from the button on the upper right corner, or by using the two-line drop-down menu on the upper left).
  • Look for the iOS profile, and allow the download.
  • Once the profile is downloaded, go to the Settings on your device, find “Profile Downloaded,” and follow the instructions. You will eventually be told to reboot, and then should be able to install the update that is available in Settings > General > Software Update.

If you’re not enrolled as an Apple developer, don’t be downhearted — there will be a public beta available for download sometime in July. When it’s available, we’ll let you know where to find it and how to install it.

the-pandemic-might-cut-down-e-waste-but-widen-the-digital-divide

The pandemic might cut down e-waste but widen the digital divide

We now have evidence that staying home to game or stream and chill during the pandemic was pretty much a first-world problem (or privilege, depending on how you look at it). The proof is in a new report published today by the United Nations University and UN Institute for Training and Research that looks at where drops in electronics sales and associated e-waste took place.

The report looked at electronics consumption in the first few quarters of 2020, and then used that to estimate future e-waste. It projects that worldwide, we’ll have discovered that 4.9 million fewer metric tons of e-waste were generated compared to a “business as usual” scenario without the pandemic. But that drop was uneven across the globe, the authors found. Electronics sales are estimated to have fallen 30 percent in low and middle-income countries, compared to just 5 percent in richer nations.

“The so-called digital divide is increasing,” report co-author Ruediger Kuehr said in a statement. “The ability to adapt to digitisation and earn a living or simply to own and benefit from electronics is decreasing in some parts of the world.” Countries in Northern Africa, Western Asia, Sub-Saharan Africa, and Central Asia will be the hardest hit, according to the report.

On the other hand, high-income countries are projected to be solely responsible for a slight global uptick in game console, cell phone, laptop, and electrical oven purchases last year. In those countries, it seems people did indeed turn to screens (and maybe baking?) to while away their time during pandemic lockdowns.

Tech companies still managed to profit during the hellscape of 2020. Microsoft and Apple raked in the dough from gaming and computers. Samsung made more money last year than it did the year before. Amazon doubled its profit near the onset of the pandemic. And the 2020 lull in tech spending among low and middle-income countries is expected to be temporary.

As more people buy more gadgets, e-waste piles up, and can leach harmful materials like mercury into the environment. E-waste reached a record high in 2019, and just 17 percent was recycled. A lot more can still be done to prolong each gadget’s lifespan, increase recycling, and make companies responsible for collecting the products they generate so that e-waste doesn’t trash the environment, advocates say.

google’s-first-folding-pixel-is-apparently-still-on-track-for-a-2021-reveal

Google’s first folding Pixel is apparently still on track for a 2021 reveal

Google may have shied away from a Pixel Watch, but a Pixel Fold still very much seems to be on the way — following a leak last August that revealed the company was planning to release its first folding Pixel phone in late 2021, Korean industry site TheElec is now reporting that Samsung will begin production of folding OLED panels this October for Google, Vivo and Xiaomi’s upcoming folding phones, all of which will reportedly be revealed late this year.

Google hasn’t exactly kept its folding phone ambitions a secret; in 2019, it published patent applications for its own folding screens and admitted it had been prototyping them for quite some time, telling CNET that it didn’t have “a clear use case yet.” But now, it appears Google has a foldable, codename “Passport,” that could be nearly ready to announce. 9to5Google even spotted a new reference to it last month in Android 12’s code, alongside other codenames believed to be the upcoming Pixel 6 and Pixel 5a 5G. TheElec says it’ll have a single 7.6-inch panel that folds inward, while Vivo’s upcoming phone will have a 8-inch main screen and a 6.5-inch outer display. It didn’t mention the size of the new Xiaomi phone’s screen.

It’s not clear whether a Pixel Fold would actually come with a display designed by Google itself, though it’s possible; Samsung acts as a contract manufacturer for many other companies, producing some of Apple’s homegrown processors. Either way, one portion of the screen’s sandwich may still largely belong to Samsung itself: ETNews reports that Samsung will supply its proprietary ultra-thin cover glass (which is technically made by German manufacturer Schott) to other smartphone manufacturers, and Google is expected to use it.

Xiaomi already announced a folding phone earlier this year, the Mi Mix Fold, but it sounds like it’ll have a second one. TheElec also reports Oppo will be delaying a new foldable phone to 2022, with a 7.1-inch main screen and a smaller one between 1.5 and 2 inches diagonally.

google’s-password-protected-photos-feature-is-arriving-on-newer-pixels

Google’s password-protected photos feature is arriving on newer Pixels

Google’s Locked Folder feature, which allows you to password-protect specific images or videos to keep them from showing up in your main photo library, is available in the latest Pixel update, according to 9to5Google. Google’s page explaining Locked Folder says the feature is only currently available on Pixel devices, starting with the 3. When it announced the feature at its I/O conference, Google said that it would be coming to other Android phones “throughout the year.”

If you’ve got an updated Pixel, you can set up the Locked Folder by going to Photos, then to Library > Utilities > Locked Folder. Once it is set up, this is where you’ll be able to see your secret stuff.

You’re able to move existing photos to the Locked Folder, which will remove them both from your regular library and from any existing Memories that the picture may appear in. It’s worth noting that, according to Google, you can’t back up any photos or videos in the Locked Folder, so there is some amount of trade-off between privacy and convenience. Anything in the Locked Folder can, however, be moved out of it if you no longer need to keep it private.

Google’s support page also explains that you can even set the camera to save captured images directly to the Locked Folder, keeping them from ever going into your normal library. This could be useful if, for example, you were at a protest and wanted to make sure any pictures you took weren’t available to anyone else who might get hold of your phone. Or, for a more obvious example, if you were taking some spicy selfies you wanted to keep private.

Locked Folder is included as part of the June Pixel update, which is rolling out to phones now. According to 9to5Google, the update also includes the ability to ask Google Assistant to answer or reject a call, take astrophotography videos (on the Pixel 4 and newer), and an improvement to Gboard that places key details (like a phone number) in your keyboard’s suggestion strip after you’ve copied the text to your clipboard.

how-to-use-screen-time-to-keep-your-iphone-use-within-healthy-limits

How to use Screen Time to keep your iPhone use within healthy limits

We all spend a lot of time on our phones, and it’s possible — just possible — that some of us spend too much time. In 2018, we ran an article explaining how to use what was then Apple’s brand-new Screen Time feature, which was built in order to help people keep their on-screen time in some sort of sane proportion.

At the time (which was when iOS 12 came out), you could use Screen Time to check how much time you spent on your phone, use an App Limits feature to limit your (or your kids’) daily time spent on various apps or types of apps, or use its Downtime feature to cut off access to all (except a few) apps.

Since then, and especially since iOS 13 came out, Screen Time has been expanded, making it easier to lock down apps and / or limit your screentime. (There have been no additional features announced so far for the upcoming iOS 15, but we’ll add them here if there are.)

To begin using Screen Time, go to “Settings” > “Screen Time.” Here are some of the things you can do.

Daily Average

At the top of the Screen Time app, you can see an accounting of your activity over the course of the day. Click on “See All Activity” to see a breakdown of which specific apps you used and how long you used them.

Downtime

Downtime lets you set periods when you want to force yourself to give your eyes a rest and avoid staring at the screen. It does this by locking down the apps with which you are most likely to spend time. These lockdowns are not absolute — as you’ll see later, you can cancel Downtime when you need to.

Begin by choosing when you want to start your time away from your phone.

  • Tap on “Downtime” and toggle it on.
  • Select the days (it can be every day or just on specific days) and times that you want to avoid getting swallowed by your favorite iPhone apps. During those times, only specified apps that you pre-selected (along with phone calls) will be allowed through. For example, you can disable Facebook and Twitter during working hours, but keep the Messages app going for texts. (We’ll go over how to choose which apps to disable in a moment.)
  • You’ll get a warning before Downtime kicks in. If you need to keep working on an app, don’t worry — you’ll be given the chance to ask for one more minute, to be reminded in another 15 minutes, or to ignore the limit for today.

Keep in mind that Downtime, and the other Screen Time features, can be applied to all your devices that use iCloud. So if you set it on your iPhone, for example, it can apply to your Mac or iPad as well. To share your settings across your devices, go to the Screen Time main screen and toggle “Share Across Devices” on.

Now that you’ve chosen when you want some downtime, you’ll probably want to select which apps should be allowed to remain active.

Back in the Screen Time main screen, select “Always Allowed.” Here you can choose which apps you will still have access to during downtime.

  • You’ll see two sets of apps: Allowed Apps and Choose Apps.
  • To select an app you’ll always want access to, even during downtime, tap on the app’s name in Choose Apps and it will appear in the Allowed Apps list.
  • If you want to disallow any of the Allowed Apps, tap on the minus sign next to the app, and then on “Remove.”

There are more ways to personalize Downtime. Let’s say you want to get alerted about text messages from specific people — you’re planning to concentrate on a project and don’t want to hear from any of your friends, but you still want to get texts from family members. You can do that.

  • On the same “Always Allowed” page, tap on “Contacts” at the top of the page.
  • Under “Allowed Communication,” select “Specific Contacts” and choose which contacts you want to allow through, even during downtime.

Note that the “Allowed Communication” page is also accessible from the main Screen Time page.

App Limits

Another way to keep your app use in check is to limit the amount of time you use an app (rather than setting what time of day you can use it). For example, if Twitter tends to be your personal black hole, you can decide not to spend more than, say, two hours on Twitter each day.

To set your app limits:

  • In the Screen Time screen, select “App Limits” > “Add Limit.” Toggle “App Limits” on and tap on “Add Limit.”
  • You’ll see a list of categories, such as “Social,” “Games,” and “Entertainment.” Tap on a specific category, and it will open up to show a list of all your apps that are in that category.
  • Select the apps that you want to limit — or select an entire category to choose all the apps in that category.
  • Tap on “Next” in the upper right corner.
  • Select the maximum amount of time you can use the app(s) on a daily basis. When you reach your limit, you’ll be interrupted by a screen that lets you either apply the limit (just tap on the “OK” button), or shrug and select “Ignore Limit.”
  • If you choose the latter, you can get one more minute, ask to be reminded in 15 minutes, or decide to ignore the limit for today.

Note: if for any reason you don’t want to use an app at all, except for on rare occasions, you can set the Screen Time to 23 hours and 59 minutes. The app will then be out of reach unless you go back into “Settings” > “Screen Time” > “App Limits” and disable the limit.

Screen Time Passcode

If you want to keep certain apps out of the reach of your kids — or your roommate — then you can create a passcode that will be needed to make any changes to Screen Time. The passcode is also useful if you feel you need an extra barrier before you undo one of your limitations.

  • Go to Screen Time and tap on “Use Screen Time Passcode.”
  • Set a four-digit passcode, and then reenter it when asked.
  • Enter your Apple ID and password so that you can use it if you’ve forgotten your passcode.

And that’s it. If you want to change or delete your passcode, go back to Screen Time and select “Change Screen Time Passcode.”

Content & Privacy Restrictions

The last selection in Screen Time isn’t as much concerned with when you use your iPhone as with what you see or hear on it. Select “Content & Privacy Restrictions” if you want to allow or restrict explicit content, keep TV shows or movies to certain ratings, set an age limit for apps, limit which websites are allowed, and set a number of different limits on games (such as multiplayer games, connecting with friends, or private messaging).

Most of this is geared toward parents who want to oversee what their kids see and hear online, but if you’d rather avoid accidentally crashing into any “adult” websites, it could be useful. There are also a number of privacy features, such as stopping Apple advertising, or not allowing apps to change the settings of your microphone, Bluetooth sharing, and other features.

sony-wf-1000xm4

Sony WF-1000XM4

Our Verdict

You won’t find many true wireless earbuds that come close to matching the all-round brilliance of the Sony WF-1000XM4

For

  • Clear, detailed bass performance
  • Wonderful sense of musicality
  • Comfortable
  • Class-leading battery life

Against

  • Missing Sony’s Multipoint feature
  • Lacking ear tip choices
  • No aptX HD

How do you improve on arguably the best all-round true wireless earbuds on the market? Sony has gone back to the drawing board and designed a brand new pair that look nothing like their predecessors – and the result is the WF-1000XM4. Is it a brave move? Definitely. Crazy? Quite possibly.

Sony’s WF-1000X range of wireless earbuds has been a dominant force in this category over the last few years, and the last pair to emerge from its stable, the WF-1000XM3, are two-time What Hi-Fi? Award-winners.

But instead of making the odd refinement here and there, Sony’s engineers have gone to town on the WF-1000XM4 with an all-new design, a new charging case and a new audio processor. They have even found time to develop a new eartip material, which here is appearing on a pair of Sony earbuds for the first time. What could possibly go wrong?

Luckily for Sony, very little does. In fact, the WF-1000XM4 are one of the most feature-packed, user-friendly and sonically gifted pair of wireless earbuds we’ve tested.

Pricing

Unsurprisingly, the Sonys sit at the premium end of the market, coming in at £250 ($280, AU$500). That places them right in the firing line of other five-star rivals such as the Sennheiser Momentum True Wireless 2 (£279, $299, AU$499), Bose QuietComfort Earbuds (£249, $280, AU$399) and, of course, the Apple AirPods Pro, which at the time of writing range in price between £199 ($199, AU$300) and £249 ($249, AU$329).

Build

(Image credit: Sony)

Your initial contact with the WF-1000XM4 is a surprising one. Sony has ditched the usual glossy box for recycled packaging made from a special blend of paper. This makes for a more compact box (34 per cent smaller than the WF-1000XM3’s), and one that’s plastic-free. That’s great news for the environment, though it doesn’t really give off the vibe that you’ve just bought a pair of premium noise-cancelling headphones.

Sony WF-1000XM4 tech specs

(Image credit: Sony)

Bluetooth version 5.2

Noise-cancelling Yes

Battery life 8 hours (BT + ANC), 24 hours (total)

Voice control Google Assistant, Amazon Alexa

Finishes x2

Weight 7.3g (x2)

Once you’ve liberated the WF-1000XM4 from their packaging, you’re greeted by a small, black charging case. It’s smaller than the case that comes with the Bose Quiet Comfort Earbuds, and positively tiny (40 per cent smaller) compared with the charging case that comes with their predecessors.

The case charges via USB-C and also introduces wireless charging to the WF-1000X range for the first time – all you need is a compatible Qi charging pad. You can even battery share with compatible smartphones and piggyback off their power supply, too.

You shouldn’t have to worry too much about the battery life. Sony’s new buds might come with a smaller case, but the XM4’s battery life is actually up compared with the XM3. You now get eight hours of play from the earbuds with noise-cancelling and Bluetooth turned on, and Sony claims the case can supply a further 16 hours of charge. That places their battery life from a single charge above all major rivals. The AirPods Pro can only manage five hours, the Sennheiser Momentum True Wireless seven hours and the Bose QuietComfort Earbuds six hours. Turn off noise-cancelling and the Sony’s life is extended to 12 hours from a single charge and 24 hours with the case. A five-minute quick charge is good for one hour of playtime, too. 

You can see the life remaining in both the buds and the case through Sony’s Headphones Connect app, which will also give you a reminder when the case drops below 30 per cent charge.

As with all wireless earbuds, battery life can vary due to a number of different factors, such as the quality of files you’re listening to, how hard the internal processor is working, and the volume you’re listening at. During our testing, we found the battery life consistently good enough to get us through a day of mixed use.

Comfort

(Image credit: Sony)

Flip open the magnetic case and you’ll see the all-new earbud design of the WF-1000XM4. Based on a combination of customer feedback about the XM3 and research about the human ear, Sony has settled on a rounder body that sits more inside the ear opening. 

The matte finish on each earbud gives the headphones a premium feel, while the small accents around the microphone and sensor holes add a tiny splash of colour. Speaking of colour, the XM4 come in a choice of black or silver.

If you want your XM4 to double as sports or running headphones you’ll be pleased to know they boast an IPX4 rating, making them resistant to “splashing from any angle” – a big improvement on the old model.

Besides the new-look earpieces, the XM4 also have brand new eartips. Made from polyurethane, which feels like a cross between silicone and foam, Sony claims they help secure a tighter, more stable fit. The thousands of tiny bubbles in the tips are also supposed to help reduce and dissipate noise.

The only downside here is that you only get a single set of small, medium and large-sized tips to choose from. Sony says you will get years of use out of one pair, and naturally extra tips should be available to purchase if you need them.

We don’t have any major problems sliding the earbuds in and twisting them into place. If you are struggling for a seal, you can pinch the tips and slide them into your ear canal, until they expand. We find they sit snugly in your ear opening, but they are  comfortable over longer listening sessions.

To make sure you have the perfect fit, Sony has introduced a new air-tightness test, accessible through its Headphones Connect app. The app fires out a test tone and reports back on whether or not you need to make any adjustments. It’s worth trying out, especially if you feel the sound is lacking bass or there is outside noise leaking in.

In fact, we’d recommend installing the Headphones Connect app when you first connect the XM4. It gives you direct access to all the key features and functions of the earbuds so you can choose which ones to enable and disable. It also helps you get set up for listening to music in Sony’s 360 Reality Audio format from compatible streaming services such as Tidal and Deezer.

Features

(Image credit: Sony)

The circular outer surface of each earpiece is a touchpad and, by using the Headphones Connect app, you can customise the functionality of each one. They can control volume and playback or switch between noise-cancelling and ambient sound modes through the usual combination of taps, presses and long holds – and the headphones are quick to respond to these actions. Switching between sound modes, changing volume and activating and deactivating features such as Quick Attention (which drops the volume of what you’re listening to, so you can have a quick conversation without having to remove the earbuds from your ears) happen with minimal fuss.

The Sony WF-1000XM4 borrow the Speak-to-Chat function that debuted in the WH-1000XM4 wireless headphones. This feature allows you to talk to someone while the earbuds are still in place and is triggered when you start talking. It works well, although as is the case with the over-ears, it’s only triggered a second or so after you start talking.

This slight delay can be frustrating, as can the tendency for the feature to be triggered by a cough or an impromptu karaoke session while sat at your desk. You can reduce the sensitivity of the feature, or you can turn it off completely and either use Quick Attention or remove an earbud completely (which pauses playback automatically).

On the inside of the XM4 is plenty of new technology. The earbuds feature an improved DAC and analogue amplifier and are powered by a new Integrated Processor V1. Sony claims it provides a clearer sound and even better noise-cancelling than their predecessor. The new model also gets Sony’s DSEE Extreme audio processor with Edge-AI, which we have already experienced in the WH-1000XM4 over-ear headphones, and is designed to upscale low-bitrate music files to near hi-res quality.

The 6mm driver used inside the XM4 is similar in size to the one used in the previous model, but it’s made from a new material and features a bigger magnet, which Sony claims helps improve sound quality and noise-cancelling, especially with certain low frequencies.

There’s no aptX HD support onboard, but the XM4 support Sony’s LDAC file format, which, streamed over Bluetooth from a compatible source, allows hi-res audio files up to 24-bit/96kHz to be transmitted at data rates of up to 990kbps.

(Image credit: Sony)

Sony has also aimed to deliver clearer call quality with new features, including beam-forming and the use of a bone conduction sensor that stops the mics from picking up distracting ambient sounds while you’re talking. There’s even an automatic wind noise reduction mode which attempts to cut out swirls of noise passing through the headset and into your ears.

All of this works with Sony’s Precise Voice Pickup technology, originally introduced in the WH-1000XM4. The net effect is an impressive call quality for a pair of wireless earbuds. The technologies all combine to do a solid job of dampening down outside noise and interference, especially for the person on the other end of the line.

The general level of noise-cancelling is excellent, especially for a pair of wireless earbuds. Not everyone likes that ‘vacuum’ feeling you get when it’s turned on, but it’s extremely effective through the Sonys and you’ll struggle to find better noise cancellation at this level.

Android users will be pleased to hear the Sonys are compatible with Fast Pair so you can get up and running with minimal fuss. You receive a battery notification pop-up on your smartphone when they power up and you can even track their location down using the Google Find My Device app.

Unfortunately, iOS users don’t get any such pairing perks, but all you need to do to start pairing is open the case and take the headphones out. It’s a shame Sony hasn’t carried across the ‘Multipoint’ feature enabled on the WH-1000XM4 over-ears. This allows you to connect the headphones to two different Bluetooth devices simultaneously, which can come in handy if you’re working on a laptop but still want to be connected to your phone. Here’s hoping it can be added at a later date.

In terms of stability, we use an Apple iPhone 12 and Macbook for the bulk of our testing and find the connection to be rock solid with no dropouts, even in more built-up areas.

Sound

(Image credit: Sony)

Before we get to the WF-1000XM4’s immense musicality and expressive dynamics, we should note the way the headphones handle bass. The quality of bass and the clarity of low frequencies is stunning. There’s such a fantastic level of detail on display that it makes rival headphones, such as the Bose QuietComfort Earbuds, sound congested in comparison.

We’re keen to hear how the earbuds handle one of our favourite bass-heavy test tracks, Massive Attack’s Angel – and we’re blown away by the confidence with which the song is dispatched. Every element of that pulsing bassline is precisely deployed and dripping in texture. It’s the clarity around the notes that really grabs you – it allows the WF-1000XM4 to communicate intricacies in the bass notes that other headphones struggle to uncover.

But it’s not a sound that purely favours low frequencies. There’s clarity across the board and a sense of rhythmic precision that allows the Sony’s to switch pace effortlessly. They sound as at home keeping up with, and succeeding in not being tripped up by, Radiohead’s 15 Step as they are dispatching the slow, deliberate swagger of Nina Simone’s Feeling Good.

Simone’s effortless vocal oozes class and sophistication, with every nuance in her delivery laid bare for the listener. Combine the emotion in her voice with the impact of the piano, percussion and wind section and the Sony’s create a captivating sound you can’t help but be swept away by.

If you were wondering whether the WF-1000XM4 would be a step up from the WF-1000XM3, we can confirm that they are. The newer model sounds more informative and uncovers more subtle detail. Bass notes are better defined and the overall sound is better balanced. Even the much-admired Sennheiser Momentum True Wireless 2 struggle to match the Sonys for tonality and refinement. 

You can hear that refinement and natural tone shine through as we listen to Ludovico Einaudi’s Experience. From the delicate, deliberate piano strokes at the start to the soaring strings at the song’s climax, the Sonys bring the individual personalities to life and mix them together like the ingredients of a fine cocktail.

Verdict

We’re quite taken by the Sony WF-1000XM4. Given all the design changes and new features in these wireless earbuds, it must have been a real challenge to get them right. But Sony has absolutely nailed it. The headphones deliver a satisfying user experience, class-leading battery life, some of the best noise-cancelling we’ve heard in this category, and absolutely stunning sound quality. Put simply, this is a new benchmark for premium true wireless earbuds.

SCORES

  • Sound 5
  • Comfort 5
  • Build 5

MORE:

Read our guide to the best in-ear headphones

Read our Bose QuietComfort Earbuds review

Read our Sennheiser Momentum True Wireless 2 review

Read our Apple AirPods Pro review

Read our Sony WF-1000XM3 review