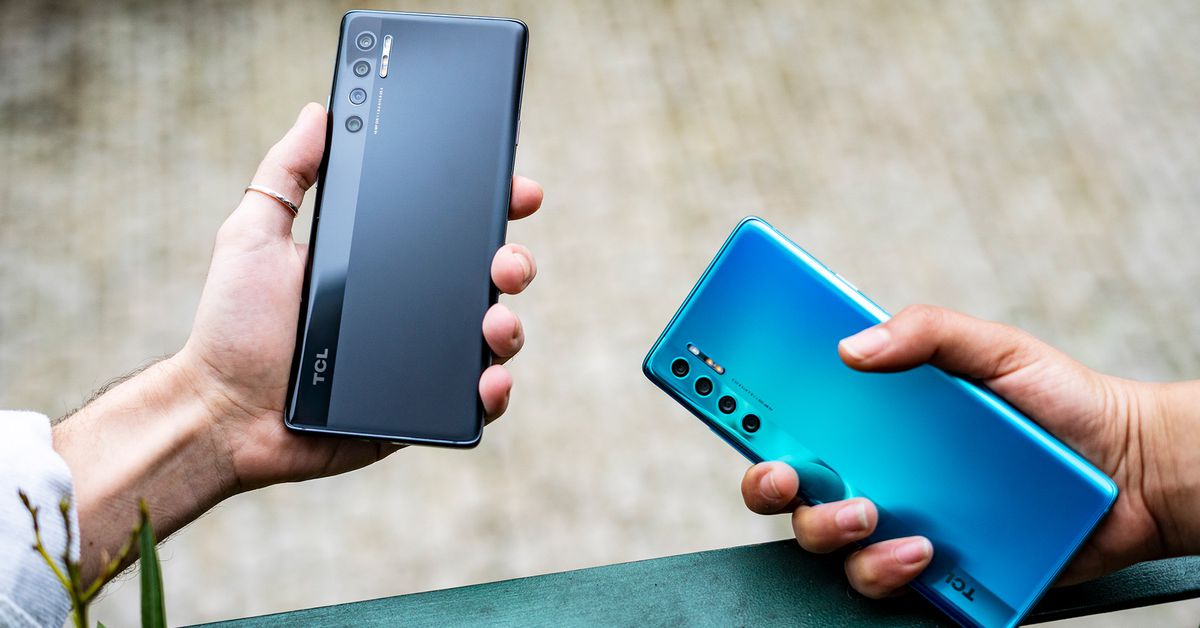
TCL has announced the rest of its 20-series lineup, with the 20 Pro 5G leading the way. Along with the 20L and 20L Plus, the phone joins the two devices announced earlier this year at CES, the TCL 20 5G and 20 SE, all of which prominently feature the company’s display technology. TCL says the 20 Pro 5G and 20S (a regional variant of the 20L Plus) will come to the US this summer, though the company hasn’t confirmed prices yet.
The TCL 20 Pro 5G offers the most advanced specs of the bunch, with some refinements over last year’s good-not-great 10 Pro. It offers a 6.67-inch 1080p OLED with HDR10 support and includes the latest generation of TCL’s NXTVISION technology to identify on-screen content and adjust color, contrast, and sharpness accordingly. The 20 Pro 5G uses a Snapdragon 750G chipset — a step up from the 10 Pro’s 600-series processor — with 6GB RAM, ships with Android 11, and offers a 4,500mAh battery. Sub-6GHz 5G is supported, but TCL says it can adapt to include other 5G bands depending on the carrier.
The 20 Pro 5G will come to the US this summer.Photo: TCL
The phone’s main camera uses a 48-megapixel sensor with a small but important addition: optical image stabilization. It’s a feature that should help reduce blur in lower-light conditions, and it wasn’t offered on any of last year’s 10-series models.
The standard wide camera is accompanied by a 16-megapixel ultrawide, 5-megapixel macro, 2-megapixel depth-sensing chip, and 32-megapixel selfie camera. For biometric unlock, the 20 Pro includes an in-display fingerprint sensor. We’re pleased to report that the 3.5mm headphone jack remains, and a microSD card slot is available for expansion on the 256GB of built-in storage. The 20 Pro 5G goes on sale tomorrow in the UK, Italy, and Portugal for €549 (about $655).
TCL 20L Plus
TCL 20L Plus
The TCL 20L and 20L Plus are more budget-oriented devices. They both offer a 6.67-inch 1080p LCD, a 5,000mAh battery, and a Snapdragon 662 processor. The 20L offers 4GB of RAM in its base model, while the Plus model starts at 6GB.
The 20L Plus also features a 64-megapixel main camera, while the 20L includes a 48-megapixel main sensor; both devices include an 8-megapixel ultrawide, 2-megapixel macro, 2-megapixel depth sensor, and 16-megapixel selfie camera. Both phones also use circular polarization display technology, so that the screen is visible from any angle when viewing it with polarized sunglasses.
The 20L and 20L Plus go on sale tomorrow in the UK, Italy, and Portugal, starting at €229 and €269, respectively.
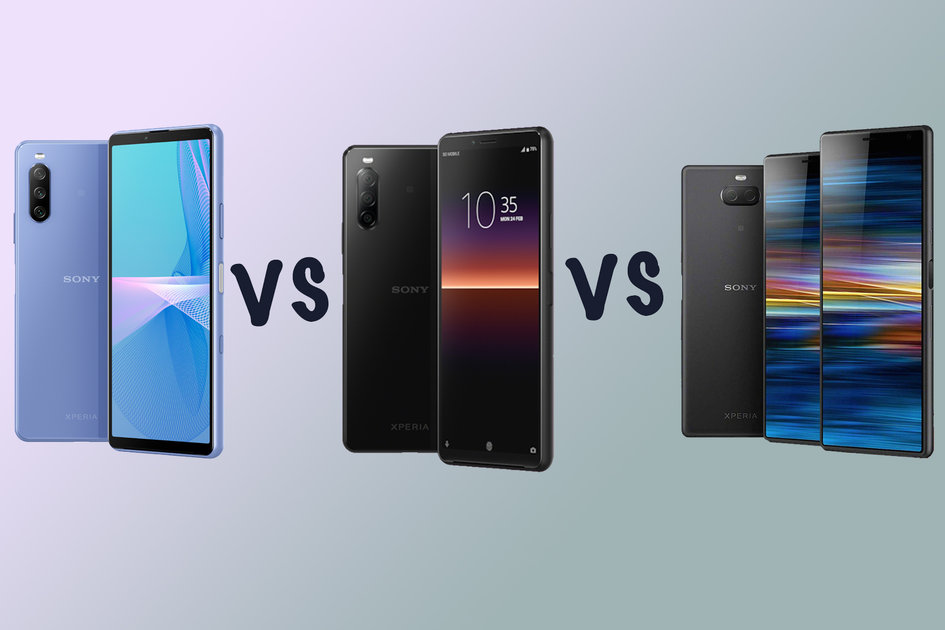
(Pocket-lint) – Sony Mobile refreshed its phone line up in 2021 with the Xperia 10 III, alongside the flagship Xperia 1 III and the Xperia 5 III during an online event on 14 April.
The Xperia 10 III succeeds the Xperia 10 II that arrived in 2020, continuing to offer just one device in the mid range Xperia portfolio rather than two. In 2019, the range began with the Xperia 10 and Xperia 10 Plus – both of which are included in this feature for reference.
So which Sony Xperia mid-range device is the best one for you? Here are the Xperia 10 III’s specifications up against the Xperia 10 II and Xperia 10 and 10 Plus to help you decide.
squirrel_widget_3686026
Design
Xperia 10 III: 154 x 68 x 8.3mm, 169g, IP65/68
Xperia 10 II: 157 x 69 x 8.2mm, 151g, IP65/68
Xperia 10: 156 x 68 x 8.4mm, 162g
Xperia 10 Plus: 167 x 73 x 8.3mm, 180g
The Sony Xperia 10 III, Xperia 10 II, the Xperia 10 and the Xperia 10 Plus all share similar design traits, but the Xperia 10 III and 10 II are more premium, offering a glass rear over the metal backs seen on the Xperia 10 and Xperia 10 Plus.
The camera housings on the rear of the Xperia 10 III and 10 II are also positioned in the top left, just like the Xperia 1 III, making for a better design finish than the horizontal housing on the Xperia 10 and Xperia 10 Plus. The Xperia 10 III is also slightly shorter, though heavier than the Xperia 10 II.
All four devices have rounded edges and a tall, slender look though and they all feature a 21:9 aspect ratio display. The Xperia 10 III and Xperia 10 II are both IP65/68 water and dust resistant however, like the flagship Xperia 1 III and Xperia 5 III, while the Xperia 10 and Xperia 10 Plus offer no water resistance.
Sony Xperia 1 III vs 5 III vs 10 III: What’s the difference?
Display
Xperia 10 III: 6-inch, OLED, Full HD+, 21:9, HDR
Xperia 10 II: 6-inch, OLED, Full HD+, 21:9
Xperia 10: 6-inch, LCD, Full HD+, 21:9
Xperia 10 Plus: 6.5-inch, LCD, Full HD+, 21:9
The Sony Xperia 10 II1 and Xperia 10 II come with a 6-inch display, matching the size of the Xperia 10. The Xperia 10 Plus has a slightly larger display at 6.5-inches, though all four models have the same Full HD+ resolution.
The Xperia 10 III and Xperia 10 II differ in terms of panel technology too though. Like the Xperia 1 III, the Xperia 10 III and 10 II have an OLED display for vibrant colours and deep blacks. The Xperia 10 and Xperia 10 Plus both have LCD displays. The Xperia 10 III also adds HDR support over its predecessors.
All four devices have a 21:9 aspect ratio display, as mentioned above, and all of them offer a 60Hz refresh rate. It’s worth noting that the Xperia 5 II, Xperia 5 III and the Xperia 1 III all have a 120Hz refresh rate.
As you would expect from a succeeding device, the Xperia 10 III improves on the internals of the Xperia 10 II, as well as – naturally – the Xperia 10 and Xperia 10 Plus too. The 2021 device runs on the Qualcomm Snapdragon 690G platform, supported by 6GB of RAM. That chipset means the Xperia 10 III is a 5G capable device, which is the first for the Xperia 10 range.
The Xperia 10 II runs on the older, but still capable, Qualcomm Snapdragon 665 processor, supported by 4GB of RAM as standard.
The Xperia 10 and Xperia 10 Plus both run on the Qualcomm Snapdragon 630 processor with 3GB of RAM as standard for the smaller model and 4GB of RAM as standard for the Plus model. Both come with 64GB of internal storage, while the Xperia 10 II and Xperia 10 III come with 128GB.
The Xperia 10 II, Xperia 10 and Xperia 10 Plus all support microSD for storage expansion but the Xperia 10 II will take cards up to 1TB, while the Xperia 10 and Xperia 10 Plus will only support cards up to 512GB. At the time of writing, it was not confirmed if the Xperia 10 III will also offer microSD support.
In terms of battery capacities, the Xperia 10 III wins here too. It offers a 4500mAh battery, compared to the Xperia 10 II’s 3600mAh battery, Xperia 10’s 2870mAh battery and Xperia 10 Plus’ 3000mAh battery. All models offer Sony technologies like Stamina Mode however and the Xperia 10 III also has Sony’s Battery care feature.
Camera
Xperia 10 III/10 II: Triple rear, 8MP front
Xperia 10: Dual rear, 8MP front
Xperia 10 Plus: Dual rear, 8MP front
The camera department is another area the Xperia 10 III and Xperia 10 II improve over their original predecessors, at least on paper. There’s a triple lens rear camera on the Xperia 10 III and Xperia 10 II, consisting of an 8-megapixel ultra wide-angle sensor, a 12-megapixel wide angle and an 8-megapixel telephoto sensor. There’s also a night mode.
The Xperia 10 meanwhile, has a dual camera consisting of a 12-megapixel sensor and an 8-megapixel sensor, while the Xperia 10 Plus has a 13-megapixel sensor and an 8-megapixel sensor on the back.
All four devices have an 8-megapixel front camera.
Sony Xperia 5 III vs Xperia 5 II: What’s the difference?
Price
Sony hasn’t announced the Xperia 10 III’s price as yet, though we don’t expect it to stray too far from the Sony Xperia 10 II, which costs £319 in the UK.
When they launched in 2019, the Xperia 10 started at £299, while the Xperia 10 Plus started at £349, but you’ll likely find them cheaper now.
squirrel_widget_147110
Conclusion
Sony simplified its mid-range Xperia in 2020, by only offering one device rather than the two offered in 2019 and that was a good thing. It continued this is in 2021, whilst also adding 5G support and some good upgrades.
The Xperia 10 III offers a more advanced processor, 5G capabilities, HDR support and a larger battery than the devices it succeeds. It also has a better camera capabilities (on paper at least) and a nicer design than the original Xperia 10 handsets.
The Xperia 10 III is the device to buy out of these four, assuming Sony doesn’t price it too high and you are happy to wait for it to hit shelves of course. That said, you might consider the Xperia 10 II if you can find it for a good price now, or 5G and HDR don’t bother you too much.
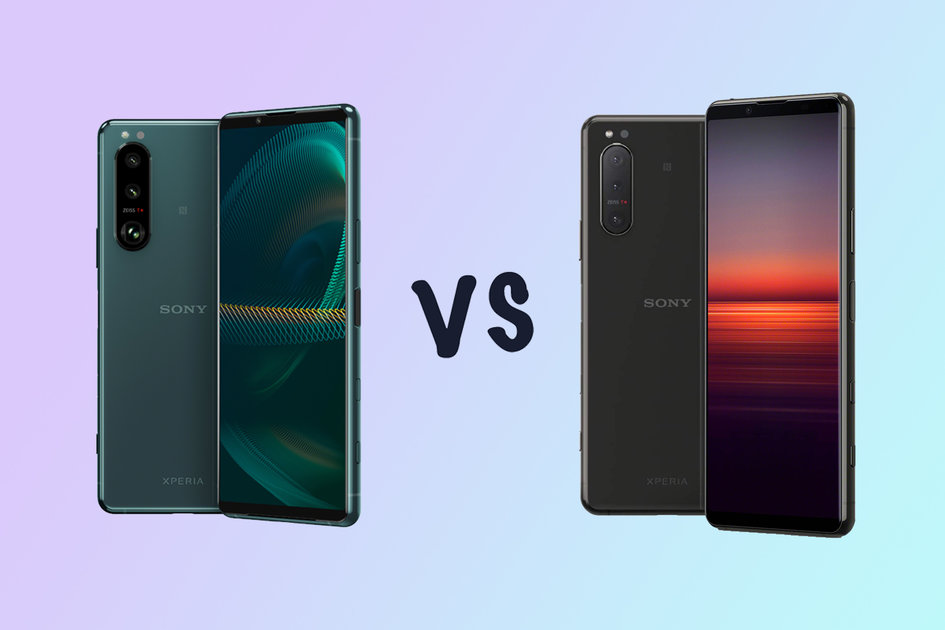
(Pocket-lint) – Sony announced the third generation of its compact Sony Xperia 5 smartphone during an online event on 14 April 2021, just six months after the Xperia 5 II came to market.
The Xperia 5 II was revealed alongside the Xperia 1 III and mid-range Xperia 10 III and you can read how it compares to those devices in our separate feature, but here we are looking at how the Xperia 5 III compares to its predecessor – the Xperia 5 II.
Sony Xperia 1 III vs Xperia 5 III vs Xperia 10 III: What’s the difference?
Design
Xperia 5 III: 157 x 68 x 8.2mm, 168g
Xperia 5 II: 158 x 68 x 8mm, 163g
The Sony Xperia 5 III and Xperia 5 II share a very similar design, both offering an OmniBalance body with a metal frame with curved edges and corners sandwiched between a glass front and rear panel.
The Xperia 5 III is slighter shorter and 0.2mm thicker than the Xperia 5 II, as well as 5g heavier, but otherwise, the two devices are almost identical in size and appearance.
They also both offer IP65/68 water and dust resistance, a physical fingerprint sensor built into their power buttons on their right edge and a 3.5mm headphone jack. They also have a Google Assistant button and dedicated camera button, as well as a pill-shaped rear camera housing.
The Xperia 5 III comes in Black, Green and Pink colour options, while the Xperia 5 II comes in Black and Blue options.
Display
Xperia 5 III: 6.1-inch, OLED, Full HD+, HDR, 120Hz
Xperia 5 II: 6.1-inch, OLED, Full HD+, HDR, 120Hz
The Sony Xperia 5 III and Xperia 5 II have the same 6.1-inch OLED 21:9 display, with both offering a Full HD+ resolution at 2520 x 1080 and both delivering the same 449ppi pixel density.
There’s HDR support on both the third and second generation models and they both also offer a 120Hz refresh rate with 240Hz touch sampling.
The two displays are also “powered by CineAlta”, which is designed to deliver the same colour reproduction on the screen as the Master Monitor used for films.
The Sony Xperia 5 III runs on the Qualcomm Snapdragon 888 chipset, supported by 8GB of RAM and a choice of 128GB or 256GB storage. We would expect it to offer microSD support but that wasn’t confirmed at time of writing.
The Sony Xperia 5 II runs the Qualcomm Snapdragon 865 chipset, also supported by 8GB of RAM, though there’s only 128GB as a storage option. MicroSD support is on board. Both the Xperia 5 III and Xperia 5 II are 5G devices.
There’s a bump in battery capacity for the third generation model, with the Xperia 5 III featuring a 4500mAh cell under the hood. It also offers support for 30W fast charging, wireless charging and reverse wireless charging. The Xperia 5 II meanwhile, has a 4000mAh battery with support for fast charging but not wireless, with a a graphene heat dissipation pad instead to keep the device cool.
Camera
Xperia 5 III: Triple rear camera, 8MP front
12MP ultra wide, 16mm, 1/1.7in, f/1.7
12MP wide, 24mm, 1/2.6in, f/2.2
12MP periscope, 70mm-105mm, 1/2.9in, f/2.3-f/2.8
Xperia 5 II: Triple rear camera, 8MP front
12MP ultra wide, 16mm
12MP wide, 24mm, 1/1.7in 1.8µm pixels, f/1.7
12MP telephoto, 70mm
The Sony Xperia 5 III features the same camera as the Xperia 1 III, but without the additional ToF sensor. That means it offers a triple 12-megapixel rear camera, featuring ultra wide, wide and periscope lenses. The periscope lens offers two different telephoto lengths from the single lens, with the ability to switch between 70mm and 105mm and an aim of delivering better results.
The Xperia 5 II meanwhile, also has a triple 12-megapixel rear camera, though its third lens is a standard telephoto lens with 70m focal length. It has some interesting features on board though, like 20fps burst shooting, real-time eye autofocus for people and animals and the ability to capture 120fps 4K HDR slow motion. The Xperia 5 III offers all these too though, plus a few extras.
Price
SQUIRREL_167498
Sony hasn’t revealed the price of the Xperia 5 III as yet, with the device not expected to hit shelves until early summer.
The Xperia 5 II costs £799 in the UK and €899 in Europe. We would expect the Xperia 5 II to fall into a similar ballpark, though nothing is confirmed as yet.
Conclusion
The Sony Xperia 5 III makes a couple of adjustments to the second generation model, with a processor upgrade, a camera upgrade, a battery increase and a storage increase. It also adds wireless charging and support for faster wired charging.
For those with the Xperia 5 II, it’s probably not worth the upgrade to the third generation model unless you are really keen on some of those additions given the Xperia 5 II isn’t even a year old yet.
For those choosing between the Xperia 5 III and Xperia 5 II, the third generation model is the model to go for on paper, unless you can find the Xperia 5 II at a good price when the Xperia 5 III hits the shelves.
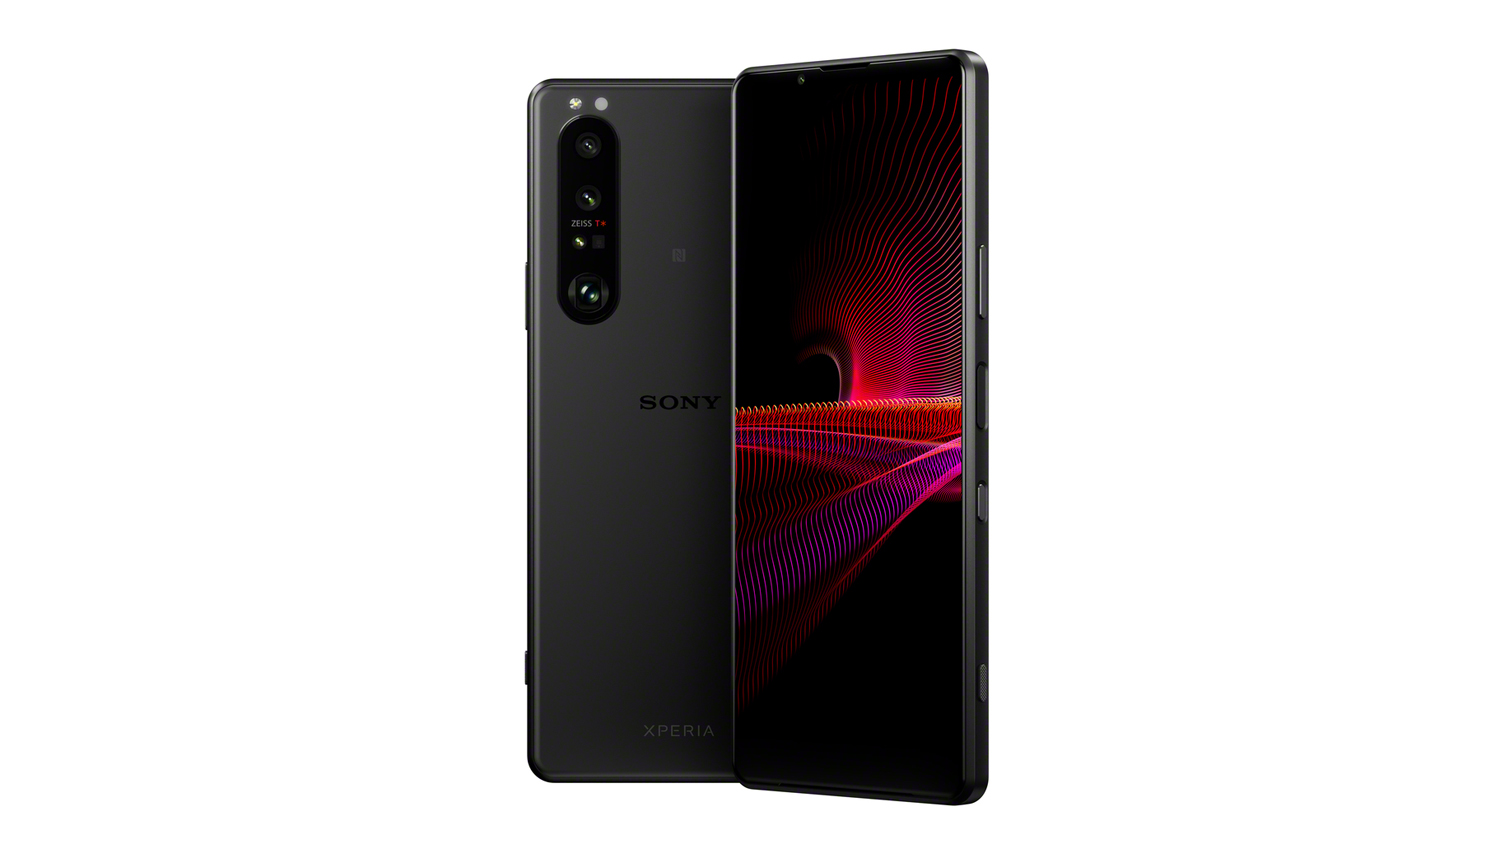
Sony has launched a full refresh of its Xperia phone range, headed up by the Xperia 1 III (the successor to our favourite phone of 2020) and the Xperia 5 III (the follow-up to the five-star Xperia 5 II).
The new third-generation Xperia handsets are virtually identical with almost matching features and specs, but the main difference lies in their screens. The Xperia 1 III sports a 6.5in 4K OLED display – designed for those who like a big screen device – while the 6.1in Full HD+ Xperia 5 III is a little more hand and pocket friendly.
The big draw for both gamers and film fans on-the-go will doubtless be the flagship Xperia 1 III, which according to Sony has the world’s first 120Hz 4K OLED screen. It has a 21:9 aspect ratio for full width cinema and gameplay, and that refresh rate can be set to 60Hz if you want to save on battery life. Plus, there’s even space to throw in extra frames for Sony’s 240Hz motion processing tech which should smooth out any blur.
The OLED on each of these phones is individually factory calibrated with what Sony says is a highly accurate white point to mirror the colour reproduction of the company’s film industry monitors. They also benefit from a mobile version of Sony’s X1 Bravia TV engine for HDR processing.
Sony has continued its commitment to quality sound not only with its support of a 3.5mm headphones socket but also its offering of hi-res audio over wired or wireless headphones. They feature newly optimised audio circuitry aimed at improving loudness by 40 per cent while reducing distortion. Most interesting of all, though, is that it can up-mix your local and streamed two-channel music tracks into 360 Spatial Sound in real-time. That should offer some very interesting insight into Sony’s emerging immerse format.
(Image credit: Sony)
Both handsets are Dolby Atmos-enabled and have front-facing stereo speakers that Sony promises will have enriched bass and a build to reduce vibration. You’ll also be able to appreciate your tracks in 360 Spatial Sound through the speaker as well as headphones.
They are powered by Qualcomm’s Snapdragon 888 chip and boast a 4500mAh battery that Sony says will remain in top health for a minimum of three years. They come with 12GB RAM and the option of either 128GB or 256GB of storage space.
Naturally, the Xperia III family is replete with the kind of Zeiss photography smarts to make most compact cameras blush. Both the Xperia 1 III and Xperia 5 III come with a 12MP triple lens camera that can handle four focal lengths (16, 24, 70 and 105mm) thanks to what Sony says is the world’s first dual-position telephoto sensor. The company has made advances with its AF tracking, its AI detailing for digital zoom and has added burst shooting of 20fps with autofocus and auto exposure.
Once again there is no support for 8K video shooting, but the phones can capture 4K video at up to 60fps as well as at 120fps for slow motion. There’s also the option of plugging your Xperia into a Sony Alpha camera to use the mobile as a large viewfinder monitor for stills and video.
The Sony Xperia 1 III will come in a choice of Frosted Grey, Frosted Black or Frosted Purple. Included in the box is a new 30W charger which offers a 50 per cent charge for 30 minutes of wall time. The colours for the Xperia 5 III are black, green and pink.
While pricing isn’t currently available, we do know that both phones will launch at the same time in early summer this year along with Sony’s mid-price phone, the Xperia 10 III. It’s a 5G handset, like the others, and it still gets the 4500mAh battery – a considerable improvement on the 3600mAh unit from the previous model.
(Image credit: Sony)
It has a 6in, 21:9, HDR OLED display, coated in Gorilla Glass, and at 154 x 68 x 8.3mm is marginally smaller than the Xperia 10 II. There’s no 360 Spatial Sound but there’s plenty of decent audio specs with support for hi-res audio (wired and wireless), LDAC and a 3.5mm socket.
Under the hood is a slightly lowered powered set-up of the Snapdragon 690 processor, 6GB RAM and 128GB of storage space. It has an 8MP front-facing camera, an 8MP 16mm ultra-wide lens, a 12MP 27mm wide and an 8MP 54mm lens for portraits.
All of the Xperia phones will ship with Android 11.
MORE:
Take a look at our choice of the best Android phones 2021
And how about a pair of the very best headphones to go with them?
The 2022 iPhone lineup will feature substantial changes to the camera system, according to analyst Ming-chi Kuo in an investor note reported on by MacRumors and AppleInsider. Kuo says the high-end iPhones — presumably the Pro range — will use a larger 48-megapixel sensor for the primary camera. Separately, the analyst suggests that 2023 iPhones may start to use Face ID sensors under the screen as a way to get rid of the notch.
48-megapixel sensors have been common in Android phones for years, but this component will reportedly be larger than most. It’ll be a 1/1.3-inch sensor with a pixel size of 1.25µm, according to Kuo. That’s smaller than the 1.7µm pixels in the iPhone 12 Pro Max, but Kuo says that the equivalent pixel size will be more like 2.5µm when the sensor is used for 12-megapixel images. Kuo also expects the higher-resolution sensor to enable 8K video capture.
The 2022 iPhone lineup is going to see a reduction in screen size options, Kuo says; there won’t be a 5.4-inch mini any more, and Apple will stick to the 6.1-inch and 6.7-inch displays on other models. The mini has reportedly not sold to Apple’s expectations, with the company said to have overestimated demand and cut production orders. The 2021 lineup, however, is expected to keep the same screen sizes.
Finally, Kuo says that the iPhone will begin to use an under-display Face ID system in 2023. Kuo has previously claimed that Apple will replace the Face ID notch with a hole-punch camera in some models from next year, and that 2023 will also see under-display fingerprint scanners come to the iPhone. It’s not clear exactly which technologies will make it out when, or in which combination.
Sony is announcing two new phones today, the Xperia 1 III and the Xperia 5 III. Both are the latest in Sony’s campaign to redefine the Xperia brand as a kind of sibling to its well-regarded Alpha digital cameras. As such, the camera system is once again the main focus, and Sony specifically is touting the “world’s first smartphone with a variable telephoto lens paired with a Dual PD sensor” and improvements to its already fast and accurate autofocus system.
Pricing was not announced, but they should both be available in the US “this summer.”
Each phone has the basic specs you’d expect on a top-flight Android phone: three cameras on the rear, a Snapdragon 888 processor, and support for 5G. Actually, the 5G support is worth noting because these Xperia phones will be able to work on 5G networks in the US, something weirdly lacking on the last models. However, they’ll only work on the regular sub-6 networks on Verizon and T-Mobile, without support for AT&T’s 5G network. As is fairly usual for Sony, these will be sold directly rather than via carriers.
The phone also keep the Xperia design language Sony landed on with the original Xperia 1. They’re tall and narrow, with lots of glossy black and small curves on all the angles, giving them the most monolithic look of a smartphone today. I think they look great, but I’m also aware that they’re likely to cost a lot of money when Sony gets around to announcing the price.
In order to establish the Xperia brand, Sony has also been pushing a lot of other nice specs that are relatively hard to come by on other Android phones. The Xperia 1 III has a 4K OLED screen that now supports a fast (though locked) 120Hz refresh rate. There are dual speakers that are 40 percent louder and will work with Sony’s 360 Reality Audio format.
Sony is also enabling a special mode for the USB-C port that allows you to use a special cable to take an HD-resolution video signal from an SLR camera so you can use it as a monitor – much like the Xperia Pro can do with HDMI. That could also make them an interesting option for live streaming.
They’ll come in both dual-SIM and SIM+microSD variants. And there’s even a good ol’ headphone jack and a shutter button.
The Sony Xperia 1 III
Sony Xperia 1 III
Sony Xperia 1 III
Sony Xperia 1 III
Sony Xperia 1 III
Sony Xperia 1 III
Sony Xperia 1 III
Sony Xperia 1 III
Sony Xperia 1 III
Sony Xperia 1 III
Sony Xperia 1 III
Sony Xperia 1 III
Sony Xperia 1 III
Sony Xperia 1 III
There’s also the more standard fare, like wireless charging and a 4,500mAh battery. When plugged in and gaming the phones can redirect power away from the battery to reduce heat. Both phones will ship with Android 11, but as of right now there’s no clear commitment to future software updates.
If you step down from the Xperia 1 III to the Xperia 5 III, you’ll get a very similar set of specs with a few exceptions. It’ll be smaller, of course. The larger phone has a 6.5-inch 21:9 display while the 5 has a 6.1-inch 21:9 display — at 1080p resolution instead of 4K. But it still has support for the periscope-style variable lens.
But again, the big push is on the cameras and here Sony has done quite a bit to improve the hardware. Sony is using three 12-megapixel sensors on the back, and both the main and telephoto lenses support OIS. (The Xperia 1 III also gets a time-of-flight sensor.)
Sony says it has lenses that are the equivalent to 16mm (f/2.2 ultrawide), 24mm (f/1.7 wide), and 70mm (f/2.3 telephoto), but that the telephoto can also reach to an f/2.8 105mm equivalent. That extra telephoto zoom comes thanks to a folded periscope lens design, and the Xperia is physically moving the lens elements to get different focal lengths.
The idea is that photographers will mostly stick to those focal lengths, but should they want to zoom further or use a zoom level in between the Xperia phones will utilize digital zoom.
Sony Xperia 5 III
Sony Xperia 5 III
Sony Xperia 5 III
Sony Xperia 5 III
Sony Xperia 5 III
Sony Xperia 5 III
Beyond the fancy hardware, Sony has iterated on its software. Unlike Google, Apple, and even Samsung, Sony is putting its emphasis on technical features rather than computational photography. It is claiming some improved low-light performance in some situations, but really the main emphasis is on features like autofocus and shooting speed.
These phones can take photos at up to 20fps with focus/exposure readings happening at 60fps. They also support 120FPS 4K in HDR. There’s still eye-tracking autofocus, but this year there’s real-time tracking for that autofocus. In a demo, Sony showed a subject turning around and when their eye was visible again, the camera adjusted.
Sony is finally integrating its pro camera app with the main camera app. There’s the “basic” mode like any smartphone, but it’s now quicker to get to the pro mode. Sony’s pro mode really is angled towards people who use Sony’s cameras, too: the interface is very similar.
On paper, all of this sounds really great. We’ll need to review them to see if these specs can translate to great experiences. Previous Sony Xperia phones have also had great camera hardware specs, but for taking quick shots they have often missed the mark. Treating a smartphone camera as a pro SLR-style camera could limit their appeal.
Sony’s tack with the Xperia line is to pack them to the gills with specs and features that will appeal to photographers and even videographers (there’s an excellent workflow-based video app included). In reality, however, Sony has struggled mightily to gain any measurable marketshare in the US. A lot of that has come down to higher prices than is the norm for even flagship Android phones, but some of it also comes down to availability. Without carrier partnerships or massive marketing budgets, these Xperia phones are more likely to appeal to camera enthusiasts than mainstream Android buyers.
Last month Nikon announced the development of its highest-end mirrorless camera to date, and now Canon has responded with the announcement of the EOS R3, which ought to fit in a similar bracket. The R3 is still in development and details are thin, but it’s clear that it’ll be positioned above the EOS R5, which is currently Canon’s flagship mirrorless camera.
Like Nikon’s upcoming Z9, the EOS R3 looks to be a hefty camera with a built-in vertical grip for shooting in portrait and landscape orientations. The body design and control layout is broadly similar to the EOS-1D X Mark III, Canon’s highest-end pro DSLR, and the body features dust and water resistance.
Canon says the EOS R3 will be the first camera to use a new 35mm full-frame stacked CMOS sensor with backside illumination, and its image processor and electronic shutter will allow for 30fps shooting with AF and AE tracking. Canon is touting the EOS R3’s autofocus capabilities, too. It’s the first digital camera from the company with eye-control AF, and a deep-learning algorithm has been used to improve recognition of human subjects from the torso up, which is said to help its performance in challenging situations like sports photography.
That’s about it for details from Canon; the company hasn’t given any detailed specs, let alone a price or a release date. But together with Nikon’s Z9 and Sony’s new A1, the pro mirrorless camera wars are heating up — and the EOS R3’s name implies Canon may have something even higher-end in the pipeline.
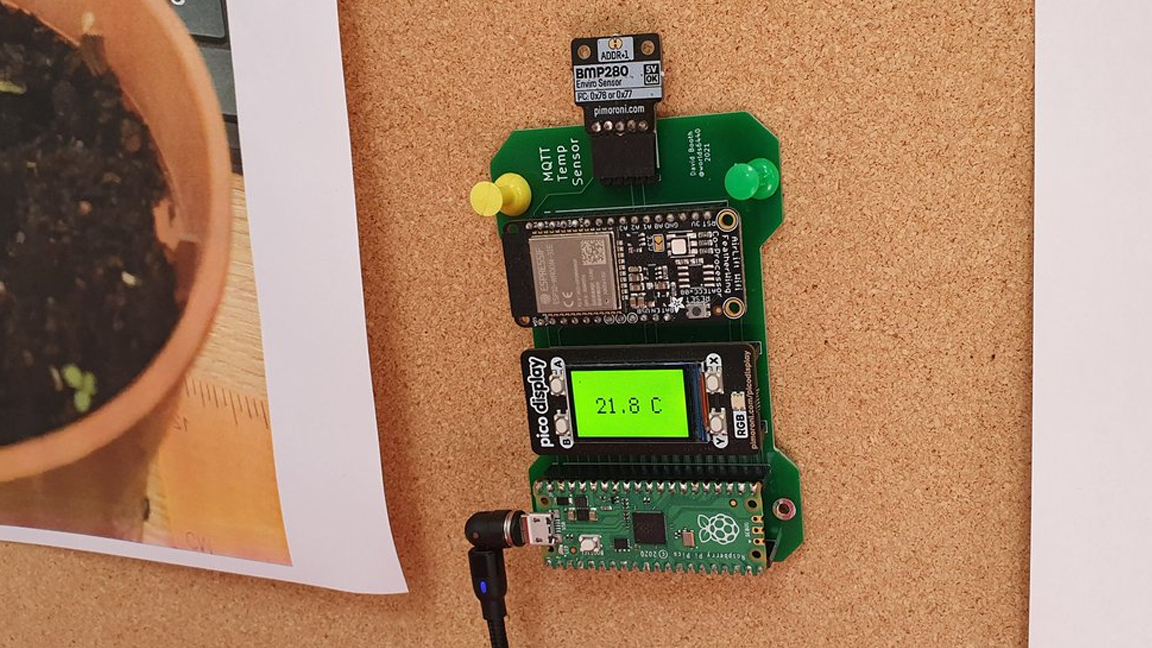
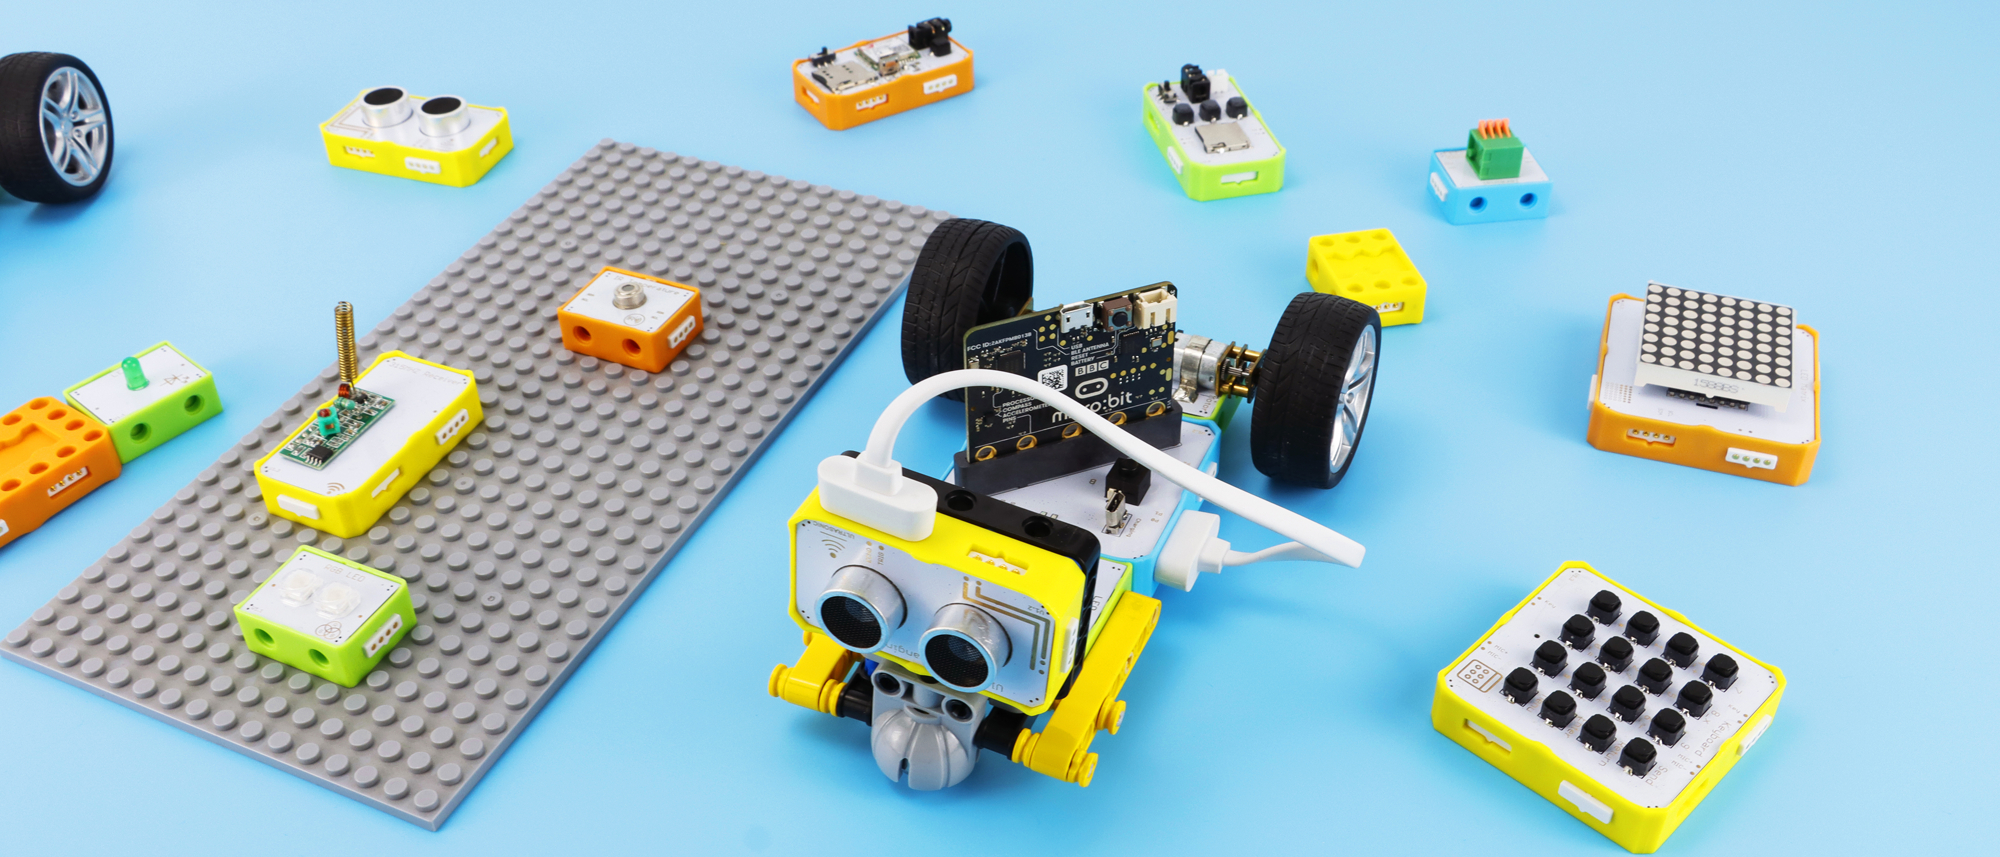
The Raspberry Pi has been a staple in DIY home automation for years, but the Raspberry Pi Pico is quickly catching up. This stylish Pico PCB comes to us from a maker named David Booth who designed it to handle input from a temperature sensor.
The module is capable of connecting to a network thanks to an Airlift WiFi Featherwing board. It’s MQTT-enabled, which makes it possible to access and utilize the temperature data in real-time. The best Raspberry Pi projects have a little visual flair and Boothe’s project sports a Pimoroni display with the current temperature information.
Image 1 of 2
(Image credit: David Boothe)
Image 2 of 2
(Image credit: David Boothe)
According to Boothe, it was designed using the open-source application KiCad and intentionally has no ground plane because of WiFi signal issues. Once he was satisfied with the design, the schematics were sent over to JLCPCB to fabricate a few boards.
The project was designed with home automation in mind and is intended to be a part of Boothe’s home automation hub. If you’d like to get a closer look at this board design, check out the original thread on Twitter.
Mobvoi is starting to sell the TicWatch GTH today, a $79.99 fitness wearable that features sensors for skin temperature and blood oxygen that are typically reserved for more expensive watches. Mobvoi has generally focused on Wear OS devices in the past, providing a variety of options for Google’s troubled wearable operating system, but the TicWatch GTH seems more like a Fitbit competitor than anything else.
The TicWatch GTH has an Apple Watch-esque square body, a noticeably bezeled 1.55-inch screen, and only comes in “raven black.” Mobvoi claims the GTH’s 260mAh battery can last more than a week on one charge, “depending on usage,” and that the watch is also water-resistant up to 5ATM or 50 meters. Despite that, Mobvoi’s website notes that the GTH is not safe for shower use.
The TicWatch GTH has several sensors that appear on more expensive watches, like an SpO2 sensors and an electrodermal activity sensor.Image: Mobvoi
For sensors, the GTH has the usual fitness tracker standbys like an accelerometer, gyroscope, and a heart rate monitor, but also a SpO2 sensor for measuring blood oxygen level and a skin temperature sensor for… well, measuring your skin temperature. Actual uses for skin temperature data vary, however. The Fitbit Sense advertised skin temperature sensing as an indicator for stress. In its announcement for the GTH, Mobvoi didn’t specify what skin temperature should be used for. But as a rule, we urge caution for any big claims a new sensor might come attached with.
That rule also applies to measuring blood oxygen saturation. There’s been a trend of including blood oxygen sensors in smartwatches, but the wrist is not actually the best place to measure saturation, and these smartwatches shouldn’t be thought of as medical devices. Knowing your blood oxygen level mostly seems useful for serious athletic training and not much else.
But even if they might not necessarily be useful, the fact that the TicWatch includes both SpO2 and skin temperature sensors for only $79.99 is notable. The GTH undercuts the Apple Watch Series 6 at $399, the Fitbit Sense at $299.95, and even the Fitbit Charge 4 at $169.95, while tracking a lot of the same things. The TicWatch GTH is stuck in Mobvoi’s Tic-based app world, but the company does offer a variety of features like stress management, sleep tracking, automatic workout detection, audio playback controls, and basic messaging notifications if you’re willing to invest in a potentially unfamiliar system.
The TicWatch GTH is not particularly flashy, but its price might be enticing if you’re looking for an even more affordable entry into tracking than Fitbit’s entry-level watches. The TicWatch GTH is available today for $79.99 / €79.99 / £69.99 from Mobvoi’s site or Amazon.
Samsung and South Korean carrier SK Telecom have announced the Galaxy Quantum 2, Samsung’s second phone that features built-in quantum cryptography technology for increased security. It’s the follow-up to last year’s Galaxy A Quantum.
The Quantum 2 includes a chip developed by a company called ID Quantique, which says it’s the world’s smallest quantum random number generator (QRNG) at 2.5mm square. It works by capturing random noise with an LED and a CMOS image sensor. According to SK Telecom, the QRNG chip “allows smartphone holders to use services that require security in a more safe and secure manner by generating unpredictable and patternless true random numbers.”
Quantum cryptography RNG is considered to be extremely challenging to hack without extensive physical access to a given device. The benefits will seem pretty niche to the average customer, but the QRNG chip does automatically work with apps that use the Android Keystore APIs, which should make the technology more accessible for developers. SK Telecom is touting local compatibility with the likes of Shinhan Bank and Standard Chartered Bank Korea, plus its own services like T World. The carrier says it’ll work with more services in the future, including Samsung’s own credit cards.
The phone itself has reasonably high specs, close to what you’d have found in a high-end flagship phone from a year or two ago. It has a Qualcomm Snapdragon 855 Plus processor, a 64-megapixel camera, and a 6.7-inch 120Hz OLED display.
The Galaxy Quantum 2 is only confirmed for a release in South Korea right now. It’ll go on sale on April 23rd.
Featuring a 2MP camera, a Pico and all the trimmings, this kit adds workable person and object detection to your Raspberry Pi Pico.
For
+ Simple instructions
+ Quick results
+ Compatible with many boards
Against
– Needs C/C++ knowledge
– Lens is unprotected
When we think of machine learning and artificial intelligence we instantly think of large data centers with massive computational power. But the Raspberry Pi Pico is capable of machine learning via TinyML, developed for microcontrollers. With the $40Uctronics TinyML Learning Kit, we can easily add computer vision to our projects.
Compatible with many different microcontrollers, such as those from Arduino, the Uctronics TinyML Learning Kitincludes an Arducam Mini 2MP Plus Camera which has been used for some time with other microcontrollers, but with the power of the Raspberry Pi Pico we see much better performance for machine learning, an almost 10x increase compared to an Arduino.
We put the Uctronics TinyML Learning Kit on the bench and learned more about what this kit can offer.
Design and Use of the Uctronics TinyML Learning Kit
(Image credit: Tom’s Hardware)
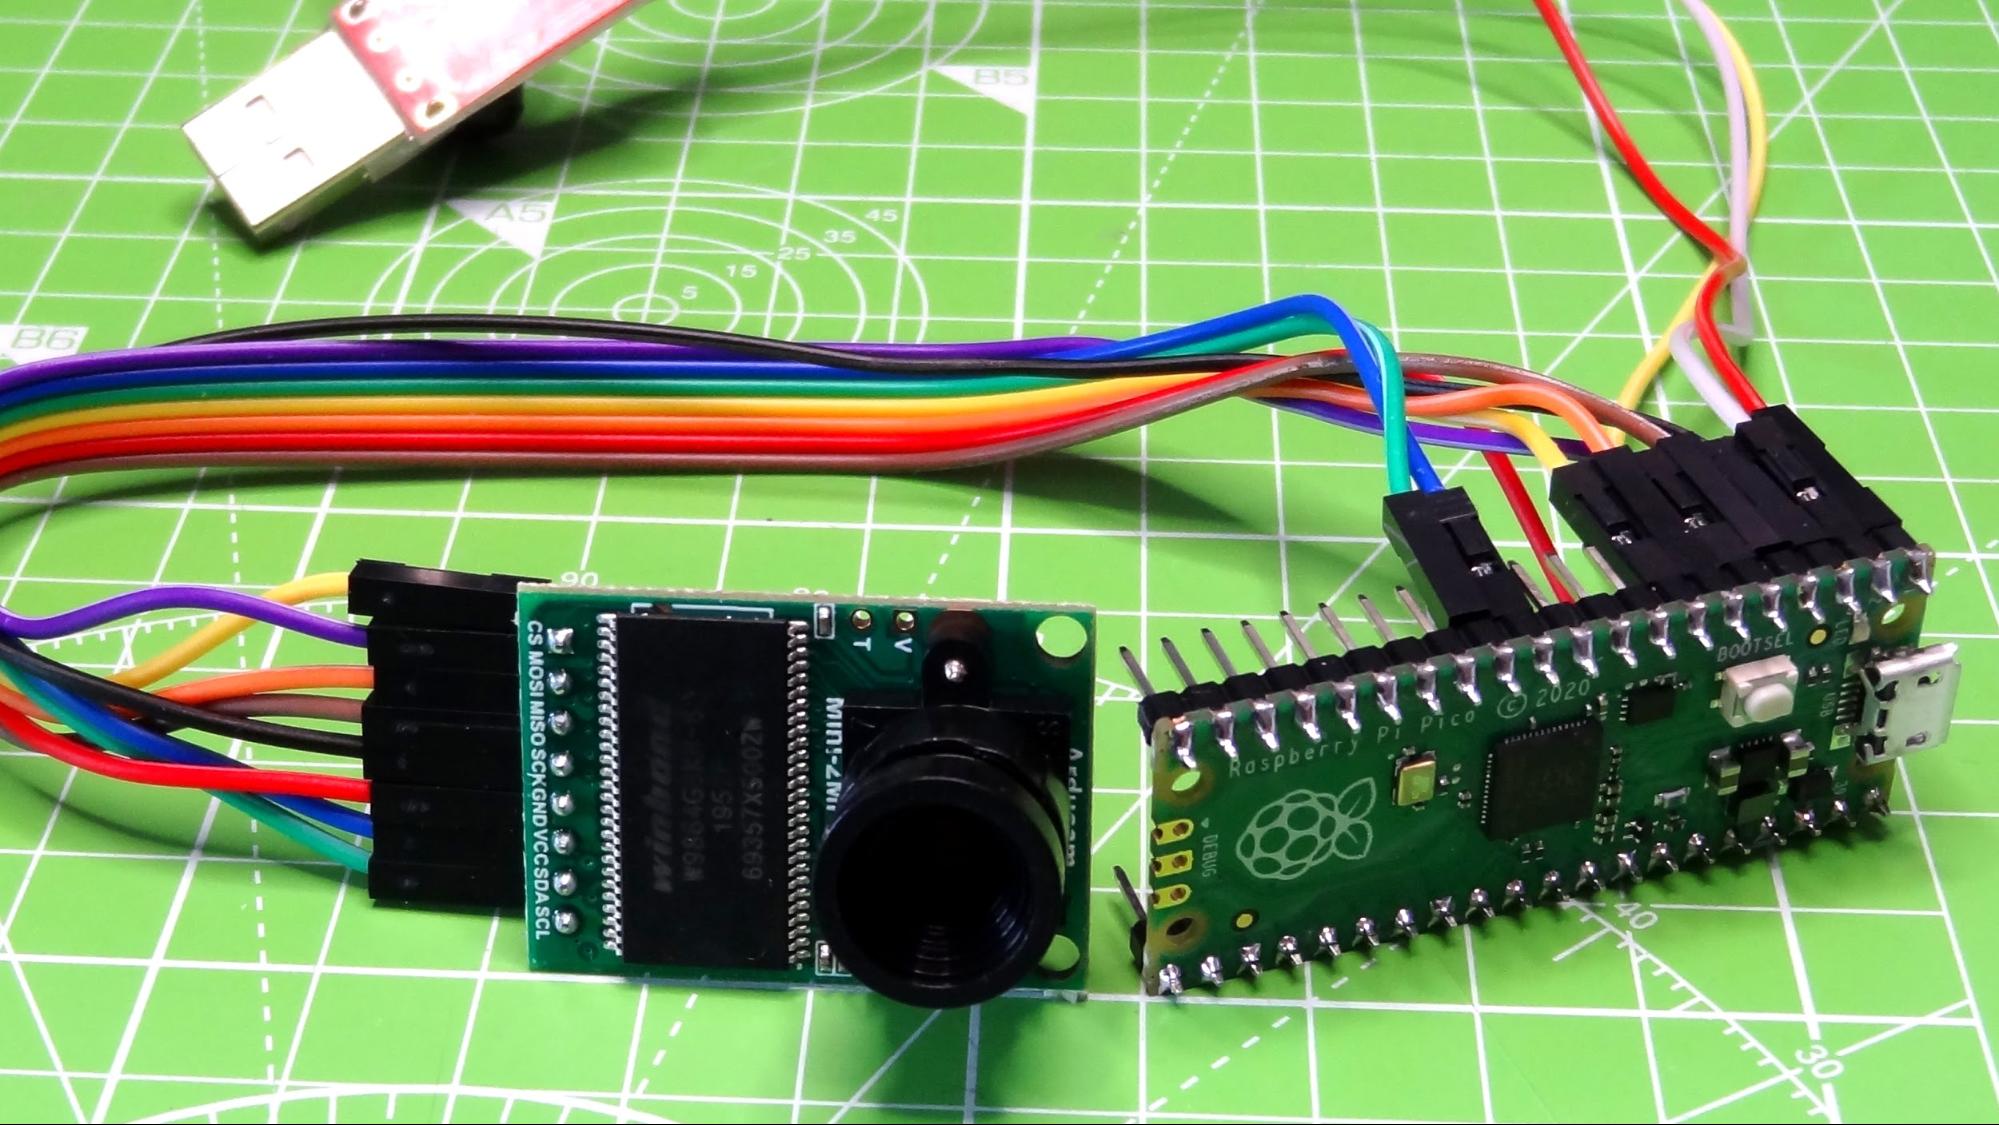
Measuring just 0.78 x 1.34 inches (20 x 34.1 mm) the focus of the kit is the Arducam 2MP Plus, a camera which is based on the OV2640, a 2MP camera which can be used with microcontrollers and computers via a SPI (data stream and commands) and I2C (sensor configuration) protocols.
This camera is not limited to just being used on the included Raspberry Pi Pico; it can also be used with Arduino and ESP32 based boards. A 2MP resolution may not sound like much, but for computer vision and machine learning it is plenty when we consider that our image will only be 320 x 320 pixels. The camera lens is contained in an M12 mount and the lens is interchangeable with other M12 lenses, available separately.
Connecting the camera to the Raspberry Pi Pico, or other RP2040 is a piece of cake thanks to the included jumper wires. The online resources clearly show the GPIO pins that we should use to connect the camera to the Pico and show the GPIO pins for the included CP2102 USB to TTL adaptor which is used to send video data from the Pico to an application, which in our review was a person detection script running Processing, a programming interface similar to the Arduino IDE but geared towards the visual arts.
After flashing a pre-made UF2 project, written in C/C++ to our Raspberry Pi Pico, we then installed the Processing IDE and the corresponding code to receive the image data and display on our desktop. If you are a MicroPython fan, then right now there are no MicroPython libraries for TensorFLow Lite for the Raspberry Pi Pico, but Arducam is working on supporting this. The Arducam Mini 2MP Plus Camera can also be used to take simple images and it has a community supported MicroPython library to simplify the process.
Image 1 of 2
(Image credit: Tom’s Hardware)
Image 2 of 2
(Image credit: Tom’s Hardware)
A camera connected to a Raspberry Pi Pico is cool, but machine learning is much cooler. Tiny Machine Learning (TinyML), is a version of TensorFlow developed for use on microcontrollers that almost always have less computational power than a full computer. Microcontrollers such as those from Arduino, Espressif (ESP32) and now Raspberry Pi are capable of being trained to identify objects, patterns or respond to external inputs from microphones, sensors etc.
Arducam claims that using the OV2640 camera with the Raspberry Pi Pico we can process at 1 FPS, which may not sound like much but the equivalent project running on an Arduino is 1 frame every 18 seconds. So the Pico is clearly the better board for TinyML on a budget. Arducam provides a Github repository containing a series of TinyML demos available as raw C code for customization and compilation on your machine. Should you wish to jump straight into using the demos, there are pre-compiled versions saved as UF2 files ready for use on the Pico.
What Projects Can We Use The Uctronics TinyML Learning KitFor?
(Image credit: Tom’s Hardware)
The Uctronics TinyML Learning Kit is designed for TinyML and so it is geared towards projects that require just enough processing power to add computer vision and artificial intelligence to a project. Using the camera as an input, we can give a robot “sight” and, using different models, we can train the robot to search for objects or persons.
Want to watch for intruders in a room and send alerts to your devices via the Internet? Well the Arducam camera and our guide to getting your Raspberry Pi Pico online will enable just this.
Bottom Line
The Uctronics TinyML Learning Kit is great fun, but to get the best from it, you really need to know your C/C++, until the MicroPython library is ready for release that is. If you are already familiar with machine learning then chances are that this is no stumbling block for you.
The Arducam Mini 2MP Plus Camera is incredibly easy to assemble, with clear instructions and a well documented GitHub repository and with a little time even a novice programmer could get great results.
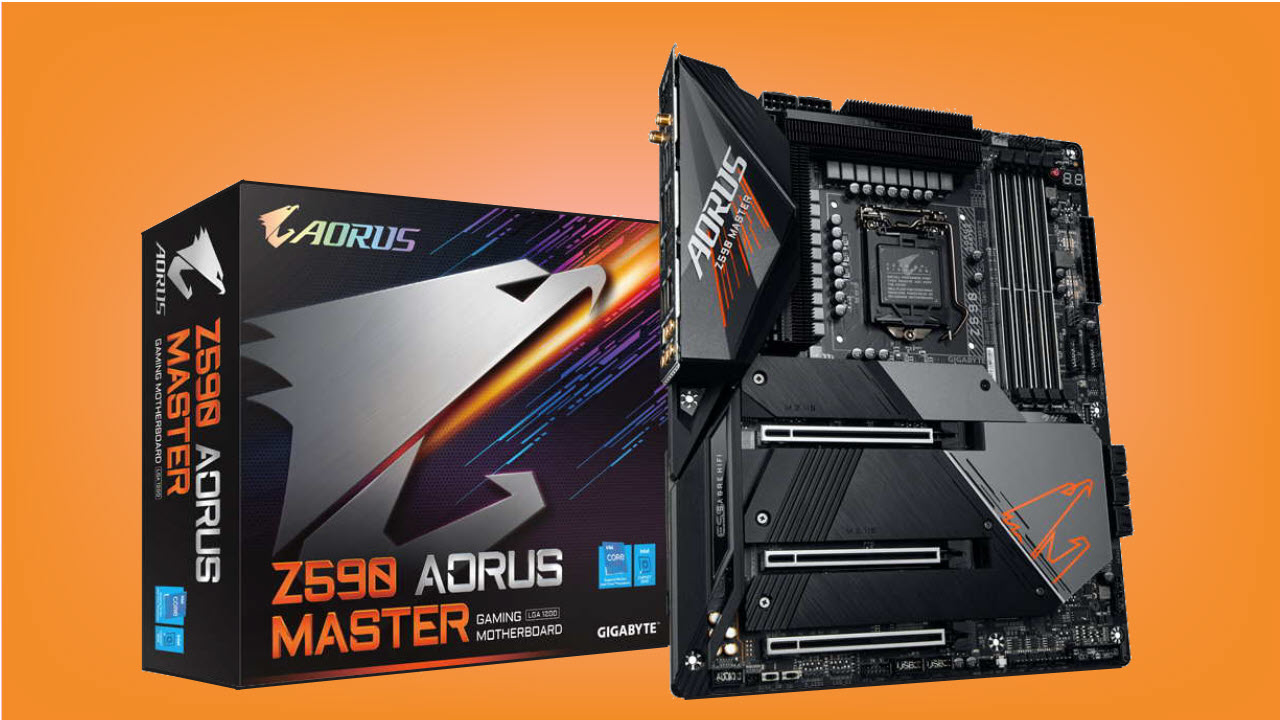
Gigabyte’s Aorus Z590 Master is a well-rounded upper mid-range motherboard with a VRM rivaled by boards that cost twice as much. Between the Wi-Fi 6E and 10 GbE, three M.2 sockets and six SATA ports for storage, plus its premium appearance, the Z590 Master is an excellent option to get into the Z590 platform if you’re willing to spend around $400.
For
+ Fast Networking, Wi-Fi 6E/10 GbE
+ Superior 18-phase 90A VRM
+ 10 USB ports
Against
– No PCIe x1 slot(s)
– Audible VRM fan
– Price
Features and Specifications
Editor’s Note: A version of this article appeared as a preview before we had a Rocket Lake CPU to test with Z590 motherboards. Now that we do (and Intel’s performance embargo has passed), we have completed testing (presented on page 3) with a Core i9-11900K and have added a score and other elements (as well as removing some now-redundant sentences and paragraphs) to make this a full review.
Gigabyte’s Z590 Aorus Master includes an incredibly robust VRM, ultra-fast Wi-Fi and wired networking, premium audio, and more. While its price of roughly $410 is substantial, it’s reasonable for the features you get, and far from the price of the most premium models in recent generations. If you don’t mind a bit of audible VRM fan noise and like lots of USB and fast wired and wireless networking, it’s well worth considering.
Gigabyte’s current Z590 product stack consists of 13 models. There are familiar SKUs and a couple of new ones. Starting with the Aorus line, we have the Aorus Xtreme (and potentially a Waterforce version), Aorus Master, Aorus Ultra, and the Aorus Elite. Gigabyte brings back the Vision boards (for creators) and their familiar white shrouds. The Z590 Gaming X and a couple of boards from the budget Ultra Durable (UD) series are also listed. New for Z590 is the Pro AX board, which looks to slot somewhere in the mid-range. Gigabyte will also release the Z590 Aorus Tachyon, an overbuilt motherboard designed for extreme overclocking.
On the performance front, the Gigabyte Z590 Aorus Master did well overall, performing among the other boards with raised power limits. There wasn’t a test where it did particularly poorly, but the MS Office and PCMark tests on average were slightly higher than most. Overall, there is nothing to worry about when it comes to stock performance on this board. Overclocking proceeded without issue as well, reaching our 5.1 GHz overclock along with the memory sitting at DDR4 4000.
The Z590 Aorus Master looks the part of a premium motherboard, with brushed aluminum shrouds covering the PCIe/M.2/chipset area. The VRM heatsink and its NanoCarbon Fin-Array II provide a nice contrast against the smooth finish on the board’s bottom. Along with Wi-Fi 6E integration, it also includes an Aquantia based 10GbE, while most others use 2.5 GbE. The Aorus Master includes a premium Realtek ALC1220 audio solution with an integrated DAC, three M.2 sockets, reinforced PCIe and memory slots and 10 total USB ports, including a rear USB 3.2 Gen2x2 Type-C port. We’ll cover those features and much more in detail below. But first, here are full the specs from Gigabyte.
Specifications – Gigabyte Z590 Aorus Master
Socket
LGA 1200
Chipset
Z590
Form Factor
ATX
Voltage Regulator
19 Phase (18+1, 90A MOSFETs)
Video Ports
(1) DisplayPort v1.2
USB Ports
(1) USB 3.2 Gen 2×2, Type-C (20 Gbps)
(5) USB 3.2 Gen 2, Type-A (10 Gbps)
(4) USB 3.2 Gen 1, Type-A (5 Gbps)
Network Jacks
(1) 10 GbE
Audio Jacks
(5) Analog + SPDIF
Legacy Ports/Jacks
✗
Other Ports/Jack
✗
PCIe x16
(2) v4.0 x16, (x16/x0 or x8/x8
(1) v3.0 x4
PCIe x8
✗
PCIe x4
✗
PCIe x1
✗
CrossFire/SLI
AMD Quad GPU Crossfire and 2-Way Crossfire
DIMM slots
(4) DDR4 5000+, 128GB Capacity
M.2 slots
(1) PCIe 4.0 x4 / PCIe (up to 110mm)
(1) PCIe 3.0 x4 / PCIe + SATA (up to 110mm)
(1) PCIe 3.0 x4 / PCIe + SATA (up to 110mm)
U.2 Ports
✗
SATA Ports
(6) SATA3 6 Gbps (RAID 0, 1, 5 and 10)
USB Headers
(1) USB v3.2 Gen 2 (Front Panel Type-C)
(2) USB v3.2 Gen 1
(2) USB v2.0
Fan/Pump Headers
(10) 4-Pin
RGB Headers
(2) aRGB (3-pin)
(2) RGB (4-pin)
Legacy Interfaces
✗
Other Interfaces
FP-Audio, TPM
Diagnostics Panel
Yes, 2-character debug LED, and 4-LED ‘Status LED’ display
As we open up the retail packaging, along with the board, we’re greeted by a slew of included accessories. The Aorus Master contains the basics (guides, driver CD, SATA cables, etc.) and a few other things that make this board complete. Below is a full list of all included accessories.
Installation Guide
User’s Manual
G-connector
Sticker sheet / Aorus badge
Wi-Fi Antenna
(4) SATA cables
(3) Screws for M.2 sockets
(2) Temperature probes
Microphone
RGB extension cable
Image 1 of 3
(Image credit: Gigabyte)
Image 2 of 3
(Image credit: Gigabyte)
Image 3 of 3
(Image credit: Gigabyte)
After taking the Z590 Aorus Master out of the box, its weight was immediately apparent, with the shrouds, heatsinks and backplate making up the majority of that weight. The board sports a matte-black PCB, with black and grey shrouds covering the PCIe/M.2 area and two VRM heatsinks with fins connected by a heatpipe. The chipset heatsink has the Aorus Eagle branding lit up, while the rear IO shroud arches over the left VRM bank with more RGB LED lighting. The Gigabyte RGB Fusion 2.0 application handles RGB control. Overall, the Aorus Master has a premium appearance and shouldn’t have much issue fitting in with most build themes.
(Image credit: Gigabyte)
Looking at the board’s top half, we’ll first focus on the VRM heatsinks. They are physically small compared to most boards, but don’t let that fool you. The fin array uses a louvered stacked-fin design Gigabyte says increases surface area by 300% and improves thermal efficiency with better airflow and heat exchange. An 8mm heat pipe also connects them to share the load. Additionally, a small fan located under the rear IO shroud actively keeps the VRMs cool. The fan here wasn’t loud, but was undoubtedly audible at default settings.
We saw a similar configuration in the previous generation, which worked out well with an i9-10900K, so it should do well with the Rocket Lake flagship, too. We’ve already seen reports indicating the i9-11900K has a similar power profile to its predecessor. Feeding power to the VRMs is two reinforced 8-pin EPS connectors (one required).
To the right of the socket, things start to get busy. We see four reinforced DRAM slots supporting up to 128GB of RAM. Oddly enough, the specifications only list support up to DDR4 3200 MHz, the platform’s limit. But further down the webpage, it lists DDR4 5000. I find it odd it is listed this way, though it does set up an expectation that anything above 3200 MHz is overclocking and not guaranteed to work.
Above the DRAM slots are eight voltage read points covering various relevant voltages. This includes read points for the CPU Vcore, VccSA, VccIO, DRAM, and a few others. When you’re pushing the limits and using sub-ambient cooling methods, knowing exactly what voltage the component is getting (software can be inaccurate) is quite helpful.
Above those on the top edge are four fan headers (next to the EPS connectors is a fifth) of 10. According to the manual, all CPU fan and pump headers support 2A/24W each. You shouldn’t have any issues powering fans and a water cooling pump. Gigabyte doesn’t mention if these headers use auto-sensing (for DC or PWM control), but they handled both when set to ‘auto’ in the BIOS. Both a PWM and DC controlled fan worked without intervention.
The first two (of four) RGB LED headers live to the fan headers’ right. The Z590 Aorus Master includes two 3-pin ARGB headers and two 4-pin RGB headers. Since this board takes a minimal approach to RGB lighting, you’ll need to use these to add more bling to your rig.
We find the power button and 2-character debug LED for troubleshooting POST issues on the right edge. Below is a reinforced 24-pin ATX connector for power to the board, another fan header and a 2-pin temperature probe header. Just below all of that are two USB 3.2 Gen1 headers and a single USB 3.2 Gen2x2 Type-C front-panel header for additional USB ports.
(Image credit: Tom’s Hardware)
Gigabyte chose to go with a 19-phase setup for the Vcore and SOC on the power delivery front. Controlling power is an Intersil ISL6929 buck controller that manages up to 12 discrete channels. The controller then sends the power to ISL6617A phase doublers and the 19 90A ISL99390B MOSFETs. This is one of the more robust VRMs we’ve seen on a mid-range board allowing for a whopping 1,620A available for the CPU. You won’t have any trouble running any compatible CPU, including using sub-ambient overclocking.
(Image credit: Gigabyte)
The bottom half of the board is mostly covered in shrouds hiding all the unsightly but necessary bits. On the far left side, under the shrouds, you’ll find the Realtek ALC1220-VB codec along with an ESS Sabre ESS 9118 DAC and audiophile-grade WIMA and Nichicon Fine Gold capacitors. With the premium audio codec and DAC, an overwhelming majority of users will find the audio perfectly acceptable.
We’ll find the PCIe slots and M.2 sockets in the middle of the board. Starting with the PCIe sockets, there are a total of three full-length slots (all reinforced). The first and second slots are wired for PCIe 4.0, with the primary (top) slot wired for x16 and the bottom maxes out at x8. Gigabyte says this configuration supports AMD Quad-GPU Cand 2-Way Crossfire. We didn’t see a mention of SLI support even though the lane count supports it. The bottom full-length slot is fed from the chipset and runs at PCIe 3.0 x4 speeds. Since the board does without x1 slots, this is the only expansion slot available if you’re using a triple-slot video card. Anything less than that allows you to use the second slot.
Hidden under the shrouds around the PCIe slots are three M.2 sockets. Unique to this setup is the Aorus M.2 Thermal Guard II, which uses a double-sided heatsink design to help cool M.2 SSD devices with double-sided flash. With these devices’ capacities rising and more using flash on both sides, this is a good value-add.
The top socket (M2A_CPU) supports up to PCIe 4.0 x4 devices up to 110mm long. The second and third sockets, M2P_SB and M2M_SB, support both SATA and PCIe 3.0 x3 modules up to 110mm long. When using a SATA-based SSD on M2P_SB, SATA port 1 will be disabled. When M2M_SB (bottom socket) is in use, SATA ports 4/5 get disabled.
To the right of the PCIe area is the chipset heatsink with the Aorus falcon lit up with RGB LEDs from below. There’s a total of six SATA ports that support RAID0, 1, 5 and 10. Sitting on the right edge are two Thunderbolt headers (5-pin and 3-pin) to connect to a Gigabyte Thunderbolt add-in card. Finally, in the bottom-right corner is the Status LED display. The four LEDs labeled CPU, DRAM, BOOT and VGA light up during the POST process. If something hangs during that time, the LED where the problem resides stays lit, identifying the problem area. This is good to have, even with the debug LED at the top of the board.
Across the board’s bottom are several headers, including more USB ports, fan headers and more. Below is the full list, from left to right:
Front-panel audio
BIOS switch
Dual/Single BIOS switch
ARGB header
RGB header
TPM header
(2) USB 2.0 headers
Noise sensor header
Reset button
(3) Fan headers
Front panel header
Clear CMOS button
(Image credit: Gigabyte)
The Z590 Aorus Master comes with a pre-installed rear IO panel full of ports and buttons. To start, there are a total of 10 USB ports out back, which should be plenty for most users. You have a USB 3.2 Gen2x2 Type-C port, five USB 3.2 Gen2 Type-A ports and four USB 3.2 Gen1 Type-A ports. There is a single DisplayPort output for those who would like to use the CPU’s integrated graphics. The audio stack consists of five gold-plated analog jacks and a SPDIF out. On the networking side is the Aquantia 10 GbE port and the Wi-Fi antenna. Last but not least is a Clear CMOS button and a Q-Flash button, the latter designed for flashing the BIOS without a CPU.
Crowbits’ progressive STEM kits teach future engineers (ages 6-10 and up) the basics of electronics and programming, but nondurable paper elements and poorly translated documentation could lead to frustration and incomplete projects.
For
+ 80+ Lego-compatible electronic modules and sensors
+ Helpful programming software
+ Progressive learning kits
+ Examples are very helpful
+ Engaging projects for pre-teen and teen engineers
Against
– Inadequate and inaccurate project tutorial
– Cable modules are stiff and pop off easily
– Cardboard projects are flimsy and cumbersome
– Labels are hard to read
They say that the best method of teaching is to start with the basics. This is true for most subjects, but even more so for getting kids involved and interested in learning about electronics and programming. This is exactly Elecrow Crowbits’ approach to launching young inventors and creators into the world of technology.
Available via Kickstarter, the STEM kit series starts with building simple projects that make use of basic electronic concepts, then steps up kids’ skills by introducing projects that require some coding and graduates to more advanced application development. The Crowbits lineup consists of five interactive STEM-based packages, each appropriately themed with projects that cater to kids from ages 6 -10 and up. These are the Hello Kit, Explorer Kit, Inventor Kit, Creator Kit and Master Kit.
With the variety of engineering kits out in the market today, Crowbits’ pricing falls in the mid-range category. Ranging from $26 to $90, depending on which kit you prefer, it is money well spent. One of the key values that Crowbits brings is its focus on teaching kids the basics of electronics through the use of these programmable blocks and sensors and ties that learning to current practical uses, like turning the lights on or off. This simple circuit logic is used to program small home appliances like coffee machines, automatic dispensers or even smart home security systems.
Much like the company’s previous Kickstarter project the CrowPi2, a Raspberry Pi-powered laptop which we reviewed last year, Crowbits also presented issues with documentation. Makers and creators know that clear and concise directions are very important for any project building. Unclear and inadequate instructions causes users, especially beginners, to feel that they may have done something wrong. They may be able to troubleshoot some issues themselves, but if left unresolved an air of defeat and frustration ensues.
Crowbits Setup
Setup for Crowbits starts with choosing which components to use depending on the project the child wants to try. The modules are designed to be plug-and-play so young makers can use them to build structures and experiment right away. Modules are also compatible with the entire series of learning kits, so if you purchased more than one, you can use them interchangeably.
If you want to try building from the suggested projects, of which there are plenty to choose from, note that they become more challenging as you move up in the series and may include some coding and firmware downloads.
How Crowbits Work
(Image credit: Elecrow)
Every kit consists of a number of modules. Each module has magnetic pogo-pins on all sides that help connect them easily. Another way of connecting modules are by the magnetic cables. At the back of each module are Lego holes for seamless integration of Lego bricks to any structure.
(Image credit: Elecrow)
There are four different types of modules and are easily identified by color: Blue for power/logic, yellow for input, green for output and orange for special modules. It’s important to keep in mind a few rules for creating a circuit sequence. There should be at least a power, an input and an output module in order to build a circuit, with the proper sequence having the input block before the output.
There could be multiple input and output blocks in a sequence where the output is controlled by the nearest input block. Lastly, names of modules must be facing up to ensure the correct pins are being used.
Crowbits Module and Sensor Breakdown
(Image credit: Elecrow)
There are four different types of modules and sensors for Crowbits and each function is distinguished by color:
Power Modules (Blue) – the power source and a core module that’s required for every project build. You’ll see a green light that indicates when the power is on. Use the included micro-USB cable to re-charge the power supply when needed.
Logic Modules (Blue) – for basic operations. Includes: 315 MHz Controller, Expansion, etc.
Input Modules (Yellow) – accepts input data like touch, vibration or object detection and passes it to the output modules. Includes: Touch module, IR reflective sensor, light sensor, etc.
Output Modules (Green) – receives command from input module and executes ending action. Examples are: Buzzer module (makes a sound), LED (Y) light up, or vibrate
Special Modules (Orange) – used for advanced programming tasks. Examples are: I2C or UART
Crowbits Software and Hardware
(Image credit: Elecrow)
Programming Languages Supported: Letscode (Elecrow’s visual programming software based on Scratch 3.0), which supports Python and Arduino IDE.
Open Source Hardware Compatibility: ESP32 TFT, Micro:bit board, Arduino UNO and Raspberry Pi (TBA).
OS Supported: Windows and Mac
Crowbits Learning Kits Use Cases
Hello Kit and Explorer Kit
(Image credit: Elecrow)
The Hello Kit and Explorer Kit are learning tools for beginners and targets children ages 6-8 and up. It introduces the concept of modules and their functionality. No coding is required for any of the suggested experiments and projects here. Building the projects with cardboard elements proved to be difficult for my seven-year-old and she got easily frustrated trying to use the thin double-sided tape that came with the kit.
Once the structures were built (with my help) she did enjoy putting the modules together and making things happen like sounding the buzzer on the anti-touching device or making the lights turn on her window display project. Another annoyance to note was when using the cable module that serves to connect modules together. The cable is quite thick and not flexible so it had the tendency to pop off and break the connection for multiple projects.
I would have to say that my daughter was most engaged with the Explorer Kit, perhaps because the projects had more integration with Lego blocks, and some projects were also very interactive like the Quadruped Robot and the Lift, which were her favorites. She enjoyed building the structures and seeing the creations come to life, especially when there was movement, sounds and lights.
Inventor Kit and Creator Kit
(Image credit: Elecrow)
The Inventor Kit and Creator Kit are the intermediate learning tools of the Crowbits series and targets children ages 10 and up. The Inventor Kit includes more advanced projects that incorporate the Micro:bit board in the builds. This requires some coding and the use of Letcsode, Elecrow’s Scratch-based drag-and-drop visual programming software.
The software seemed a bit buggy (mainly in steps like downloading custom code) and there were inaccuracies in the project documentation that led to a lot of troubleshooting on our part. Hopefully, by the time Crowbits is ready for release in June, these kinks will have been resolved.
It is worth noting, though, that the list of projects suggested for the Inventor kit seem to be age-appropriate. My tween worked on the Horizontal Bar and the Ultrasonic Guitar projects. She thoroughly enjoyed the experience and had no issues following the diagrams in building the Lego structures. There was a little hiccup in using the software, as I mentioned earlier, where we were wanting for troubleshooting tips and more clear documentation.
Unfortunately, we were not able to try out the Creator Kit as it was not available when we received our evaluation samples. We may update this review when we receive the Kit after its June release.
Master Kit
(Image credit: Elecrow)
The Master Kit definitely is the most challenging of the engineering kits in the Crowbits lineup, with the task of programming hardware and software to build real-life products like a mobile phone, a game console and a radar. I’ll set aside my comments for this kit as I was unsuccessful in trying to make the phone and console work due to a corrupted SD card.
Additionally, we had intermittent issues while uploading firmware. It is unfortunate because I was looking forward to this kit the most, but perhaps I can re-visit the Master Kit and post an update at a later time.
The one successful project build out of this kit, the radar, honestly left us scratching our heads. The expected results were not seen as we tried a placing variety of objects in the vicinity of the rotating radar dish and none of them seemed to be detected.
Crowbits Learning Kits Specs and Pricing
Modules
Projects
Age
Price
Hello Kit
7 Modules
5 Cardboard Projects
6+
$26
Explorer Kit
13 Modules
12 Projects
8+
$70
Inventor Kit
10 Modules
12 Lego, graphic programming projects and Letscode introduction
10+
$80
Creator Kit
TBD
TBD
10+
$90
Master Kit
TBD
TBD
10+
$90
Crowbits Available Bundles and Special Pricing
Bundles
Kits Included
Pricing
Bundle #1
Explorer Kit, Creator Kit, Master Kit
$239
Bundle #2
Explorer Kit, Inventor Kit, Master Kit
$249
Bundle #3
Hello Kit, Explorer Kit, Inventor Creator Kit, Master Kit
$354
Bottom Line
Despite all its kinks, overall the Crowbits STEM Kit appears to be another great educational tool from Elecrow with the emphasis on educating kids on electrical engineering. Whether it be building simple circuit projects or coding more complex applications for use in everyday living, the Crowbits series provides a complete learning platform for kids ages 6-10 and up.
With its average pricing and the flexibility to pick and choose which kit to purchase, it is an attractive choice for someone looking to buy an educational STEM kit for their child or loved one. Of course you can also buy the entire set as a bundle and enjoy helping your child build models and program as you go through the different stages of electronic learning from basic to advanced concepts. It’s also worth noting that the Letscode software program that comes with the packages is free and supports Python and Arduino programming which is a welcome added bonus.
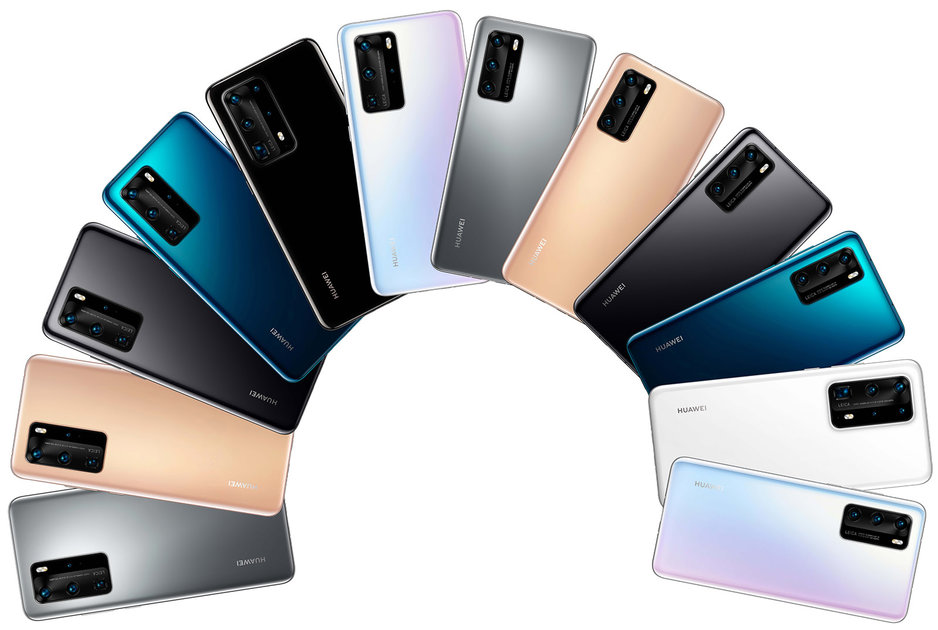
(Pocket-lint) – Not content with bringing its usual two-model flagship series release programme, for 2020 Huawei stepped things up by bringing not just one, not two, but three different P series handsets: the P40, the P40 Pro, and the P40 Pro+.
It’s a move that came as no surprise, in a world where many competitors have gone down a similar route – check out Samsung’s S20 series, for example – but with now three P40 series models to choose from, just how do they differ?
squirrel_widget_203929
Design: Colours & Finishes
P40 Pro only: Silver Frost, Blush Gold with matte-touch finish
P40 Pro+ only: Black ceramic, White ceramic
All models: Ice White, Black, DeepSea Blue
The standard P40 is smaller than the P40 Pro and Pro+, the latter two are the very same size.
But the colour options and finishes is where things differ. At the entry point there’s white, black and blue glass-backed finishes. The P40 Pro also options a silver and pink-gold finish, both of which have a matte-touch finish which is said to be fingerprint repellent – despite still being made of glass.
Lastly there’s a ceramic finish, in either black or white, for the P40 Pro+ only. Huawei tells us this “nanotech ceramic back” is comprised of ceramic beads, which are compressed at higher pressure, then kilned at 1500C for five days, creating a sapphire-strength rear with a reflective index “similar to diamond”.
Screen: Size & Resolution
P40 Pro & Pro+: Edge-to-edge ‘Overflow Display’ with curved edges / P40: Flat display
P40 Pro & Pro+: 6.58-inch OLED, 2640 x 1200 resolution
P40: 6.1-inch OLED, 2340 x 1080 resolution
P40 Pro & Pro+: 90Hz / P40: 60Hz
As we said, the P40 is the smaller handset, on account of its 6.1-inch screen. This display is also flat, not curved, with slightly larger bezels than its bigger models.
The P40 Pro and Pro+ have a 6.58-inch screen, so aren’t as ultra-massive as some current handsets, such as the Samsung Galaxy S21 Ultra. We think that’s a sensible decision, to make for greater ease of use with one hand.
Whichever of the Pro and Pro+ models you choose you’ll be getting a so-called ‘Overflow Display’. That’s Huawei’s way of saying Waterfall Display, really, meaning the edges spill over, much like a waterfall, so the edge bezel is barely visible. This applies to all edges – both sides and the top and the bottom – for a real screen-dominant design.
There’s no notch as a result, instead a dual punch-hole is present on all three handsets. More info about the (extensive!) cameras is further down the page.
While the P40 offers a standard 60Hz display, the Pro and Pro+ offer a 90Hz refresh rate – which is 50 per cent greater than the typical 60Hz panels. That’s all well and good, but with OnePlus running 120Hz panels and others offering up to 165Hz panels in gaming phones (the Red Magic 6 the first example of that), you might wonder why Huawei hasn’t reached to the stars here. The answer, we suspect, is cost, battery performance, and, frankly, that this extra rate won’t make a huge difference in the way most people see apps and content perform anyway.
Performance
All models: Kirin 990 processor, 8GB RAM
P40 Pro & Pro+: 4,200mAh battery
P40: 3,800mAh battery
P40 Pro+: 40W fast-charging (incl. 40W wireless)
P40 Pro: 40W fast-charging (incl. 27W wireless)
P40: 22.5W fast-charging (no wireless charging)
All three P40 models will deliver a similar experience, given their Kirin 990 processor, 8GB RAM, and 5G connectivity across the board.
None of the three will come with Google Services, though, which means no access to Google Play Store (instead there’s Huawei’s App Gallery, which lacks some of the majors at present, such WhatsApp (you can download it as an APK using a browser though – but no Google Drive will mean no backup), and more. That’s despite the P40 launching on Google’s Android 10 operating system, with Huawei’s EMUI 10.1 user interface.
What apps can you actually get on Huawei’s App Gallery?
It’s in the battery department where the three models differ a little more. The P40 has a 3,800mAh cell, which is fairly small by today’s standards, while the Pro and Pro+ up that to 4,200mAh – which is about on par with what current competitors offers.
The recharging of those batteries is speedy too. The P40 sticks to the well-established 22.5W fast-charging, while the P40 Pro and Pro+ up this to 40W – which is quick, but not the very fastest available (that goes to OnePlus with its 65W Warp Charge 65T for the OnePlus 9 Pro).
However, Huawei is introducing 40W wireless charging to the Pro+. It means wire-free charging of the handset in little more than an hour – which is impressive. The standard P40, however, has no wireless charging capability.
Cameras
P40: Leica triple camera system
P40 Pro: Leica quad camera system
P40 Pro+: Leica penta camera system
Main camera:
All models: 50MP SuperSensing (RYYB) sensor, 1/1.28in size
f/1.9 aperture, optical stabilisation (OIS)
Focal length (approx): P40 at 27mm, Pro at 25mm, Pro+ at 24mm
Ultra-wide camera:
P40: 16MP, f/2.2, 17mm equiv.
P40 Pro & Pro+: 40MP cine lens, f/1.8, 18mm equiv.
Always the P series’ big-hitting feature is its camera setup. We thought the P30 Pro set a new bar when it launched in 2019 – something that the P40 series bettered.
It’s a little complicated, though, as the camera setup for each device is rather different. The P40 has a triple camera rear, the P40 Pro a quad setup, the Pro+ a penta system.
However, all three offer one consistent thing: the same main camera. This is a 50-megapixel SuperSensing sensor – the same red, yellow, blue (RYYB) technology as in the P30 Pro – and, at 1/1.28in size, it’s a lot larger than a typical camera sensor.
That make-up and physical size work to its benefit in delivering a clean signal for better image quality overall. Not to mention the use of four pixels into one on-screen pixel means oversampling for even better quality (12.5MP output) – a method used by many others already. And there’s 100 per cent on-sensor phase-detection pixels for autofocus too.
There’s a wide-angle camera on each P40 model, too, but it’s one of two variants: the P40 has a 16-megapixel sensor at a 17mm focal length, while the Pro and Pro+ offer 40MP at 18mm (so it’s slightly less wide, likely for the sake of edge/corner quality). The higher-resolution offering is described as a ‘cine lens’ as it’s also used to cater for video, at up to 4K.
Then there’s the zoom element. All three P40 models have an optical zoom lens: the P40 a 3x zoom, the P40 Pro a 5x zoom, the P40 Pro+ a 10x zoom. That 3x is the same as we’ve seen in the P30, with just 8-megapixels of resolution for the P40 and P40 Pro+. The 5x is different to the one found in the P30 Pro, as Huawei is also utilising the RYYB SuperSensing technology here for the P40 Pro’s zoom. The 10x was the first time we’d seen such a periscope zoom, as reserved for the P40 Pro+ only (and used in tandem with the 3x zoom optic to offer the ability to step through zoom levels to deliver the most appropriate tools for each job).
The P40 Pro and Pro+ also come with a Time-of-Flight depth sensor, which derives distance information, which the software can utilise in layers to help create background blur (bokeh) in portrait mode.
All three P40 cameras will offer familiar modes, from Artificial Intelligence shooting, to Night Mode. However, these have been advanced, with the AI tech now able to shoot multiple frames before during and after pressing the shutter to select the best of a burst and suggest a top three selection.
The front cameras can be found in a dual punch-hole or ‘pill’ cut-out in all three P40 models. The main camera is 32-megapixels, which also uses four-in-one oversampling for 8MP output by default, paired with a depth sensor for background blur software effects and more.
squirrel_widget_203940
Price, Release Date & Conclusion
P40: €799 (at launch)
P40 Pro: €999 (at launch)
P40 Pro+: €1399 (at launch)
Once again the P40 series looks to be grappling for camera dominance. And that variety of versatile cameas – especially on the Pro+ model – make for great reading.
That said, the absence of Google Play Store on these devices is a major pain point. Sure, there’s App Gallery, and consumers have choice in what’s important to them. But, right now, it makes the P40 series difficult to recommend.
(Pocket-lint) – The gaming phone market shows no signs of slowing down. Indeed, just 20 hours prior to revealing our verdict on this very device, the Red Magic 6, Lenovo revealed its next-gen Legion Duel gaming monster.
Except, interestingly, the Red Magic 6 has a bit of a headline feature that the Lenovo lacks: there’s a 165Hz screen refresh rate, which, at the time of writing, is the fastest you’ll find in a gaming phone – or, indeed, any phone to date – to make for super smooth visuals.
The Red Magic 6 is all about its gaming focus elsewhere, too, thanks to a top tier processor, stacks of RAM, plus a built-in cooling fan. So does all that make it a case of game on, or should you go game elsewhere?
Design & Display
6.8-inch OLED panel, 1080 x 2400 resolution, 20:9 aspect ratio
165Hz refresh rate, 500Hz touch sampling rate
Dimensions: 170 x 77 x 9.7mm / Weight: 220g
Finish options: Eclipse Black, Aurora
Dedicated switch for Game Space
Under-display fingerprint scanner
Built-in shoulder triggers
3.5mm headphone jack
Visually speaking the Red Magic 6 looks much like the Red Magic 5G and 5S devices that came before it. Except it’s actually a little bit bigger. Yup, as if those aforementioned slabs weren’t substantial enough, Nubia has gone and installed a yet bigger screen – up from 6.65-inches to 6.8-inches – making for a slightly wider overall package (although, thankfully, it’s a slither thinner than its predecessors).
Pocket-lint
In this Eclipse Black finish it’s also approaching subdued for a gaming phone. Perhaps that’s because the 5S we had came in a so-called ‘Pulse’ colourway. Which was loud to say the least. Not that the Red Magic 6 lacks some flashy “look at me” moments – helped along for the most part by rear lighting that can be set to various colours and patterns based on notifications, calls, gameplay and more (or switched off entirely, if you prefer).
The principal attraction of the Red Magic 6, we think, is its screen. This 6.8-inch OLED panel is quite the monster, plus it’s equipped with some headline-grabbing features. First, it’s flat, not curved, which makes it very practical for gaming (and anything, really, which is why we see curved screens on the decline). Second, it’s got a 165Hz refresh rate, meaning it can refresh that many times every second if you want – or select from 60Hz, 90Hz, 120Hz from the settings instead to conserve battery. It’s bright, too, with a 630 nits peak brightness claimed.
We’re always a little on the fence about fast-refresh panels, though, as the Red Magic 6’s sell over the 5S is basically 144Hz vs 165Hz. Will your eyes notice those extra 21 cycles per second? No, it’s not humanly possible. But it’s there, so it’s “one better” on paper nonetheless. You’ll most certainly see a big jump from the base 60Hz, though, so there’s obvious benefit to having a higher refresh rate panel. Plus, with 500Hz sampling rate, it’s super responsive to finger taps.
Pocket-lint
Not that you have to just tap the screen. Being a gaming phone, Red Magic continues with its gaming focus, which includes integrated shoulder triggers to one edge, which you can programme for certain games. You can even adjust the screen’s responsiveness in zones using the Game Space application.
Activating Game Space is a simple case of flicking the red switch to the upper left side (facing) of the device. It’s a nice touch, able to transport you into a games carousel, along with the ability to select various key options – such as do not disturb (DND), permitting specific apps to notify (such as Discord in a pop-up overlay), controlling lighting, the cooling fan, and screen refresh rate.
We just wish that switching into Game Space would automatically apply selected presets. For example, we’d (perhaps) activate 165Hz when in the space, but drop that to 90Hz once done and flicking the switch back to ‘normal’ for our everyday activities. But that doesn’t happen – the selected refresh rate remains in play, so you have to manually adjust it.
Pocket-lint
Elsewhere in terms of design, the Red Magic 6, rather unusually, features a 3.5mm headphone jack. So you can plug in your wired headphones. That’s an increasing rarity for high-end devices, although we suspect most will just use Bluetooth anyway.
Performance & Battery
Qualcomm Snapdragon 888 platform, 12GB LPDDR5 RAM
128GB UFS 3.1 storage, no microSD card slot
5050mAh battery capacity, 66W fast-charge
Turbofan and liquid cooling system
Dual-Core Cooler accessory
Wi-Fi 6E (802.11 a/b/g/n/ac)
5G connectivity
So why is the Red Magic 6 so chunky, at almost a full centimetre wide? There’s a number of reasons: the massive battery capacity (5,050mAh), the integrated physical cooling fan, the spatial capacity to ensure airflow won’t overheat the processor inside. And that’s just three reasons.
Pocket-lint
There’s no doubting the Red Magic 6 has got the goods when it comes to power. Utilising Qualcomm’s Snapdragon 888 platform, alongside 12GB RAM, there’s nothing more powerful inside phones right now. Which makes the asking price of this phone all the more phenomenal.
Motorola’s new Moto G9 Plus is a stunner of a phone – find out why, right here
By Pocket-lint Promotion
·
For most people the difference between a Snapdragon 888 and, say, 870 isn’t going to make much difference for casual use. But the Red Magic 6 is all about gaming – so it has a processor that can put in the extra work to eke out those extra frame-rates and graphical options that you might otherwise not get elsewhere.
That said, only so many games are able to really tuck in. The same goes with the refresh rate debate: which games will genuinely benefit from 165Hz? Not many, perhaps none at all. Running Red Magic’s own FPS checker in real-time showed that many of our favourites – South Park: Phone Destroyer being the main, PUBG Mobile being the other – apparently max out at 31fps. Surely an error on Red Magic’s software? Because PUBG Mobile can run at 90fps.
Pocket-lint
That self administered punch to the face aside, however, and the Red Magic 6 does a darn good job when it comes to playing games. There’s no delay, no fuss with fidelity, no issues with graphics textures, and so forth. It’s about as good as it gets.
However, that cooling fan doesn’t half make a lot of noise. It’s whirring sound whistles quite irritatingly. Having it on will undoubtedly use up power, too, so we’ve opted for leaving the standard cooling system minus the additional fans to take care of things. It’s a good job you can manually adjust this from the settings shade – because the fan also activates when fast-charging kicks in, unless you tell it not to.
The reason for that is the fast-charging, at 66W, is really quick. You can fill it from dead in under 40 minutes, assuming you have the correct plug at the wall, which is borderline ridiculous. Pop it on a slower recharge and you’ll be kinder to the battery’s health, but it’ll take a fair lot longer.
As for realistic longevity per charge. With this phone, more than most, that’s going to depend on how much you game. We’ve found the battery life a little unpredictable in general, with a day of ‘normal use’ (at 90Hz, note) and some gaming thrown in delivering close to 15 hours. That’s fine for a single day, except there are some moments when the battery will bomb and that’ll leave you reaching for the charger when you might not usually expect so – and that can render the 165Hz plus cooling fan as limited time options.
It would also be remiss to not speak on software, which here is Red Magic OS (V4.0), built over Google’s Android 11 operating system. It’s fairly harmless, in that it has various obtuse Themes, but there are some fundamentals that are just broken.
Notifications, for one, are scruffy, filling up layers per app in a not-too-useful format. But at least, unlike with the Poco X3 Pro, we get consistent notifications, eh?
Pocket-lint
The home screen also can’t accept new apps being dragged from the app drawer and onto it as icons – they just vanish, unless you load multiple apps into a folder and drag them from there. It’s a ridiculous and irksome bug. That, in a sense, is indicative of what to expect when it comes to software experience: a unique yet unpredictable one.
Cameras
Triple rear system:
Main (26mm): 64-megapixel, f/1.8 aperture, 0.8µm pixel size
Wide (13mm): 8 MP, f/2.0, 1.12µm
Macro: 2MP
Selfie camera: 8MP, f/2.0
One area where we’ve been critical of previous Red Magic devices is with the cameras. Although the Red Magic 6 doesn’t get away Scot-free by any means, its main camera is fairly decent – outshining the likes of the Moto G100, that’s for sure.
Thankfully the rear of this phone is slightly curved so it slots into the hand pretty elegantly. There’s no giant camera bump in the way. No unwarranted protrusions or oddities. But that’s because the cameras here simply aren’t as high-end as you’ll find in some devices.
Pocket-lint
According to the specification, the Red Magic 6 has a 64-megapixel main sensor (a S5KGW3 – which is Samsung’s GW3 sensor) that squeezes images down to 16-megapixels by using one-in-four processing. Then there’s an 8MP wide-angle (a HI846, so a typical Hynix sensor). Lastly there’s a 2MP macro for close-ups (the OV02A10, supplied by OmniVision).
Thing is, the camera app doesn’t offer any wide-angle shooting. It’s not to be found anywhere. So you can already forget about getting any ultra-wides out of this device. Yet another problem of the software, perhaps?
The macro, given that it’s just 2-megapixels, is also of really poor quality – so we doubt you’ll ever want to use it. At least the system does prompt you to use it when very close to a subject, though, and the magnifying glass-style focus symbol on the screen is particularly useful to get in-focus shots. Not that they’ll be all that sharp, given the limit in quality.
So it all falls to the main lens to sell the camera system. Think of the Red Magic 6 as a single camera and it’s reasonably successful. The real-time phase-detection autofocus is snappy at showing what it’s focusing onto. The quality of images is fairly decent in a variety of conditions, too. Oversharpened, sure, but there’s detail here that could easily be negated by a lesser setup.
Just make sure you turn off the watermark feature (as you can see from the gallery above, we didn’t) – because it’s on by default, will plaster your images with unwanted words that you can’t remove, and it’s still beyond perplexing to us that this is an acceptable practice. Kill the watermark default already.
Not that you’ll be taking pictures, right? You’ll be playing games. Because, ultimately, that’s what the Red Magic 6 is all about.
Verdict
If you’re in the market for a gaming phone then the Red Magic 6 has a lot going for it: it’s well priced, it’s seriously powerful, and it has a faster screen refresh rate than you’ll find on any other phone right now.
Thing is, whether you’ll get genuine use from 165Hz is a whole other matter. And with it active the cooling fan’s whining drone sound isn’t delicate on the ears. Plus it rather affects the battery life for the worse.
That there is physical fan-based cooling, however, is testament to how gaming-focused this phone is. With its Game Space dedicated switch, too, there’s quick-access to controls and gaming-specific settings.
Just like its predecessors, the Red Magic 6 does what it sets out to achieve: being an alluring gaming phone. But while it’s “game on” in that regard, it’s “game off” for everyday use – where the software comes up short, the sheer size approaches unwieldy, and the cameras are way off their billing.
Also consider
Pocket-lint
Lenovo Legion Phone Duel
squirrel_widget_3736803
Ok, so it’s the first-gen model – the second-gen has just been announced – and it’s pricier than the Red Magic. But with the Lenovo’s side-positioned pop-up camera and dual charging facility, it’s a super-powered gaming device unlike anything else on the market.
Read our review
Writing by Mike Lowe.
We use cookies on our website to give you the most relevant experience. By clicking “Accept”, you consent to the use of ALL the cookies.
This website uses cookies to improve your experience while you navigate through the website. Out of these, the cookies that are categorized as necessary are stored on your browser as they are essential for the working of basic functionalities of the website. We also use third-party cookies that help us analyze and understand how you use this website. These cookies will be stored in your browser only with your consent. You also have the option to opt-out of these cookies. But opting out of some of these cookies may affect your browsing experience.
Necessary cookies are absolutely essential for the website to function properly. This category only includes cookies that ensures basic functionalities and security features of the website. These cookies do not store any personal information.
Any cookies that may not be particularly necessary for the website to function and is used specifically to collect user personal data via analytics, ads, other embedded contents are termed as non-necessary cookies. It is mandatory to procure user consent prior to running these cookies on your website.