7-segment displays, the kind found on old digital alarm clocks, can be great for Raspberry Pi projects, including those you make with Raspberry Pi Pico. You can use a 7-segment display to keep score in a game, show sensor data like temperature or distance numbers or to keep track of time. You can even show some letters.
There are many kinds of 7-segment displays on the market and they vary not only based on the number of digits and the color, but also on the controller board or lack thereof. Some cheap 7-segment displays have no controller and use separate pins for every single light. When you consider that each digit has seven different lights (hence the name “7-segment display”), that’s a lot of pins.
However, better 7-segment displays have controller boards which employ an I2C connection that uses just four pins, powered by a TM1637 controller board. Below, we’ll show you how to use one of these TM1637-powered 7-segment displays with a Raspberry Pi Pico.
What You’ll Need
- 7-segment display. There are so many models, but we used this one.
- Raspberry Pi Pico with soldered pin headers and MicroPython.
- Four female-to-female jumper cables
If you haven’t used your Pico before, see our article on how to set up a Raspberry Pi Pico and how to solder pins to your Raspberry Pico.
How to Connect a 7-Segment Display to Raspberry Pi Pico
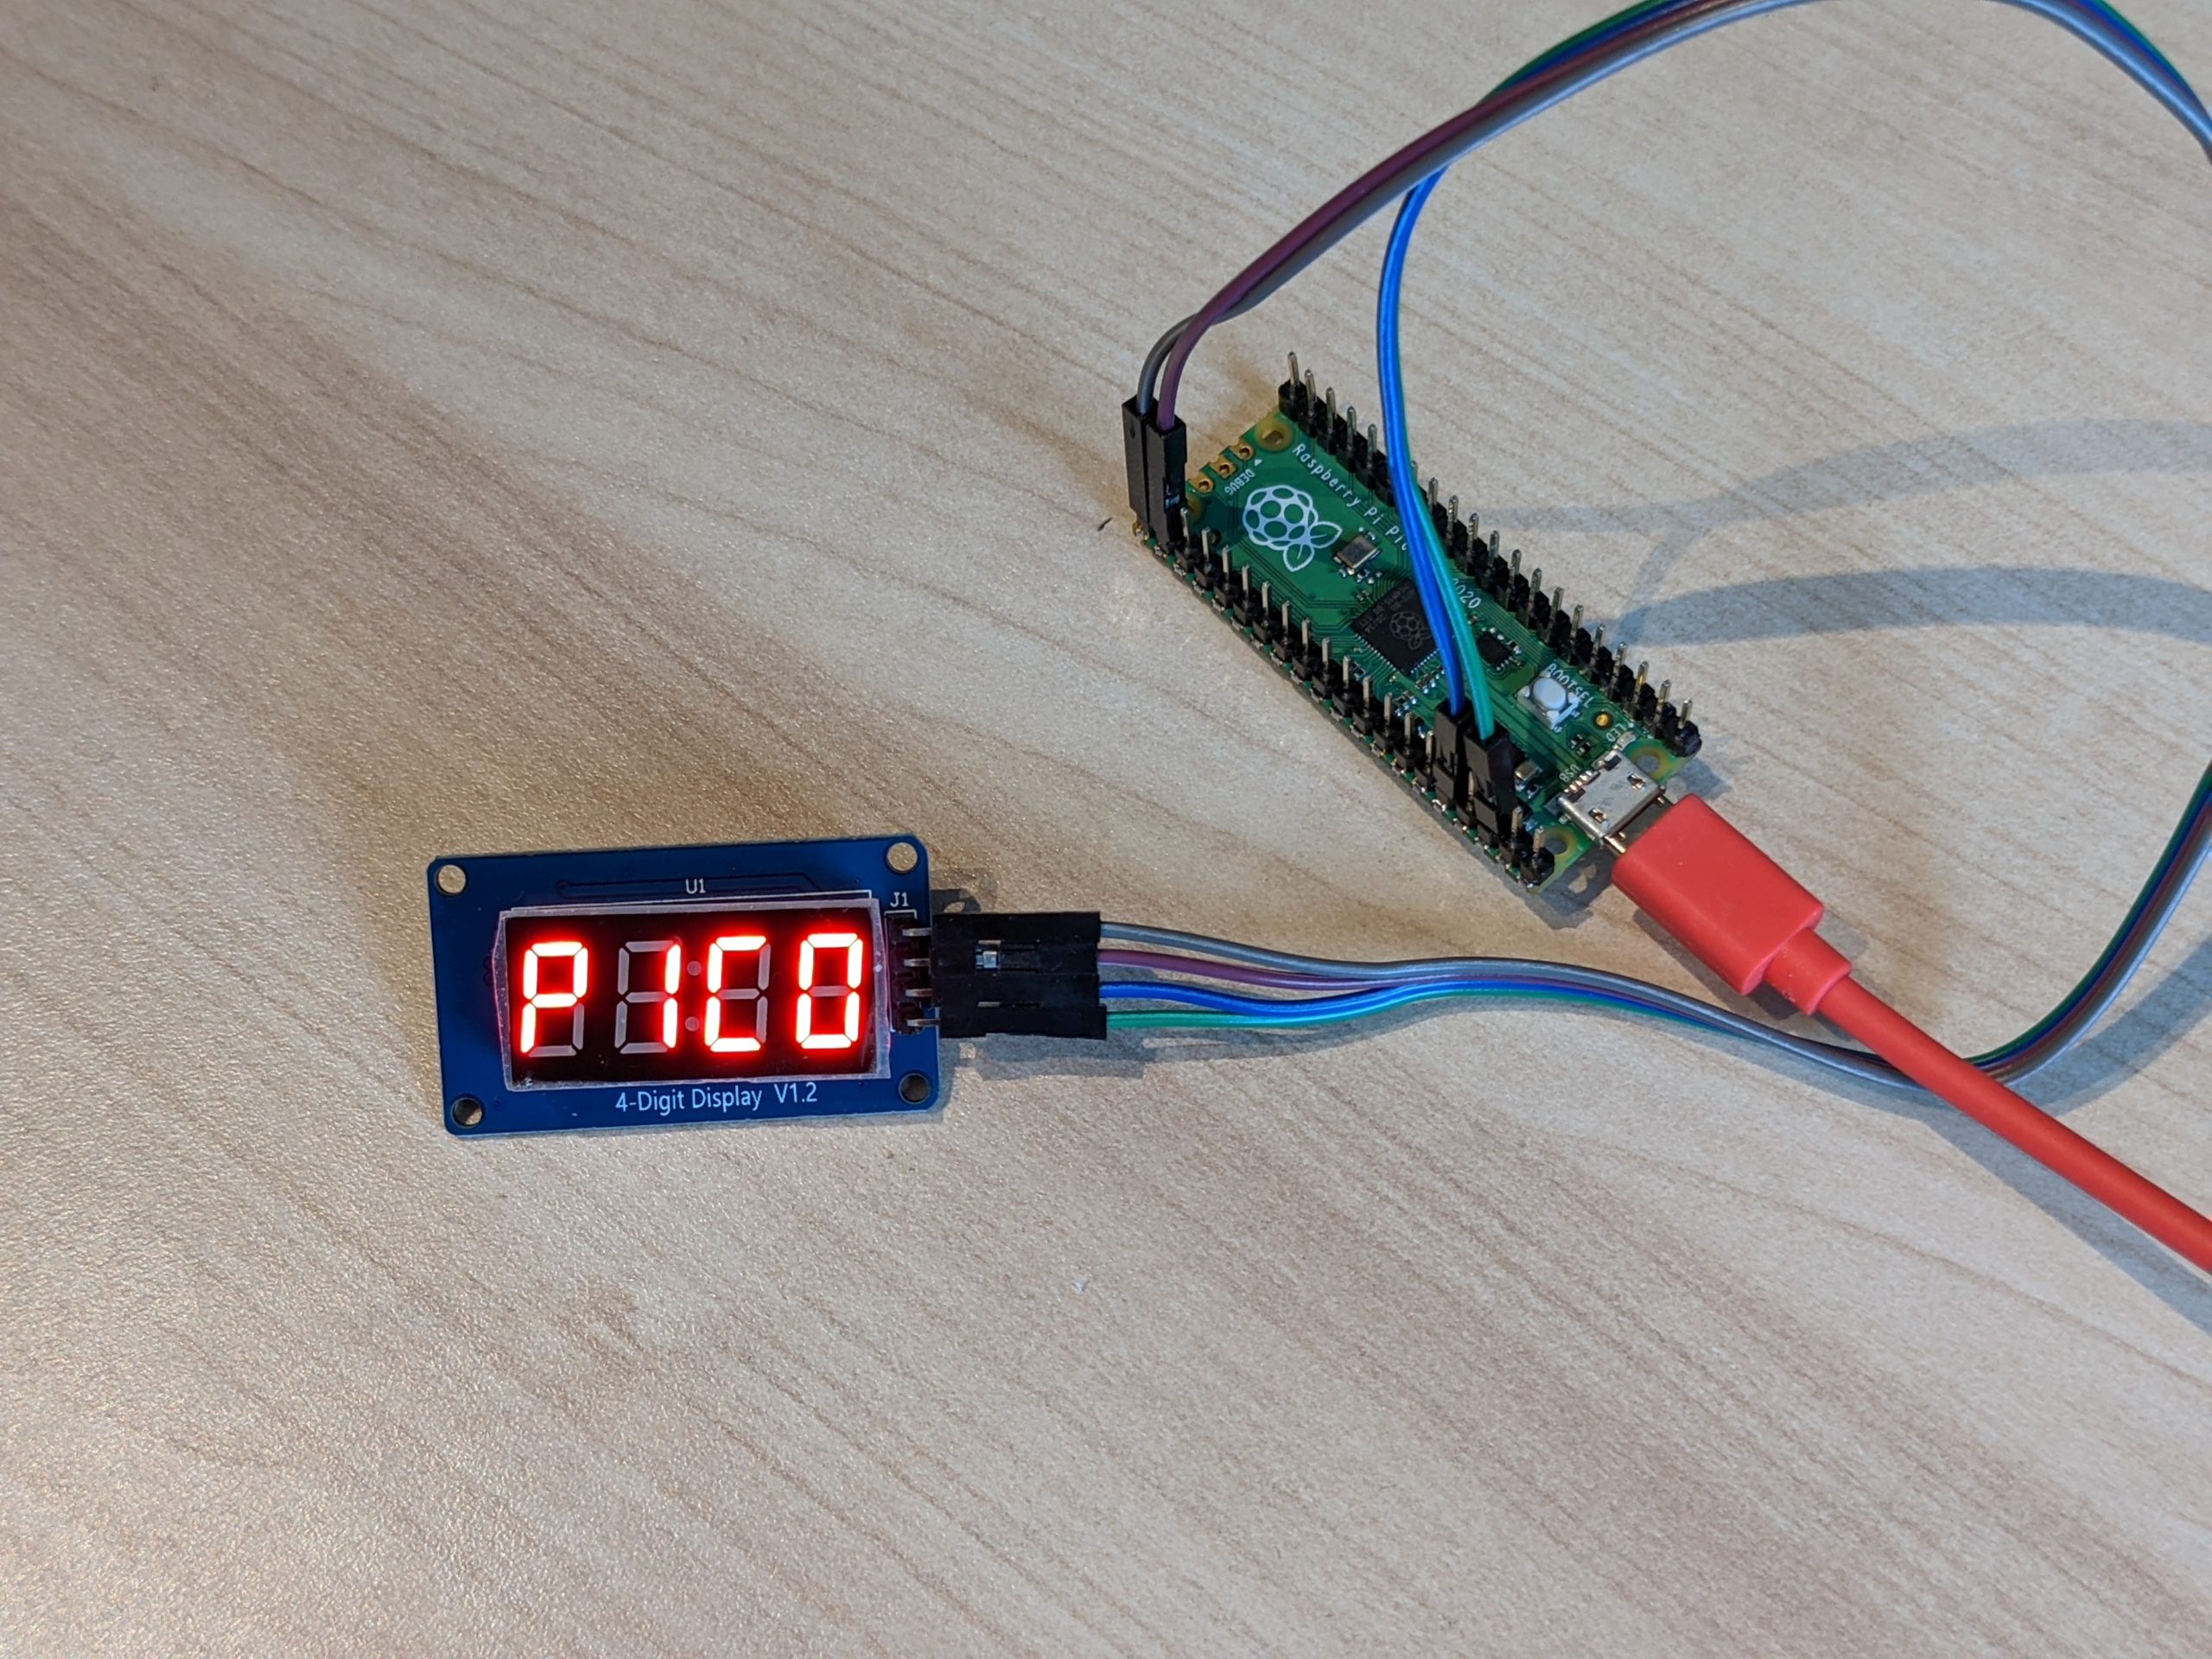
The 7-segment display has four pins: CLK, DIO, GND and VCC. If you use female-to-female jumper wires, you don’t need a breadboard to do the connections.
Connect the following pins from the 7-segment display to the PIco.
- VCC pin to 3V3 on the Pico (physical pin 36, the fifth on the right side).
- GND pin to GND on the Pico (physical pin 34, the third on the right side).
- CLK pin to GP16 on the Pico (last pin on the right side).
- DIO pin to GP17 on the Pico (next-to-last pin on the right side).
You could choose to connect the CLK and DIO pins to any two GPIO pins on the Pico which support I2C SCL and SDA respectively and you can connect the GND pin to any of the Pico’s 8 GND pins. See the Raspberry Pi Pico pinout for details.
How to Code a 7-Segment Display in MicroPython
We’re going to rely heavily on the excellent TM1637 MicroPython library from Mike Causer and create a script which shows a variety of display options, which you can use in your own projects later on.
5. Download the tm1637.py file from Mike Causer’s TM1637 github project. You don’t need the other files.
6. Copy tm1637.py to your Pico’s root directory. Since the Pico with MicroPython doesn’t appear as a drive letter, the easiest way to do this is to open tm1637.py in Thonny or the IDE or your choice and save it from there.
7. Create a new MicroPython script in Thonny or the MicroPython IDE of your choice.
8. Import the necessary libraries.
import tm1637
from machine import Pin
from utime import sleep
We will use the utime library to put a one-second “sleep” delay between each function so you have time to watch them on the display.
9. Create an instance of the tm1637.TM1637 object called “mydisplay” and enter the correct pin numbers for the CLK and DIO pins as parameters.
mydisplay = tm1637.TM1637(clk=Pin(16), dio=Pin(17))10. Use the “show” method to display any four characters. These can be letters or numbers, but note that many letters, W for example, will look awkward. If you enter more than four characters, only the first four will be shown. Be sure to put the parameter string in quotes.
mydisplay.show(“Pico”)
sleep(1)
11. Blank the screen by using “show” with four blank spaces (assuming you have four digits on your screen).
mydisplay.show(“    “)
sleep(1)
Note that if you don’t blank the display, it will remain on when your program is finished executing. You don’t need to blank the display when changing it, but if you use another show command with less than the maximum number of characters, any characters you don’t replace will stay on the screen. For example, if you do show(“halo”) and then show(“20”), the screen will read 20lo.
12. Use the “number” method to show an integer. Do not put quotes around the parameter. You can display a negative or positive number, but if it’s a negative number, it has to reserve one character for the minus sign. Note that, if you enter a larger number than the available number of digits (ex: entering 12345 on four-digit display), the screen will read “9999” or “-999” for negative numbers.
mydisplay.number(-123)
sleep(1)Use the “numbers” method to show a time with the color visible. Enter two, two-digit numbers as parameters and the colon, provided your screen has one, will show in between them. This example will appear as 12:59.
13. Considering that you can use the “show” method to show numbers or letters, you might wonder why you’d want to employ the number method instead. One reason is that you don’t need to convert integers to strings and another is that the screen will only use the necessary amount of digits so you don’t need to enter blank spaces to align your number to the right.
mydisplay.numbers(12,59)
sleep(1)
14. Adjust the brightness using the brightness method. You can enter a number that ranges from 0 (lowest) to 7 (highest) as the parameter.
#adjust the brightness to make it loewr
mydisplay.brightness(0)
sleep(1)
15. Use the “scroll” method to display scrolling text. Enter a string (in quotes) as the first parameter and add, “delay=” and a number of milliseconds to control the speed of the scroll. If you skip the delay parameter, it will default to 250ms.
mydisplay.scroll("Hello World 123", delay=200)
sleep(1)
16. Use the “temperature” method to show a temperature in Celsius. This method adds the degree symbol and letter C after your digits. You enter either a one or two digit integer as the temperature and you can do negative temperatures but these can only be one digit.
mydisplay.temperature(99)
sleep(1)
17. Blank the screen again so it doesn’t stay lit when the program is over.
mydisplay.show(“ “)Here’s the final code
import tm1637
from machine import Pin
from utime import sleep
mydisplay = tm1637.TM1637(clk=Pin(16), dio=Pin(17))

# Show a word
mydisplay.show("Pico")
sleep(1)

#blank the screen
mydisplay.show("    ")
sleep(1)

#show numbers
mydisplay.number(-123)
sleep(1)

#show a time with colon
mydisplay.numbers(12,59)
sleep(1)

#adjust the brightness to make it loewr
mydisplay.brightness(0)
sleep(1)

#show scrolling text
mydisplay.scroll("Hello World 123", delay=200)
sleep(1)

#show temperature
mydisplay.temperature(99)
sleep(1)

#blank the screen again
mydisplay.show(" ")
There are other methods that Causer documents on his github page, including one that will convert numbers to hexadecimal format for you or take hex input. However, these are the main methods we think most people will need to get use with a 7-segment display and Raspberry Pi Pico.