Responding to an inquiry from Dutch hardware site Tweakers, Asus has recently made public a detailed list of its different laptops for 2021, which GPUs they will use and what the clock speeds and TGPs are for each.
That’s big news, since even though CES 2021 left us knowing that Ampere would be coming to mobile this year — we’ve reviewed a few RTX 30 series laptops already — the specs for Nvidia’s next generation of mobile GPUs is still confusing. Part of that’s due to shifts in Nvidia’s branding, as it’s been inconsistent in assigning the Max-Q title to Ampere. But more importantly, we also still didn’t know specifics regarding how many clock speed and TGPp configurations there would be for mobile RTX 3060, 3070 and 3080 cards until very recently.
On January 26th, German hardware site
Computer Base
leaked a list of mobile Ampere configurations that supposedly matches what Nvidia sends to its OEM. This list had 28 total configurations, with 11 configs each for both the RTX 3060 and RTX 3080 and 6 configs for the RTX 3070. This leak caused Tweakers to reach out to Asus for more detailed and official information, to which the company responded with a full table of the laptops it’s releasing this year plus their GPU configurations.
Laptop
GPU
Boost Clock
TGP
Dynamic Boost
Max GPU Power
ROG XG Mobile GC31S
RTX 3080
1810
150
0
150
ROG XG Mobile GC31R
RTX 3070
1720
125
15
140
ROG Flow X13 GV301QH
GTX 1650 Max-Q
1255
35
5
40
ROG Zephyrus Duo 15 SE GX551QS
RTX 3080
1645
115
15
130
ROG Zephyrus Duo 15 SE GX551QR
RTX 3070
1660
115
15
130
ROG Zephyrus Duo 15 SE GX551QM
RTX 3060
1802
115
15
130
ROG Zephyrus G15 GA503QS
RTX 3080 Max-Q
1345
80
20
100
ROG Zephyrus G15 GA503QR
RTX 3070 Max-Q
1390
80
20
100
ROG Zephyrus G15 GA503QM
RTX 3060
1525
80
15
95
ROG Zephyrus G15 GA503IM
RTX 3060
1525
80
15
95
ROG Zephyrus G14 GA401QM
RTX 3060 Max-Q
1382
60
20
80
ROG Zephyrus G14 GA401QH
GTX 1650
1615
50
15
65
ROG Strix SCAR 17 G733QS
RTX 3080
1645
115
15
130
ROG Strix SCAR 17 G733QR
RTX 3070
1660
115
15
130
ROG Strix SCAR 17 G733QM
RTX 3060
1802
115
15
130
ROG Strix SCAR 15 G533QS
RTX 3080
1645
115
15
130
ROG Strix SCAR 15 G533QR
RTX 3070
1660
115
15
130
ROG Strix SCAR 15 G533QM
RTX 3060
1802
115
15
130
ROG Strix G17 G733QR
RTX 3070
1660
115
15
130
ROG Strix G17 G733QM
RTX 3060
1802
115
15
130
ROG Strix G17 G733QH
GTX 1650
1615
50
15
65
ROG Strix G15 G533QR
RTX 3070
1660
115
15
130
ROG Strix G15 G533QM
RTX 3060
1802
115
15
130
ROG Strix G15 G533QH
GTX 1650
1615
50
15
65
TUF Dash F15 FX516PR
RTX 3070 Max-Q
1390
80
5
85
TUF Dash F15 FX516PM
RTX 3060
1525
80
5
85
TUF A17 FA706QR
RTX 3070 Max-Q
1510
90
5
95
TUF A17 FA706QM
RTX 3060
1630
90
5
95
TUF A15 FA506QR
RTX 3070 Max-Q
1510
90
5
95
TUF A15 A506QM
RTX 3060
1630
90
5
95
Tweakers is a well-known source, but it seems Asus has also taken this opportunity to update its own website with these specifics as well.
Other manufacturers such as Lenovo and Gigabyte have yet to follow suit, but according to Asus’ list, it seems as if we can expect mobile Ampere cards to hover between 80 and 150 Watts depending on product and SKU. Similarly, boost clock speeds vary between 1345MHz and 1810 MHz. Interestingly, the Alienware m17 R4 we just reviewed has an RTX 3080 with 165W TGP, 15 watts higher than the highest Asus.
Asus’ list only details 11 unique GPUs, 4 for RTX 3060, 4 for RTX 3070 and 3 for RTX 3080. It also includes the GTX 1650 line a few times, though the only laptop on the list that exclusively uses it, the ROG Flow X13, can also be hooked up to an external mobile RTX 3080 for additional power. The list Asus provided to Tweakers also mentions Max-Q technology a few times, but it seems as if the listings on Asus’ store pages don’t mention Max-Q in the names of its mobile Ampere cards, which follows Nvidia’s lead regarding branding.
This ultimately leaves plenty of configs left to confirm, if Computer Base’s leak is to be believed. But it’s a good place to start.
It can be difficult to figure out how you’re coming across in a videoconference, especially if you want to make sure everything works before you start the meeting. How is your lighting? Are you sitting too close or too far from the camera? Is your audio okay, are you accidentally muted, or do you sound as if you’re in an echo chamber?
Google has now made it easier to check your appearance and your tech before a Meet conference with its new “green room” feature (via 9to5Google). When you start or prepare to join a meeting, in the usual “Ready to join?” window that first appears, you will now also see a small button below your video that says “Check your audio and video.” Just click on that button, and a pop-up window will not only show your video image, but allow you to see (and change) which microphone, speaker, and camera is currently live.
Google Meet’s “green room” lets you check your audio and video.
A “Next” button on that pop-up window then lets you record a short 6-second video sample, allowing you to see how you will look and sound to the others in your meeting. According to Google, the clip is private to you and will not be saved. Your mic, speaker, camera, and connection are also checked by the system and get green checkmarks if they seem to be working.
While previously you could see how you appeared in the initial “Ready to join?” window, Meet’s new “green room” can be even more helpful. For example, you can test various forms of lighting, test whether your laptop’s audio is better or worse than your headset’s, and make sure that you’re looking good before your meeting — with colleagues, friends, or family — starts.
Google Meet’s new “green room” feature is available now.
Performance for Nvidia’s RTX 3060 mobile has been difficult to understand, with the 3060 (as well as RTX 3070 and RTX 3080 mobile) being capable of running in a range of power configurations depending on the laptop model. Now we have some actual data on how much faster or slower the different TDP configurations are. (Note: We’re using “TDP,” aka Thermal Design Power, and “TGP,” aka Total Graphics Power, interchangeably. Basically, we’re talking about the total amount of power the graphics card subsystem is design to dissipate.)
Hardware reviewer Techspot (known as Hardware Unboxed on YouTube), recently checked out a pair of RTX 3060 equipped laptops and ran them in an assortment of gaming benchmarks. The notebook used was the XMG Apex 17 with two different configurations, one with a Ryzen 7 5800H CPU and a 115W configured RTX 3060, the other equpped with an Intel Core i7-10870H and an 80W configured RTX 3060. (Side note: the 5800H probably has more thermal headroom than the 10870H.)
Keep in mind, both notebooks feature Max-Q Dynamic Boost, which can give the RTX 3060 mobile up to an additional 15W of power when CPU utilization is low enough, so the TDP listed for each RTX 3060 mobile is simply the baseline spec.
(Image credit: TechSpot)
Comparing all the gaming results together, TechSpot found that the performance gap between the higher and lower-powered RTX 3060s was on average 11%, with a few outliers in the 20% range and others in the <5% range.
Of course, the processor choice affects these results somewhat. TechSpot does say that most of the games tested were primarily GPU bottlenecked, but there are certainly games that still favor Intel’s architecture.
As expected, the performance differences — at least for the 80W vs 115W model — will vary based on the games you play. That’s especially true with Dynamic Boost 2.0 working in the background, which is also affecting these results.
Unfortunately, TechSpot wasn’t able to test the 60W RTX 3060, and frankly, that model is probably the most interesting to test. At 60W, you are almost cutting the 3060’s power consumption in half when compared with the 115W model. It will be interesting to see how well that configuration does within the power contraints.
We’re working to get RTX 30-series laptops in for review as well, and we’ve already looked at the Asus Flow X13, Alienware m15 R4 and Alienware m17 R4. Unfortunately, none of those are equally equipped when it comes to hardware. Not surprisingly, the specific laptop design will impact the performance quite a bit.
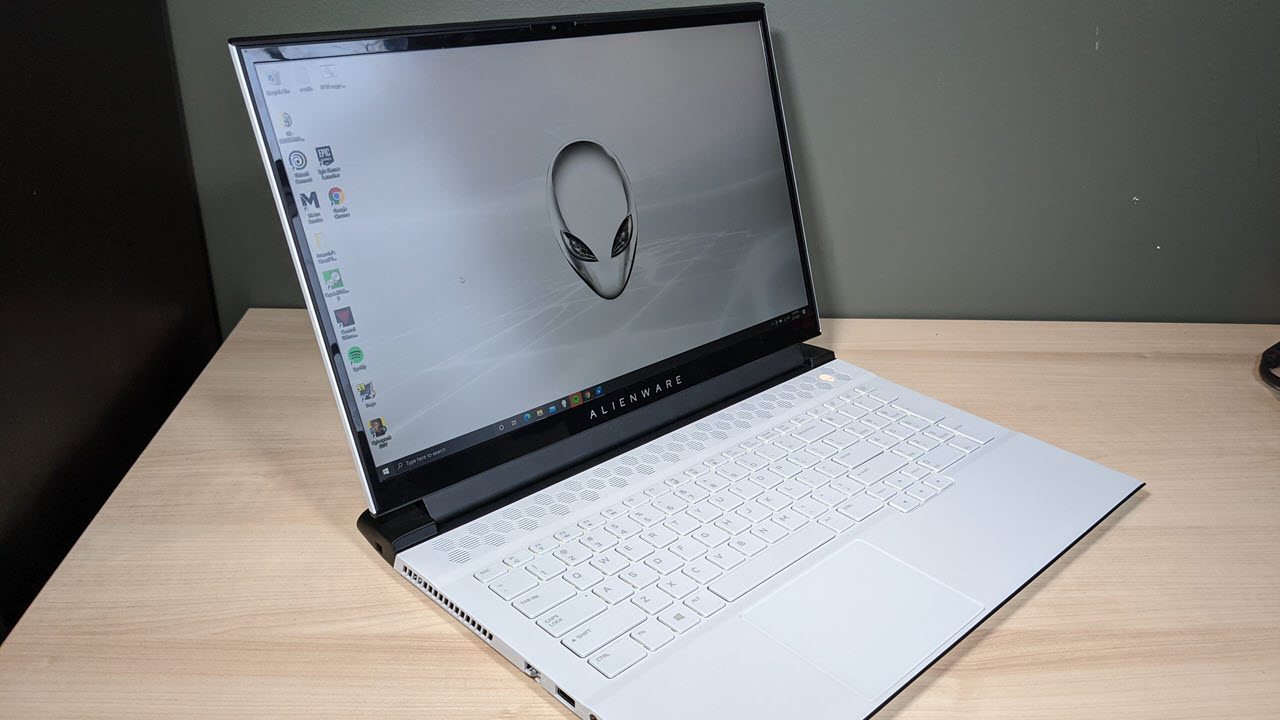
A speed demon that prioritizes raw performance, the Alienware m17 R4 puts plenty of pop into a sleek but bulky chassis.
For
Unrivaled performance
Snappy keyboard
Attractive design
At present, RTX 3080 is the fastest laptop graphics card around, but not all RTX 3080-powered laptops are created equal. Many vendors use Nvidia’s Max-Q technology, which prioritizes power efficiency and low fan noise over high performance. Alienware’s m17 R4, however, seeks to pump out every possible frame, deploying a special cooling system and eschewing Max-Q to make its top-of-the-line configuration one of the best gaming laptops,
But the Alienware m17 R4 is not just a speed demon. Starting at $2,106 ($3,586 as tested), this laptop has a snappy keyboard, a sleek sci-fi inspired design with plenty of RGB and an optional 360 Hz screen. You just have to live with a heavy chassis and the occasional bout of fan noise.
Editor’s Note: The Alienware m17 R4 review unit we tested came with a 512GB boot drive and 2TB RAID 0 storage drive. While this hardware is for sale, it is normally shipped to consumers with the 2TB RAID 0 drive as boot drive.
3x USB Type-A 3.2, 1x HDMI 2.2, 1x mini DisplayPort 1.4, 1x Thunderbolt 3, 1x microSD card reader
Camera
1280 x 720
Battery
86 WHr
Power Adapter
330W
Dimensions (WxDxH)
15.74 x 11.56 x 0.87 inches
Weight
6.6 pounds
Price (as configured)
$3,586
Design of the Alienware m17 R4
Image 1 of 5
(Image credit: Tom’s Hardware)
Image 2 of 5
(Image credit: Tom’s Hardware)
Image 3 of 5
(Image credit: Tom’s Hardware)
Image 4 of 5
(Image credit: Tom’s Hardware)
Image 5 of 5
(Image credit: Tom’s Hardware)
The Alienware m17 R4 has the same sci-fi inspired “Legend” design as both its immediate predecessor, the m17 R3, and its sibling, the Alienware m15 R4. Available in “lunar light: white or “dark side of the moon” (black), the m17 R4 looks like a giant starship, rocketing through space. The body (ours was white) has a black rear end that juts out like the jet engine on the back of an imperial cruiser. The number 17 on the lid appears in a sci-fi font that you might find adorning a secret warehouse at Area 51.
There’s a honeycomb pattern for the vents on the back, above the keyboard and on the bottom surface. We can only assume that Alienware aliens live in some kind of hive where they are all doing CUDA core calculations.
And, of course, there’s lots of RGB lights to brighten the mood in outer space. The keyboard has four-zone RGB and there are customizable lights on the back edge and in the alien heads on the back of the lid and the power button.
The chassis is made from premium materials: a magnesium alloy with matte white or black paint, covered by a clear coat for extra durability. The interior uses Alienware’s cryo-tech cooling technology which has 12-phase graphics voltage regulation, 6-phase CPU voltage regulation and a CPU vapor chamber.
At 6.6 pounds and 15.74 x 11.56 x 0.87 inches, the Alienware m17 R4 is not exactly light or thin, not that would you expect that from a 17-inch laptop with a Core i9 CPU and RTX 3080 graphics. By comparison, the Gigabyte Aorus 17G (5.95 pounds, 15.9 x 10.8 x 1.0 inches) and Razer Blade Pro 17 (6.1 pounds, 15.6 x 10.2 x 0.8 inches) are both significantly lighter, though the Aorus is thicker. The Asus ROG Flow X13, which we’re also comparing to the m17, is much thinner and lighter (2.87 pounds, 11.77 x 8.74 x 0.62 inches), because it’s a 13-inch laptop that gets its RTX 3080 graphics via an external dock.
The Alienware m17 R4 has plenty of room for ports. On the right side, there are two USB 3.2 Type-A ports, along with a micro SD card reader. The left side contains a Killer RJ-45 Ethernet 2.5 Gbps port, a 3.5mm audio jack and another USB Type-A port. The back holds a Thunderbolt 3 port, a mini DisplayPort 1.4, an HDMI 2.1 connection, Alienware’s proprietary graphics amplifier port and the power connector.
Gaming Performance on the Alienware m17 R4
Image 1 of 4
(Image credit: Tom’s Hardware)
Image 2 of 4
(Image credit: Tom’s Hardware)
Image 3 of 4
(Image credit: Tom’s Hardware)
Image 4 of 4
(Image credit: Tom’s Hardware)
Sporting an Nvidia RTX 3080 GPU and an Intel Core i9-10980HK CPU, our review configuration of the Alienware m17 R4 is as fast of a gaming laptop as you can get right now. Thanks to Alienware’s strong cryo-tech cooling solution and the company’s willingness to include a full version of the RTX 3080, rather than the Max-Q variants in some thinner notebooks.
When I played Cyberpunk 2077 at Ultra RTX settings, the game ranged between 61 and 72 frames per second, depending on how intense the action was at any given time. The frame rate improved to between 85 and 94 fps after I changed to Ultra settings with no RTX. In both cases, the fan noise was really loud by default. Changing the fan profile to quiet improved this somewhat while shaving only a couple of fps off, and only in intense scenes.
The Alienware m17 R4 hit a rate of 120 fps in Grand Theft Auto V at very high settings (1080p), eclipsing the Gigabyte Aorus 17G and its Max-Q-enabled RTX 3080 and Core i7-10870H CPU by 20%. The Asus ROG Flow 13 with its Ryzen 9 5980HS CPU and external RTX 3080 dock, was also a good 13% behind while the RTX 2080 Super-powered Razer Blade Pro 17 brought up the rear.
On the very-demanding Red Dead Redemption at medium settings, the m17 R4 achieved an impressive rate of 79.7 fps, besting the Aorus 17G and ROG Flow X13 by more than 20%. Saddled with last year’s card, the Razer Blade Pro 17 was a full 29 % behind.
Alienware’s behemoth exceeded 100 fps again in Shadow of the Tomb Raider, hitting 103 while the Aorus 17G and the ROG Flow X13 hovered in the mid 80s and 60s. On this test, surprisingly, the Razer Blade Pro 17 came close to matching the m17 R4.
Far Cry New Dawn at Ultra settings also provided a great example of the Alienware m15 R4’s dominance. It hit a full 105 fps where its nearest competitor, the Gigabyte Aorus 17G could only manage 92 fps with the Asus ROG Flow X13 and Razer Blade Pro 17 were both in the 80s.
To see how well the Alienware m17 R4 performs over the long haul, we ran the Metro Exodus benchmark at RTX, the highest settings level, 15 times at 1080p. The laptop was remarkably consistent, averaging 75.6 fps with a high of 76.2 and a low of 75.4. During that time, the average CPU speed was 4.19 GHz with a peak of 5.088 GHz. By comparison, the Gigabyte Aorus 17G, got an average frame rate of just 59.6 fps with an average CPU speed of 3.47 GHz and the Asus ROG Flow X13 managed a slightly-higher 65.2 fps with an average CPU speed of 3.89 GHz.
Productivity Performance of Alienware m17 R4
Image 1 of 3
(Image credit: Tom’s Hardware)
Image 2 of 3
(Image credit: Tom’s Hardware)
Image 3 of 3
(Image credit: Tom’s Hardware)
With its Core i9-10980HK CPU, 32GB of RAM and dual storage drives, which include both a 2TB RAID 0 PCIe SSD (2 x 1TB) and a 512GB SSD, and that RTX 3080, our review configuration of the Alienware m17 R4 can be a powerful work tool.
On Geekbench 5, a synthetic benchmark that measures overall performance, the m17 R4 got a single-core score of 1,318 and a multi-core score of 8,051, which wa slightly ahead of the of the Core i7-10870H-powered Gigabyte Aorus 17G on both counts but behind the Asus ROG Flow X13 and its Ryzen 9 5980HS on single-core performance while creaming the Razer Blade Pro 17, which we tested with a Core i7-10875H.
The storage in our review unit came misconfigured slightly, with a 512GB NVMe PCIe SSD as boot drive and a significantly faster 2TB RAID 0 drive made from two 1TB NVMe PCIe SSDs. Dell sells this hardware, but consumers receive units with the 2TB as boot and the 512GB SSD as a secondary, storage drive.
In our tests, copying about 25GB of files, the 512GB drive managed a mediocre 379.7 MBps, but the 2TB drive hit an impressive 1305.5 MBps, which beats the Aorus 17G (869 MBps), the ROG Flow X13 (779.5 MBps) and the Blade Pro 17 (925.2 MBps).
The Alienware m17 R4 took just 6 minutes and 44 seconds to transcode a 4K video to 1080p in Handbrake. That time is 21% faster than the Aorus 17G, 18% quicker than the Flow X13 and a full 29% ahead of the Blade Pro 17.
Display on Alienware m17 R4
(Image credit: Tom’s Hardware)
The Alienware m17 R4 comes with a choice of three different, 17-inch display panels: a 1080p panel with 144 Hz refresh rate, a 4K, 60 Hz panel and the 1080p, 360 Hz panel in our review unit. Our panel provided sharp images and accurate but mostly unexciting colors, along with smooth, tear-free gaming.
When I watched a trailer for upcoming volcano-disaster-flick Skyfire, the red-orange of lava bursts was lively and the green trees in a forest seemed true-to-life. Fine details like the wrinkles in actor Jason Isaacs’ forehead also stood out.
In a 4K nature video of a Costa Rican jungle, details like the scales on a snake and colors like the red on a parrot’s feathers were also strong, but not nearly as strong as when I viewed it on the 4K, OLED panel from the Alienware m15 R4 I tested recently. On both videos, viewing angles on the matte display were strong as colors didn’t fade even at 90 degrees to the left or right.
In Cyberpunk 2077, details like the threads on a rug or the barrel of a gun were prominent and colors like the red and yellow in the UI seemed accurate but didn’t pop.
The Alienware m17 R4’s display registered a strong 316.2 nits of brightness on our light meter, outpacing the Aorus 17G (299.6), the Razer Blade Pro 17 (304.4) and the Asus ROG Flow X13 (281.6). According to our colorimeter, the screen can reproduce a solid 80.6% of the DCI-P3 color gamut, which is about on par with the Aorus 17G and slightly behind the Razer Blade Pro 17, but miles ahead of the ROG Flow X13.
Keyboard and Touchpad on Alienware m17 R4
(Image credit: Tom’s Hardware)
With a deep, 1.7mm of travel, great tactile feedback and a full numeric keypad, the Alienware m17 R4 offers a fantastic typing experience. On the tenfastfingers.com typing test, I scored a strong 102 words-per-minute with a 3% error rate, which is a little better than my typical 95 to 100 wpm and 3 to 5% rate.
Not only does the keyboard have a full numeric keypad, but it also sports four customizable macro keys above the pad on the top row. The Alienware Command Center software allows you to set these to launch a program, enter text or use a pre-recorded set of keystrokes when you hit them. I found programming them very unintuitive, however.it. Alienware Command Center also allows you to set RGB colors or lightning effects for four different zones on the keyboard.
The 3.1 x 4.1 glass touchpad, which uses Windows precision drivers, offers great navigation with just the right amount of friction. Whether I was navigating around the desktop or using multitouch gestures such as pinch-zoom or three-finger swipe, the pad was always accurate and responsive.
Audio on Alienware m17 R4
(Image credit: Tom’s Hardware)
The Alienware m17 R4’s audio system outputs sound that’s loud enough to fill a mid-sized room and rich enough to dance to. When I played AC/DC’s “Back in Black” with the volume all the way up, the sound was mostly accurate, but some of the high-pitched percussion sounds were a little harsh. Earth, Wind and Fire’s bass-heavy “September” sounded great, with a clear separation of sound where instruments such as the horns section appeared to come from a different side of the notebook than, for example, the drums.
Gunshots and the sound of my NPC friend Jackie yelling at me to stay down sounded sharp and clear in Cyberpunk 2077. However, I had to turn the volume way up to compensate for the fan noise when the system was on high performance settings. Even on the “quiet” thermal setting, fan noise was quite prominent.
The preloaded Alienware Command Center app has an audio section that lets you tweak the sound settings and choose among profiles such as Music, Movie, Shooter and Role Play. I found that the default “Alienware” profile sounded about the same as the Music one, but disabling the audio enhancement definitely made the sound flatter.
Upgradeability of the Alienware m17 R4
(Image credit: Future)
The Alienware m17 R4 has three different M.2 SSD slots, all of which are accessible and user upgradeable. The first slot is an short 2230 length and the other two are both the normal 2280 size. Unfortunately, the RAM is soldered onto the motherboard and therefore not replaceable.
Opening the Alienware m17 R4 should be easy: there are eight Philips-head screws, some of which come out and the others of which you can just loosen, on the bottom panel. In our testing, getting the screws loosened was easy by prying off the bottom panel was challenging and required several minutes with a spudger. Once the panel is off, all three SSDs are visible, but are covered by copper heat sinks you can easily unscrew.
Battery Life on Alienware m17 R4
(Image credit: Tom’s Hardware)
Forget about using the Alienware m17 R4 without a power outlet for any length of time. The laptop lasted just just 2 hours and 5 minutes on our battery test, which involves surfing the web over Wi-Fi at 150 nits of brightness. That’s awful in comparison to all of its competitors as both the Gigabyte Aorus 17G and Razer Blade Pro 17 lasted for an identical 4 hours and 41 minutes. But this is a 17-inch, 6.6-pound laptop so portability isn’t a primary concern.
Heat on Alienware m17 R4
The main touchpoints on the Alienware m17 R4 stay relatively cool when you’re not gaming and remain warm but tolerable when you are. After we streamed a YouTube video for 15 minutes, the keyboard hit a reasonable 35.5 degrees Celsius (95.9 degrees Fahrenehitt), the touchpad was a chilly 26.2 degrees Celsius (79.3 degrees Fahrenheit) and the underside was just 36.6 degrees Celsius (97.9 degrees Fahrenheit).
After running the Metro Exodus benchmark for 15 minutes to simulate gaming, those temperatures were obviously higher. The keyboard hit 35.5 degrees Celsius (112 degrees Fahrenheit), the touchpad measured 35 degrees (95 degrees Fahrenheit) and the bottom hit 50 degrees (122 degrees Fahrenheit).
When I played Cyberpunk 2077, the area around the WASD keys measured about 40 degrees Celsius (105 degrees Fahrenheit) but the key caps themselves didn’t feel uncomfortably warm to touch. At performance settings, the fan noise was extremely loud.
Webcam on Alienware m17 R4
(Image credit: Tom’s Hardware)
The Alienware m17 R4’s 720p webcam is nothing special. Even when I shot it in a well-lit room, an image of my face was filled with visual noise and fine details like the hairs in my beard were blurry while colors such as the blue in my shirt and the green on the walls were muted. You’ll get by with this built-in camera if you need to, but you’d be better off springing for one of the best webcams.
Software and Warranty on Alienware m17 R4
Image 1 of 4
(Image credit: Tom’s Hardware)
Image 2 of 4
(Image credit: Tom’s Hardware)
Image 3 of 4
(Image credit: Tom’s Hardware)
Image 4 of 4
(Image credit: Tom’s Hardware)
The Alienware m17 R4 comes preloaded with a handful of useful first-party utilities.
Alienware Mobile Connect allows you to control your Android handset or iPhone from your laptop, taking calls and texts for the desktop.
Alienware Command Center lets you control all the RGB lighting effects, set keyboard macros, tweak audio settings and even modify the performance settings and thermals to go for better performance or quieter and cooler temps. You can even change the max frequency, voltage and voltage offset for the CPU manually if you have an unlocked CPU and want to try overclocking.
As with any Windows laptop, there’s also a small amount of preloaded bloatware, including a trial of Microsoft Office, links to download Photoshop Express and Hulu and free-to-play games like Roblox.
Alienware backs the m17 R4 with a standard one year warranty on parts and labor that includes in-home service (if there was already a remote diagnosis). You can pay extra to extend the warranty up to five years and you can add accidental damage protection with no deductible.
Configurations of Alienware m17 R4
When you purchase the Alienware m17 R4 from Dell.com, you can custom configure it with your choice of a Core i7 or Core i9 CPU, RTX 3070 or 3080 GPU, up to 32GB of RAM and up to 4TB of storage. You can choose white or blackcolor options and you can also pay extra to get per-key RGB lighting instead of the standard 4-zone lighting we tested.
You also get a choice of screens that includes 144 Hz and 360 Hz 1080p panels, along with a 4K, 60 Hz panel that promises to hit 100 % of the Adobe RGB color gamut. If you value image quality over fps, we recommend the latter, because the color on our 360 Hz panel was ok, but not exciting.
Our review configuration of the Alienware m17 R4 currently goes for $3,586.79. For that price, you get the Core i9-10980HK, RTX 3080 graphics, the 360 Hz display, 32GB of RAM and a combination of storage drives that includes two, 1TB M.2 PCIe SSDS in RAID 0 and a 512GB M.2 SSD by itself for a total of 2.5TB of storage. Dell lists the RAID drive as the boot drive in its store but our review model came with the 512GB drive as boot and the 2TB RAID drive as storage, which seems odd.
Bottom Line
(Image credit: Tom’s Hardware)
At this point, it’s hard to imagine someone making a gaming laptop that’s significantly more powerful than the Alienware m17 R4 we tested unless they use desktop parts. The RTX 3080 is currently the fastest mobile GPU around, especially since Alienware didn’t opt for Nvidia’s more power efficient Max-Q technologies.. Using a strong cooling system, pairing it with a Core i9-10980HK, and you have performance that’s often 20% faster than competitors that also use RTX 3080s.
In addition to its strong performance, the Alienware m17 R4 offers a deep, tactile keyboard and a unique, attractive design that’s all its own. The 360 Hz screen is more than capable, but unless you’re a competitive gamer, you can go with the default screen or, better yet, go for the 4K panel which promises much richer colors.
The biggest drawbacks for this epic laptop are those which are kind of inherent to any 17-inch laptop which turns the performance volume up to 11. It’s heavy, has short battery life, emits plenty of fan noise. It’s also quite expensive. It would be nice if, for this price, you got a better-than-awful webcam, but most laptop webcams are terrible.
If you want to save a few dollars or you need a little more battery life, consider the Gigabyte Aorus 17G, which goes for $2,699 with similar specs (but just 1TB of storage) to our Alienware m17 R4. The 17G lasts more than twice as long on a charge and weighs 0.65 pounds less than the m17, but its gaming performance isn’t as good.
If you don’t feel attached to the 17-inch form factor, consider the Alienware m15 R4, which has the same design and keyboard but is much more portable, albeit hotter. It also has an optional, 4K OLED panel which has incredibly vibrant output. However, if you want the ultimate 17-inch gaming rig right now, the Alienware m17 R4 is your best choice.
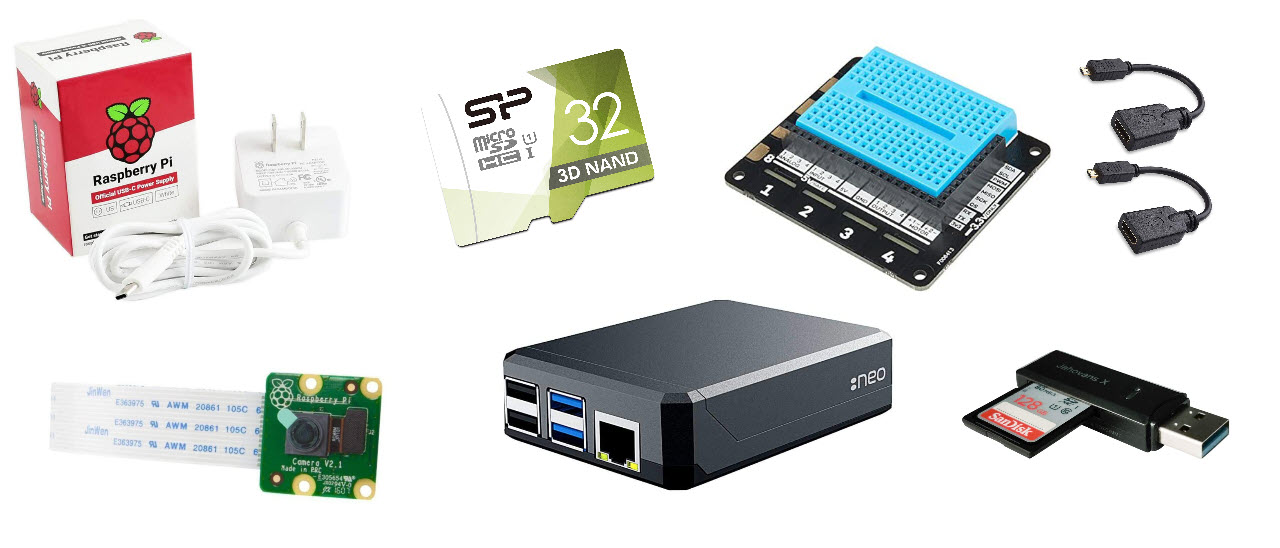
You can purchase a Raspberry Pi for as little as $5 (for the Raspberry Pi Zero) or more likely $35 (for the Raspberry Pi 4), but you’ll need a few extra products to make it run. And, beyond that, there’s a whole world of accessories that help you make the most of your Pi.
As with any computer, on the Raspberry Pi, you’ll need a way to enter data and a way to see the interface, which usually means getting a keyboard, a mouse and a monitor. .However, you can opt for a headless Raspberry Pi install, which allows you to remote control the Pi from your PC. In that case, the minimum requirements are:
microSD card of at least 8GB, but the best Raspberry Pi microSD cards have 32GB or more. When you first set up a Raspberry Pi, you need to “burn” the OS onto it by using a PC, another Raspberry Pi or even a phone with microSD card reader.
Power supply: For the Raspberry Pi 4, you need a USB-C power source that provides at least 3 amps / 5 volts, but for other Raspberry Pis, you need a micro USB connection that offers at least 2.5 amps and the same 5 volts.
In addition, there are a number of accessory and add-on types that protect your Pi, add new features and make everything a lot more useful and fun. These include:
Cases: The best Raspberry Pi cases give you style, functionality and durability.
HATs (aka add-on boards): The best Raspberry Pi HATs let you do everything from adding motors to creating LED light shows.
Breakout Boards: To breakout the GPIO for easier access or to use via a breadboard. Essential for the new Raspberry Pi 400.
Camera Modules: The Raspberry Pi has its own special camera port and there’s a whole ecosystem of compatible camera modules for it.
Cooling: Raspberry Pi 4 models in particular can get hot so fans and heatsinks help.
Electronic parts: You can make great projects and have a lot of fun with motors, sensors, transistors and other bits and bobs.
Overall, these are the best Raspberry Pi accessories. No matter what your needs or project, you’ll definitely need some of these.
The Best Raspberry Pi Accessories You Can Buy Today
(Image credit: Tom’s Hardware)
1. Argon Neo Case
Best Raspberry Pi Case
Attractive aluminum design
Easy access to GPIO pins
Passive cooling
Sliding magnetic cover
Must remove cover to get to pins
The top overall choice on our round-up of the best Raspberry Pi Cases, the Argon Neo combines great looks with plenty of flexibility and competent passive cooling. This mostly-aluminum (bottom is plastic) case for the Raspberry Pi 4 features a magnetic cover that slides off to provide access to the GPIO pins with enough clearance to attach a HAT, along with the ability to connect cables to the camera and display ports. The microSD card slot, USB and micro HDMI out ports are easy to access at all times.
With the cover on or off, the Argon Neo provides solid passive cooling capability as an included thermal pad connects the Raspberry Pi 4’s CPU to an aluminum plate to dissipate heat. You can also attach an optional fan HAT for active cooling. At just $15, this case is extremely affordable but cuts no corners.
(Image credit: Tom’s Hardware)
2. Raspberry Pi High Quality Camera
Best Raspberry Pi Camera
Great image quality
Interchangeable Lenses
Tripod mountable
Expensive
Doesn’t come with lens
It doesn’t come cheap, but the official Raspberry Pi High Quality camera offers the best image quality of any Pi camera by far, along with the ability to mount it on a tripod. The 12-MP camera doesn’t come with a lens, but supports any C or CS lens, which means you can choose from an entire ecosystem of lenses, with prices ranging from $16 up to $50 or more and a variety of focal lengths and F-stop settings.
The Raspberry Pi High Quality camera plugs into the same CSI port on the Raspberry Pi as any other Pi camera module, but unlike the others, this one has a ¼ inch screw hole that allows you to attach it to any standard tripod or camera mount. If you care about image quality, the Raspberry Pi High Quality Camera is a must-have.
Read: Raspberry Pi High Quality Camera review
(Image credit: Tom’s Hardware)
3. Raspberry Pi Camera Module V2
Best Affordable Raspberry Pi Camera
Good image quality
Affordable price
No tripod mounting
If you need a Raspberry Pi camera, but don’t want to spend more than $50 on the high quality module and then have to bring your own lens, the official Raspberry Pi Camera Module V2 is the one to get. This 8-MP camera uses a Sony IMX219 sensor that gives it really solid image quality, records video at up 1080p, 30 fps and is a big improvement over the 5-MP OmniVision OV5647 that was in the V1 camera.
There are a number of third-party Raspberry Pi camera modules on the market, with some costing around $10 or less. However, most of these use the older, OV5647 sensor which provides far worse image quality.
(Image credit: Tom’s Hardware)
4. Lenovo ThinkPad TrackPoint Keyboard II
Best Keyboard for Raspberry Pi
Best-in-class typing experience
Trackpoint for navigation
Both 2.4 GHz and Bluetooth wireless
Long battery life
Expensive
Whether you want to control your Raspberry Pi from the couch or you have it on a table and don’t want to waste space, getting one of the best wireless keyboards is a good idea. It’s particularly helpful to have a wireless keyboard with a pointing device so you don’t need to also drag around a mouse.
Lenovo’s ThinkPad TrackPoint Keyboard II is the best keyboard for Raspberry Pi thanks to its excellent key feel, multiple connectivity options and built-in TrackPoint pointing stick. The keyboard looks and types just like those on Lenovo’s ThinkPad line of business laptops, offering plenty of tactile feedback and a deep (for a non-mechanical), 1.8mm of key travel. The TrackPoint pointing stick sits between the G and H keys, allowing you to navigate around the Raspberry Pi’s desktop, without even lifting your hands off of the home row.
The Thinkpad TrackPoint II has both 2.4-GHz (via a dongle) and Bluetooth connectivity which you can toggle between using a hardware switch. So, if you have two Raspberry Pis or one Pi and one PC, you can switch back and forth with ease. Charging via USB-C, the keyboard promises up to two months of battery life on a charge.
Read: Lenovo ThinkPad TrackPoint Keyboard II review
(Image credit: Amazon)
Raspberry Pi 4 Official Power Supply
Best Raspberry Pi Power Supply
Provides just the right amount of power
Built for Pi
No on/off switch
Not the cheapest option
If you’re going to use a Raspberry Pi 4, you need a USB-C power supply that offers at least 3 amps of juice with a roughly 5-volt output. We’ve found that the best USB-C laptop chargers are capable of delivering this kind of power (albeit often with 4.8 – 4.9 volts, which still works), but if you don’t have a powerful charger handy or need one just for your Pi, the official Raspberry Pi power supply is your best choice.
Rated for 5.1 volts and 3 amps, the official Raspberry Pi 4 power supply has good build quality and a nice design. Available in black or white, it’s a small rectangle, emblazoned with the Raspberry Pi logo and a strong, built-in Type-C cable that’s 59 inches (1.5m) long. Unlike some third-party competitors, it doesn’t come with an on / off switch, but it is compatible with cheap on / off adapters you can attach to the end. You may find competitors for a few dollars less, but the official Raspberry Pi 4 power supply is a sure thing.
If you are shopping for any other Raspberry Pi, including the Raspberry Pi Zero or Raspberry Pi 3 or below, you’ll need a power supply that outputs to a micro-USB port and only requires 2.5 amps and 5 volts. There’s also an official Raspberry Pi charger for these older models.
(Image credit: Amazon)
6. Pimoroni Explorer HAT Pro
Best Raspberry Pi HAT
Analog to digital conversion
Motor controller
LED lights
Built-in breadboard
No pass-thru for other HATs
The Raspberry Pi’s 40 GPIO pins are arguably its most important feature. Using these pins (see our GPIO pinout), you can attach an entire universe of electronics, including motors, sensors and lights. There’s a huge ecosystem of add-on boards, appropriately called HATs (hardware attached on top) that plug directly into the GPIO pins and matching the same layout as the Pi. These add on boards give you all kinds of added functionality, from LED light matrixes to touch screens and motor controllers for robotics projects.
Sitting at the very top of our list of Best Raspberry Pi HATs, each of which has a different purpose, the Pimoroni Explorer HAT Pro provides a smorgasbord of features that you can use in a wide variety of projects. While the Raspberry Pi doesn’t come with an analog to digital converter like Arduino does (see Raspberry Pi vs Arduino), the Explorer HAT Pro provides four ADCs you can use with joysticks or potentiometers. It also packs two motor controllers, four colorful LED lights, four touch pads and four crocodile clips for attaching other electronics. Oh and it comes with a small breadboard you can stick on top and use for mounting and wiring electronics. Every serious Raspberry Pi fan should have one of these on hand.
(Image credit: Amazon)
7. Pimoroni Fan Shim
Best Cooling for Raspberry Pi
Great cooling
HATs go on top of it
Expensive in the US
If you’re using a Raspberry Pi 4, you definitely need some kind of cooling, whether it’s a heat sink, an aluminum with passive cooling built in or, best of all, a fan. The Pimoroni Fan Shim is powerful, easy-to-install and unobtrusive. You just push it down onto the left most side of your GPIO pin header and it does a fantastic job of cooling your Pi. You can even use a Pimoroni Fan Shim on a Raspberry Pi 4 that’s been overclocked all the way to 2.1 GHz, without seeing any throttling.
You can just let the Fan Shim run all the time or you can download Pimoroni’s software, which allows you to set temperature thresholds for it.
Read: Pimoroni Heatsink and Fan Shim Tested
(Image credit: Silicon Power)
8. Silicon Power 32GB 3D NAND microSD Card
Best Raspberry Pi microSD Card
Inexpensive
Leading performance
White surface you can write on
Slow boot times
Unless you’ve specifically configured yours to boot from an SSD (see our article on How to Boot Raspberry Pi from USB), every Raspberry Pi uses a microSD card as its primary storage drive. We maintain a list of the Best microSD cards for Raspberry Pi and have chosen the 32GB Silicon Power 3D NAND card as the top choice.
Unless you’re hosting a media server or have a ridiculous amount of ROMS on a game emulator, a 32GB microSD card provides more than enough storage for Raspberry Pi OS and a ton of applications. The operating system and preloaded applications take up far less than 8GB by themselves.
In our tests, the Silicon Power 3D NAND microSD card had the fastest application open times and the best combination of random reads and writes. Considering that it’s also less expensive than most 32GB cards and that its white surface provides a little room for you to write on it (with marker), this is currently the best card around.
(Image credit: Amazon)
9. GPIO Reference Board
Helpful Accessory
Helpful reference
Cheap
You can look this up online
Each of the Raspberry Pi’s 40 GPIO pins has a different function so it’s hard to keep track of which does what. For example, some of the pins provide I2C communication while others offer power and others are just for grounding. You can look at a GPIO pinout guide such as ours, but sometimes it’s just easier to put the list of functions right on top of the pins.
GPIO reference boards are tiny, non-electronic headers that you place on top of the pins to show you which one has which name. There are many different brands and models for sale and all do pretty much the same thing so there’s no need to be picky about which one you buy. Most have small holes on top that you can use to hang them on a keychain and take them wherever you go.
(Image credit: Amazon)
10. micro HDMI to HDMI Adapters
Must-Have for Pi 4
Very helpful and work well
You still need an HDMI cable
While most of the earlier Raspberry Pi models have a single, full-size HDMI port, the Raspberry Pi 4 has dual micro HDMI ports that can each output to a monitor at up to 4K resolution. While there’s a good chance you already have one or more HDMI cables lying around the house, most of us don’t have micro HDMI cables, because it’s a rarely used connector.
To connect the Raspberry Pi 4 to a screen, you’ll either need a micro HDMI to HDMI cable or a micro HDMI to HDMI adapter you can connect an existing cable to. Cable Matters, a well-known and reputable brand, sells a pair of such adapters for just $10. That’s much cheaper than a single micro HDMI to HDMI cable, which goes for $8 to 10 for just one. I’ve been using these Cable Matters adapters for more than a year now and they’ve worked really well.
(Image credit: Amazon)
11. Electronics Kit with Breadboard, Wires
Great for learning
Helpful for prototyping
No soldering necessary
You can use your Raspberry Pi as a game emulator, a server or a desktop PC, but the real fun begins when you start connecting electronics to its GPIO pins. Of course, to even get started playing with GPIO connectors, you need some interesting things to connect to them such as lights, sensors and resistors.
The market is filled with electronics kits that come with a slew of LED lights, resistors, jumper cables, buttons and other bits and bobs you need to get started. Most importantly, all of these kits come with at least one breadboard, a white plastic surface filled with holes you can use to route and test circuits, no soldering required.
There are plenty of good kits from no-name brands on Amazon, but the Freenove LCD 1602 Starter kit caught our eye, because it comes with an ADC chip for analog-to-digital conversion, an LCD text screen and a GPIO extension board you can use to route all your pins over to the breadboard at once.
(Image credit: Amazon)
12. USB 3 microSD Card Reader
Need it to read and write
PC with USB port quired
In order to write Raspberry Pi OS (or a different OS) to a microSD card, you’ll need some kind of microSD card reader that you can attach to your PC. Just about any make or model will do as long as it reads SDHC and SDXC cards and, preferably, connects via USB 3.0. I’ve been using the Jahovans X USB 3.0 card reader, which currently goes for $5.99, for almost a year now and it has worked really well.
You can also attach a microSD card reader to your Pi and use it to create a disk image backup of your Raspberry Pi.
(Image credit: Tom’s Hardware)
13. Raspberry Pi Zero Official Case
Best Case for Raspberry Pi Zero
GPIO Access
Camera Access
Official Pi design
Can’t have both GPIO and Camera at once
We’re not huge fans of the Official Raspberry Pi 4 case, because it covers the GPIO pins and camera slots. However, the Official Raspberry Pi Zero case is a completely different as it comes with three different covers: one which has a camera hole (so you can make a Raspberry Pi body camera), another which exposes the GPIO pins and a third which covers the whole thing. The official Raspberry Pi Zero case also has the official burgundy and white colors of the Raspberry Pi Foundation.
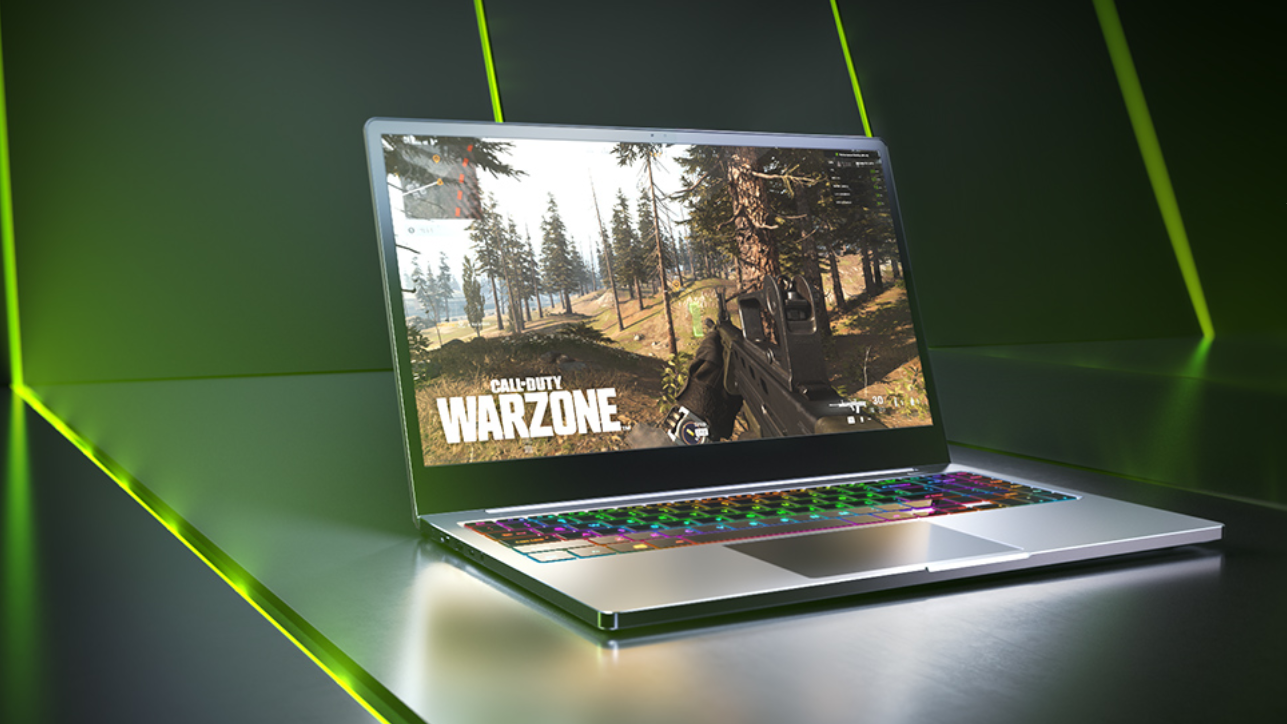
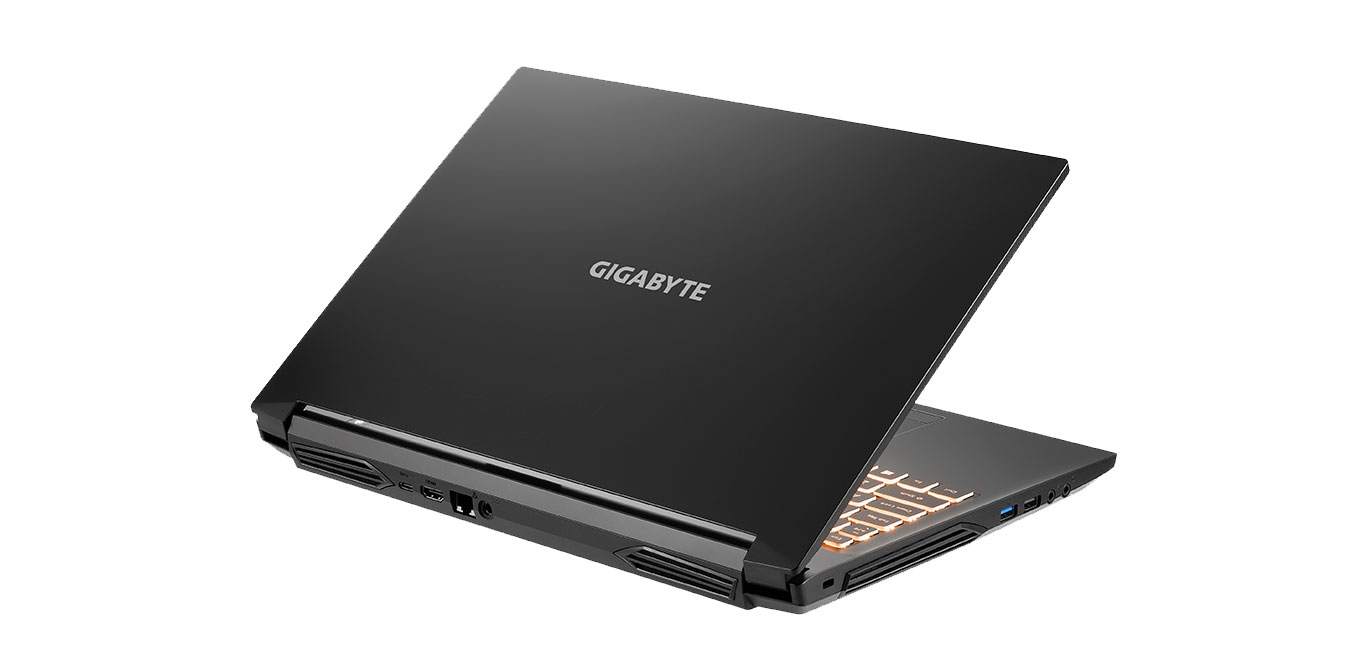
We have our first benchmark sighting for the highly-anticipated RTX 3060 mobile GPU from Nvidia. The GPU was spotted in a Gigabyte G5 running Geekbench 5’s OpenCL benchmark.
The RTX 3060 will be Nvidia’s latest mid-range GPU for mobile devices. The GPU comes with a fully unlocked GA106 core with 3840 CUDA cores (yes, more than the desktop variant) and a combination of either 14Gbps or 12Gbps VRAM with 6GB of capacity (yes, potentially half the VRAM of the desktop card). The 3060’s power consumption will vary significantly depending on the laptop model, with a configurable TDP of 60-115W depending on the OEM’s design choices.
In the Gigabyte G5, the RTX 3060 scored 93,263 points in the OpenCL benchmark. This equates to performance just below a desktop RTX 2070 Super and just above the RTX 2080 Super Max-Q. Yes, you read that correctly: RTX 2070 Super (Max-P) tends to outperform RTX 2080 Super Max-Q. That’s why Nvidia’s decision to obfuscate RTX 30-series mobile power levels even more annoying.
If these results are indicative of real-world performance, the RTX 3060 in the Gigabyte G5 laptop offers excellent performance for a mid-range laptop. Unfortunately, we have no idea of the 3060’s TGP in the Gigabyte G5 (probably at the higher end of the TGP range), and other aspects of the latop configuration (memory, CPU, storage) can also impact performance.
Image 1 of 3
(Image credit: Geekbench 5)
Image 2 of 3
(Image credit: Geekbench 5)
Image 3 of 3
(Image credit: Geekbench 5)
This has become an ongoing problem with mobile Ampere, as each GPU model can run at significantly variable TGPs. According to Nvidia’s site, an RTX 3060 laptop can run from a minimum spec of 60W (“Max-Q”) up to 115W, a near doubling of the total power limit. In short, performance for Nvidia’s mobile Ampere GPUs depends on more than just the GPU model number.
The GPU core counts on an RTX 3060 will be the same, whether that’s a 60W model or a 115W model, but clock speeds are directly impacted by power limits. The design of the laptop chassis and cooling solution for the GPU are major factors in overall performance, and based on what we’ve seen with RTX 20-series Max-Q parts, the performce difference between minimum power and maximum power variants could be as large as 30 percent.
This represents a double-edged sword for the laptop industry. It’s a positive for manufacturers, as they can produce quality thin and light laptops with better thermals and acoustics. It could turn out to be a nightmare for consumers, however, trying to determine whether you’re getting a “fast” high-power laptop or a “slow” low power laptop. Generally speaking, we expect most laptops that fall into the thin and light category to use lower TGP configurations.
Back to the Gigabyte G5 laptop, we suspect this specific RTX 3060 model uses a higher TGP setup. The G5 measures 361x258x27.9mm, so it’s a bit thicker and bulkier and thus has the potential to properly cool a 100W GPU. Sadly, the only way to know for certain how it performs relative to other RTX 3060 models is to test each one.
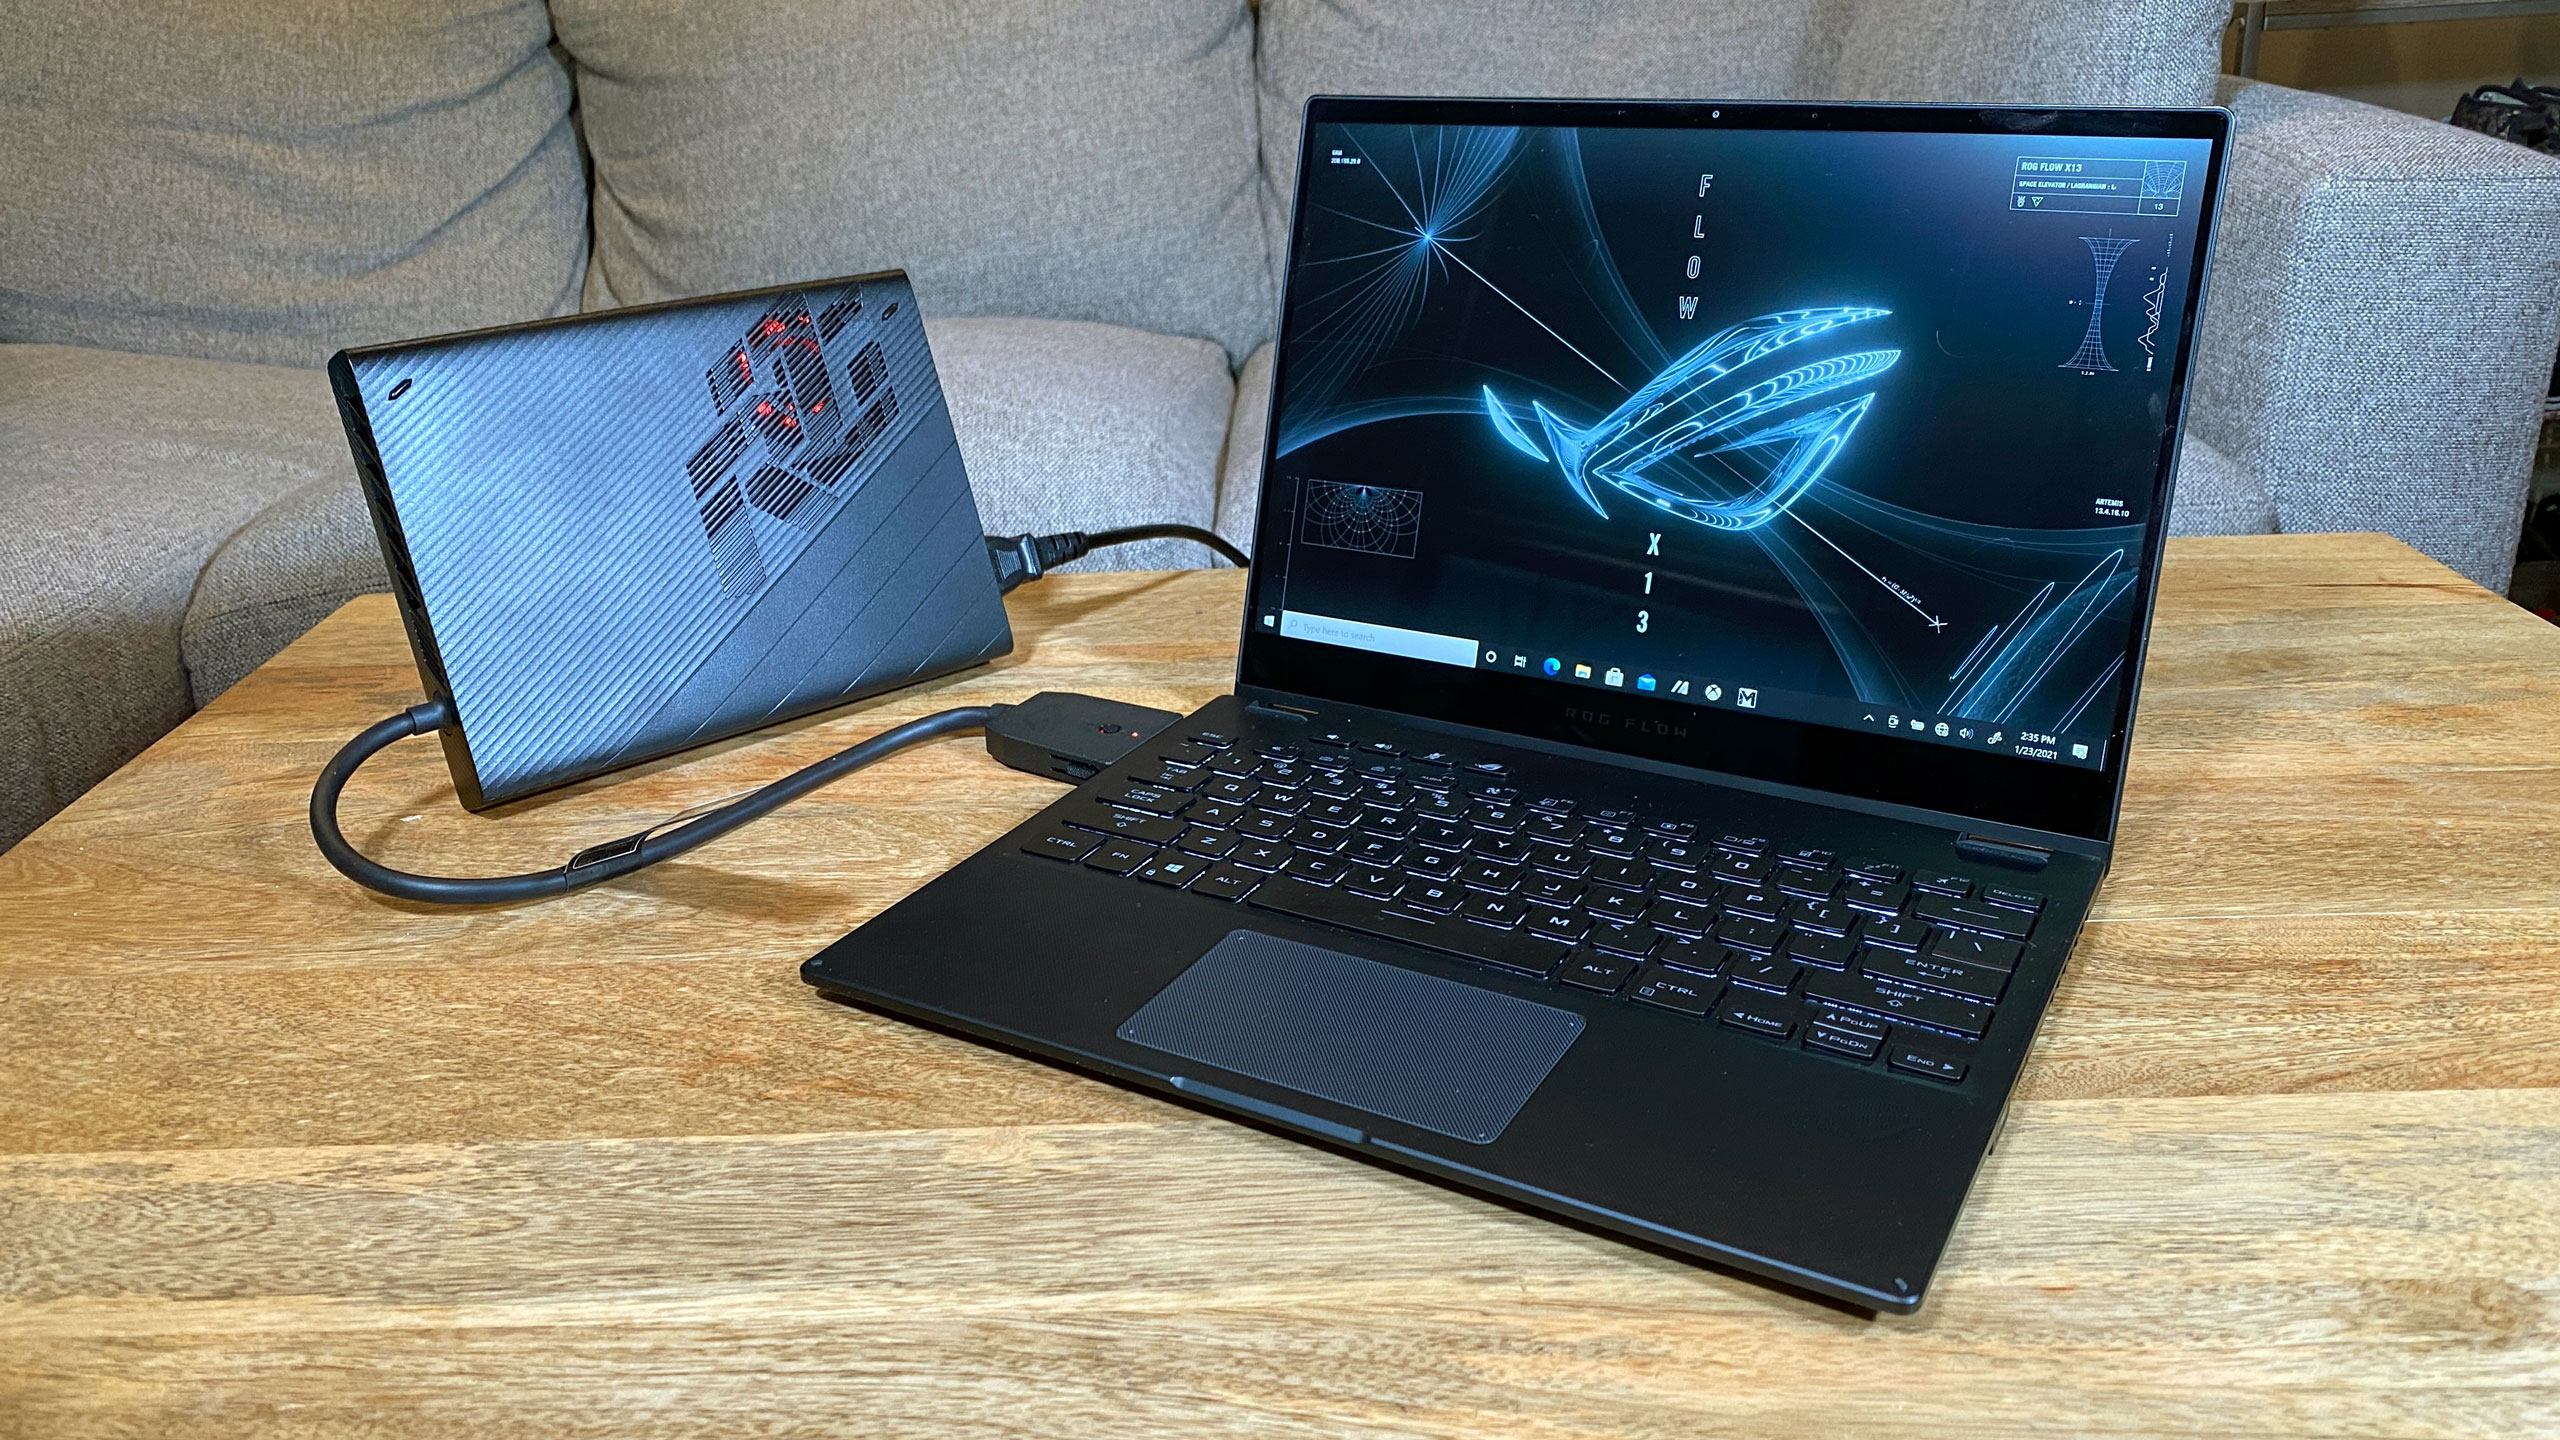
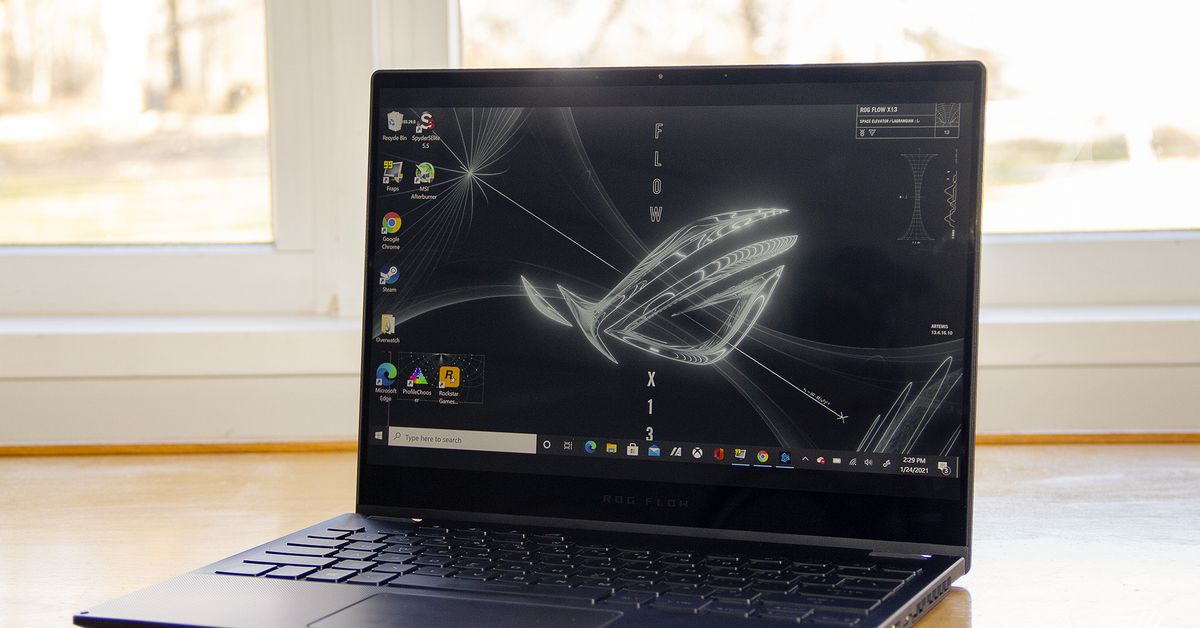
The Asus ROG Flow X13 was one of the most-hyped announcements of CES 2021, with good reason — how often do you see a 13-inch convertible gaming laptop, especially one that looks so cool? — but there was a catch. On Asus’ store, the ROG Flow X13 was only listed in a $3,000 bundle with an XG Mobile eGPU. (This was also the only preorder link given to media at the time of the Flow X13’s announcement.) That’s a chunk of change, and it led most Flow X13 reviewers (myself included) to express reservations about the steep price.
But a new clarification from Asus may change the game. On the latest episode of the ROG PulsePodcast, Asus marketing manager Sascha Krohn indicated that the company does, in the future, plan to sell the ROG Flow X13 by itself.
“There was some misunderstanding about us only selling it as a bundle, so the XG Mobile together with the X13,” Krohn said. “So we do sell it as a bundle, but we also sell it separately, and that’s important.”
Asus marketing specialist Ryan Nesbit gave a rough starting price of “$1,200-ish.” Nesbit and Krohn did not reveal a timeline or release date for this X13 configuration. We’ve asked Asus about this and will update this article if we hear back.
That $1,200 price point, if Asus follows through on it, would be a game-changer for the ROG Flow X13. Many reviews pointed out that the X13’s value proposition as a $3,000 gaming laptop is iffy outside of a fairly niche audience. Its internal GPU is entry-level compared to the chips you’ll find in other gaming ultraportables, and external GPUs tend to incur a performance penalty. (After all, they’re outside the laptop.)
But as a $1,200 general-purpose laptop, I’d be comfortable calling the Flow X13 an absolute steal. Not only is it great in almost every way — there’s a unique and sturdy design, a great keyboard, and an excellent 16:10 touchscreen with stylus support — but it includes an eight-core processor (starting with AMD’s Ryzen 5900HS). That’s undoubtedly the most powerful chip you can currently find in a 13-inch chassis. At $1,200, this laptop would be a no-brainer for anyone who needs a 13.4-inch laptop for CPU-intensive work.
The flipside of this: it means the GeForce RTX 3080 XG Mobile (in the bundle that’s listed on Asus’ site and also the one that was sent to reviewers) is pretty expensive. Krohn and Nesbit also indicated that an RTX 3070 edition of the XG Mobile will be available in the future, with an estimated price of “around eight to nine hundredish.” Basic math suggests this would make the RTX 3070 XG Mobile as much as $1,000 cheaper than the RTX 3080 configuration in the bundle that’s currently listed. That’s quite a large delta, but I guess we’ll see.
It’s not clear from the podcast whether Asus plans to sell the XG Mobile on its own or whether this eGPU will be sold in a cheaper Flow X13 bundle. We’ve asked Asus for clarification here, too.
You can view the full episode below. The pricing discussion begins just over 15 minutes in.
(Pocket-lint) – In the world of tech we’ve become accustomed to devices with multiple purposes. One could point at the smartphone as being the ultimate example of that – with plethora of apps, it’s replaced our physical alarm clocks, calendars, to-do lits, sticky notes, cameras, and many other functions. So when a gadget comes along with a single purpose, it catches our attention.
That’s what Norway-based ReMarkable is attempting to do with its paper tablet. It’s a digital tablet, but it’s designed to replace paper and pen only. To do that, the company has focused on recreating a genuine paper-and-pen experience of writing, so that – in this age of wanting to reduce our impact on the planet – it can replace physical notebooks and notepads.
It’s not cheap, but for those who love to write with a pen or pencil on paper – whether to jot down ideas, keep a journal, or just doodling – it’s a modern alternative to books, which either take up space on our shelves, or paper, which inevitably ends up in the recycling bin.
Design and display
Dimensions: 187 x 246 x 4.7mm / Weight: 403g
10.3-inch monochrome display
One of the elements that makes ReMarkable’s second-generation tablet so appealing its its design. It’s made from super slim piece of aluminium. And when we say super slim, it really is: imagine if someone sliced an iPad Air in half and you’re pretty much there. At just 4.7mm thick, the ReMarkable 2 is much slimmer than your typical tablet.
Pocket-lint
That slimness makes it a pleasure to hold, but also makes it really easy to carry around in your bag. You don’t need to make space for it. Likewise, at just 403 grams, it’s not that heavy either – about a third of a laptop’s typical weight.
This isn’t really for carrying around instead of your laptop, phone or tablet though. Due to the ReMarkable 2’s dedicated function, it’s really just to replace an A4 notepad. In that context, it’s far easier and more convenient to carry around than a Black’n’Red ruled notepad. And that’s where its attraction first sets in. For those of us used to carrying around paper sketchpads or notebooks, the lightness and ease of the ReMarkable 2 is really appealing.
The display takes up a lot – but not all – of the space on the front. It’s surrounded by a white bezel which is thicker on the bottom than on the top, to give you somewhere to rest your palm when you’re writing on the bottom section of the digital page. What we like is how this white frame is designed to match the default white surface of the E-Ink display. It’s also covered in the same matte-textured glass.
Pocket-lint
This same texture and finish is on the back too, which adds consistency to the feeling and look from both sides of the tablet. It contrasts nicely with the dark grey metal frame that runs around the edges and the metal side panel on the left edge. One nice little detail is the rubber feet on the back – there are four tiny rubber dots, one per corner, so that when you place the tablet down on a desk or table to write on it, it doesn’t feel uneven or slip around.
As far as ports and buttons go, there’s not much to talk about. There’s a power/sleep button right on the top edge in the left corner, with a USB Type-C port for charging on the bottom edge. Apart from that, you have a five-dot connection point on the left edge, with magnets built into the sides that allow you to snap on one of the company’s luxurious and lovely folio cases, or the essential Marker stylus.
Reading, writing and rhythm
Textured display surface
Digital ‘Marker’ support
Multiple page formats as standard
PDF and ePUB file reading
After we’d finished gawping at the slim design, the thing that stood out is just how easy the ReMarkable 2 is to get writing on. That’s pretty much the entire point of this tablet – to feel like pen/pencil on paper.
Pocket-lint
There’s no learning curve. No awkward repositioning of a hand because it was making the touchscreen react oddly. No having to hold the Marker (stylus) in a specific way to see what we were doing. We just put the tablet down, loaded up an Oxford-ruled lined paper template, then started writing. Easy.
That textured surface on the front is a big part of what makes this tablet such a pleasure to use. Your hand doesn’t slip like it might on a glossy slab of glass, like the displays on ‘proper’ tablets. What’s more, because it’s a transflective E-Ink display, the surface reflects the colour temperature of the light in the room, so it looks natural.
Reponse on screen is relatively lag-free. It’s not quite as instant as using a real pen on real paper, but it’s not far off and it’s not laggy enough that it stops the natural feeling. The monochrome E-Ink also means it’s easy to see what you’re doing. It’s inky black and relatively sharp thanks to its 226dpi resolution.
However, it’s not sharp enough that it looks super crisp, not so responsive that it feels effortlessly fluid. Both points that could be improved a little for third-generation model, if there is one in the future.
Pocket-lint
The only aspect to learn is the interface, but that doesn’t take long. The home page – if you want to call it that – is an overview of your notebooks. You create new ones by tapping an icon at the top of the screen, where you select what style of paper you want, which is where its versatility shines.
Not only can you choose from a wide array of standard lined, ruled and grid papers, but for the musically minded there are useful templates like guitar tab, bass tab, guitar chords, and piano sheet templates in various sizes. There are week planner templates for those who like to get their week organised in advance, and – for artists – various isometric, symmetrical and caligraphy templates.
Essentially, if you can buy a book from a stationery story with bespoke template lines in, ReMarkable has thought of it and added it to the available options. So if you need one notebook as a journal, another for practicising your calligraphy, another for song-writing, and another just for planning and doodling ideas, you can do that all in the one place.
Pocket-lint
Once you’re in a notebook, drawing away, you can add multiple layers to a page and hide layers you’re not working on, just like working in painting app/programme, so it’s even flexible in that regard. You can also choose which style of pen you’re using within a page. For instance, choosing a paintbrush, pencil or pen, depending on how you want to draw or write.
The only thing that took us aback a little was that the ReMarkable tablet doesn’t come with a stylus as standard – that’s an additional extra. Which is unusual given how essential it is to using the tablet. And how pricey the product is in the first place. The Marker has a built-in ‘eraser’ at the end for rubbing out text on screen. There’s no setup required and you don’t need to charge it. It just works – much like a real pen.
While the ReMarkable 2’s primary aim is as a distraction-free creation tool, that’s not all it can do. With ePub and PDF support, you can load up e-books and documents on to it as well for offline reading. What’s more, with the iOS and Android smartphone apps, plus the MacOS and Windows 10 desktop apps, you can sign into your account on a smart device and read/sync pages and notebooks for easy access everywhere.
Pocket-lint
The biggest downside of the lot, however, is that the display is lacking a backlight. So those wanting to read, write or create while in bed at night will need a bedside lamp on in order to see what they’re doing. Again, much like real paper.
Verdict
Sometimes a gadget comes along that’s so niche and limited in its purpose that for most people it’d be a needless expense. But for those who want to reduce their impact on the planet but love handwriting notes, plans and journals, the ReMarkable 2 is simply divine. With a backlight on the display it’d be almost perfect, although it’s not cheap.
If you’re completely focussed on going paperless, there isn’t a product on the market that can replicate the pleasure of writing with a pen on paper digitally like the ReMarkable 2. It’s divine.
With that said, its limited functionality and singular purpose mean that it’s not a gadget for most people. It’s not going to replace your existing tablet, laptop, Kindle or phone, but we get the sense that ReMarkable is fine with that. It knows its audience, and for those people, it might just be the perfect device.
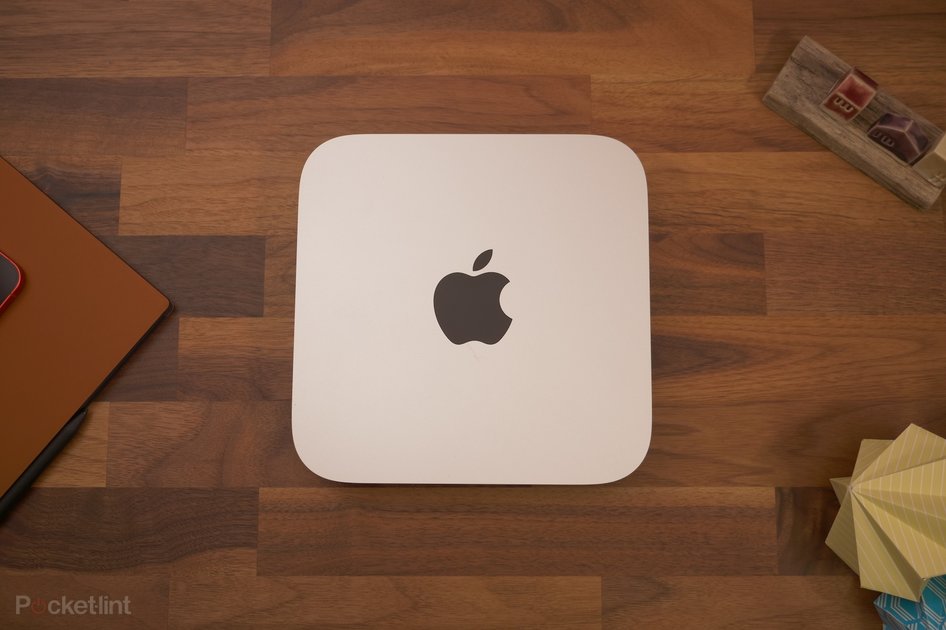
(Pocket-lint) – The Apple Mac mini has been around in one form or another for the best part of 15 years. It may not be a top seller, or a model you see millions upon millions of people using, but it clearly has strong appeal that’s seen it last as long as any of Apple’s product families.
What makes it attractive now is the same thing that made it attractive back in 2005 (when the PowerPC G4 version first shipped): it’s small, it’s powerful and it’s a lot less expensive than an iMac.
And while this Mac mini looks identical to the one that’s been on store shelves for the past couple of years, it has a totally new brain: Apple’s M1 processor. So what does that mean and does it make for the best miniature desktop machine you could buy?
Minimalist to the extreme
Case built from recycled aluminium
Dimensions: 197mm square x 36mm tall / Weight: 1.2kg
Like the M1-updated MacBook Air and MacBook Pro, nothing has changed for the Mac mini from a visual perspective. It’s still that minimalist rounded-edged square aluminium case with the Apple logo in the centre, with nothing but a single white LED on the front. All the ‘ugly’ ports are hidden at the back, so that if you want to hide all your messy cables then it’s easy.
Size wise, it’s maybe not as ‘mini’ as it could be though. Watch enough teardown videos and you’ll see how much space there is inside the new M1-powered Mac mini. That’s because the M1 hardware and all that entails fits into a much smaller space than all the previous components. We’d be surprised if the next-generation model wasn’t even smaller for that very reason.
Still, compare it to a tower PC or any other Mac desktop computer and it takes up a lot less space than most. Despite being a bit old now, there’s something quite attractive about a sleek metal box sitting on your desk with no seams, joins or screws visible (well, unless you you turn it upside down or look at it from the back).
That minimalism also applies to the port selection on the back, but there’s still much wider support here than on either of the M1 MacBooks. For starters, you get two USB-A ports, along with the two USB 4 Type-C/Thunderbolt ports. You even get an Ethernet connection point, HDMI 2.0, and a 3.5mm headphone jack. There’s also an opening to allow airflow from the fan.
Pocket-lint
We’d love to see one or two more Thunderbolt ports and an SD card reader in future models though (as much as the latter is highly unlikely). It certainly seems like there’s adequate space, though, so we can’t fathom why there isn’t a card reader on a machine that’s otherwise primed and ready for creators. The same can be said of the MacBook Pro, really.
It’s not unusable with this number of ports, of course, but we had to rely on a Thunderbolt 3 desktop dock to get constant access to an SD card and microSD card reader. It also expanded our options for additional ports and – just as usefully – gave us a headphone port that we didn’t need to reach around the back of a computer to gain access.
Which monitors can I use?
Thunderbolt supports 6K up to 60Hz
HDMI 2.0 port supports 4K up to 60Hz
Thunderbolt 3 to Thunderbolt 2, DVI and VGA adapters available
We can’t talk ports without talking monitors, which is certainly something to consider before deciding on whether to get a Mac mini or not. In this home office there’s been a USB-C LG monitor for a good few years. Primarily because it’s a monitor with multiple input options, and because for a good chunk of time, the MacBook Pro was our home computer of choice.
The model we paired up is the LG 27UK850. It’s a 4K 27-inch monitor that supports up to 60Hz refresh rates and is pretty much perfect for the Mac mini. You can plug it either into the HDMI 2.0 port on the back, or use one of the USB-C/Thunderbolt ports.
Pocket-lint
The good thing about this particular monitor is that it also features two USB-A ports on the back, so you can effectively use it as a desktop hub if you need to plug an extra couple of peripherals in, like a USB microphone or a wired keyboard.
Anyway, enough about the monitor. The real thing to note with this Mac is that you can connect up to two monitors. But you do need to split it between the HDMI port and one Thunderbolt port. Using two screens, you get 4K and 60Hz on both. For higher-resolution monitors, you’re limited to just one monitor and you have to use one of the Thunderbolt ports as the HDMI maxes out at 4K. Those power users who like three or more screens won’t have much luck here, but we suspect those users are few and are already using a Mac Pro.
M1 power
8 core M1 processor, 8GB or 16GB RAM
8 core GPU + 16 core Neural Engine
256GB/512GB/1TB/2TB storage
A lot has been said about Apple’s M1 processor. That’s not exactly a surprise though. Following years of partnership with Intel, Apple used the expertise it’s built up following years of putting powerful ARM-based chipsets in its smartphones and iPads, and applied that to a custom processor for ‘proper computers’.
In our use-case – primarily video editing in Final Cut Pro and Affinity Photo – the apps are already optimised for the M1 processor, so the experience is dreamy.
Pocket-lint
It’s worth noting at this point, however, that our unit is 16GB RAM model, so it’s a custom order from Apple which – as well as being pricier than the standard configurations – takes longer to ship. Compared to the other Macs it’s by far the most affordable and best value if you have monitor, keyboard and mouse already.
It took us by complete surprise how quickly Affinity opened images. Where our older Intel Core i5-powered MacBook would take a second or two to open large image files, the M1 Mac mini is virtually instant.
Likewise when zooming and out of those images using trackpad gestures, it’s instant and smooth, making the process of editing photos so much more convenient Even compared to using our previous powerful Nvidia GeForce GTX 1080Ti-powered desktop PC with 32GB RAM and SSD storage, Affinity Photo feels much quicker. We’ve been genuinely blown away by it.
It’s a similar feeling when editing 4K video in Final Cut Pro: skimming through timelines of 4K/30 projects is smooth and rarely resulted in any noticeable frame drop. It’s worth noting, our edits aren’t especially complex – we’d have a maximum of three video streams – but it remains smooth in ways we don’t typically see.
Pocket-lint
For instance, when we show screen recordings on top of an expanded and blurred background of that same recording, or when adding masks and censoring to parts of the screen. These are the areas when we’d typically see a little stutter or frame drop on a lot of our previous MacBook setups. With the M1 Mac mini that just didn’t happen.
Export times are fast, too, but it’s the buttery smoothness when actually working with footage, photos and timelines in the M1-optimised apps that makes the most day-to-day difference.
We also dabbled with Pixelmator Pro, using it to edit thumbnails for videos, and found it as fast and responsive as Affinity Photo. For those interested in benchmarks, there are plenty available to view on Geekbench.
For those apps that aren’t yet M1-optimised, there’s Rosetta – which is like an app translator, to ensure things can run – but the list of programmes and apps that needs Rosetta is slowly getting smaller. Both Zoom and Chrome now have M1-optimised versions, while Microsoft Edge is close at the time of writing.
For creatives, the list of apps that are M1 optimised is getting bigger too. Adobe Photoshop and Lightroom are both ready, as is Microsoft Office. In terms of video editors, both Premiere Pro and DaVinci Resolve have beta versions available with M1 support but – at time of writing – no official, stable release.
Pocket-lint
Like its laptop-shaped cousins, the desktop Mac does everything quietly with a barely an audible whirr from its built-in fans. It’s just ridiculously efficient. It didn’t seem to matter what we were doing with it, we didn’t hear the fan, even when exporting a video. That would normally be enough to send an Intel Mac’s fans spinning furiously.
The best Chromebook 2021: Our pick of the top Chrome OS laptops for school, college and more
As for other apps, we tested a whole load of them during our testing of both the M1-powered MacBook Pro and M1-powered MacBook Air, both running Big Sur, and our experience was pretty much faultless. Of course, those using specific enterprise software and systems my have a different experience and it’s worth looking up examples of tests on your specific needs before making the jump to M1. For the average user though, we don’t anticipate any significant issues arising.
Verdict
This miniature desktop might be small, but it’s still mighty thanks to the M1 chipset. It won’t be for everyone, however, especially if you’ve invested in a lot of apps not yet optimised for M1 support. Otherwise it’s a speedy and reliable workhorse that, given its small size, doesn’t draw attention to itself and helps you gets stuff done quickly.
The Mac mini has long been about being a versatile tool that works for most people. Given how fast and efficient it now is, it’s also a great tool for digital creatives. Whether you edit lots of photo or video, or just need something at home that works for you.
It’s the lowest price Mac available, yet its performance with optimised apps blows away some of the supposedly more powerful Intel-powered versions that cost far more. The Mac mini M1 really delivers big bang for your buck.
(Pocket-lint) – With more and more laptops and devices being equipped with flash memory, that often means it becomes too expensive to get a good amount of storage built-in.
And, with so many more of us travelling around for work, working from home or needing to use more than one machine, it’s more important than ever to have an external drive of sorts.
Thankfully, there’s a lot of them around. And most of the portable options are small enough to go in a pocket.
There’s both SSD (solid state) and HDD (more traditional style hard-drive), with the former being a bit more expensive, but also faster, smaller and more portable. They’re also more likely to last you a long time because there are no moving parts. For editing movies and photos on an external drive, nothing really gets the job done like an SSD.
SSD vs HDD: What’s the difference between flash storage and traditional hard drives?
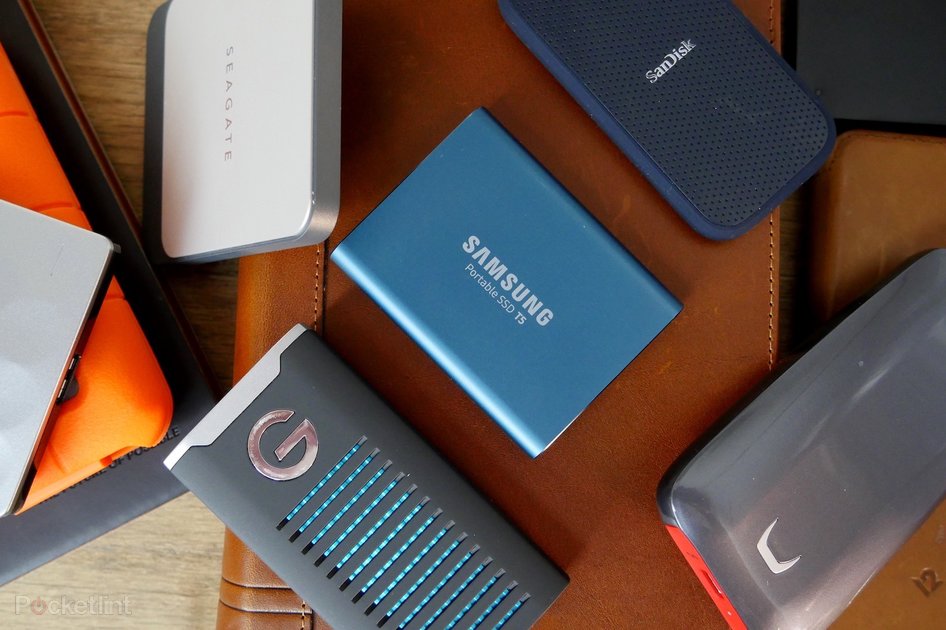
SSDs – Small and speedy
We’ve tested each of the following, using each of them to edit 4K video footage in Final Cut Pro, keeping the original files on the external drive, and each of them performed really well, with no real frame-drop issues, slow export or render times. So, regardless of which of the following you get, you’ll enjoy the speediness and efficiency.
Judging them based on portability, design, performance and value for money, here are our top picks.
How to improve your gaming performance with blazing-fast NVMe SSDs
Our top external drive recommendation
Pocket-lint
Samsung T7 Touch
squirrel_widget_178700
The Samsung T7 Touch is the latest in ultra-fast portable drives from Samsung that joins our list and replaces our previous favourite – the T5. With the T7 Touch, Samsung has taken the brilliant foundations of the previous drive and improved upon them. Not only is the transfer speed of the T7 almost double that of the T5 (at up to 1,050 MB/s) but it’s also interesting in other ways too.
This is a drive that’s designed to blur the lines between professional and personal use with the inclusion of AES 256-bit hardware data encryption and a fingerprint sensor/password setup. It includes both USB type-C-to-C, USB type-C-to-A cables in the box and software for Mac, PC and Android phones too. Using that software you can set a secure password and scan your fingerprints to secure the drive so no one else can access it. Plugged in without scanning it simply won’t show any files on the drive.
You also have the option of registering as many as four different fingerprints, meaning you can scan your preferred fingers or give access to family or team members with ease.
All this is rounded off in a durable, aesthetically pleasing aluminium housing with a nifty “Motion LED” light around the fingerprint reader. The T7 Touch is a brilliant balance of speed, portability and security that we love and are sure you will too.
Pocket-lint
WD_Black P10
squirrel_widget_175998
The WD_Black P10 is one of several variants of external SSDs Western Digitial has designed specifically for gamers. This drive comes with a robust, snazzy-looking housing that includes an aluminium top for passive cooling goodness. It’s available in several size formats and offers extra space for your games.
An external drive like this is a brilliantly simple way to upgrade your storage space for more games without messing about with internals. We’ve written before on how to upgrade your PS4 and Xbox One using this sort of drive and the WD_Black range is an awesome option. The bonus of the P10 is it’s plug and play. We used it on PC, installing a multitude of Steam games, then booting them straight from the drive with reasonable speed. The P10 isn’t the fastest of the line-up (that honour goes to the P50) but it is a brilliant balance of speed, size and value for money.
If you want something faster, the P50 is a niftier option with a rear/write speed of 1980MB/s and USB SuperSpeed 20Gbps too. While if you need insane amounts of space there’s the D10 which offers up to 12 TBs of storage space and can hold as many as 200 games.
Pocket-lint
Seagate FireCuda gaming SSD
squirrel_widget_336537
Gamers love RGB and speed. At least that’s what Seagate seems to be saying with this external FireCuda Gaming SSD. A drive in a solid, robust casing that’s rubber backed and sports a customisable RGB lighting strip.
This is a compact drive you could easily slip in your pocket, but it’s also a great looking bit of kit with up to 2TB storage space and as much as 2,000MB/s max speed with USB 3.2 gen 2×2 tech.
Fast, fabulous and a fantastic addition to your gaming setup.
Pocket-lint
ADATA SE800 External Solid State Drive
squirrel_widget_168938
The ADATA SE800 is a compact, lightweight, blazingly fast portable SSD. This is an external drive that comes in a uber-snazzy looking protective shell that looks like it’s made of brushed aluminium. That shell is also IP-68 rated, meaning that (as long as it is properly sealed) it’s waterproof, dustproof and shockproof too. So your data is safe if you happen to take a soaking while carrying it or accidentally drop it into a small body water – the bath, a puddle, a river, the toilet. We’re not here to judge.
This drive isn’t just about looks and waterproofing though, it’s also a powerhouse. Thanks to USB 3.2 Gen2 Type-C connectivity, it’s able to transfer data at speeds of up to 1,0000MB/s making it one of the fastest drives on this list. It comes bundled with both a USB 3.2 Type-C to C cable and USB 3.2 Type-C to A cable meaning it will also connect to basically anything you own with ease too.
Pocket-lint
Sandisk Extreme Portable SSD
squirrel_widget_169154
Testing the transfer speeds from our MacBook Pro desktop to the Sandisk Extreme Portable SSD, we got virtually identical results to the Samsung. The same 9.3GB collection of files was transferred in 20.66 seconds, and the discrepancy easily ignorable, and probably explained by the pace of human reaction, rather than the speed of the transfer itself.
So performance is essentially as good, but there’s one real reason you might want this over the Samsung: design. Not only is the Sandisk (somehow) considerably smaller and lighter than the T5, but it’s also got some water and dust resistance.
You can’t submerge it, but it’ll survive the odd accidental splash. As a bonus, it also has a handy little cutout in the corner to feed a carabiner through so you can attach it to your keys if you want to.
Pocket-lint
Gtech G-Drive Mobile SSD
squirrel_widget_169155
The G-Drive Mobile SSD is taller and thicker than either the Samsung T5 or Sandisk Extreme SSDs, but what it lacks (slightly) in portability, it more than makes up for in durability. Its external surfaces are covered in a shock-absorbing plastic/rubber material, ensuring that it can survive falls up to three metres. What’s more, it has IP67 rated water and dust resistance, which means it can survive in up to one metre of water for up to 30 minutes. As a bonus, you also get a limited five-year warranty as standard.
You don’t really lose out on performance either, with Gtech claiming up to 560MB/s transfer speeds. Testing using the same selection of files, the G-Drive Mobile SSD took 24.4 seconds to transfer. We tested it a few times just to be sure, and it was consistently around four to five seconds slower than the previous two drives, despite claiming faster top speeds. Still, it’s hardly slow, just not quite as fast as the T5 or Sandisk Extreme.
Pocket-lint
Samsung X5 Thunderbolt drive
squirrel_widget_169170
If you want a stupendously fast external drive, look no further. The Samsung X5 is it, featuring sequential read speeds up to 2,800MB/s and sequential write speeds up to 2,300MB/s. Using the same 9.3GB collection of seven video files, we tested the transfer speeds and were blown away. Those same files that take 20-25 seconds on the previously mentioned drives took less than 6.5 seconds on the Samsung X5.
You may be wondering, why with those speeds is it not our top recommendation? Two simple reasons: it is pretty expensive, and it only achieves those speeds if you use a Thunderbolt 3 port on your Mac/Laptop. If you can afford it, and you have TB3 ports on your computer, it’s well worth it. It’s so ridiculously fast.
Taking a different approach to the T5, Samsung clad the X5 in plastic, but in the form that looks more like the outer shell of a sports car than an external drive. What’s more, inside it has a protection guard built from magnesium and a heat sink to ensure the NVMe SSD inside is kept at a temperature below 45 degrees C.
All of this innovation and design comes at a cost, both literally in terms of cash outlay and in portability. It’s not exactly huge, but it’s three times heavier than the Samsung T5, and considerably taller, wider and thicker. Still, it’s not difficult to carry around and comfortably fits in a pocket.
Pocket-lint
LaCie Rugged SSD
squirrel_widget_169186
As SSD standards go, the LaCie is big and bulky but – as the name suggests – it’s very durable. It can survive drops up to 2 metres, and conforms to Military Standard 810-F. It’s recognisable instantly too, thanks to its bright orange chunky, texturised silicone outer casing that absorbs all the shocks and bumps you can throw its way.
Don’t confuse its chunky, hefty looks for slow pace though. It’s just as speedy as most of the others on this list, thanks to that SSD storage. Using our same selection of video files, it transferred them in around 20.2 seconds, bringing it up to speed with the Samsung T5 and SanDisk options.
As a bonus, for those who still have computers rocking the old style Thunderbolt port, it has one of those connectors built into the unit, wrapped around safely in the rubber sleeve.
Pocket-lint
Seagate Backup Plus Ultra Slim
squirrel_widget_169187
As external HDDs go, the Seagate Backup Plus Ultra Slim has a lot going for it. It’s attractive, covered in a dimpled sheet of aluminium and – as the name suggests – it’s really slim.
It’s compatible with both Windows and mac OS, and is very affordable compared to the SSDs in the list above. While the speeds aren’t quite fast enough for live editing of RAW photos or 4K video, the transfer speeds are reasonable. We got those same video files as we’ve been using previously, dragged them across, and they’d written to the drive in around 1min 18 seconds.
Pocket-lint
Toshiba Canvio Basics Portable HD
squirrel_widget_169202
If you’re looking for really great value for money, the Toshiba Canvio Basics is one way to go. It’s compatible with USB 3.0, so it’s not a snail, and it’s compatible with Xbox and PS4, although it is formatted to NTFS for Windows machines, rather than the system Mac uses. It can be reformatted to work with Mac, however, or you can download plugins to make your Mac read NTFS-formatted drives.
In our file transfer test, it was slightly faster than the Seagate Backup Plus, but not by much. The 9.3GB collection of videos transferred across in around 1min 12 seconds.
Writing by Cam Bunton. Editing by Max Freeman-Mills.
Have you ever heard of the saying, “Not everything is made equal?” That statement holds even more truth now with the launch of Nvidia’s GeForce RTX 3000 Laptop GPUs.
Nvidia has only released three primary mobile Ampere graphics cards: GeForce RTX 3080, 3070, and 3060 Laptop GPUs. In reality, there are multiple variants of each graphics card since Nvidia has given its partners freedom to adapt the graphics cards to their product. If you’re wondering how many variants of the GeForce RTX 3000 Laptop GPUs are out there in the wild, there’s a grand total of 28 of them, according to the latest ComputerBase report.
If you take a good look at Nvidia’s website, the chipmaker never really established a fixed clock speed or TGP (total graphics power) for each mobile Ampere SKU. Instead, Nvidia leaned toward using a range of values, making it even more important that OEMs disclose the clock speed and TGP for their products. Sadly, Nvidia hasn’t imposed this transparency on its partners. The chipmaker has only encouraged vendors to list the relevant specifications. So while you have vendors like XMG that follow good practices, others haven’t followed Nvidia’s recommendation.
Nvidia GeForce RTX 3000 Laptop GPU Specifications
Graphics Card
TDP (W)
CUDA Cores
Base Clock (MHz)
Boost Clock (MHz)
Memory Interface
Memory Speed
RTX 3060 Laptop GPU Max-Q
60
3,840
817
1,282
192-bit
12 Gbps
RTX 3060 Laptop GPU Max-Q
65
3,840
975
1,357
192-bit
12 Gbps
RTX 3060 Laptop GPU Max-Q
70
3,840
1,050
1,402
192-bit
12 Gbps
RTX 3060 Laptop GPU
80
3,840
900
1,425
192-bit
14 Gbps
RTX 3060 Laptop GPU
85
3,840
1,035
1,485
192-bit
14 Gbps
RTX 3060 Laptop GPU
90
3,840
1,163
1,530
192-bit
14 Gbps
RTX 3060 Laptop GPU
95
3,840
1,215
1,567
192-bit
14 Gbps
RTX 3060 Laptop GPU
100
3,840
1,267
1,605
192-bit
14 Gbps
RTX 3060 Laptop GPU
105
3,840
1,305
1,642
192-bit
14 Gbps
RTX 3060 Laptop GPU
110
3,840
1,342
1,680
192-bit
14 Gbps
RTX 3060 Laptop GPU
115
3,840
1,387
1,702
192-bit
14 Gbps
RTX 3070 Laptop GPU Max-Q
80
5,120
780
1,290
256-bit
12 Gbps
RTX 3070 Laptop GPU Max-Q
85
5,120
855
1,365
256-bit
12 Gbps
RTX 3070 Laptop GPU Max-Q
90
5,120
930
1,410
256-bit
12 Gbps
RTX 3070 Laptop GPU
115
5,120
1,110
1,560
256-bit
14 Gbps
RTX 3070 Laptop GPU
120
5,120
1,170
1,590
256-bit
14 Gbps
RTX 3070 Laptop GPU
125
5,120
1,215
1,620
256-bit
14 Gbps
RTX 3080 Laptop GPU Max-Q
80
6,144
780
1,245
256-bit
12 Gbps
RTX 3080 Laptop GPU Max-Q
85
6,144
870
1,320
256-bit
12 Gbps
RTX 3080 Laptop GPU Max-Q
90
6,144
930
1,365
256-bit
12 Gbps
RTX 3080 Laptop GPU
115
6,144
1,110
1,545
256-bit
14 Gbps
RTX 3080 Laptop GPU
120
6,144
1,155
1,575
256-bit
14 Gbps
RTX 3080 Laptop GPU
125
6,144
1,185
1,605
256-bit
14 Gbps
RTX 3080 Laptop GPU
130
6,144
1,230
1,635
256-bit
14 Gbps
RTX 3080 Laptop GPU
135
6,144
1,260
1,665
256-bit
14 Gbps
RTX 3080 Laptop GPU
140
6,144
1,275
1,665
256-bit
14 Gbps
RTX 3080 Laptop GPU
145
6,144
1,320
1,695
256-bit
14 Gbps
RTX 3080 Laptop GPU
150
6,144
1,350
1,710
256-bit
14 Gbps
As per ComputerBase’s list, the GeForce RTX 3060 Laptop GPU and GeForce RTX 3080 Laptop GPU each have eight different variants. It’s understandable since the first is the budget offering, while the latter is the flagship part. The GeForce RTX 3070 Laptop GPU presents the least confusion of the lot with just three variants. Even the Max-Q versions weren’t saved from the hatchet as there appear to be three different variants for each Max-Q SKU.
With mobile Ampere, Nvidia has introduced the Dynamic Boost 2.0 technology that basically utilizes AI to balance the power load between the processor, GPU, and GPU memory. As a result, OEMs have the liberty to supply the GPU with an extra 5W, 10W, or 15W through Dynamic Boost 2.0. This would bump the GeForce RTX 3080, RTX 3070, and RTX 3060 Laptop GPUs’ maximum thermal limit up to 165W, 140W, and 130W, respectively.
It’s even more important now that consumers do their due diligence before picking up a GeForce RTX 3000 gaming laptop. Unless the vendor explicitly lists the GPU variant inside the laptop, consumers have no way of finding out which variant they’ve gotten until they’ve bought the device.
Of course, you can always rely on reviews, but the problem is that there are so many laptops out there, it’s practically impossible to find a review for every single unit. Furthermore, you have to take regionalization into account. Sometimes the same model that’s being sold here in the U.S. may present a slight difference in hardware in other countries. If the vendor doesn’t list the GPU’s TGP and a review is not available, it would be wise to get in touch with the company to find out the important details. If that fails, just move on to another brand that does provide transparency with its products.
AMD reported its fourth-quarter 2020 and full-year results today, setting new records as it continues to whittle away market share from its archrival Intel despite the challenges associated with the pandemic and US-China trade war. AMD is making strides in all facets of its operation; CPU, GPU, data center, and console sales are all strong, but exceptional demand driven by the pandemic has led to rolling shortages.
AMD CEO Lisa Su said the shortages primarily impact the gaming (both consoles and gaming CPUs and GPUs) and the low end of the PC market, and overall demand has exceeded its planning. That’s particularly challenging given that, in the first quarter of availability, the company’s Ryzen 5000 processors have sold twice the number of units compared to any other Ryzen series in history.
Su expects to see ‘tightness’ throughout the first half of 2021 until added production capacity comes online. That means we could see a limited supply of AMD’s PC and console chips until the middle of the year. Su also explicitly called out the low end of the PC market and consoles as being impacted the most, meaning higher-margin products are more readily available at retail.
Interestingly, AMD’s inventory swelled during the quarter, reaching $1.4 billion in unsold goods (up from $930 million the prior quarter), which seems odd given that the company has unmet demand. An AMD representative tells us that the company’s inventory values can consist of chips in various stages of production, so it’s possible that AMD’s increased wafer starts at TSMC has resulted in more chips in various stages of production. AMD also confirms that packaging shortages continue to be a pinch point in the supply chain. That implies that there could be plenty of chip dies also awaiting packaging, meaning lithographic capacity at TSMC (i.e., wafer starts) aren’t the only factor impacting the company’s ability to deliver chips.
If there’s one certainty, it’s that AMD is selling every chip it can put on shelves. AMD raked in a record $3.24 billion in revenue in the fourth quarter, up 53% over the year prior, and net income weighed in at $1.78 billion, a staggering 948% increase over the prior year, albeit buoyed by an income tax benefit of $1.3 billion.
Image 1 of 2
(Image credit: AMD )
Image 2 of 2
(Image credit: AMD )
On the client group side of the house that produces both consumer CPUs and GPUs, AMD’s $1.96 billion in Q4 revenue marked an 18% YoY and quarterly increase. AMD says higher sales of Ryzen processors drove this performance and average selling prices (ASPs) increased during the quarter, though ASPs lagged the prior year due to a higher mix of Ryzen Mobile sales.
That higher mix of laptop chips isn’t surprising – AMD recently recorded its highest laptop market share in history. AMD also says that its Ryzen 5000 processors doubled the launch sales of any prior-gen Ryzen processor. As a result, annual processor revenue grew 50% even though the PC market only grew 13%, meaning the company gained more market share during the year.
On the graphics side of the house, Su said that demand for Radeon 6000 GPUs is strong, marking the fastest-selling GPU over $549 in AMD’s history, and ASPs are up for both the quarter and the year. The company will launch RDNA 2 GPUs in the first half of 2021.
For the company’s EESC unit, which comprises its data center and semi-custom business, AMD raked in $1.38 billion in revenue, a 176% year-over-year (YoY) increase. Su said that the Sony PS5 and Microsoft Xbox ramp is faster than the previous cycle, which seems to be a given in light of the constant shortages. AMD says that it expects sales of its console chips to stay strong in the first half of the year, bucking the normal historical trend of reduced console sales in Q1.
AMD lumps both data center and game console processors under this same unit, making it hard to determine how much of the revenue gain can be attributed to its server chip business. However, during the earnings call, Su noted that server processor revenue reached an all-time high in the fourth quarter and now comprises “high mid-teens” percentage of the company’s overall revenue (for both the quarter and the year), implying AMD raked in ~$550 to ~$600 million in revenue for EPYC server chips for the quarter, and ~$1.4 billion for the year. That’s a big step forward but still lags behind Intel’s $6.1 billion in data center revenue in 2020.
AMD did note that its EPYC ASPs were higher sequentially, meaning the company is making more money per chip. Meanwhile, Intel has taken a haircut on ASPs, and thus margins, as it has cut pricing to fend off AMD’s EPYC.
AMD began production of its next-gen EPYC Milan in the fourth quarter of last year and sampled to HPC and cloud providers. Su said the company is on track for the official launch in March with very strong ecosystem support.
(Image credit: AMD )
AMD’s Q4 gross margins were flat YoY at 45%. For the next quarter, AMD guides for $3.2 billion in revenue, up 79% YoY and down 1% on the quarter.
AMD’s full-year results were exceptional, as well. The company raked in a record $9.76 billion in revenue, a 45% YoY jump, and net income hit $2.5 billion, a staggering 630% increase over the prior year.
Image 1 of 32
(Image credit: AMD)
Image 2 of 32
(Image credit: AMD)
Image 3 of 32
(Image credit: AMD)
Image 4 of 32
(Image credit: AMD)
Image 5 of 32
(Image credit: AMD)
Image 6 of 32
(Image credit: AMD)
Image 7 of 32
(Image credit: AMD)
Image 8 of 32
(Image credit: AMD)
Image 9 of 32
(Image credit: AMD)
Image 10 of 32
(Image credit: AMD)
Image 11 of 32
(Image credit: AMD)
Image 12 of 32
(Image credit: AMD)
Image 13 of 32
(Image credit: AMD)
Image 14 of 32
(Image credit: AMD)
Image 15 of 32
(Image credit: AMD)
Image 16 of 32
(Image credit: AMD)
Image 17 of 32
(Image credit: AMD)
Image 18 of 32
(Image credit: AMD)
Image 19 of 32
(Image credit: AMD)
Image 20 of 32
(Image credit: AMD)
Image 21 of 32
(Image credit: AMD)
Image 22 of 32
(Image credit: AMD)
Image 23 of 32
(Image credit: AMD)
Image 24 of 32
(Image credit: AMD)
Image 25 of 32
(Image credit: AMD)
Image 26 of 32
(Image credit: AMD)
Image 27 of 32
(Image credit: AMD)
Image 28 of 32
(Image credit: AMD)
Image 29 of 32
(Image credit: AMD)
Image 30 of 32
(Image credit: AMD)
Image 31 of 32
(Image credit: AMD)
Image 32 of 32
(Image credit: AMD)
For the full-year 2021 guidance, AMD pegs revenue to grow ~37% (~$13B) and non-GAAP gross margins to weigh in at 47%, driven by growth across all of AMD’s business segments.
AMD also says it is on track to complete its Xilinx acquisition, which should be complete by the end of 2021.
Be it at work or at home, a lot of us spend a whole lot of time at our desks. For many, a 9-to-5 job is likely to have you sitting in front of your computer for upwards of 1,500 hours every year.
But look at it another way: that’s enough time to listen to a couple of thousand albums, and there’s absolutely no reason why you shouldn’t be listening to them in style.
While it’s easy enough just to jam a pair of headphones into your laptop, or even play music and video through built-in speakers, there’s no denying that better sound is attainable through just a few simple upgrades.
These seven tips don’t involve massive investment, and you don’t have to spend money on every aspect to achieve a great-sounding desktop set-up. Follow a few of them, though, and we’d like to think your time at your computer will be greatly improved.
Music for self-isolation: the What Hi-Fi? lockdown playlist
Invest in good desktop speakers
(Image credit: KEF)
If you’re still using the speakers built into your laptop for listening to music, then this is how to transform your desktop music experience in one single step.
Like with televisions, computer audio wasn’t always quite this bad when we had big box computer monitors, often with decent-sized speakers tacked onto the side. But ultra-thin screens and lightweight laptops have meant we now receive ultra-thin and lightweight sound.
There are loads of options out there – check out our round-up of the best desktop computer speakers for decent and affordable options. They usually have a good range of connections, too, including Bluetooth compatibility for easy wireless set-up.
Try home-specific headphones
(Image credit: Grado)
You certainly don’t need a different pair of headphones for every separate task, so if you’ve just spent a few hundred on a pair of five-star wireless noise-cancelling headphones then your wallet can remain closed.
If you’re only using the bundled in-ears from your smartphone, however, then this is another easy win. Most of us are fine with compromised sound when we’re out on a run or on a busy train – textural insight is less important here than just having something to drown out the world’s noise – but that is less the case at home or in a quiet office.
Forgoing portability and features such as noise cancellation and wireless connectivity means you can get a lot more performance for your money from a pair of home-specific headphones. Open-backed headphones leak sound, which makes them better suited to home use and the design allows the best models to offer up a lot more space in a presentation.
Best audiophile headphones 2021
Upgrade your DAC
(Image credit: Audioquest)
Think of all the tasks your computer is asked to perform, and that four-figure sum you paid for it rapidly starts to appear great value for money. But that also means that not a huge amount of production costs can have been budgeted for absolutely every feature.
So, while you have a digital-to-analogue converter in your device already, it means you don’t have to spend much at all to achieve a significant upgrade. The aptitude and accuracy with which digital files are translated into analogue signals can have a huge bearing on sound quality, so it is also one of the areas in which you might hear the greatest difference.
From USB sticks to components that would feel just at home in a traditional hi-fi system, there are portable DAC and headphone amp combinations to suit all budgets. Just make sure to pick one that complements the talents in the rest of your chain. Our round-up of the best DACs should help.
Boost your wi-fi
For the best streaming experience you’ll need a strong and stable internet connection. That means wiring your computer by its ethernet connection is highly preferable, but it isn’t always all that convenient or even possible.
So whether it’s via a signal booster, or as a last resort upgrading your internet plan with your service provider, pimping your wi-fi is a good way to make sure you’re always getting the highest-quality streaming experience possible.
Use a hi-res music streaming service
(Image credit: MQA, Tidal)
The above entry only really matters, of course, if you’ve subscribed to one of the web’s many hi-res streaming platforms. It appears the rest of the world is finally agreeing with us that MP3 is a dirty word, not to mention a grubby little performer.
We use Spotify for a lot of things – its catalogue is unparalleled and the ubiquity of its users makes playlist sharing relatively hassle-free – but there’s no point spending a load of money on new speakers and headphones if all you’re going to do is expose its highly compressed streams.
Our Award-winning hi-res streaming service for the past few years has been Tidal, which offers CD-quality and MQA streaming, so its trial offers are as good a place as any to start.
Best music streaming services 2021: free streams to hi-res audio
Download music rather than stream
(Image credit: Qobuz)
Though we are all quite taken by the convenience of streaming – especially now it doesn’t necessarily mean deficient audio quality – you will still achieve better sound from hi-res files downloaded and stored on your computer or separate hard drive.
Certain streaming services such as Qobuz also offer hi-res downloads, with a healthy discount in their download store for those who take up their premium annual plan, which – though we have our issues with it as a streaming platform – could be a cost-effective way of experiencing both worlds.
And until 15 May, Qobuz is offering What Hi-Fi? readers 29 free hi-res and CD-quality album downloads.
Make sure your desk is sturdy
Regular readers are likely sick to their back teeth of us going on about this kind of thing, but stable and rigid support for your electronics is something you ignore at your peril.
It doesn’t mean you have to go out and buy a specifically treated desk or else your speakers will sound like you got them out of a bin, but it shouldn’t be buckling under the weight of your computer or tipping on wonky legs as you type.
And keep it as clear as possible. You don’t want books covering your speakers or newspapers heating up on your DAC. Try to organise your desk around your audio set-up, rather than the other way round.
After that, our best advice is to keep listening to new music and try to enjoy work time as if it were play.
The bike arrives at a time when many people want to work out at home
Last year was the year of the COVID-19 pandemic, the year sweatpants become acceptable workwear, and the year Peloton peaked. Mid-pandemic, the company announced two new devices: the pricier Bike Plus and a less expensive treadmill called the Tread. The Bike Plus started shipping in September and includes significant updates to the company’s signature hardware during an especially critical time when many people have shifted their fitness routines from gyms into their own homes.
I, for years, have been a dedicated Crunch gym-goer, usually taking five classes a week. But with gyms closing off and on and classes generally being canceled, I moved my routine indoors. First, I started with Peloton’s app workouts, using resistance bands and bodyweight. I then switched to Zoom classes taught by an instructor I enjoy from Crunch. For the past few months, I’ve been testing Peloton’s Bike Plus. To put it simply: I’ve loved my time with the Bike Plus. It’s become an important tool for my well-being. Anytime I need to sweat out stress or transition my day from work into leisure, the bike is my go-to. Peloton has built a truly reliable spin bike, but at $2,495, the price is still hard for me to accept, especially considering its ecosystem lock-in.
The main thing to keep in mind when assessing Peloton’s products is that you’re paying solely for new hardware. The Peloton software remains the same across both the old and new internet-connected bikes, similar to how most old and new iPhones receive the current iOS. You can also access that app content without any official Peloton equipment. To get people to upgrade, though, Peloton has to offer real hardware innovation in order to justify the Bike Plus’ nearly $2,500 price versus the original bike’s $1,895 cost. This time around, for the extra $600, riders get a new swiveling display, a fresh speaker system, automatic resistance calibration, and Apple Watch GymKit support.
Before fully assessing the bike investment, though, let’s first break the Bike Plus down by what’s new and how those features work:
THAT SWIVEL DISPLAY
The most obvious change with the Bike Plus is the new 23.8-inch HD touchscreen. The prior model included a 21.5-inch HD touchscreen with thick bezels on all sides. It effectively looked like an iMac bolted to a stationary bike. The Bike Plus places a speaker across the top of the display, augmenting those bezels. To be clear: there are definitely still bezels on the new display, but they feel unobtrusive. It’s a massive screen solely for workout content, and your attention is firmly planted at the center of the screen most of the time. However, for a display this size and at this high of a cost, its lack of an ambient light sensor is questionable. I work out at various hours of the day but particularly love an evening ride in a dark room. The screen should dim itself rather than me having to manually do so. (There’s a camera at the top of the display for video calls with friends, so it could easily detect light.)
As for the new swivel function, the main idea is people can take Peloton’s floor classes without having to uncomfortably stand behind their bikes. You can swivel the display out and away from the bike to face the rest of the room, allowing you to move around to complete yoga, strength, or meditation classes.
Peloton also launched a new class format, called Bike Bootcamp, to coincide with this bike’s release. The bootcamp is designed to give cyclers a chance to do it all — bike and strength train within the same class — without having to complete two separate workouts. And while the swivel display makes this option feasible, I still found these classes difficult to pull off for the first few weeks, namely because of the Peloton cycling shoes. When you ride on a Peloton, you clip into the bike with cycling shoes, and these shoes take time to clip out of the pedals, which requires lots of practice. For context, the Peloton employee who delivered my bike recommended leaving my shoes in the pedals and slipping my foot in and out to avoid a hassle.
Bike Bootcamp classes expect you to clip in and out to complete various portions of the class, which took me a while to get used to doing. Adding to the quick transition stress was the lack of a pause button, meaning that I often missed the demo portion of the strength routine and fell behind. Peloton says the missing pause button is because the bike is “designed to give you a great workout and ensure that you work as hard as you would in a live indoor cycling class,” but in a home context, it’s more of a pain than anything else. You can exit the class, but this means you’ll have to reenter it, which takes a while and is annoying to do. And if you accidentally tap that you want to restart the class entirely, there’s no forward or back button.
I also found the angling of the display to be slightly off. Working out on a mat means you want the display to tip as far down as possible to provide a good view of the content. But this display doesn’t angle far enough down, meaning I had to crane my neck to see the instructor. This didn’t prevent me from using the screen for mat workouts, but it did annoy me (and kind of hurt!) at times.
Still, the swivel is an essential upgrade, especially if you use your bike’s display as your main one for other workouts. I don’t have a TV, so I need the swivel, but Peloton also offers a suite of options for broadcasting to a TV, including a Roku app, Fire TV app, and AirPlay and Cast compatibility. If you have any of these options available to you in your home gym, the swivel screen likely won’t do much for you and isn’t worth the upgrade cost.
THE NEW SPEAKER SYSTEM
The new bike comes with 26-watt, front-facing stereo speakers, as well as woofers that face away from you. The prior bike only included rear-facing stereo speakers. The new speakers sound great, although I preferred to bike with Bluetooth-paired wireless earbuds. (There’s also a headphone jack for anyone who might want wired options.) Peloton lets you select between different audio mixes, either prioritizing the music, the instructor, or finding a balance between the two in the original mix. I always work out with the music prioritized and when I do this through my AirPods Pro, I have no problem also hearing the instructor. But when I listen through the speaker, I find the music mix to be almost unusable; I sometimes can’t hear the instructor at all and miss my cues. The music is loud and sounds fantastic, which is perhaps what Peloton wanted, but finding the perfect balance between thumping music and hearing directions was complicated. (I’ll also note here that the bike is remarkably silent. My roommate would ride next to my bedroom door, and I couldn’t hear anything apart from his breathing. It’s a great bike for a shared home where people want to exist in their own spaces.)
AUTOMATIC RESISTANCE DETECTION
This feature is undeniably cool. Typically, in a spin class, the instructor offers a range within which the riders should aim to set their resistance level. Spinners reach down to their resistance knob and turn it to the desired resistance whenever a new range is called out. The Bike Plus now adjusts the resistance automatically. It’s slick and convenient and absolutely the neatest feature of the Bike Plus.
I did encounter some bugs, though. Sometimes the cues were off, either with the resistance setting itself between a different range than the instructor called out, the timing of that resistance change being off, or the resistance dropping at times when it should have stayed consistent or even increased. This seemed to happen more frequently in older archive classes than new ones. With that said, though, the few times I ran into this problem weren’t a huge issue. I adjusted the knob myself and waited for the bike to catch the next instruction. I still find this feature hugely helpful, allowing me to concentrate more on the class rather than adjusting the knob to get to the right resistance, especially during climbs when the resistance can go up suddenly during an energy push.
APPLE WATCH GYMKIT
The Bike Plus is also the first device from Peloton to directly integrate with the Apple Watch through GymKit. I had a couple of problems with this functionality at first: the Watch wouldn’t pair with the bike, but then Peloton issued an update which seemed to correct the issue. Only one other time did I have a problem with pairing and had to restart my Apple Watch. Although these issues only came up a couple of times, they were particularly upsetting because when the bike is paired with the Apple Watch, your heart rate shows up on-screen during a workout, which I look to monitor as I’m moving through a class. With the Apple Watch paired, workouts are also tracked in Apple’s Health app with all the bike’s own data taken into account, like energy output, so the functionality not working 100 percent of the time is frustrating and actively takes away from my exercise. But on the whole, it’s remained mostly reliable.
The watch only directly syncs with the bike for spin or bike bootcamp workouts, meaning you won’t be able to see your heart-rate on the screen while you complete a strength or pilates class, for example. This isn’t great and feels like it defeats the purpose of having GymKit compatibility in the first place.
IS THIS THE BIKE FOR YOU?
The Bike Plus is an expensive, tough sell for Peloton and one that needs to be pulled off flawlessly, especially as new software competitors, like Apple Fitness Plus, enter the market, as well as cheaper hardware competitors like Echelon and Bowflex. The Bike Plus feels like the iPhone of spin bikes — it’s intuitive to use and works right out of the box. (But actually, there is no box because Peloton offers white glove delivery and setup with every purchase.)
For the person who doesn’t want to fiddle with a bike that isn’t totally built for Peloton’s software, meaning it doesn’t monitor output and all the other fancy fitness metrics, Peloton’s bikes are tempting. But buying one means committing to a $39-per-month subscription. The app itself only costs $12 per month but doesn’t include multi-account support, live classes, the leaderboard, and full metrics.
For some people, that $39 is a savings compared to what they used to spend for gym access, especially considering it provides access to an unlimited number of different profiles. For others, it’s a significant investment in their health and life. Either way, you’re committing to Peloton and its subscription plan forever. The display is useless without the subscription, meaning if you ever wanted to try Apple Fitness Plus or SoulCycle or any other on-demand cycling classes, you’d have to ignore the massive display and instead get a TV or laptop to watch.
As much as I loved my time with the Bike Plus, the high price and software lock-in is difficult to accept. Peloton has built undeniably great hardware. I just wish I could use it with any software I liked rather than only Peloton’s app. If I had a TV, this might bother me less because I’d plan to use whatever fitness app I liked on my TV and wouldn’t sweat losing the subscription. Although, of course, I’d then be saddled with a massive HD display that literally does nothing.
The question of whether I’d recommend this bike depends on how much you love Peloton’s classes and how much you want to work for your exercise bike. Other spin bikes exist, many of which are cheaper and allow you to swap in your own tablet. You can even use Peloton’s app with them, albeit with some compromises, like losing your place on Peloton’s competitive leaderboard.
There’s also Peloton’s notorious delivery delays to consider. The New York Times notes that buyers’ delivery dates are being rescheduled day-of with the actual equipment showing up months after the date they were first quoted. All of this is to say, if you’re considering this bike purely for pandemic workouts, prepare to wait.
Still, to me, the Bike Plus is a must-get for anyone who lives the true Peloton lifestyle and sees themselves loving the company and its software far into the future. It’s reliable, works well, and, broadly, my gripes didn’t take away from the experience; I’ve been riding nearly daily for months now.
I just can’t predict whether I’ll want to go back to the gym post-pandemic or if I’ll get used to working out at home indefinitely. To Peloton’s credit, however, I can’t imagine myself readily giving this bike back; it’ll hurt a little to watch it leave. That feels like a victory for the brand and an admission for me that I do want a Peloton bike in my life.
Carl Pei, the OnePlus co-founder who parted ways with the company last year, has announced the name of his next venture: Nothing. It describes itself as a “London based consumer technology company” and counts the likes of iPod inventor Tony Fadell, Twitch co-founder Kevin Lin, Reddit CEO Steve Huffman, and YouTuber Casey Neistat as investors. It plans to release its first “smart devices” in the first half of this year.
“Nothing’s mission is to remove barriers between people and technology to create a seamless digital future,” says Pei, Nothing’s founder and CEO, in a press release. “We believe that the best technology is beautiful, yet natural and intuitive to use. When sufficiently advanced, it should fade into the background and feel like nothing.”
Carl Pei, who previously co-founded the smartphone brand OnePlus.Image: Nothing
What’s unclear at the moment is exactly what products Nothing plans to release. In an interview with The Verge ahead of today’s announcement, Pei declined to offer specific details on what form Nothing’s first “smart devices” will take. He also declined to say which companies Nothing plans to compete with.
Pei does confirm, however, that Nothing plans to release products across multiple categories, with the eventual aim of building up an ecosystem of devices.
“Right now… the team is being built, so we want to focus on simpler categories,” Pei says, “but as our team gains capabilities and skills we want to start moving up. The ultimate vision of having everything connected in a seamless way, that can only happen when you have multiple categories of products that are connected.”
During Pei’s tenure at OnePlus, the company released everything from smartphones to headphones and even TVs. Last year, Wired reported that Pei’s new company could focus on music and might include manufacturing headphones. When asked, Pei declined to confirm whether headphones would be among Nothing’s early products. When asked by Wired, he said the company’s plans were “so much more than that.”
While there’s been speculation that this could point toward Nothing developing an accompanying music service, Pei tells The Verge that Nothing plans to make most of its money by selling hardware rather than software subscriptions, at least initially. “We haven’t spent too much time thinking about the software portion of it,” Pei says. “It definitely needs to be a good user experience if you are to generate revenue from software.” In the long term, however, he admits that a “healthy business” requires both good hardware and good software.
Pei’s new company plans to differentiate itself by using “custom made” components in its products right from the start. Pei suggests this will stop Nothing’s products from looking too much like its competitors. “There’s a reason why a lot of products on the market look quite similar,” Pei observes. “It’s because they share a lot of the same components and the same building blocks.”
In contrast, OnePlus’ phones have faced frequent criticism over the years for the similarities they’ve shared with Oppo’s phones. In a recent video, Marques Brownlee outlined a series of Oppo and OnePlus devices with strikingly similar hardware, like the OnePlus 5 and Oppo R11, the OnePlus 6T and Oppo R17, and the OnePlus Nord N100 and Oppo A53. The two brands even use similar fast-charging technologies. OnePlus has Dash Charge, and Oppo has VOOC.
While OnePlus and Oppo are widely reported to exist under the same Chinese corporate giant BBK Electronics, Pei says Nothing is unencumbered by such an arrangement. “[Nothing is] a completely independent company owned by our founding team and our investors,” says Pei, with its own R&D department. And despite using contract manufacturers to build its devices, Pei says Nothing won’t just “relabel somebody else’s products.”
But while Pei hopes Nothing’s early products will feature “differentiated” designs without feeling “different for the sake of being different,” the eventual hope is for them to fade into the background.
“I kind of envision a grass field with people having a picnic and there’s no screen, there’s no laptop screen, there’s no phone screen, there’s no smartwatch screen, there’s no billboard screen,” Pei muses. “That’s kind of the end state.”
Verge columnist Walt Mossberg referred this future state as ambient computing in 2017. Pei admits that it may take 20 or 30 years to arrive, but he says the future his company is aiming for is one where its technology resembles… well, nothing.
We use cookies on our website to give you the most relevant experience. By clicking “Accept”, you consent to the use of ALL the cookies.
This website uses cookies to improve your experience while you navigate through the website. Out of these, the cookies that are categorized as necessary are stored on your browser as they are essential for the working of basic functionalities of the website. We also use third-party cookies that help us analyze and understand how you use this website. These cookies will be stored in your browser only with your consent. You also have the option to opt-out of these cookies. But opting out of some of these cookies may affect your browsing experience.
Necessary cookies are absolutely essential for the website to function properly. This category only includes cookies that ensures basic functionalities and security features of the website. These cookies do not store any personal information.
Any cookies that may not be particularly necessary for the website to function and is used specifically to collect user personal data via analytics, ads, other embedded contents are termed as non-necessary cookies. It is mandatory to procure user consent prior to running these cookies on your website.