A little-known behavior in Chrome OS could reveal a user’s movements through Wi-Fi logs. Leveraging Chrome OS’s Guest mode feature, the attack would require physical access to the device, but it can be executed without knowing the user’s password or having login access.
The bug was flagged to The Verge by the Committee on Liberatory Information Technology, a tech collective that includes several former Googlers.
“We are looking into this issue,” said a Google spokesperson. “In the meantime, device owners can turn off guest mode and disable the creation of new users.” Instructions for turning off Guest browsing are available here.
The bug stems from the way Chromebooks treat their Wi-Fi logs, which show when and how a computer connects to the broader internet. The logs can be confusing for nontechnical users, but they can be deciphered to reveal which Wi-Fi networks were in range of the computer. Combined with other available data, that could reveal the owner’s movements over the period of time covered by the logs — potentially as long as seven days.
Because Chrome OS keeps those logs in unprotected memory, they can be accessed without a password. Simply opening a Chromebook in Guest mode and navigating to a standardized address will bring up the logs in local storage. That will show all logs for the computer, even ones generated outside of Guest mode.
Electronic Frontier Foundation researcher Andrés Arrieta confirmed the attack and said it was of particular concern for targeted and marginalized communities. While the bug wouldn’t be useful to conventional cybercriminals, it’s a potentially devastating privacy issue for those worried about surveillance from family members or co-workers.
“It’s worrisome because anyone with quick physical access to the device could potentially get in as guest and quickly take some logs, and out details of location,” said Arrieta. “Security teams should try to better understand the potential repercussions of those bugs for all their users and include that in their assessment and prioritization of bugs.”
Google is forging ahead with its third-party cookie replacement technology
Repent, o ye ad trackers, for the cookiepocalypse is nigh!
If Google sticks to its roadmap, by this time next year Chrome will no longer allow websites to use third-party cookies, which are cookies that come from outside their own domains. The change theoretically makes it vastly more difficult for advertisers to track your activities on the web and then serve you targeted ads. Safari and Firefox have already blocked those cookies, but when it comes to market share, Chrome is currently the leader and so its switchover is the big one.
Blocking third-party cookies means that only websites you explicitly visit will be able to save those little cookie files on your computer, and they should theoretically only do what cookies were originally intended to do: keep track of smaller things like whether you’re logged in or which shopping cart is yours. Blocking third-party cookies also means ad networks can’t figure out who you are and serve you targeted ads, which is a big problem for the ad industry.
Google, which is the biggest player in online ads, has claimed that it does not intend to replace third-party cookies with “alternative identifiers to track individuals as they browse across the web.” This seems like a win for privacy all around, but if something about the story of Google as the privacy and anti-ad crusader strikes you as a little… off, you are far from alone.
Because of course Google doesn’t want to kneecap the online ad industry — the one it dominates and from which it makes all its money. Instead, Google wants to replace the third-party tracking cookie with a complicated set of (bird-themed) technologies that are meant to let ad companies target specific demographics like age and location, while at the same time allowing the people who are targeted to remain anonymous.
Google is trying to avert the cookiepocalypse for the ad tech industry, no repentance necessary.
And so today, the company is forging ahead with an “origin trial” for one of these new technologies, the Federated Learning of Cohorts (FLoC). In an origin trial, websites are able to begin testing without asking browser users to turn on specific flags. The feature itself will be slowly turned on inside Chrome via the usual process of introducing it into developer builds, then beta, then finally in the shipping version most people use.
But what the hell is FLoC, and does it really protect your privacy?
FLoC: a Federated Learning of Cohorts
FloC is a proposed browser standard that, in Google’s words, will enable “interest-based advertising on the web” without letting advertisers know your identity. Instead, you’ll be associated with a “cohort,” a group of users sufficiently large enough to make you at least semi-anonymous to the companies targeting you.
That’s the simple explanation. The technical one gets very complicated very quickly. Here’s a quick version. Chrome browsers will use algorithms (the “Federated Learning” part) to create a very large number of “cohorts,” groups of people that share certain qualities and interests. Each person’s individual browsing history is kept private and never shared with anybody, but the browser itself will look at the history and then assign a user to one of those cohorts.
When you visit a website, Chrome will tell that site that the visitor is part of cohort 198273 (or whatever) and then it’s up to the website to know that cohort 198273 (or whatever) is interested in pickup trucks and shoes with vegan leather. Since Chrome will never assign a user to a small cohort (Google has proposed that it will wait until there are “thousands” in a group), your identity as an animal-loving coal roller is theoretically protected.
Chrome itself isn’t assigning any content labels to these FloCs; Google is leaving that to the ad tech industry to figure out. So you won’t be able to open up a privacy page inside Chrome and see what it thinks you’re interested in (though there’s theoretically nothing stopping a third-party website from telling you).
Since FLoC is structured in this way, it could mean that the powerful players in ad tech could become even more entrenched, because they have the technology to parse what FLoCs mean and what ads to target against them. Or it could mean smaller players could find a way in. We don’t know all the possible repercussions of FLoC, which is why it has both ad industry executives and privacy advocates so unsettled.
You can read the whole proposal and even check out the code for how it works at the GitHub repository for FLoC inside the Web Incubator Community Group. As with most things on the web, it’s being developed out in the open and is part of a process of proposals, critiques, counter-proposals, attempts to get other browser vendors to join, arguments, harangues, screeds, and good-faith efforts to make the web a better place. It’s a party, y’all.
The new front in the browser wars: privacy
No other browser vendor has signaled its intention to support FLoC. The rest are simply blocking third-party cookies and letting the chips fall where they may. And those chips are messy.
Whatever motivations you want to imbue on the Chrome team, it is already apparent that simply blocking third-party cookies will lead to very problematic new solutions from the ad tech industry. So Google is creating both FLoC and a suite of other technologies to replace the third-party cookie, in order to hopefully forestall even worse replacements.
One of the very bad things Google is trying to forestall is fingerprinting. That’s the generalized term for ways that websites can identify you through little data signals that leak out of your browser when you visit a site. Sites can look at your IP address, the OS you’re browsing from, the size of your window, whether your browser supports Bluetooth controllers, and much more.
Battling fingerprinting is a huge arms race for browser engineers and new, nefarious methods pop up seemingly weekly. Here’s a new method of fingerprinting I just came across: playing a very tiny bit of audio and then analyzing how your particular browser and device handle it, and then using that data to individually identify you in milliseconds. (The website that proposed it sells fingerprint services to legitimate companies so they can ostensibly use it to better identify potential fraudsters on their sites.)
Apple has very publicly and vociferously advocated for cutting off all methods of individualized tracking, including fingerprinting, and has committed itself to that arms race indefinitely. The Chrome team’s concern is that essentially such a hard line creates an incentive for legitimate ad tech companies to start engaging in fingerprinting, which will then be all but impossible to stop or regulate.
Here’s how Google puts it in its blog post:
When other browsers started blocking third-party cookies by default, we were excited about the direction, but worried about the immediate impact. Excited because we absolutely need a more private web, and we know third-party cookies aren’t the long-term answer. Worried because today many publishers rely on cookie-based advertising to support their content efforts, and we had seen that cookie blocking was already spawning privacy-invasive workarounds (such as fingerprinting) that were even worse for user privacy. Overall, we felt that blocking third-party cookies outright without viable alternatives for the ecosystem was irresponsible, and even harmful, to the free and open web we all enjoy.
It’s hard to separate each company’s financial incentives from their very real philosophical differences. Google prints money with its de facto monopoly on monetizing the open web through ads and is therefore incentivized to keep it going. At the same time, Chrome’s developers are true believers in the power and importance of the open web. Meanwhile, Apple wouldn’t be sad if Google made less money amid a massive online ad tracking reckoning. At the same time, Apple’s developers are true believers in the importance of personal privacy and the urgent need to go all-out in protecting that privacy against constant online assaults.
In any case, the problem with fingerprinting is that once you’re identified, it’s much harder to anonymize yourself. A cookie can be deleted, but the way your particular computer processes a milliseconds-long snippet of audio is much harder to change (though Brave has an innovative solution called Farbling).
The basic argument from the Chrome team is that erecting a so-called “privacy wall” will entice legitimate ad tech companies into succumbing to the temptation of fingerprinting. Google is hoping that ad tech companies will adopt FLoC as an alternative.
If nothing else, there’s one big thing to take away from all this: FLoC is a hell of a lot better than the current status of third-party cookies that directly identify you anywhere you go on the web. But “better than the worst” is a low bar, and it’s hard to know yet whether FLoC just clears it or vaults way over it.
Is FLoC really private?
Instead of a trying to build a metaphorical privacy wall that blocks all forms of ad targeting, Google plans on building a Privacy Sandbox inside Chrome. Within that sandbox, websites can still legitimately request to know certain details about your browser as they need. A game streaming site could ask to know if your browser supports a game controller, for example. But ask too much and you’ll exceed the browser’s “privacy budget” and get cut off. Websites can have just a little identifying information, as a treat.
FLoC will be part of that privacy sandbox and further should protect your identity by only associating you with a cohort if that cohort is sufficiently large. Chrome will also change what FLoC cohort your browser is associated with on a regular basis, say once a week or so.
But whether FLoC is actually anonymous is very much up for debate. Bennett Cyphers at Electronic Frontier Foundation recently put up a handy post detailing some of the biggest concerns with FLoC.
One of the key aspects of FLoC is that Google isn’t making some giant list of interests and demographics and then assigning you to them. Instead, it’s proposing to use Federated Learning to create a ton of these cohorts algorithmically. Chrome won’t really know what any of them are actually about; it’ll be up to ad tech vendors to understand that over time.
But as Cyphers points out, that algorithm will inevitably create cohorts that could be incredibly dangerous — say, a group of people who have visited sites about getting out of domestic abuse situations. The Chrome team says it recognizes this concern and so will be analyzing the algorithmically created cohorts to see if any are related to what it deems to be sensitive topics — and then Chrome won’t serve those cohort IDs. But FLoC isn’t centralized, so it’s important to know that if another browser vendor adopts FLoC, it will be incumbent on that browser to create similar block lists.
Websites will be able to opt out of participating in FLoC, meaning that visits to their sites won’t contribute to an individual FLoC user’s profile. Similarly, the Chrome team intends to put opt-out toggles somewhere in Chrome’s settings for users who don’t want to provide FLoC IDs to the websites they visit.
Could FLoC become just another data point for fingerprinters? It seems likely, and defending against that seems to be another job for Chrome’s privacy budget and privacy sandbox algorithms.
One more thing: FLoC is a very convenient way for the websites you visit to know enough about you to target relevant ads, which means that FLoC is a very convenient way for websites to know things about you. It’s certainly no worse than the current cookie situation, but it’s far from the “You Shall Not Pass!” philosophy other browser vendors (like Apple and Brave) apply to allowing access to potentially identifiable information.
What’s next?
This first FLoC “origin trial” is designed to help websites learn how FLoC works; some of the testing for Chrome users will come later. Here is how Google describes the way it’s going to work:
The initial testing of FLoC is taking place with a small percentage of users in Australia, Brazil, Canada, India, Indonesia, Japan, Mexico, New Zealand, Philippines and the U.S. We’ll expand to other regions as the Privacy Sandbox expands globally. In April, we’ll introduce a control in Chrome Settings that you can use to opt out of inclusion in FLoC and other Privacy Sandbox proposals. In the meantime, if you’ve chosen to block third-party cookies, you won’t be included in these origin trials.
If you look at that list of countries, you might notice that something stands out: none of them are in the EU, where GDPR regulations are in effect. Recently, Robin Berjon of TheNew York Times wondered whether that meant that FLoC would run afoul of those privacy regulations. According to the product manager for the Chrome privacy sandbox, Marshall Vale, it’s more a matter of limiting the size of the early tests and that his team is “100% committed to the Privacy Sandbox in Europe.”
Under normal circumstances, a newly proposed web technology wends its way through mailing lists and W3C conference room debates. It gets supported by the browser vendor that championed it and then, if its lucky, other browsers. Thus, the web manages to not become browser-specific in the ways it was back in the bad old days of Internet Explorer 6.
But when Google originally announced its intention to block third-party cookies last year, I pointed out that the rhetoric between browser vendors was getting sharp. It’s only gotten sharper as Apple, Google, Microsoft, Mozilla, Brave, and others have gone further down their respective paths.
It seems unlikely that FLoC will lead to a standard because everybody agrees on a good way to allow targeted advertising. If FLoC does become a standard, it’ll probably be because Chrome will eventually turn it on and it will become the norm just through sheer market share — both Chrome’s within the browser market and Google’s within the ad tech market.
That possible future might avert the cookiepocalypse, but it could also become a different kind of nightmare for the web: one where websites once again try to push you to use the browser they can best monetize via whatever ad tech platform they’re using.
(Pocket-lint) – Huawei’s second generation of its foldable smartphone comes in the form of the Mate X2, while Xiaomi’s foldable phone is called the Mi Mix Fold.
Both follow a similar design to the Samsung Galaxy Z Fold series after Huawei changed the format of the folding device from its predecessor – the Mate X and Xs- moving from a foldable display on the outside, to an inward folding display.
If you’re in the market for a vertically folding smartphone, here is how the Xiaomi Mi Mix Fold, Huawei Mate X2 and the Samsung Galaxy Z Fold 2 compare.
Design
Mi Mix Fold: 173.3 x 133.4 x 7.6mm unfolded / 173.3 x 69.8mm x 17.2mm folded / 317g (Black) 332g (ceramic)
Mate X2: 161.8 x 145.8 x 4.4-8.2mm unfolded / 161.8 x 74.6 x 13.6-14.7mm folded / 295g
Z Fold 2: 159.2 x 128.2 x 6.9mm unfolded / 159.2 x 68 x 16.8mm folded / 282g
The Xiaomi Mi Mix Fold has a vertical folding display in a book-style design, like the Huawei Mate X2 and Galaxy Z Fold 2. It comes with a glass or special edition ceramic back and there is a prominent camera housing in the top left corner. There’s a metal frame, large display and a single punch hole camera in the top right corner when folded.
When unfolded, the Mi Mix Fold has an 8.01-inch display and a precision based hinge. There is a small gap when folded though, like the Samsung Galaxy Z Fold 2. It comes in Black or Special Edition Ceramic finishes.
The Huawei Mate X2 meanwhile, also features a vertical folding display. There’s a glass rear with a prominent rectangular camera housing in the top left corner, a metal frame and a full display with dual cut-out cameras on the front when folded.
When unfolded, the Mate X2 has a large 8-inch screen. The hinge is multi-dimensional, creating a water dropped-shaped cavity for the display when the phone is folded, allowing for no gap at all when shut, resulting in a different design to the Mi Mix Fold and Galaxy Z Fold 2. There’s also a wedge-like design that is just 4.4mm at the slimmest point. It comes in White, Black, Crystal Blue and Crystal Pink colours.
The Samsung Galaxy Z Fold 2 has a similar form to the Huawei Mate X2 and Xiaomi Mi Mix Fold in that it offers a vertical fold in a book-style design. It too has a glass rear, with a rectangular camera housing in the top left corner, as well as a metal frame. Like the Mi Mix Fold, it has a single, punch hole camera on the front when folded but it is centralised rather than positioned to the right.
When unfolded, the Galaxy Z Fold 2 has a slightly smaller 7.6-inch display than the Huawei Mate X2 and Xiaomi Mi Mix Fold. It’s hinge allows for multiple viewing angles but there is a slight gap at the fold of the device when folded. It comes in Mystic Bronze and Mystic Black colours.
The Xiaomi Mi Mix Fold has a 6.5-inch AMOLED display with a resolution of 2520 x 840 resolution and a pixel density of 409ppi on the front when folded. It has a 27:9 screen ratio and a 90Hz refresh rate. There’s a punch hole camera in the top right, and the bezels are slightly larger than the Huawei and Samsung alternatives.
When unfolded, the Mi Mix Fold has a 8.01-inch display WQHD+ resolution, 1 billion colours and a 4:3 aspect ratio. It has a 60Hz refresh rate.
The Huawei Mate X2 has a 6.45-inch OLED display with resolution of 2700 x 1160 and a pixel density of 456ppi on the front when folded, making it fractionally smaller than the Mi Mix Fold, though with slimmer bezels. It features a 21:9 aspect ratio and a 90Hz refresh rate. As mentioned above, the X2 has dual punch-hole front cameras in the top left of the display.
When unfolded, the Mate X2 has an 8-inch OLED display with a 2480 x 2200 resolution, which results in a pixel density of 413ppi. The unfolded display has a ratio of 8:7.1. It too has a 90Hz refresh rate.
The Samsung Galaxy Z Fold 2 has a 6.23-inch external display, making it slightly smaller than the Mate X2 and Mi Mix Fold. It too is an AMOLED panel and it offers a resolution of 2260 x 816 pixels and an aspect ratio of 25:9.
When unfolded, the Galaxy Z Fold 2 has an internal display of 7.6-inches – which is the smallest of the three devices being compared here. It’s Dynamic AMOLED and it has a 2208 x 1768 pixel resolution, resulting in a pixel density of 372ppi. It also has a 120Hz refresh rate and supports HDR10+.
Cameras
Mi Mix Fold: Triple rear camera (108MP + Liquid Lens 8MP + 13MP), 20MP front
Mate X2: Quad rear camera (50MP+16MP+12MP+8MP), 16MP front
Z Fold 2: Triple rear (12MP+12MP+12MP), 10MP front
The Xiaomi Mi Mix Fold has three lenses on its rear, with a 108-megapixel main sensor with 2.1µm pixels and a 7P lens, along with a 13-megapixel ultra wide angle lens with a 123-degree field of view.
There is also an 8-megapixel liquid lens on the rear that uses the principle of human eye bionics and a special chip created by Xiaomi to change the radius of curvature of the spherical surface. It allows the one lens to cover two functions, enabling 3x optical zoom, up to 30x digital and a minimum focus distance of 3cm. The front camera on the Mix Mix Fold is a 20-megapixel snapper.
The Huawei Mate X2 has a quad camera on the rear, which features Leica technology, like Huawei’s other flagship smartphones. The camera setup includes a 50-megapixel main sensor, 16-megapixel ultra-wide angle sensor, 12-megapixel telephoto sensor, and an 8-megapixel SuperZoom sensor.
The main sensor has a f/1.9 aperture and OIS, the Ultra-wide sensor has a f/2.2 aperture, the telephoto sensor has a f/2.4 aperture and OIS with 3x optical zoom, while the SuperZoom sensor has a f/4.4 aperture, OIS and 10x optical zoom. The front camera is 16-megapixels wide angle with a f/2.2 aperture.
The Samsung Galaxy Z Fold 2 has a triple rear camera, comprised of a 12-megapixel main camera, 12-megapixel telephoto sensor and 12-megapixel Ultra-wide sensor.
The main camera has an f/1.6 aperture, dual pixel phase-detection autofocus and OIS, the telephoto lens has an aperture of f/2.4 and OIS and the ultra-wide sensor has an aperture of f/2.2. There is also a 10-megapixel front camera.
The Xiaomi Mi Mix Fold runs on Qualcomm’s Snapdragon 888 chipset. It’s a 5G handset and it comes with 12GB of RAM and either 256GB or 512GB of storage. The Special Edition Ceramic model has 16GB of RAM and 512GB of storage though.
There’s a 5020mAh battery under its hood that supports Xiaomi’s 67W fast charging. The software is MIUI 12, based on Android 10 and there features like a one click option to close down things like GPS for security, as well as a Desktop Mode with a three-finger swipe.
The Huawei Mate X2 runs on Huawei’s own 5nm Kirin 9000 platform. It too is a 5G device. It is supported by 8GB of RAM and it comes in 256GB and 512GB storage variants.
It has a 4500mAh battery under the hood that supports Huawei’s 25W SuperCharge. Huawei’s own Harmony OS can be installed over the company’s usual EMUI interface running on top of Android.
The Samsung Galaxy Z Fold 2 runs on Qualcomm’s Snapdragon 865 Plus chipset, supported by 12GB of RAM and it comes in 256GB and 512GB storage options.
There’s a 4500mAh battery running the Fold 2, which supports 25W wired charging, 11W wireless charging and 4.5W reverse wireless charging. It runs Android with Samsung’s One UI over the top and there are some great multi-tasking features that make great use of the screen when unfolded.
Price
Mi Mix Fold: Equivalent of £1105/$1550, China
Mate X2: Equivalent of £1985/$2785, China
Z Fold 2: £1799, $1999
The Xiaomi Mi Mix Fold costs RMB 9999, 10,999 or 12,999, starting at the equivalent of $1550 or £1105. It will be available in China from 15 April.
The Huawei Mate X2 costs RMB 17,999 or 18,999, starting at the equivalent of $2785 or £1985. It is available in China only for now.
The Samsung Galaxy Z Fold 2 costs £1799 in the UK and $1999 in the US.
SQUIRREL_339457
Conclusion
The Xiaomi Mi Mix Fold and Huawei Mate X2 is only available in the Chinese market at the moment but while the Mate X2 is a little more expensive than the Samsung Galaxy Z Fold 2, the M Mix Fold is cheaper.
On a spec-by-spec comparison, these three devices are similar and while the Xiaomi Mi Mix Fold tips the scales in several areas, the other two devices have their fair share of wins too.
The Xiaomi Mi Mix Fold has larger displays both interior and exterior than both the Huawei and Samsung. It also offers the most advanced Qualcomm chipset, the largest battery of the three devices, the fastest wired charging capabilities and it has an interesting camera setup with its liquid lens.
The Mate X2 arguably has a more streamlined design, an extra camera on the rear and a wide-angle front camera. It also has only fractionally smaller displays than the Mi Mix Fold.
The Galaxy Z Fold 2 has more RAM than the Mate X2 but the same as the Mi Mix Fold. It also has a higher refresh rate on the internal display though and it offers a more user-friendly software experience, as well as supporting Google services – the latter of which the Mate X2 does not offer. The Z Fold 2 has less cameras than Huawei but the triple rear camera does offer great results.
The Samsung is more widely available than both the Mate X2 and the Mi Mix Fold so while the Mi Mix 2 and Mate X2 might win on some specification areas, you’ll need to live in China to get your hands on them for now. It’s also worth remembering the Galaxy Z Fold 3 is tipped for a July 2021 launch.
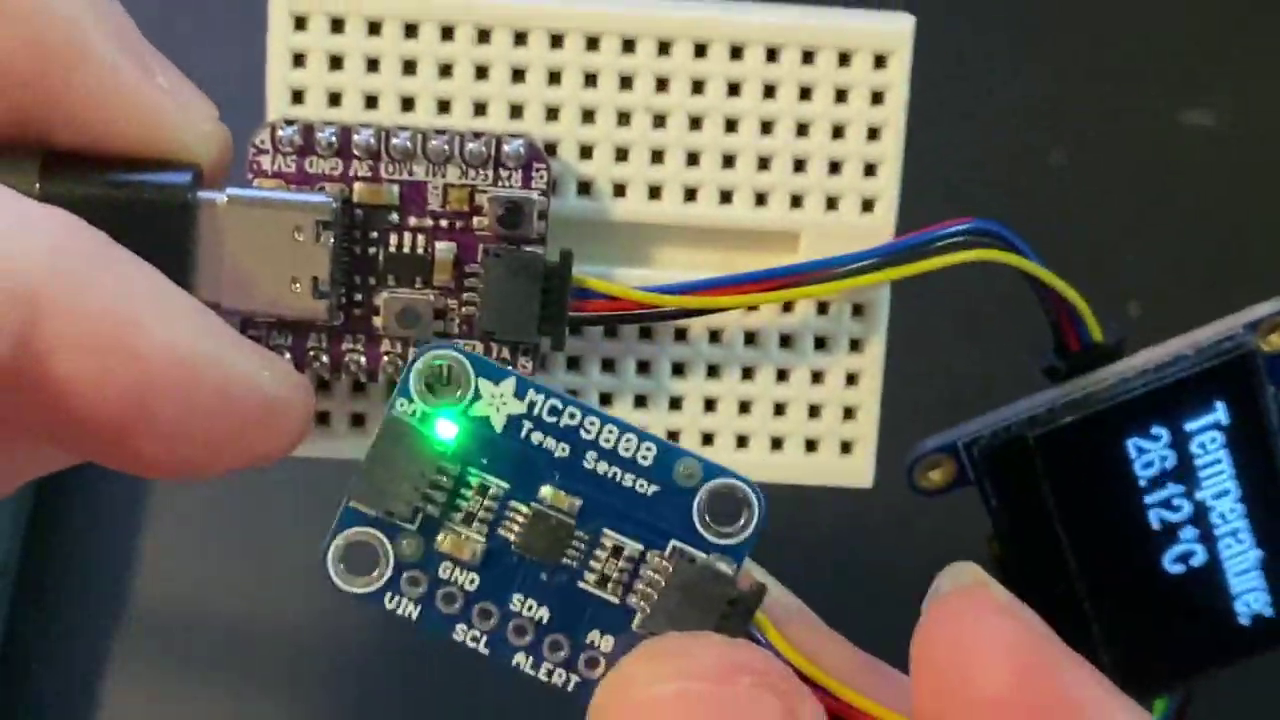
Adafruit’s smallest RP2040 board is still coming soon, but in a recent video, Adafruit founder Limor “Ladyada” Fried demonstrated the QT Py 2040, a tiny board powered by the same chip as a Raspberry Pi Pico, using a community Arduino core that enables any RP2040 board to be used with the Arduino IDE.
In the video, we get a first look at Adafruit’s upcoming QT Py RP2040, which Fried mentions is being readied for sale. The QT Py RP2040 is shown running a simple temperature sensor project, with the board connected to an I2C OLED and temperature sensor via the Stemma QT connector. The QT Py 2040 is compatible with CircuitPython and the Arduino IDE via a community project, Arduino-Pico from Earle F. Philhower, III. Official Arduino support for the RP2040 is still a work in progress, possibly timed to coincide with Arduino’s own RP2040 board.
Adafruit has three RP2040 boards in their range. From their largest board, the Feather RP2040 which has already been released, to the IstyBitsy RP2040, to the QT Py RP2040, Adafruit has a board for all projects and wallets. Measuring just 22 x 18 mm, the QT Py RP2040 isn’t the smallest RP2040 board, that honor goes to Pimoroni’s Tiny 2040. But the QT Py packs plenty of features into a diminutive form factor.
USB Type C connector
RP2040 32-bit Cortex M0+ dual-core running at ~125 MHz @ 3.3V logic and power
264 KB RAM
4 MB SPI FLASH chip for storing files and CircuitPython/MicroPython code storage. No EEPROM
Native USB supported by every OS (USB HID)
Can be used with Arduino IDE or CircuitPython
Built-in RGB NeoPixel LED
13 GPIO pins (11 breakout pads and two QT pads):
Four 12 bit ADCs (one more than Pico)
Two I2C ports (STEMMA QT and GPIO)
SPI and UART peripherals
PWM outputs on every IO pin
There are 6 GPIO in consecutive order for PIO compatibility
3.3V regulator with 600mA peak output
Reset button and Bootloader buttons
The pricing and release date for the QT Py RP2040 is still largely unknown, with stock being prepared for their store we can expect an imminent release. At a guess, the price could be between that of a Raspberry Pi Pico ($4) and the Feather RP2040 ($12).
As important as it is to keep your disks clear of duplicate files, finding copies of files is a tiresome job and most people don’t want to do it. This isn’t a problem if all you have are tiny text files that take up a few kilobytes each. But media files, especially raw images and HD videos can eat a lot of disk space, leaving you with less room for new data and apps.
Thankfully, the Fdupes command-line utility provides a faster and more efficient way of identifying duplicate files than just manually combing through your folders. Released under the MIT License, this nifty tool can be used to find duplicate files in the specified directories. The tool works by comparing the MD5 signature of the files, followed by a byte-to-byte comparison to ensure that all copies are identified.
In addition to tracking down duplicates, you can also use Fdupes to delete duplicate files, replace deleted files with links to the original, etc.
How to Install Fdupes for Linux
You’ll find Fdupes in the software repositories of most desktop distributions such as Ubuntu, Fedora, Arch, etc. The following instructions work on Ubuntu, Debian and other Linux flavors that are based on them (ex: Mint and Raspberry Pi OS).
1. Update the list of repositories by entering this command in a terminal window.
$ sudo apt update
2. Install the dependencies and npm package manager.
sudo apt install fdupes
You can similarly install Fdupes on Fedora, or other rpm based distributions with the ///BEGIN CODE///sudo dnf install fdupes///END CODE/// command.
How to Find Duplicate Files in Linux with Fdupes
Despite performing a seemingly straightforward task, Fdupes boasts of a vast number of useful features. As the utility can also be used to delete duplicate files, we would advise you to spend some time with the man page to familiarise yourself with the different command options. At a minimum, Fdupes expect the path to a directory to perform a search for duplicates.
$ fdupes
To identify duplicate files in a given directory:
Refer the directory to fdupes
$ fdupes ~/Documents
(Image credit: Tom’s Hardware)
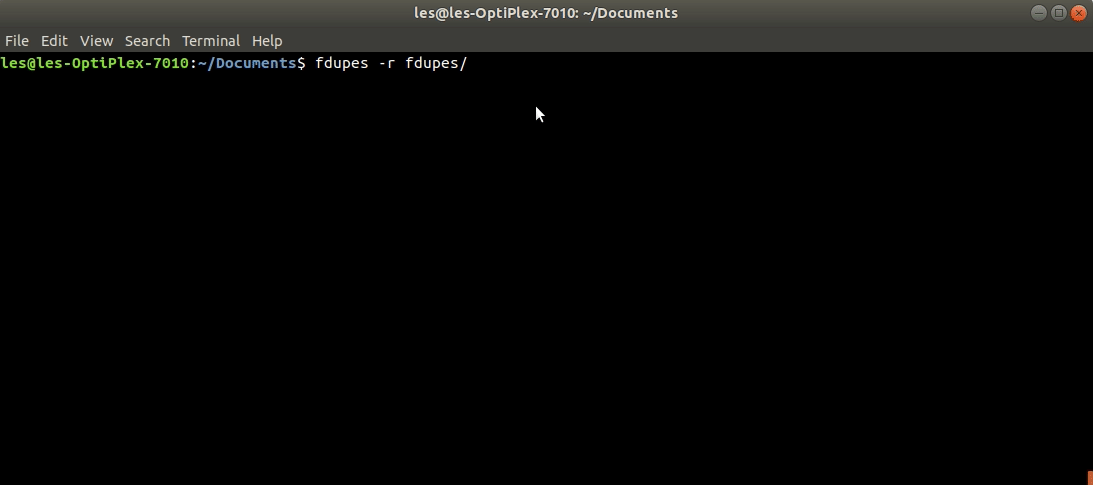
To recursively search through all sub-directories in the specified directory and identify all the duplicate files.
$ fdupes -r ~/Documents
(Image credit: Tom’s Hardware)
Both the above commands only list the duplicate files onto the screen, without deleting them. You must use the -d command option if you want Fdupes to also delete the duplicate files it identifies. But even then, Fdupes will ask to confirm which of the identified files you wish to retain. You can choose to keep a single file, or provide a comma separated list of the ones you wish to retain, or alternatively to keep all.
(Image credit: Tom’s Hardware)
Here we’ve opted to retain two files. Also, if your specified directory has multiple copies of different files, each group of copies of a single file is referred to as a set.
This is only a basic introduction to Fdupes. There’s still more that you can do such as ignore hidden files or follow symbolic links, etc.
More Linux Tutorials:
Kill Linux Processes the Easy Way with Fkill
How To Manipulate PDF Files in Linux With PDFtk
How to Send Files to Trash from the Linux Command Line
How to Get Persistent SSH Connections in Linux Using Eternal Terminal
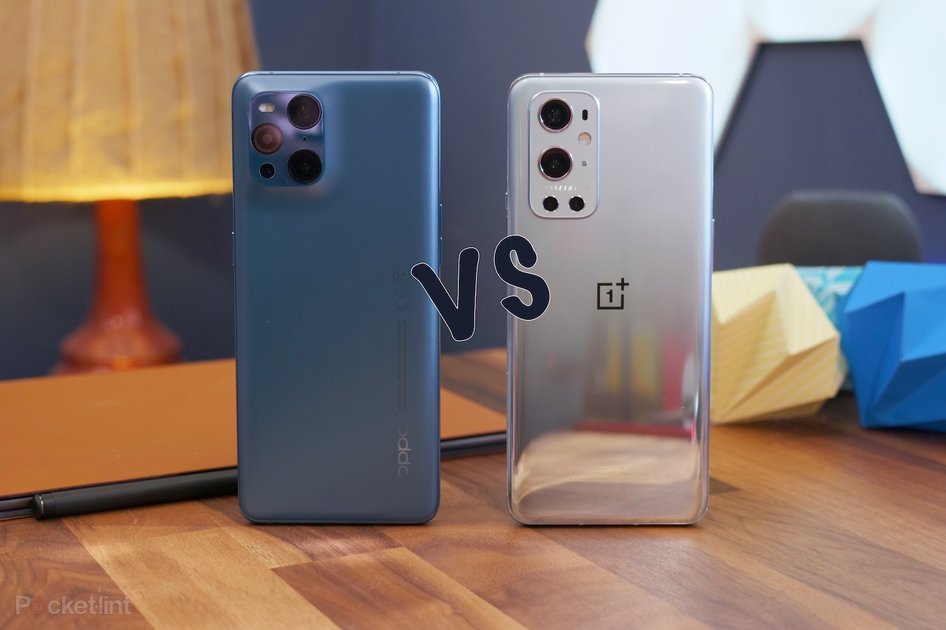
(Pocket-lint) – The line between Oppo and OnePlus may be blurring at the management level, and when it comes to launching smartphones in their homeland in China, but when it comes to delivering flagships in western markets, they still take different approaches to things.
For the start of 2021, Oppo delivered the Find X3 Pro as its standout performer while OnePlus has launched the OnePlus 9 Pro. The two phones both offer top notch specs and performance, but with the prices driving higher this year, how do you choose between them? Should you spend more on the Oppo or is the 9 Pro good enough?
Design
Oppo: 163.6 x 74 x 8.3mm – 193g
OnePlus: 163.2 x 73.6 x 8.7 mm – 197g
Oppo: Gloss Black, Blue and White colours
OnePlus: Morning Mist (silver), Forest Green and Stellar Black colours
Both: Aluminium and Corning Gorilla Glass 5 construction – IP68 water/dust resistant
There was a time when Oppo and OnePlus flagships looked very similar to each other, but with the latest range, that’s no longer true. Of course, from the front they both look almost identical, given they have the same sized skinny-bezeled display and a hole-punch camera in the left corner. Turn them over however, and there’s no way anyone’s confusing these two.
Oppo’s latest premium phone is unlike anything else on the market. The glass curving up to the camera housing is all part of the same glass that makes up the rest of the phone’s rear. That means you get an attractive, seamless look and feel. Plus that matte frosted glass on the blue model makes it feel super soft.
Pocket-lint
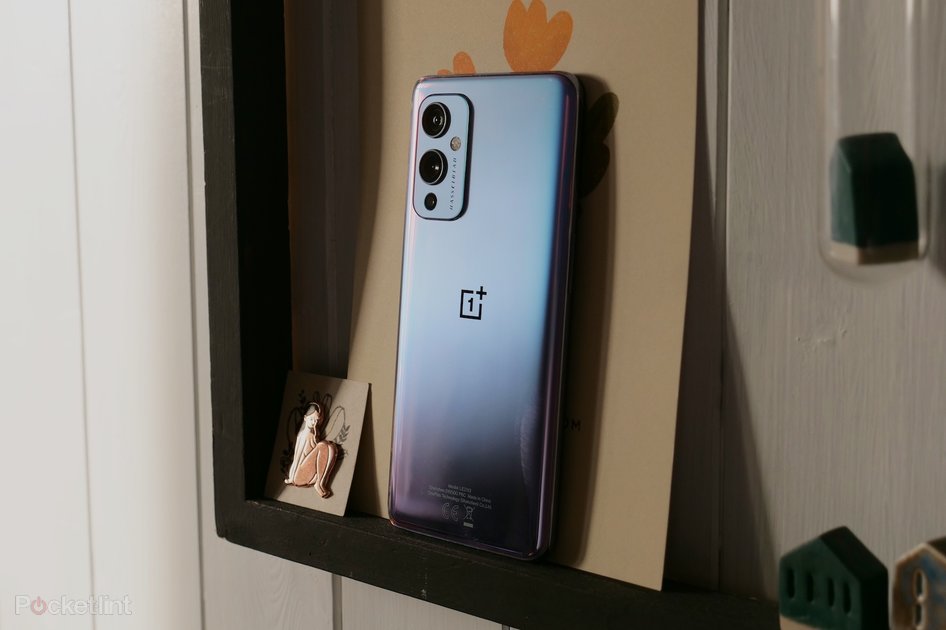
OnePlus has taken a vastly different approach, placing its cameras in a rectangle protrusion which is attractive in its own right. Each lens is surrounded by a metal ring, making them stand out visually, while the camera housing is colour matched to whatever the colour of the phone is.
Despite both being large phones, the Oppo is noticeably slimmer in the hand, and it feels more nimble and lightweight in the palm than the OnePlus does. Technically, there’s not a lot of difference in measurements, but holding the two yields very different feels.
Both have metal and glass construction and both are water and dust resistant up to IP68 rating, so which ever one you go for, it should survive being caught in the rain or dropped in a basin full of water.
The one area these two phones really are identical is in the display used on the front. Both have exactly the same 6.7-inch LTPO AMOLED display capable of reaching refresh rates up to 120Hz and a peak brightness of 1300 nits.
Maximum resolution for the both is set at QuadHD+ or, specifically, 1440 x 3216 pixels which gives it a density of 525 pixels per inch. That means they’re among the brightest, sharpest and smoothest displays currently available on any phone.
Both use an adaptive frame rate technology too, so that means if you’re looking at a still or slow-moving page, they adapt to the frame rate needed for that page. In the process, that means less power is wasted refreshing the display and as a result, it uses less battery.
Pocket-lint
Both feature Always On ambient displays too, although Oppo gives you more available style options to choose from. Plus, you get the ability to design and customise your very own.
OnePlus used to be the customisation champion with Oxygen OS, but Oppo has pulled ahead in this department offering more wallpapers that take advantage of the fluid, smooth display and giving you more fingerprint animation options.
squirrel_widget_4335124
Both sets of software let you enable various display features like a comfort tone that adapts the white balance based on your current ambient lighting, plus the ability to schedule night modes and kill blue light.
We experienced some quirks with Oppo’s notification system during the review however, where the OnePlus didn’t seem to suffer with as much inconsistency here.
Hardware and performance
Both: Snapdragon 888 processor
Oppo: 8GB/256GB or 12GB/256GB RAM/storage
OnePlus: 8GB/128GB or 12GB/256GB RAM/storage
Both: 4500mAh battery (2x 2250mAh)
Oppo: 65W Super VOOC 2.0 wired and 30W Air VOOC wireless charging
OnePlus: 65W Warp Charge wired and 50W Warp Wireless charging
Like its displays there are some clear similarities when looking at the internals of the two phones. Namely: they both have the Snapdragon 888 processor inside keeping everything ticking over smoothly.
Pocket-lint
They both even use the same speedy LPDDR5 RAM and UFS 3.1 storage, so that means that not only do your apps and games all run smoothly, but downloads and installations are quick too. Especially if you happen to live in a 5G area and can download over 5G.
What’s interesting here is that while batteries are the same size (4500mAh), we had slightly better battery life with the Oppo. No doubt, this is in part down to its pretty aggressive background task management. Still, sometimes we were able to get through two full days with the Find X3 Pro, where the OnePlus 9 Pro was a couple of hours short of making that mark.
Despite that, both will easily get you through a full day even if you’re someone who’s on the move constantly, listening to music, making calls and catching a few Pokemon on your travels.
With both being part of the same tech family, you often find similar charging technology in the companies’ devices and it’s no different here. Both use a proprietary flash charging system that can reach up to 65W speeds.
What’s different here is the OnePlus’ phone will retain those speeds for longer and can charge a battery from 1-100 per cent in under 30 minutes. The Find X3 Pro will take a few minutes longer to do the same, but in truth, both charge really quickly.
Pocket-lint
It’s in wireless charging where the OnePlus 9 Pro has the clear advantage. Its Warp Charge 50 Wireless can give you a full battery in 43 minutes using the bespoke wireless charging stand while Oppo’s 30W charge will take noticeably longer (around an hour).
In our experience, it’s in the camera department where you notice the biggest differences between the two phones. Both have high quality wide and ultrawide cameras, but Oppo opted to put the same 50-megapixel sensor on both, giving consistent results between them. Both give colour rich, detailed and warm shots.
The OnePlus 9 Pro we found quite inconsistent at times, offering photos that looked cool and blue from the primary and warmer shots like the Oppo from its ultrawide.
Pocket-lint
Both phones have a telephoto zoom lens and although the Oppo only goes up to 2x optical, we found it delivered higher quality results than the OnePlus’ 3.3x optical zoom lens. It was sharper and delivered relatively decent images up to 5x where the OnePlus lost a lot of detail and went quite mushy at times even at its lowest zoom.
Add to that the fact that the Oppo also delivered sharper, better looking images in its night mode vs. OnePlus Nightscape mode and it’s clear that the Find X3 Pro is the much better camera experience overal.
That’s without mentioning the gimmicky Micro lens which lets you get really close into objects and see right into their contruction at an almost microscope-like level. It’s fun to play with, but hard to get sharp in-focus shots from.
Pricing and availability
Oppo: From £1099
OnePlus: From £829
It’s no surprise to see OnePlus’ latest premium model cheaper than the Oppo alternative, however, to see the company’s phones getting so expensive in recent years must be difficult for some of its early fans. With prices starting at £829 in the UK, it’s as expensive as some big-name flagship phones, but still comes in cheaper than phones that are similar in terms of specs and features.
squirrel_widget_4300049
Oppo’s phone is a flagship device at a flagship price, and creeps over the £1000 barrier just as Samsung and Apple have done in recent years. It sees itself as a true flagship that doesn’t need a discounted price to persuade people to see value in its offering.
Conclusion
Ultimately there are likely only a couple of things that will sway you one way or the other on these two phones. A major factor will likely be the price. Oppo’s top tier phone is more expensive than OnePlus’, and looking at the spec sheet there may not be enough difference between them to warrant that extra money.
With that said, given the more consistent and excellent performance of the cameras on the Oppo, and the more refined design – particularly on the matte blue model – we think that’s extra money worth spending if you’re happy to pony up the extra cash.
Have you ever wanted to play a sound effect when someone enters the door? Using a Raspberry Pi, some speakers, and some ingenuity you can make your life closer to one of my favourite shows – Seinfeld. This Raspberry Pi project is great for beginners and introduces you to the concept of using the GPIO (general purpose input-output) pins.
If you’re not a Seinfeld fan, you can always replace the audio with another sound of your choosing. Here’s how to build a Raspberry Pi machine that plays a custom sound effect when a door is opened.
What You’ll Need For This Project
Raspberry Pi 4 or Raspberry Pi 3 with power adapter
8 GB (or larger) microSD card with Raspberry Pi OS. See our list of best microSD cards for Raspberry Pi.
Desktop speakers or a megaphone with a 3.5mm input and 3.55mm cable
Speaker wire, any gauge, at least a few feet in length
Aluminum foil
Electrical tape
Male to female jumper cables (2)
Wire strippers or scissors
Monitor or Projector with HDMI and power cables. (Optional)
How to Turn Raspberry Pi into an Electronic Door Chime
Before you get started, get your Raspberry Pi set up. If you haven’t done this before see our article on how to set up a Raspberry Pi for the first time or how to do a headless Raspberry Pi install (without the keyboard and screen). For this project, we recommend a headless Raspberry Pi install.
1. Install the lower-level dependencies we need to play audio files and make our code run by entering the following commands in a terminal window.
2. Set the 3.5mm audio output to be the default audio output in raspi-config. You do this by launching raspi-config (entering sudo raspi-config at the command prompt) and navigating to System Options -> Audio -> Headphones 1. The pi allows for audio to be outputted to either the 3.5mm analog output, or over the HDMI port. If you do not have a monitor attached, Headphones may be the only option.
(Image credit: Tom’s Hardware)
3. Enable auto-login in raspi-config by navigating to System Options > Boot / Auto Login > Console Autologin. When the raspberry pi restarts, it will automatically log in (which we’ll need to run our scripts).
4. Click finish to exit the raspi-config menu, and reboot your raspberry pi (either through the prompt, or the console).
sudo reboot
5. From your home directory, clone the sample code using git.
6. Plug your speakers into your Raspberry Pi, and test them by playing your audio file. You should hear sound from your speakers.
mpg321 /home/pi/doorbell/audio/audio_0.mp3
(Image credit: Tom’s Hardware)
7. Adjust your pi’s volume with the alsamixer command, or if your external speakers have a volume knob, on there too. Use the arrow keys to adjust the volume, and Ctrl + C to exit.
alsamixer
(Image credit: Tom’s Hardware)
8. Test the script. Connect one jumper wire to board pin 12 (GPIO pin 18), and a second to ground. Then run the python command below. Once it’s running, touch (short) the two jumper wires together for a second or two, then release them. If all goes successfully, the console will output “playing audio_0.mp3” and you should hear the sound over your speakers.
(Image credit: Tom’s Hardware)
python3 /home/pi/doorbell/app.py
(Image credit: Tom’s Hardware)
9. Download or copy a few short mp3 files you’re looking to play. In my case, I took a few recordings from YouTube and copied them over to the Raspberry Pi into the audio directory using SCP. However, I could have also used Chromium on the Pi to download or copied files over using VNC or FTP. Any mp3 files placed in /home/pi/doorbell/audio directory will be randomly selected when the door opens or closes.
10. Tape a small, rectangular piece of aluminum foil to the door.
(Image credit: Tom’s Hardware)
11. Cut a piece of speaker wire long enough to stretch from your Raspberry Pi to the door.
12. Strip the wire on both ends
(Image credit: Tom’s Hardware)
13. Tape one end to the door frame so that when closed, the piece of aluminum foil closes the circuit. It is also possible to use a reed switch instead of aluminum foil.
(Image credit: Tom’s Hardware)
14. Connect the other ends of the speaker wire to the jumper cables using solder or electrical tape.
(Image credit: Tom’s Hardware)
15. Add the script to /etc/rc.local so it runs automatically when the Raspberry Pi restarts.
sudo nano /etc/rc.local
# Add the following line before the last line (exit 0)
python3 /home/pi/doorbell/app.py &
16. Restart the Raspberry Pi
17. Test your project by opening or closing the door.
If all goes well, you should hear a random sound from the audio directory.
Here’s the situation: you’re typing a report for work, and you suddenly have to write the phrase “Jones née Berkowitz.” Or you are adding a phrase in Spanish and need to use the word “años.” How do you add the special characters to the letters?
Special characters (also known as diacritical marks) may be more common in certain languages, but there are plenty of circumstances in which English speakers may need to use them. But because they are so rare in English, native English speakers may not have learned how to add those marks to documents, emails, or other writings. It’s not difficult to add them to your Windows document, although it’s not quite as smooth an operation as on a Mac, where all you have to do is hold the appropriate key down. (In fact, once upon a time, you would have had to look up the symbol character codes…)
Use the touch keyboard
The easiest way to add diacritical marks to a document is to enable the Windows touch keyboard. (Thanks to Ed Bott from ZDNet for first leading me to this method.) The touch keyboard automatically appears if you’re using a Windows tablet or if you’re using a PC in tablet mode. If you don’t have a touchscreen, you can use the keyboard icon that appears in the taskbar, on the right side near the date. Don’t see it? This is how you get it:
Right click on the taskbar.
Click on “Show touch keyboard button.”
Click on “Show touch keyboard button”
Now, when you want to use a special character:
Click on the touch keyboard icon.
The touch keyboard will appear. Long press (with your mouse button or, if you have a touchscreen, your finger) on the letter you want to use.
You’ll now see several extra keys showing the ways you can type that letter with different symbols. Select the one you want, and it will appear on your document.
If you want to enter an emoji, click on the emoji key (on the left of the “space bar”).
Select the special character you want, and it will appear on your document.
Use the character map
If you’d like to try a more old-fashioned method of adding special characters to Windows, you can use the character map, which is a less polished and more complicated version of the touch keyboard but offers a similar service.
To access it on your Windows 10 system:
Type “character” in your search field and then select the Character Map app.
You’ll get a pop-up map showing a bunch of special characters for a specific font. You can change the font by clicking on the drop-down font menu at the top.
The character map lets you access a wide variety of special characters.
Click on the letter(s) or special characters that you want to use in your document and then click on the “Select” button. They’ll appear in the “Characters to copy” field.
Once you’ve selected all the characters you want, click on the “Copy” button and then paste the character(s) into your document.
The Raspberry Pi Compute Module 4 was made to be embedded into custom applications. Chipsee, a Chinese industrial electronics company, has integrated the Compute Module 4 into an industrial display designed to be added to your own chassis. As reported by CNX Software, the Industrial Pi CM4-70-EM is dominated by a 7-inch screen, but there’s plenty of features packed in around the back.
Image 1 of 5
(Image credit: Chipsee)
Image 2 of 5
(Image credit: Chipsee)
Image 3 of 5
(Image credit: Chipsee)
Image 4 of 5
(Image credit: Chipsee)
Image 5 of 5
(Image credit: Chipsee)
For $199, we get a 7 inch 1024×600 capacitive touch panel with 500 nits of brightness, a Raspberry Pi Compute Module 4 with 2GB DDR4 RAM and 16GB eMMC, but no onboard WiFi or Bluetooth. The Compute Module 4 is mounted to a custom carrier board, designed to be embedded into the customer’s project. The carrier board is packed with extras geared towards industrial applications.
2 x Micro SD card readers
Opto-isolated GPIO with four inputs, four outputs
2 x RS232 channels
RS485
DC power 6 – 36V
3.5mm Audio out
2 x USB host ports
USB OTG
Gigabit Ethernet
Zigbee wireless
Buzzer / Speaker
Raspberry Pi official camera connector (CSI)
Optional 4G/LTE via M.2 slot
The M.2 slot is most likely a PCIe interface, opening up the possibility of using an NVMe SSD or other devices designed for that interface. The included Raspberry Pi Compute Module can easily be swapped out for a model with more RAM, greater storage, or with WiFi and Bluetooth.
Should you wish, the Industrial Pi CM4-70-EM can be purchased without a Compute Module 4, but you will need to contact Chipsee for pricing. The Industrial Pi CM4-70-EM is compatible with Raspberry Pi OS, and the Chipsee software engineers have written drivers for all of the components on the board, so you are ready to drop this board into your projects.
Wiring code for your Raspberry Pi Pico can fall into two categories. The easy way for new users is to use a version of Python such as MicroPython or CircuitPython. A more advanced way is to write code in C / C++ which is for more confident users.
There is now a third way that we can write code for our Raspberry Pi Pico, and that is via the Arduino IDE, which uses “Arduino Language,” a derivative of C++. Because Arduino has been around for so many years, there’s a ton of pre-existing “sketches” (the Arduino term for programs) and tutorials for it. If you’ve worked with Arduino boards before, you may be very familiar with this powerful IDE and language.
We’ve gone through many different setup processes and found two community created projects that streamline the installation process to just a handful of steps. The first is pico-setup-windows which is a Windows port of the official Pico setup script. The second is Arduino-Pico which adds support for the Raspberry Pi Pico to the Arduino IDE. In this tutorial we show you how to set up your Windows or Ubuntu machine to write Arduino code on your Raspberry Pi Pico
How to Program Raspberry Pi Pico in Arduino IDE for Windows
1. Download the pico-setup-windows installer. This is a fairly large download.
2. Launch the installer.
(Image credit: Tom’s Hardware)
3. Ensure that all of the components are selected. This will install approximately 360MB of files and applications to your machine. Including the files necessary for building C/C++ files, Visual Studio Code, and Git version control.
(Image credit: Tom’s Hardware)
4. Click Install to install all of the applications. This can take some time, and at times it may appear stuck, but be patient.
(Image credit: Tom’s Hardware)
5. Download the Arduino IDE and install it to your machine. We chose v 1.8.13, but the beta of v 2.0 also works.
6. Open the Arduino application and navigate to File >> Preferences.
7. In the additional boards manager, add this line and click OK.
9. Type “pico” in the search box and then install the Raspberry Pi Pico / RP2040 board. This will trigger another large download, approximately 300MB in size.
(Image credit: Tom’s Hardware)
10. Go to Tools >> Board >> Raspberry Pi RP2040 Boards and select Raspberry Pi Pico.
(Image credit: Tom’s Hardware)
11. Connect your Raspberry Pi Pico and using Device Manager locate the COM port that it is connected to.
(Image credit: Tom’s Hardware)
12. Under Tools >> Port, set the COM port for the Raspberry Pi Pico.
(Image credit: Tom’s Hardware)
13. Open Files >> Examples >> Basics >> Blink to test that we can write code to the Arduino.
(Image credit: Tom’s Hardware)
14. Click on Upload to write the code to the Raspberry Pi Pico. The default Blink sketch will flash the green LED next to the micro USB port on the Raspberry Pi Pico.
(Image credit: Tom’s Hardware)
(Image credit: Tom’s Hardware)
The output window will tell us when the upload is complete. Look at your Raspberry Pi Pico and you will see the green LED flashing once per second.
How to Program Raspberry Pi Pico in Arduino IDE for Linux
We used Ubuntu for this tutorial, but the same instructions should work for other Debian based distributions such as Raspberry Pi OS.
1. Open a terminal and use wget to download the official Pico setup script.
2. In the same terminal modify the downloaded file so that it is executable.
$ chmod +x pico_setup.sh
3. Run pico_setup.sh to start the installation process. Enter your sudo password if prompted.
$ ./pico_setup.sh
4. Download the Arduino IDE and install it to your machine. We chose v 1.8.13, but the beta of v 2.0 also works.
5. Open a terminal and add your user to the group “dialout.” This group can communicate with devices such as the Arduino. Using “$USER” will automatically use your username.
$ sudo usermod -a -G dialout “$USER”
6. Log out or reboot your computer for the changes to take effect.
7. Open the Arduino application and go to File >> Preferences.
8. In the additional boards manager add this line and click OK.
10. Type “pico” in the search box and then install the Raspberry Pi Pico / RP2040 board. This will trigger another large download, approximately 300MB in size.
(Image credit: Tom’s Hardware)
11. Go to Tools >> Board >> Raspberry Pi RP2040 Boards and select Raspberry Pi Pico.
(Image credit: Tom’s Hardware)
12. Connect your Raspberry Pi Pico
13. Run a command to locate the USB device which identifies as a Raspberry Pi Pico. In our case it was ttyACM0.
$ dmesg
(Image credit: Tom’s Hardware)
14. Open Files >> Examples >> Basics >> Blink to test that we can write code to the Arduino.
(Image credit: Tom’s Hardware)
15. Click on Upload to write the code to the Raspberry Pi Pico. The default Blink sketch will flash the green LED next to the micro USB port on the Raspberry Pi Pico.
(Image credit: Tom’s Hardware)
The output window will tell us when the upload is complete. Look at your Raspberry Pi Pico and you will see the green LED flashing once per second.
(Image credit: Tom’s Hardware)
Raspberry Pi Pico Tutorials:
How to Set Up and Program Raspberry Pi Pico
How To Solder Pins to Your Raspberry Pi Pico
How To Get Wi-Fi, Internet on Raspberry Pi Pico
How to Use an OLED Display with Raspberry Pi Pico
How to Use an Ultrasonic Sensor with Raspberry Pi Pico
Sustainable smartphone manufacturer Fairphone has gotten Google’s certification for its Android 9 update for the Fairphone 2. Getting certification for a nearly three-year-old version of Android doesn’t sound that impressive until you realize that it’s running on a phone originally released five years ago when it ran Android 5. The roll-out of the software starts today, and will continue until April 18th, Fairphone says.
It’s a length of support that’s basically unheard of among Android phone manufacturers. Although Fairphone 2 owners aren’t going to be able to enjoy the latest Android 11 features, the more important thing is that they’re running a version of Android that’s still officially supported. Google’s latest Android security bulletin from this month includes multiple fixes for security issues in Android 9.
The Fairphone 2’s Android 9 update has been in the works for a while and was released in beta way back in June 2020. At the time, Fairphone outlined the challenges it had in trying to support such an old phone, including the fact that Qualcomm no longer provides support for the processor inside the device, a Snapdragon 801, which originally announced back in 2014.
“To get Google certification for Android 9 for Fairphone 2 just as we hit five years of support for the smartphone is a huge achievement for Fairphone,” says CEO of Fairphone Eva Gouwens. “In order to get certification, we had to pass approximately 477,000 Google tests.”
“We want to show the industry that this kind of thing is possible, that a smartphone doesn’t have to be discarded after 2-3 years, we can prolong it’s lifespan,” the CEO added.
The only other smartphone manufacturer that offers a similar length of support for its devices is Apple, which last year released iOS 14, its latest phone OS, for its 2015 iPhone 6S. Android manufacturers, while behind Apple, are improving. Samsung now offers four years of security updates for its recent Galaxy devices, while Google offers three years of updates for its Pixel phones, and OnePlus says it plans to release Android 11 for its 2018 OnePlus 6 and 6T.
The Fairphone 2’s update to Android 9 this long after release bodes well for the company’s long-term support of its more recent Fairphone 3 and 3 Plus phones. The company says the phones should be updated to Android 11 in the second half of this year, with “one more major Android upgrade” coming thereafter. Software support and spare parts availability is set to continue until 2024.
Here’s the situation: you’re typing a report for work, and you suddenly have to write the phrase “Jones née Berkowitz.” Or you are adding a phrase in Spanish and need to use the word “años.” How do you add the special characters to the letters?
Special characters (also known as diacritical marks) may be more common in certain languages, but there are plenty of circumstances in which English speakers may need to use them. But because they are so rare in English, native English speakers may not have learned how to add those marks to documents, emails, or other writings on their Macs.
Here’s how:
For access to more common diacritical marks, you just need to hold down the key for the letter you want to use until a small numbered menu appears on-screen. The menu that pops up will show all of the diacritical marks available for that letter; just type the correct number, and the letter with the mark will appear on your screen.
If you hold down the “e” key, all of the available diacritical marks will appear with numbers.
Use the Keyboard Viewer
There are a number of other special characters that you may want to use, which you can access by pressing down the Option key on your Mac’s keyboard and then pressing the appropriate key. Not sure which key is the appropriate one? There is a Keyboard Viewer that will let you see all of the variations that you can use.
It’s simple to find the Keyboard Viewer — if you’ve got the icon for the Input Menu in your menu bar.
The icon for the Input Menu appears in the upper right menu bar.
Don’t see it? Here’s how to get it into your menu bar:
Go to Apple menu > System Preferences > Keyboard. Click on the Input Sources tab and look for the checkbox labeled “Show Input menu in menu bar.” If it’s not checked, then check it.
To get the Input Menu icon, you need to enable it in your Keyboard preferences.
Click on the Input Menu icon (which will now be on the right side of your menu bar). Select “Show Keyboard Viewer.”
A visual of your keyboard will appear on your screen. If you press on the Option key on your keyboard, the Keyboard Viewer will show you what special characters are available if you press those keys in combination with the Option key.
Note: some of the keys will be outlined in orange. These are the keys we mentioned earlier, the ones that have several special characters and can be held down to see the various characters that can be used with them.
How do you boot your Raspberry Pi? The vast majority of us will use a microSD card, some may use a USB drive as a boot device. With the Raspberry Pi Compute Module 4 we saw a PCIe 1x slot appear on the official carrier board and intrepid hackers such as Jeff Geerling have been pushing what this board can achieve. In Geerling’s latest video he tests out recently announced beta instructions for booting a Compute Module 4 directly from NVMe.
As Geerling points out in the video, NVMe boot was quietly announced just a couple of weeks ago and is still in beta. The instructions are likely to change ready for official support to start. Geerling installed Raspberry Pi OS to a Western Digital Black SN750 500GB SSD and proceeded to benchmark the drive against a fast micro SD card, and the Compute Module’s onboard eMMC flash. Boot times across all three were pretty close, an example of how finely tuned the Linux boot process has become. Where Geerling saw marked improvements was in typical day to day operations such as open and closing applications and file copy operations which saw NVMe storage offering up to a 44% speed increase over a Sandisk Extreme micro SD card.
The Compute Module 4 was released in Q4 2020 and it was designed for use in embedded applications, and so custom carrier boards are used to break out the functionality that we require. Geerling’s tests were conducted using a MirkoPC, a Compute Module 4 carrier board with built in M.2 NVMe slot running at PCIe x1 Gen2. The MirkoPC is not the only Compute Module 4 carrier offering NVMe storage. Piunora is an alternative that squeezes a Compute Module 4 and NVMe storage onto a board no larger than an Arduino Uno. Should you wish to use NVMe on the official Raspberry Pi Compute Module 4 IO Board then you will require an adaptor for the PCIe interface.
There is no word on how long we have to wait for NVMe support to officially arrive.
(Pocket-lint) – OnePlus started off as that limited, small batch phone-maker that only insiders knew about, before growing into a proper big-time brand. And yet, despite being available through proper partner carriers and in real stores, it’s still not a company you’d consider hugely mainstream. It certainly doesn’t have that mindshare that Apple and Samsung have enjoyed for years.
Counting all the ‘T’ versions, however, we’re now into the 13th generation OnePlus flagship. And in all of those generations it’s always nailed the speed, performance and fluidity. The cameras, however, have always raised questions, never quite delivering to the same degree as the competition. To try and conquer this final frontier OnePlus has brought in some outside help from a partnership with Hasselblad.
So does the OnePlus 9 Pro, Hasselblad riposte at the ready, succeed in flying us to the moon and back?
So shiny
Finishes: Morning Mist, Forest Green, Stellar Black
Dimensions: 163.2 x 73.6 x 8.7mm / Weight: 197g
IP68 water- and dust-resistant rating
Stereo speakers
OnePlus has three different finishes for the OnePlus 9 Pro. We’ve been using the silver coloured Morning Mist version, which is oh so shiny. At least, the bottom third of the back is. It’s reflective enough that you can see your face in it (which also makes photographing it a real pain – not that this would be a concern to 99 per cent of the people who buy one).
This reflective surface subtly gradients into a more misty, foggy look at the top. The surface of the glass on the outside is glossy and slippery, so attracts fingerprints like nobody’s business. All in all meaning you may just want to use the case, or pick up the frosted glass Forest Green variant instead.
Still, there’s plenty to like about the 9 Pro’s design. For one, the camera housing has a look about it that says the designers really cared about how it turned out. It’s not just a characterless rectangle stuck onto the back. It’s colour-matched to the back and each of the two main cameras has a metallic ring around the lens, making it stand out against the background. It’ll certainly make it stand out from the crowd.
The rest of the design is very familiar for anyone who’s used a OnePlus phone over the past year. The glass curves on the back towards the edges, making an otherwise quite large phone feel a bit more comfortable than it would if it were completely flat and square.
It’s not the lightest phone around, but in its size category, squeezing in below 200 grams is a good thing. It makes it perfectly bearable to use day in day out. Plus, all the buttons being within easy thumb reach means there’s not too much over-stretching going on to locate the alert slider or the volume rocker.
Pocket-lint
While we’re on the subject of practicality, the Pro has IP68 rating against water and dust ingress. So when this slippery fish does inevitably slip out of your hand into a sink full of water, it won’t get damaged (well, not from the water anyway!).
Unlike the standard ‘non-Pro’ version, the OnePlus 9 Pro doesn’t have a completely flat panel, but the curves on the screen are definitely smaller than in previous iterations. That does mean the phone feels a bit chunkier than 7 Pro from two years ago, but it means it’s less prone to accidental touches. Plus, the bezels are really skinny, giving an almost edge-to-edge screen with only a neat little selfie camera punching its way through the top corner.
Display and software
6.7-inch AMOLED display
QHD+ resolution (1440 x 3216 pixels; 525ppi)
Adaptive frame rate up to 120Hz
Oxygen OS 11 (over Android 11)
It’s not just in physical button placement where OnePlus has attempted to make its large phone comfortable to use. The software, Oxygen OS, went through a massive refresh for its Android 11-based version – which first launched on the OnePlus 8T. This update didn’t just radically change the entire look and feel of the previously Google stock-like experience, it was designed so that the bits you need to reach with your thumb are easy to get to. Buttons and controls are shifted down, so you don’t have to awkwardly stretch across to the top corner.
The thing that works against this somewhat is that OnePlus has fewer of its own apps than it used to. It’s gone all-in with Google, so apps like Messages and the Phone app are Google; similarly, as we saw with the 8T in 2020, the Shelf that used to live on the left of the Home Screen has been replaced by Google’s Discover feed.
None of these moves are bad, as Google’s Discover is far more useful and more relevant than Shelf. That in itself hasn’t disappeared completely, though, as you can get to it by swiping down on the Home Screen. It could be useful for things like getting quick access to favourite contacts, or remembering where you parked the car. We didn’t find it all that useful, so we just changed the setting so that a swipe on the Home Screen dropped down notifications instead.
As for the screen, it’s one of the best available on the market. It’s a 6.7-inch AMOLED panel that has a top refresh rate of 120Hz, meaning it cycles through 120 refreshes per second to give the sense of smoothness.
Like Samsung’s latest flagships – the Galaxy S21 Ultra at the top of the stack – the OnePlus also has adaptive refresh rate capabilities. Here, however it can go all the way down to just 1Hz when it detects a static page, which will help save battery life. It also means it’s pretty much identical to the screen on the Oppo Find X3 Pro.
It’s really bright and vivid, and – once you’ve enabled its maximum sharpness within the settings – it’s crisp to the eyes too. One clever little feature actually enables you to toggle on a battery saver mode when you choose the QHD+ resolution, which means the screen can switch to a lower resolution if it’s appropriate to do so.
As usual, there are plenty of additional features, such as the ability to tune the appearance to your preferences: be that dark mode for night time, comfort tone for automatically adjusting the white balance based on the ambient light, or reading mode for, um, you guessed it, reading.
On the whole, it’s a mighty fine display. Colours pop, bright areas are almost searing, and animations are smooth. There’s perhaps a bit too much contrast, while auto-brightness dims the output a bit much – as to not retain balance of highlights, shadows and colours – but most of the time we were impressed by it.
For those who want it there’s plenty of customisability too. The display settings menu lets you adjust the overall look of the screen, making it more or less vibrant and adjusting colours and white balance.
Best smartphones 2021 rated: The top mobile phones available to buy today
By Chris Hall
·
The best smartphones you can currently buy, covering the best of iPhone and Samsung, and everything Android has to offer
So to the all-important cameras. Both the primary and ultra-wide cameras use high-end Sony sensors – which is OnePlus showing off that it’s sourcing the best core kit for the job. For the most part, these sensors deliver good pictures.
The primary sensor looks like it’s had the most love from Hasselblad’s partnership, delivering natural-looking colours with good detail. Likewise, the ultra-wide sensor can take great pictures – and that’s no surprise given it’s the same sensor used by the Oppo Find X3 Pro in both of its two main cameras.
In good light you’ll get sharp mostly noise-free pictures, while the freeform ultra-wide lens will ensure you don’t get lots of curving and distortion at the edges. In fact, it’s very level and doesn’t suffer from that fish-eye effect you sometimes see from such lenses. It’s not as good in low-light situations as the primary sensor, neither is perfect once light levels drop. You’ll start to see image noise introduced when it gets a bit darker, particularly in greys and blues in any shadows.
The only inescapable problem isn’t with either camera individually. It’s when you compare them to each other. At some points it looks like results are from two different phones. Not in terms of angle of view, as that’s inevitable, but with the final aesthetic. The ultra-wide often boosts warmth and saturation to give a really vivid (almost more orange feel), while the primary lens delivers a more neutral, cooler image where blues are more standout.
You can see this difference when switching to Macro mode – which automatically switches to the ultra-wide sensor to perform the close-up shot – as well as when you shoot at night time using the Nightscape mode.
Nighstscape mode seems to have improved from previous generations of OnePlus phones, though, with the 9 Pro able to draw in decent light. We did sometimes struggle to get results looking sharp though, with finer details and edges blurring – not an out-of-focus blur, more like a motion blur as if the camera’s optical stabilisation can’t quite compensate for hand-shake enough.
It wasn’t the only time the phone’s camera struggled with detail either. Using the telephoto zoom lens – which is 3.3x that of the main camera, and can reach up to 30x digitally – we found that detail simply lacked. It’s not a great optical zoom.
Pocket-lint
: Ultra-wideUltra-wide
If you scroll through the gallery above – which cycles through the cameras at ultra-wide, 1x, 3.3x, 5x, 10x and 30x – you’ll see how the tree branches in the 3.3x shot turn into a weird-looking mush. And once you zoom past 3.3x the detail becomes increasingly ropey with the images at the top end looking more like an oil painting than a photograph.
As for macro mode, that’s pretty strong in good light. Details are sharp and in-focus, while the background blur adds depth and doesn’t suffer from unnatural and nauseating bokeh like some dedicated macro lenses do. That’s likely down to the fact the OnePlus 9 Pro is using the ultra-wide sensor, rather than have a poor low-resolution macro camera.
On the whole, then, the 9 Pro’s cameras are a bit of a mixed bag. It performs well, but the difference in colour balance between the primary and ultra-wide is confusing, especially given OnePlus’ insistence on using Hasselblad’s ‘strict’ tuning standards. The optical zoom lens is quite poor when it comes to detail, and night mode suffers a little with motion blur.
The primary lens is great for the most part, but we’d just love to see that consistency between the different lenses. It’d turn this system into one that truly competes with the market leaders. The hardware is obviously there, we just need to see attention to detail on balance still.
Speed, I am speed
Qualcomm Snapdragon 888 platform, 5G connectivity
RAM: 8GB/12GB LPDDR5
Storage: 128GB/256GB (UFS3.1)
4,500mAh battery (2x 2250mAh cells)
Warp Charge 65T flash charging (1-100% in 28 minutes)
Warp Charge 50 wireless charging (1-100% in 43 minutes)
If there’s one thing you can virtually guarantee from OnePlus when it comes to its flagship phones: they’re all fast and fluid. For years the company has used whichever is Qualcomm’s latest top-tier processor. For 2021 that’s the Snapdragon 888.
In all areas, the OnePlus 9 Pro performs like a proper flagship should. It’s fast and smooth, loading any games and apps without stopping to think about it. We had no instances of stutter or delay. Part of that is also down to the screen’s refresh rate, but also its touch sampling rate – which can read your fingers taps and swipes at a rate of 240 times per second. The animation on screen responds virtually immediately, making it feel nimble and instant.
Even simple and mundane tasks like refreshing a Twitter feed or loading a web page is hassle-free. Plus, if you live in an area with 5G signal, you get that goodness too, for speedy cellular downloads.
During our testing there were moments where – after an hour or so of gaming – the phone became a little warm, but it didn’t feel uncomfortable. That’s likely down to having an efficient vapour chamber and graphite-based cooling system inside, making this the most non-gamer gamer phone on the market.
As for battery life, with the screen cranked up to its highest resolution and frame rate settings, the 4500mAh capacity is more than capable of pushing through a full day. Even on quieter ones, however, we never quite got the sense it’d make it through two full days.
On our heavier days with a three or more hours of screen time, we got to bed with somewhere around the 30 per cent mark left over. Here’s the thing though: battery anxiety is never an issue because when it comes to charging few phones compare to the OnePlus 9 Pro.
If you use the included 65W wired charger, you can get the battery from dead to 100 per cent in just 28 minutes. That’s a full charge in less than half an hour, which is mind-boggling. Plug the phone in for 10 minutes and that’ll provide enough to get you through a good few hours.
But there’s more: it charges fast wirelessly too. Using OnePlus’ latest Warp Charge Wireless stand (an optional extra, at your expense), you can get a full charge in 43 minutes. Of course, if it’s by your bed and you charge overnight you don’t need those speeds, but it can be programmed to go into bedtime mode which charges slower and, crucially, quieter. The fan it uses to keep itself cool during the faster charging speeds is shut off to allow you to get to sleep.
The Warp Charge Wireless is so quick that we’d often just leave the 9 Pro off charge at night, then put it on the stand while getting ready in the morning. It’s a bit of a game-changer.
It’s worth noting that – even though it charges quickly – OnePlus has kept its battery optimisation features in play, which ensure the device’s battery isn’t harmed by such speedy refills. It learns your charging routine and does the first chunk of charging quickly, before leaving it and then finishing the charge right before you wake up in the morning – which is good for battery health and longevity over an extended period of time.
Verdict
The OnePlus 9 Pro attemps to address the series’ historically biggest issue: the cameras. However, even with support from Hasselblad, it still doesn’t quite hit the mark in that regard. But the core of the phone impresses, with fast wireless charging a truly brilliant feature, and the display being top notch too.
While it’s possible to get great photos from the 9 Pro’s cameras, the imbalance of colour between the two main sensors – with photos often looking like they’ve come from two different phones – and the poor results from the telephoto zoom just don’t quite add up to what we’d expect. More hassle than Hasselblad, eh?
It’s also worth pointing out that the 9 Pro’s price has crept higher still, edging ever closer to the four-figure mark and, in so doing, sitting closer to other premium flagship competitors. That does mean it’s still more affordable than some of the other top tier phones out there, but it’s no longer the instant buy the series once was.
Overall, the OnePlus 9 Pro continues to deliver on the series’ well-established strengths. Its fast and fluid, has a cracking screen, mind-boggling impressive fast-charging, and all for a price that undercuts the established elite. But it continues the series’ ongoing weaknesses too, as those cameras still just aren’t class-leading.
Also consider
Oppo Find X3 Pro
squirrel_widget_4300049
In a lot of ways, the Oppo is very similar to the 9 Pro, offering similar hardware in terms of screen, battery size, charging and processing power. Where it differs is with a more consistent camera experience and a more refined designed.
Read our review
Samsung Galaxy S21+
squirrel_widget_3816733
Pricing isn’t all that much between Samsung’s S21+ and OnePlus’ latest top tier phone. It may have a plastic back, but its performance is strong in all the important ways. The cameras are a tad disappointing however.
(Pocket-lint) – It’s safe to say OnePlus has been on something of a journey over the past few years. It lifted itself out of that initial ‘plucky upstart’ role and started to become a real smartphone company.
It’s gone from being a company that launched one or two new phones a year to launching six phones in 2020, with varying specs and at different price tiers. In 2021 that output glut looks set to continue – and it starts with the OnePlus 9.
Design
Dimensions: 160 x 74.2 x 8.7mm / Weight: 192 grams
Finish options: Winter Mist, Arctic Sky, Astral Black
3D Corning Gorilla Glass back
Dual stereo speakers
Look at the camera housing and you’ll see an evolution of design when you compare the OnePlus 9 to its most recent predecessors: the OnePlus 8T and OnePlus 8. The 9’s two main cameras have very deliberate metallic ring around them, while the camera housing has been designed to colour-match the rest of the phone’s rear panel.
It’s a classy and minimalist look, now with the addition of a Hasselblad logo. Because, yep, OnePlus is all about a camera partnership with this new series.
It’s in the rest of the build where we’ve seen OnePlus move backwards compared to its previous models though. The 9’s frame is made from a similar shiny plastic to what we first saw on the OnePlus Nord. Or, as OnePlus calls it: “fibreglass infused polymer”. Thankfully, the back is covered in Corning Gorilla Glass for protection.
It’s not the slimmest or lightest phone around either, certainly feeling thicker than previous models, but that’s almost certainly down to the move towards a flat screen. Rather than have those curved edges on both sides of the phone, it only has them on one side, so you lose that more sleek effect. Still, the OnePlus 9 feels noticeably chunkier than the 8T – another flat-screened model – which was thicker than the OnePlus 8 before it.
Of course, there are real benefits to having a flatter screen. There’s very little chance you’ll suffer from accidental touches, because it doesn’t curve around the edges, so that makes the phone a bit easier to use.
Our own review unit is the Winter Mist model, which has a light purple colour, with the rear featuring a gradient refraction effect. That means the bottom part of the phone is really glossy and reflective, but the top is more frosted and gradients between these two finishes. We think some people will like it, but we prefer the softer fully frosted look of some of the blue Arctic Sky model. It’s also a bit of a fingerprint magnet, which diminishes the overall finish effect.
There are all the usual OnePlus buttons and ports though. That means the volume rocker is within easy reach on the left side, with the alert slider switch on the right near the power/sleep button. The dual nano SIM tray is on the bottom edge near the USB-C port and the bottom-firing loudspeaker – which joins with a speaker near the earpiece to form stereo sound that’s boosted by Dolby Atmos tech.
Display
6.55-inch AMOLED panel
Full HD+ resolution (2400 x 1080 pixels; 402ppi)
120Hz refresh rate
OnePlus has focused on having lightweight and fast software for years. Its latest iteration of Oxygen OS is no different, and the display is primed and ready to take full advantage of that fluidity too.
Pocket-lint
The AMOLED screen on the front of the OnePlus 9 isn’t quite as sharp as that of the 9 Pro, but with a pixel density over 400 pixels-per-inch it should be sharp enough for most content you’d want to watch.
What’s more, with a refresh rate peak of 120Hz, it can keep up with any fast frame-rate gaming. OnePlus says it has improved the colour accuracy and the automatic brightness adjustment too – the result of adding in two ambient light sensors, while the brightness has more than 8000 different levels to enable smoother adjustment.
Like Apple’s True Tone, there’s a Comfort Tone feature that adjusts the colour temperature of the display to match your environment, which should be handy when reading ebooks on a white screen, making it seem a bit more like a paper surface.
Brightness itself shouldn’t be a problem either. With a peak of up to 1100nits and HDR10+ certification you should find a very attractive, vivid and bright panel. Of course, we need a bit more time to test it thoroughly, but all early indicators are good.
Hardware and performance
Qualcomm Snapdragon 888 platform
128GB/256GB UFS 3.1 storage
8GB/12GB LPDDR5 RAM
4,500mAh battery capacity
Warp Charge 65W charging
15W Qi wireless charging
With a top OnePlus flagship you know one thing for certain: you’ll always get the latest, most powerful mobile processor. That means the Snapdragon 888 platform for the 9 series, along with suitably quick LPDDR5 RAM and UFS 3.1 storage.
What that means in daily use is that, not only will your apps and games load quickly, but any downloads and installs will be fast too. That’s helped further by 5G support, presuming you’re in an area with 5G coverage, for speedy and low-latency connectivity.
All this power needs cooling for efficiency. For the OnePlus 9 there’s something called the OnePlus Cool Play system. Essentially, the manufacturer has made the vapour chambers larger and added more layers of graphite and copper to dissipate heat when you’re powering your most demanding games.
We’ve not yet experienced a OnePlus phone that under-delivers on speed and performance, so we don’t expect the OnePlus 9 will be any different. Our first few days of use have been pretty much plain sailing.
Regarding the battery and it’s really the charging that sells this phone. You may remember OnePlus saying in the past that it didn’t want to use wireless charging until it was as fast and convenient as its fast wired system. Well, for the non-Pro model in the OnePlus 9 family, it turns out it’s forgotten all about that.
The regular OnePlus 9 does have wireless charging, but it’s not blindingly fast. Instead, it uses a fairly standard 15W Qi-compatible wireless charging. That means it’s nowhere near as quick as the new Warp Charge 65T wired charging capability which can keep those 65W speeds pumping for longer and give you a full charge in under 30 minutes.
Cameras
Triple camera system with Hasselblad tuning:
Main: 48-megapixel, f/1.8 aperture, Sony IMX689 sensor
Ultra-wide: 50MP, f/2.2, SonyIMX766 sensor
Mono: 2MP
Front-facing camera: 16-megapixel
Video: 8K30p / 4K120p
OnePlus has listened to its critics over the past few years and says it’s finally delivering a flagship level camera experience. That’s thanks in part to its new collaboration with Hasselblad, to help tune the image processing to strict standards, ensuring your pictures should come out looking great.
It’s not just that tuning that’s changed though. The regular OnePlus 9 features the same main camera sensor found in the OnePlus 8 Pro from 2020, and has the same sensor in the ultra-wide as found in the excellent (and more expensive) Oppo Find X3 Pro.
Best smartphones 2021 rated: The top mobile phones available to buy today
By Chris Hall
·
The best smartphones you can currently buy, covering the best of iPhone and Samsung, and everything Android has to offer
Those two are joined by a low-res monochrome sensor for extra light detail, but that’s it. No macro lens or gimmicky chroma filter camera in sight this time.
What’s more, the video recording capability can reach the heights of 8K resolution at 30fps or – perhaps more impressively – can capture 4K up to 120fps, which should enable some fantastically sharp slow-motion video.
Hasselblad’s partnership has led to some other more inconsequential features, like the orange colour of the shutter button, and a leaf shutter sound when you press it. However, where you’ll see the biggest influence is in the ‘Pro’ camera mode.
Pocket-lint
The user interface has been designed to look like one developed by Hasselblad for some of its cameras. This includes a focus peaking feature that will highlight in-focus areas in orange when you’re using the manual focus.
First Impressions
The OnePlus 9 design may not have wowed us that much, but this company knows its users are all about getting the best performance out of every area of its phones.
So if cutting corners and adding in a plastic frame means being able to stick two flagship cameras on the back, add wireless charging, a capacious battery, and market-leading speed, then we think that’s a compromise worth making.
We can’t quite get out of our heads that the OnePlus 9 is similar to the much cheaper Nord in some respects, and that might still be worth considering, but on the whole – from the spec conscious – this latest OnePlus looks like it will deliver an experience much closer to its Pro-labelled sibling this year.
Also consider
Pocket-lint
OnePlus Nord
squirrel_widget_305633
If you’re all about price then the last-gen affordable OnePlus model is a sensible option.
Read our review
Writing by Cam Bunton.
We use cookies on our website to give you the most relevant experience. By clicking “Accept”, you consent to the use of ALL the cookies.
This website uses cookies to improve your experience while you navigate through the website. Out of these, the cookies that are categorized as necessary are stored on your browser as they are essential for the working of basic functionalities of the website. We also use third-party cookies that help us analyze and understand how you use this website. These cookies will be stored in your browser only with your consent. You also have the option to opt-out of these cookies. But opting out of some of these cookies may affect your browsing experience.
Necessary cookies are absolutely essential for the website to function properly. This category only includes cookies that ensures basic functionalities and security features of the website. These cookies do not store any personal information.
Any cookies that may not be particularly necessary for the website to function and is used specifically to collect user personal data via analytics, ads, other embedded contents are termed as non-necessary cookies. It is mandatory to procure user consent prior to running these cookies on your website.