The developer of indie hits Celeste and Towerfall has unveiled its next game: Earthblade. There aren’t many details about the game just yet, but Extremely OK Games billed Monday’s news as a “vibe reveal,” taking the wraps off the game’s title, a poster, and a song from the game.
You can see the poster and the game’s logo (designed by Pedro Medeiros) and hear the song (composed by Lena Raine) in a teaser video posted on Twitter.
Earthblade Vibe reveal! ( sound on!) A 2D explor-action game in a seamless pixel art world. The next release from the Celeste team, coming 20XX. pic.twitter.com/ceAM80PEaG
— Extremely OK Games (@exok_games) April 19, 2021
We might be waiting a while for the actual release of the game. Extremely OK Games has only officially listed a vague “20XX” release date, and the studio’s Maddy Thorson said in Monday’s announcement blog that “it sounds optimistic to say out loud that Earthblade could be released within 5 short years of Celeste.” (Celeste, if you were wondering,came out in January 2018.) “The truth is that we don’t know how long it will take, just that it will take as long as it takes (and that it will take a long time),” Thorson added.
We might also be waiting some time for more news about the game. “While making Celeste, we basically tweeted out whatever interesting-looking thing we were working on day-to-day, when we were in the mood for sharing,” Thorson said. “But an air of mystery lends itself particularly well to this project, so we’ve opted to save it all up for a big reveal that will hopefully blow your socks off. It’ll probably be a while before you get more information about Earthblade.”
While you’re waiting for Earthblade, you should play Celeste if you haven’t already. It’s really good.
Facebook is going all in on audio. The company announced multiple products on Monday that emphasize voice content over text, images, or video. The products will be released over the next few months and, in some cases, will start with a limited set of people.
Most notably, Facebook is indeed launching a competitor to the buzzy social audio app Clubhouse with a feature called Live Audio Rooms, which will be available this summer. It’ll first roll out to groups and public figures as a test, but it will eventually make its way to Messenger, too, so people can hang out with friends. Users will be able to record their conversations and distribute them, and eventually, people can charge for access to these rooms through either a subscription or one-time fee.
To get people to join, Facebook says it’s introducing an Audio Creator Fund to “support emerging audio creators.” All of these conversations can also be turned into “Soundbites,” a forthcoming feature that allows people to create and share shortform audio clips along with an algorithmic feed to promote them. Think TikTok, but with audio clips.
The Soundbite creation tool will let people put effects on their voices.Image: Facebook
Soundbites will live within the broader News Feed. Users will be able to record them in a separate tool within Facebook, which the company describes as a “sound studio in your pocket.” In a chat with Casey Newton, the author of Platformer and a contributing editor at The Verge, Facebook CEO Mark Zuckerberg equated Soundbites to Reels, Instagram’s TikTok competitor, but for audio.
He also added that he likes audio over video or images because it allows people to multitask and host longer, nuanced conversations.
“The high-level picture here is that we think that audio is, of course, also going to be a first-class medium, and that there are all these different products to build across this whole spectrum,” Zuckerberg said.
Facebook also plans to take on a bigger role in podcasting. The company says it’ll start recommending shows and episodes based on people’s interests and that people can comment on them and recommend them to friends. The company says 170 million people on Facebook are connected to a page that’s linked to a specific podcast, and more than 35 million people are members of fan groups around podcasts.
Facebook wants to support podcasts with direct monetization.Image: Facebook
Zuckerberg says a partnership with Spotify is forthcoming, too, which will bring the company’s player over to Facebook, letting people stream music and podcasts from their News Feed. Zuckerberg emphasized that this feature is for music. But still, Facebook users will be able to share Spotify podcasts and let people listen without having to leave the Facebook world — they just have to link their accounts.
“Our ambition has always been to make Spotify ubiquitous across platforms and devices — bringing music and podcasts to more people — and our new integration with Facebook is another step in these efforts,” a Spotify spokesperson said in a statement. “We look forward to a continued partnership with Facebook, fueling audio discovery around the world.”
Finally, Facebook’s tipping system, Stars, will be coming to Live Audio Rooms as well as for individual creators and public figures.
How serious Facebook is about audio and whether users actually want it over other formats is still unclear. On one hand, the audio industry is hot right now, with most major tech companies wading into the broader podcasting industry. Clubhouse and other audio startups have also made live audio a popular way to interact, and already, multiple big platforms have integrated the format into their apps.
On the other hand, live audio has clearly found its moment during the pandemic, when everyone’s been starved of human interaction and mostly confined to their homes. Podcasting offers edited, on-demand conversations, which people have enjoyed for years, but whether the live formats will survive remains an open question. Facebook has also routinely gone all in on a format, only for it to languish. It went for longform video with IGTV but has since pivoted to a focus on Reels. It launched and subsidized Facebook Live content, which has since mostly fallen by the wayside. The same could happen for audio, but Facebook is clearly using its size to try to make its mark on the industry.
(Pocket-lint) – When the Fujifilm X-T2 arrived back in 2016, we thought it set a new benchmark for mirrorless cameras. Since then we’ve been spoiled with the likes of the Panasonic Lumix G9 and many other compact system cameras.
In 2018, Fujifilm came back with a bang: the X-T3 brought a new sensor, new autofocus and 4K 60fps video capture that set it apart from its X-T2 cousin. Below we breakdown the key differences between those two. But if you’re looking for the even newer X-T4 then go read our review here.
squirrel_widget_145646
Fuji X-T3 vs X-T2: Design & Layout
X-T3: A little deeper (58.8mm) than X-T2 (49.2mm) due to eyecup and grip
Both cameras: Full manual control dials, Fujifilm X mount lenses
Optional battery grip is different for each camera
Both cameras: Weather resistant build
At a glance, the X-T3 and X-T2 are one and the same. But they’re a slightly different size, which means if you want to use an accessory battery grip then you’ll need to buy for the specific camera. X-T2 users will be disappointed that an X-T3 will require a new grip.
Otherwise, the layout and operation is similar: there’s full manual control, all the shutter/aperture/ISO/exposure compensation dials you could need, and that old skool design aesthetic.
The X-T3 does shrink the exposure compensation dial to avoid it getting accidental knocks, while the toggles around its dials are larger for easier adjustment. There’s also a dioptre lock on the X-T3 which was lacking previously.
Fuji X-T3 vs X-T2: Viewfinder, Screen, Performance
Both cameras: 3.0 inch, 1040k-dot, tri-adjustable LCD (X-T3 adds touchscreen)
X-T3: 1.5x autofocus speed improvement over X-T2 (Fujifilm claims)
X-T3: 2.16m phase-detection pixels offer edge-to-edge autofocus (X-T2 has a limited selection area)
Mirrorless cameras have gone from strength to strength in recent times, with electronic viewfinders good enough to rival traditional optical ones. The X-T2’s already decent 0.5in OLED finder remains the same size (magnification) in the X-T3, but the new camera ups the resolution by over 50 per cent. It’s the same finder as found in the Canon EOS R.
Regarding the rear screen, both cameras offer a tri-adjustable fit, meaning the LCD panel can be pulled out for waist-level or overhead work in either portrait or landscape orientation. Most competitors can’t handle this vertical orientation. However, we found this method of control a little fiddly to use, which is a setback. The X-T3, like the X-H1, adds touchscreen – which was lacking from the X-T2.
When it comes to speed, the X-T3 also ups the autofocus ante with a claimed 1.5x speed improvement over the X-T2. The biggest change is the full edge-to-edge autofocus system, though, which offers a mammoth 2.16m phase-detection pixels right across the whole sensor for precision autofocus anywhere within the frame (it offers 425 AF areas, compared to the X-T2’s 325). Even the newer X-T4 doesn’t really elevate its autofocus beyond the X-T3’s capabilities.
Fuji X-T3 vs X-T2: Image Quality, Speed, Video
X-T3: X-Trans CMOS IV sensor, 26-megapixel resolution
X-T2: X-Trans CMOS III sensor, 24-megapixel resolution
X-T3: 11fps burst shooting at full resolution
X-T2: 11fps with optional battery grip only
X-T3: 4K video at 60fps / XT-2: 4K 30fps
Core to the X-T3 is its X-Processor and X-Trans CMOS sensor, both of which are in their fourth generation guises (compared tot he X-T2’s third-gen). This brings greater processing speed, able to handle the slightly higher resolution of the newer camera.
In terms of burst speed, the X-T2 was never a slouch, capable of up to 11fps at full resolution. However, you had to have the optional battery grip attached to achieve that. With the X-T3 you do not: it’s 11fps capable out of the box (and it’ll even hit 30fps with a 1.25x crop and electronic shutter).
Another big benefit of this X-Processor is the readout speed means the X-T3 can cater for 4K video at 60fps straight to the camera’s internal SD card. At the time of launch no other APS-C sensor camera could do this. Furthermore, the X-T3 offers up to a 400Mbps data rate with H.265 compression and 24-bit stereo sound support.
Fuji X-T3 vs X-T2: Conclusion
X-T3: £1,349 body only (at launch)
X-T2: £1,399 body only (around £1,249 at time of writing)
The X-T3 is a savvy replacement for the X-T2. It’s faster, more adept at focusing, will deliver similar image quality at a slightly higher resolution, and will appease videographers too. And all for a price that’s actually less than the X-T2 was at launch.
Our suggestion would be to go with the newer model and all the extras that brings (unless the X-T2’s price really plummets). Of course, with the X-T4 being launched since, in 2020, there’s an even newer generation to consider – but, on balance, if you can find the older model in stock then picking it up for a bargain price makes heaps of sense.
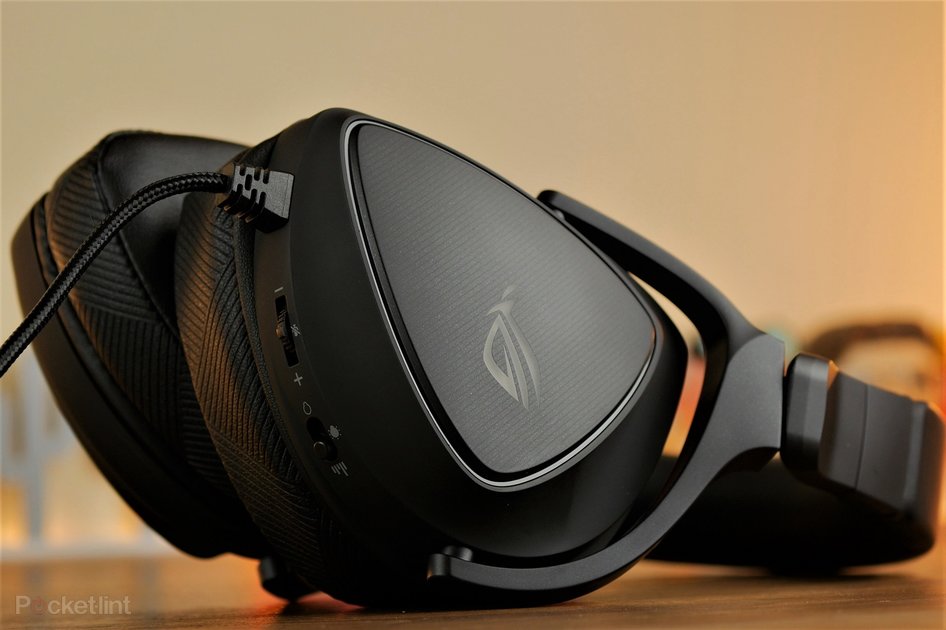
(Pocket-lint) – There aren’t a great many high-resolution gaming headsets out there, but the devices that do exist can make a real difference to your gaming experience. That extra audio range provides more immersion and also helps with things like hearing footsteps in competitive shooters.
The Asus ROG Delta S sports a high-resolution Quad DAC (digital-to-analogue converter) and MQA technology that promises “true to life” audio. So on paper it should be fantastic, but is it? We’ve been gaming and listening to find out.
Best PC gaming headsets: The best wired, wireless and surround sound headsets around
Lightweight comfortable design with RGB
Detachable microphone
Lightweight 300g frame
Braided 1.5m USB-C cable, 1m USB 2.0 adapter
ROG Hybrid ear cushions / protein leather cushions with fast-cool memory foam padding
The first thing that struck us about the Asus ROG Delta S upon wearing it for the first time was the comfort. This headset comes with a flexible headband and earcup design that extends nicely over the head and sits in a satisfying way over the ears. But more importantly, it sports D-shaped ergonomic ear cushions, with a choice of either a protein leather or ROG Hybrid finish backed by fast-cool memory foam padding.
Pocket-lint
Both these ear cushions are included in the box, giving you a choice of what to use – but they’re equally comfortable in our mind. The protein leather cushions do a better job of blocking out external noise though, which means you can focus on the sound.
The D-shaped cushions fit nicely over the ears and they’re both deep and wide enough to not put unnecessary pressure on your ears either. This, combined with the nicely padded headband and the lightweight over ear design, result in a headset that’s comfortable to wear all day for work and then into the evening for gaming.
Comfort and convenience go hand-in-hand with this headset. As standard it has a USB-C connection, which means you can use it with your Android phone or Nintendo Switch and still get great sound. Alternatively, there’s an adapter that converts it to USB-A with ease, meaning you can connect it to even more devices. The detachable mic also gives you the choice of whether you use the provided one or opt for something external.
Best microphones for video calling, podcasting and streaming
On the outside of the headset there’s a couple of RGB lighting zones on each earcup: a ring around the outer plate and the ROG logo. This lighting can be adjusted within the Armoury Crate software – there’s a few different effects including static, breathing, strobe, colour cycle and, of course, rainbow. The headset itself also has a hardware button to set it to three different modes – on, off or soundwave. Soundwave makes the lights respond to your voice when you’re talking, which might appeal to streamers.
Pocket-lint
One thing we were impressed with is the RGB lighting works even when plugged into a smartphone, which is a fairly unusual feature. So yes, you can have RGB on the go with this headset. If you really want to show off your passion for gaming when outside the house. But there’s the option to turn it off too if you don’t want to look like a mobile disco.
Satisfying high-resolution audio
50mm Neodymium magnet drivers
20Hz-40KHz frequency response
Hi-Res ESS 9281 Quad DAC
MQA rendering technology
24-bit, 96KHz sample rate
Virtual 7.1 surround sound
Custom audio profiles
The main selling point of the Asus ROG Delta S is the inclusion of the Hi-Res ESS 9281 Quad DAC and MQA rendering technology (which stands for ‘Master Quality Authenticated’). This tech means that with Tidal Masters recordings you can enjoy some seriously satisfying sound quality.
Pocket-lint
We thoroughly enjoyed listening to music this way on a Google Pixel 5. The audio is rich, warm, and has a superb range to it. If you’ve never heard hi-resolution audio before, you’ll soon notice new elements to your favourite tracks that you’ve never heard before.
Best USB-C headphones for Android phones 2021
By Dan Grabham
·
That same logic applies to gaming too. Plug the headset into a PC, set the 24-bit/96KHz sample rate in Windows sound settings, tweak the equaliser (EQ) in ROG Armoury Crate and get your game on.
Suddenly you’ll find a wider audio range than you’ve heard before. This is great as it often means you can pick up on important sounds more easily. The footsteps of enemies in games like Rainbow Six Siege or Warzone, for example, are much easier to hear and discern their direction from within the game world.
That said, we did feel like this headset oddly isn’t as bassy or as rich as other high-res headsets we’ve tried. Strangely, music is richer than when gaming. And though you can adjust the EQ settings and sound profiles within Armoury Crate, we just feel like it lacks some of the richness we’d expect at this price point.
That said, the virtual surround sound is good and combined with high-res audio it delivers great positional awareness. This headset is also insanely loud. So if you feel like you struggle to hear with other headsets then the ROG Delta S won’t disappoint.
AI-powered mic?
AI-noise cancellation
Unidirectional pick up pattern
100Hz to 10KHz frequency response
Noise gate, perfect voice, other settings in Armoury Crate
The Asus ROG Delta S has a flexbile, detachable unidirectional microphone included in the box. This mic offers AI-powered noise cancellation that’s designed to block out external noise and help keep your voice in focus.
We weren’t overly impressed with the mic on this headset, though, but it’s far from the worst we’ve tried.
You can adjust settings for noise gate, perfect voice and the AI noise-cancellation in the Armoury Crate software. But we found our voice was captured more clearly when we didn’t use those settings. This is going to depend on your environment of course, but the quality of the audio can certainly be tweaked in various ways with ease.
Verdict
The Asus ROG Delta S is a comfortable and easy-to-wear gaming headset that sounds fantastic when listening to high-res music on Tidal.
However, for our ears the audio lacks depth when gaming. It’s not as rich or as bassy as we’d like, but there are plenty of settings to play around with and tweak to your preference.
The included microphone is also not as good as, say, that included on the Corsair Virtuoso – so we’d highly recommend a proper mic as an alternative.
All told, the Asus ROG Delta S is a mixed bag. We love that it works with multiple different devices – a benefit of that USB-C/USB-A connection option – and for music it’s absolutely fantastic. But it’s just not quite as on point for gaming audio.
Also consider
Pocket-lint
Corsair Virtuoso RGB
squirrel_widget_167882
A fantastic alternative thanks to a superior microphone and more connection options with 3.5mm, wireless and USB-A. It’s not as comfortable as the ROG Delta S, but is more impressive in a number of ways and also delivers high-res audio that’s fantastic on PC.
Pocket-lint
Audeze Penrose
squirrel_widget_3762273
This is a wireless version of the company’s Mobius headset. It features massive 100mm Planar Magnetic drivers and a broadcast-quality microphone. It also works well on PC and PS5 and offers 2.4Ghz wireless, Bluetooth connectivity and 3.5mm options too.
One of the big draws of mechanical keyboards is the sound. That resonant, thocky, clacky rhythm can only come from the movement of plastic against plastic, and it’s one of the big things separating mechanical keyboards from their membrane-centric brethren. Compared to a cheap keyboard, the sound of just about any mech is heavenly.
But maybe you’re not so satisfied anymore. Perhaps you’ve started to notice other sounds–the pinging of little springs, or a scratching scrape-y sort of plastic sound that you don’t enjoy. Or maybe you caught your favorite streamer with a new custom mechanical keyboard that sounds absolutely stunning. How can yours measure up? Is there a way to make it sound better, or is it time to just buy a new board?
There is a way: you can lubricate your switches. Lubing switches is one of the most common and immediately effective aftermarket modifications done by mechanical keyboard enthusiasts, and it’s easy to see why: the process can make your switches sound better, deepening and clearing up those clacks and thocks; it can make them feel better, too, getting rid of any internal scratchiness and making the whole typing experience that much smoother. Lubing can also make the best gaming keyboards even better.
In case you’ve not seen this before, though, here’s an example. First, here’s a quick video of me typing on some stock, unlubed Cherry MX Red switches:
And now here’s another video, on the same keyboard, except now those Reds are lubed with Krytox 205g0 lube (and the springs with Krytox 105):
Lubing switches is delicate work, but it’s not hard to learn, and the rewards are huge. In this tutorial, we’ll walk you through it. My biggest recommendation, though, is to approach this with an experimental spirit, testing out switches as you work, seeing how they sound and feel. The right way to lube switches is, ultimately, the way that feels best to you.
What You’ll Need to Lube Switches
Switch Opener (I strongly recommend a metal one, the plastic and 3D-printed ones just aren’t stable enough in my testing)
Switch lube (The standard recommendation is Krytox 205g0 for linear switches and Tribosys 3203 for tactile, with some Krytox 105 grease for springs)
Switches
Small paint brush, preferentially 0 or 00 brush size
Plastic baggy
Jeweler’s Tool
Lube Station (these are optional, but handy)
Steps
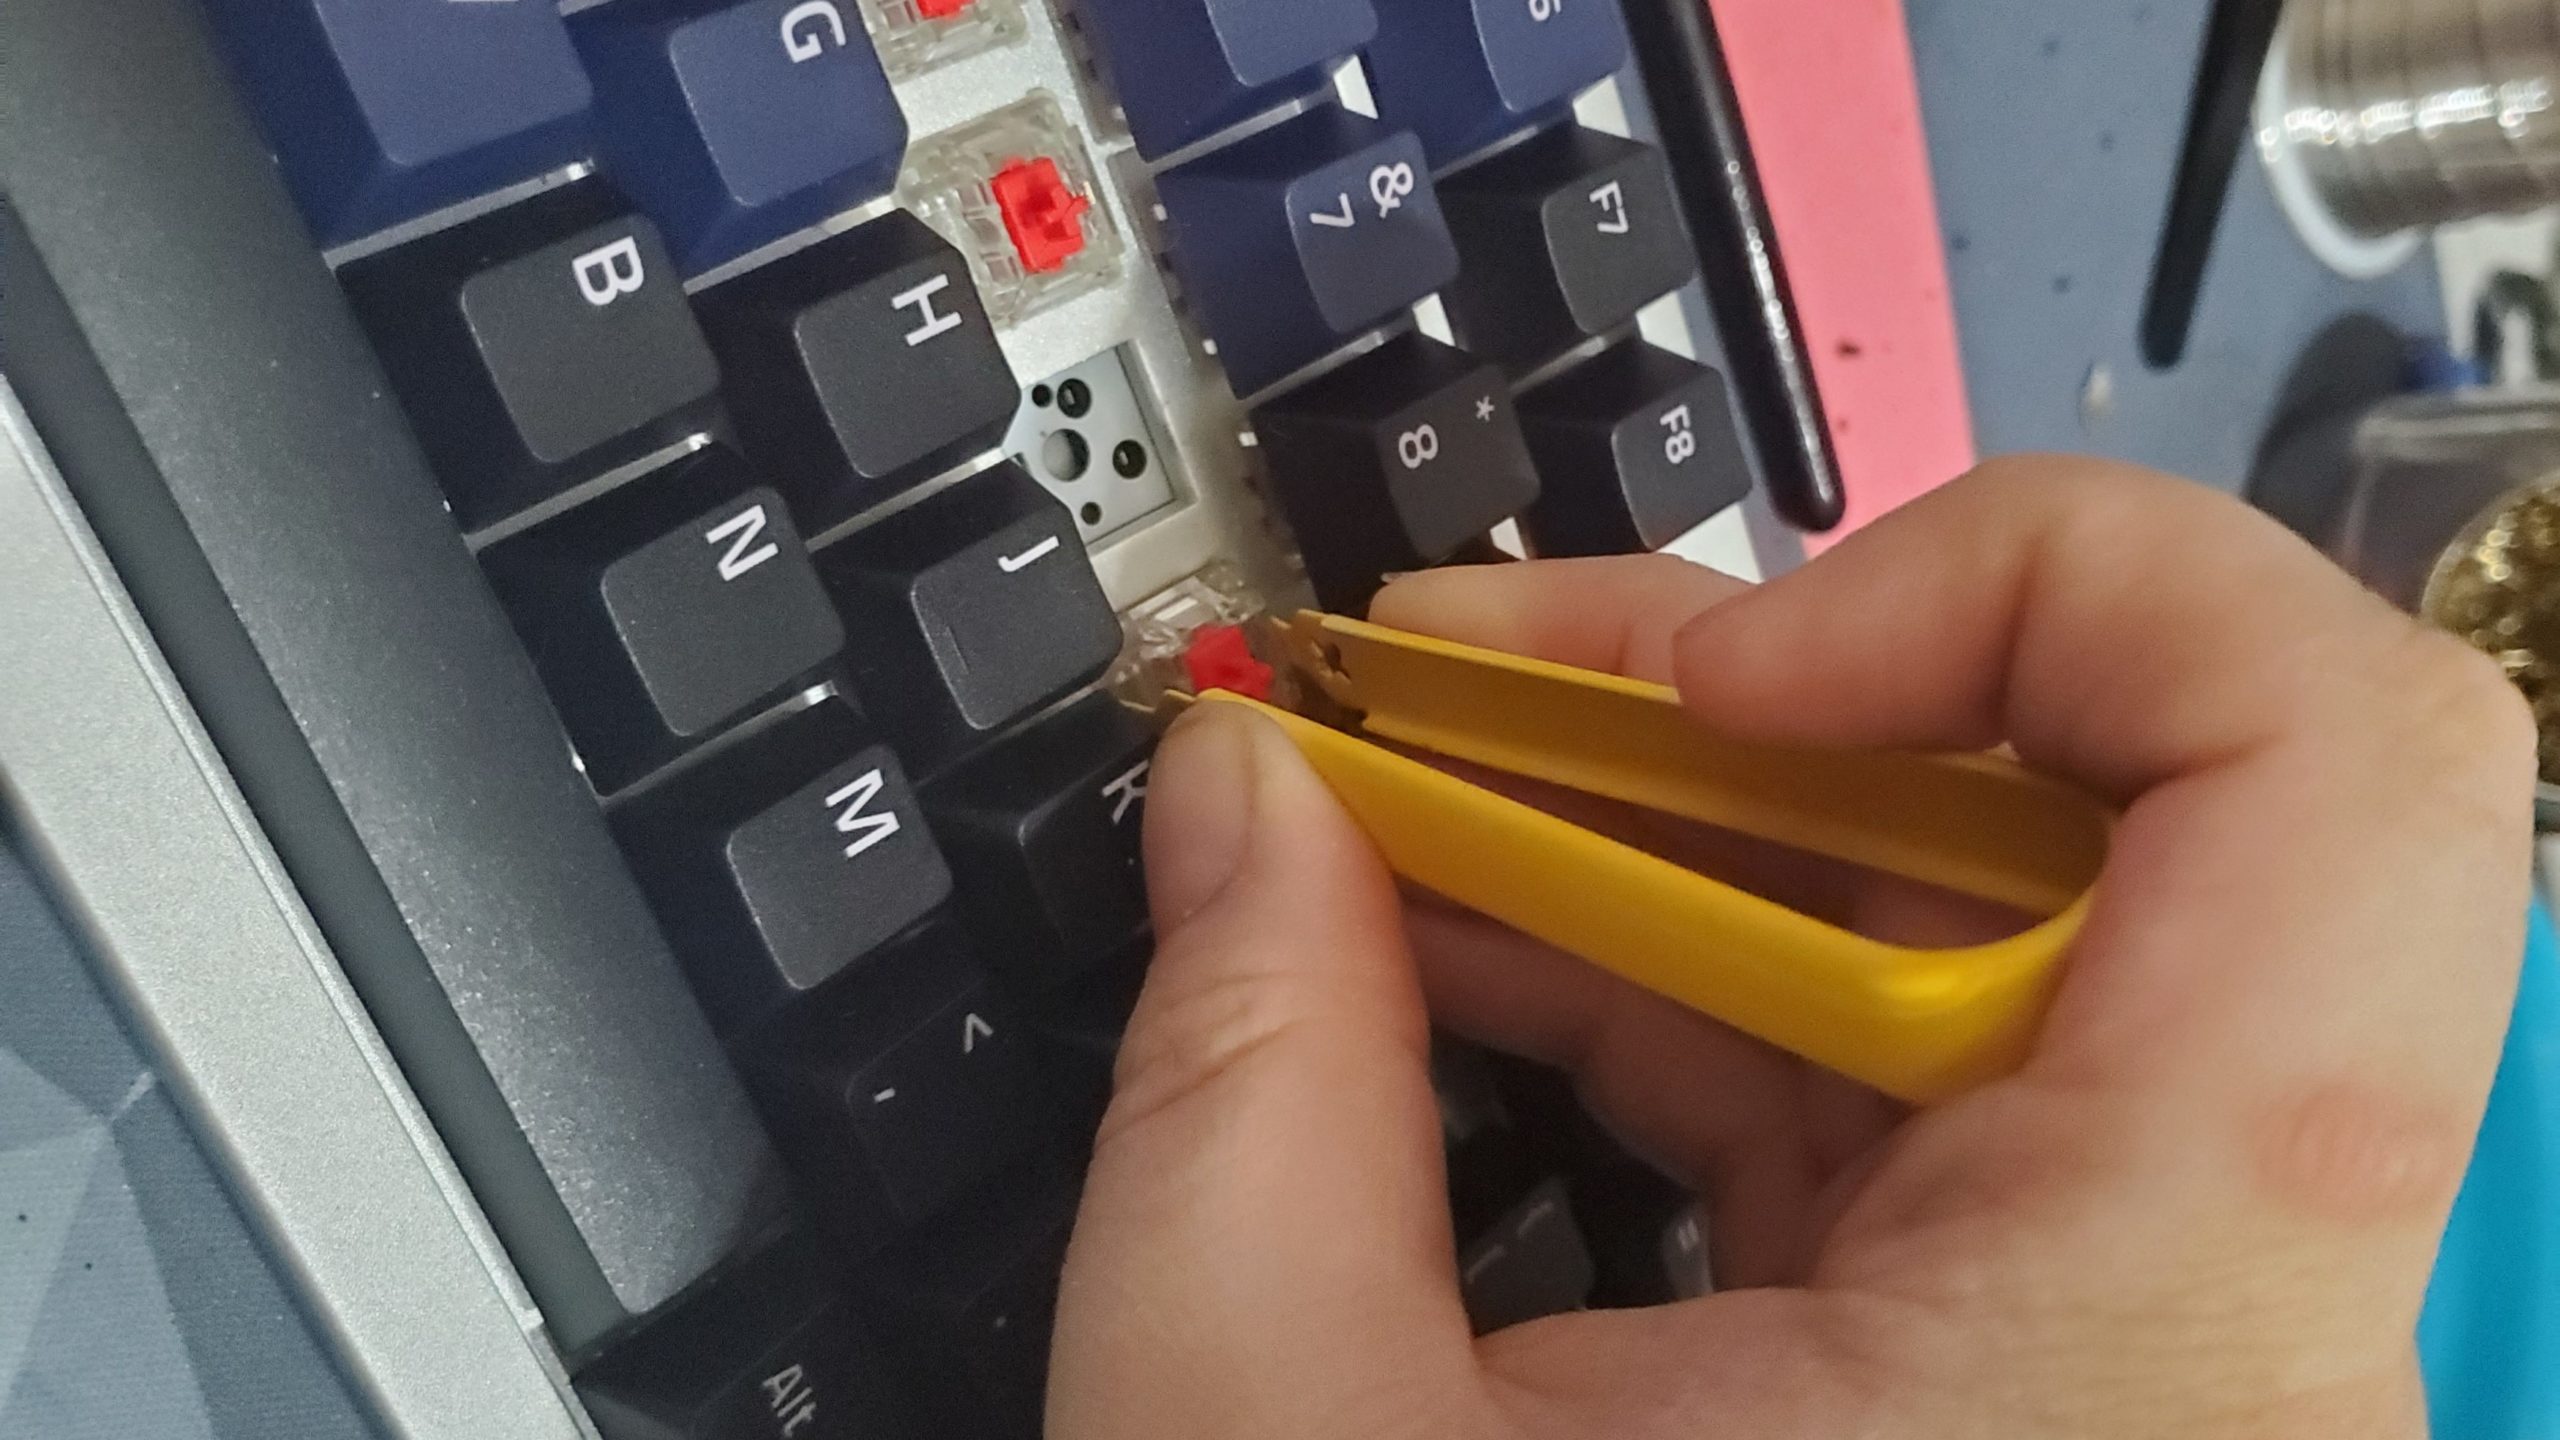
1. Remove your switches from the keyboard. If you have a hot-swappable keyboard like the Hexgears Impulse, you can pull the switches out with a simple puller. Otherwise, you’ll need to desolder your switches. Or, if you’re feeling ambitious, you can desolder your switches from a more traditional soldered mechanical keyboard.
Either way, these need to be loose switches–you could technically try to open up and lube switches while they’re installed in the keyboard, but you run the risk of breaking a lot of things.
Image 1 of 2
(Image credit: Tom’s Hardware)
Image 2 of 2
(Image credit: Tom’s Hardware)
2. Take the switches apart. To do this, grab your trusty switch opener. Now, if you look at your switches, you’ll notice tabs slotted into the sides of the switch, from the top housing into the bottom. On Cherry-style switches, these are two tabs, like a fork; on Kailh’s switches, they’re two big thick tabs that cover the entire sides of the bottom housing. And if you look at your switch opener, it should have two interior surfaces, corresponding to each style–one with two tabs facing upward, and one with four.
Place the switch, right-side up, on the switch opener on the corresponding part, lining the tabs up with the tabs on the switch opener. Then, just press down on the stem and the top housing. This should press the tabs against the switch opener, causing the switch to pop open. It shouldn’t take a massive amount of force, but you might have to push a bit. Then, just pull the top of the switch housing off, and separate out all the components–the stem, the spring, the top housing, and the bottom housing. If you have a lubing station, put them in their corresponding spots.
Note that this probably should not be done with clicky switches, as lubing clicky switches tends to remove their, well, click. But linears and tactiles will work just fine.
Image 1 of 3
(Image credit: Tom’s Hardware)
Image 2 of 3
(Image credit: Tom’s Hardware)
Image 3 of 3
(Image credit: Tom’s Hardware)
3. Lube the springs. I always like to do this first, because the process with springs is different than with the rest of the switch. There are two ways to lube springs: the painstaking way or the simple way. The painstaking way is to take your paint brush, lightly dip it into your lube of choice, and brush lube on your spring until it has a light, shiny coat.
Or, you can bag lube them. This is my strong personal preference, as the results are good without being horribly tedious. To do this, place all the springs in a small plastic baggie. Then drip in a few drops of Krytox 105 grease, maybe 5 drops per 10-20 springs in my experience, though you can experiment to see what works for you. As with all lubing, the goal is to have a very light coating as even as possible.
Now, close the baggie most of the way. When it’s mostly closed, blow into the opening, inflating the bag. Then close it up and shake it vigorously until all the springs are coated, 1-2 minutes. After that, you can empty the bag and place them in your lube station, or a bowl, or wherever you want. Often, you’ll have to untangle the springs, which you can do by gently turning them until they come apart, the way you take a key off a keychain.
Image 1 of 2
(Image credit: Tom’s Hardware)
Image 2 of 2
(Image credit: Tom’s Hardware)
4. Lube the bottom housing. Once the springs are lubed, it’s time to get to the rest of the switches. You can do this in any order you want, but I prefer to start with the bottom housing. To do this, dip the tip of the brush gently in your lube — Krytox 205g0 for linears and Trybosis 3203 for tactiles is my go-to– and then wipe away the excess on the rim of the container. You want a light sheen of lube–if you can see the white globs of lube on there, you probably have too much.
Now, brush one end of your brush along one of the interior sliders on the sides. Then, brush the other side on the other slider. Brush on each slider one or two more times, until the coating seems even — which means you’ll barely be able to see it. Always start with less lube than you think you might need, as you’ll be amazed what a little bit can do. And it’s a lot easier to add more lube than to clean it off.
Finally, take what’s left on your brush — without dipping again — and swirl it around the reset of the plastic interior of the bottom housing, avoiding the metal leaf spring. I usually do this just once, as it’s not the most necessary place to lube carefully.
(Image credit: Tom’s Hardware)
5. Lube the stem. Now, you want to set the bottom housing aside, in your lube station if you have it. Take the switch’s stem, holding the cross-shaped part with your jewelry tool if you have it. Then, get some more lube on your brush, the same way you did last time. Apply a gentle coating and wipe off the excess.
When that’s done, it’s time to lube the stem. Gently brush lube on the flat face of the stem, smoothing it out like you did before. Then use the same side of the brush to lube one of the slider sides. After that, you need to lube the face with the stem’s legs.
These legs are what comes into contact with the switch’s leaf mechanism, actuating it. On a linear switch, these legs are smooth. On a tactile switch, they have bumps on them which provide the switch’s tactility. This means that, on a linear switch, you do want to lube the legs; on tactile switches, you absolutely don’t want to lube the legs, as doing so will reduce or outright eliminate the tactility.
So, on a linear switch, gently brush lube on the legs and the flat space between them, brushing a couple more times to smooth the lube out. On a tactile, just lube that flat space, or avoid lubing that side of the stem entirely. Like all of this, it’s up to preference. After that, use the remaining lube on the remaining slider side.
You can also, after this, run the brush over the pole at the base of the stem.
Image 1 of 2
(Image credit: Tom’s Hardware)
Image 2 of 2
(Image credit: Tom’s Hardware)
6. Lube the top housing, if you want. Some people recommend lubing the interior of the top housing to reduce any plasticky sound or feeling you might get from the stem or leaf spring rubbing against the top housing. But in my experience, this is a pretty negligible problem and I usually don’t bother.
If you do want to bother, do the same thing you’ve been doing — gently coat the brush with lube, remove the excess, and put a light clear sheen of lube on the plastic.
7. Reassemble your switches. Congrats, you did it! Time to put those babies back together. Take the bottom housing, put the spring in its place, then put the stem in the spring, with the legs facing toward the leaf spring. Finally, snap the top housing back into place — the side with the writing on it usually goes over the leaf spring.
8. Put your switches back in your keyboard. Send those switches home, either by snapping them into a hot swappable or soldering them in if not.
Now your switches should have a smoother feel and a different sound. Enjoy.
South Korean brand HiFi Rose has launched in the UK and Ireland, and you can now pick up two of its products from select stores, supplied by Henley Audio.
Both products are premium networked streamers. The HiFi Rose RS201 E (pictured) is a music streamer, DAC and amplifier in one. Its minimalist design might be a little industrial for some, but it’s a good size to fit on a desk and boasts an 8.8in touchscreen display.
It supports audio up to 32-bit / 384KHz (PCM) and DSD256 (Native DSD), and you can stream digital music from your network or attached devices using the Rose OS Music app. It’s compatible with Apple AirPlay, Roon Ready and Spotify Connect, and comes with integrated apps for Qobuz and Tidal.
It’s MQA certified and has 100 watts of amplification. It connects online using Wi-Fi or Ethernet, or you can stream offline using Bluetooth 4.0. There’s also an HDMI output to connect to a TV. A Bluetooth remote control comes as standard.
This is joined by the RS150 network streamer which shares many features. It’s bigger than its sibling, though, with a 14.9in touchscreen, and benefits from a speedy Hexacore CPU and Mali-T864 GPU. It features an Asahi Kasei VERITA AK4499EQ DAC with support for Velvet Sound technology, and benefits from what HiFi Rose claims is “industry-leading technical measurements for exceptional sonic integrity”.
You can manually adjust the input/output settings to your liking, and it has HDMI-ARC and AES/EBU connections.
The RS201 E costs £1749, and the RS150 £3899. Both are on sale now from your local Henley Audio stockist.
MORE:
These are the best music streamers around
Find out how to add a streamer to your hi-fi system
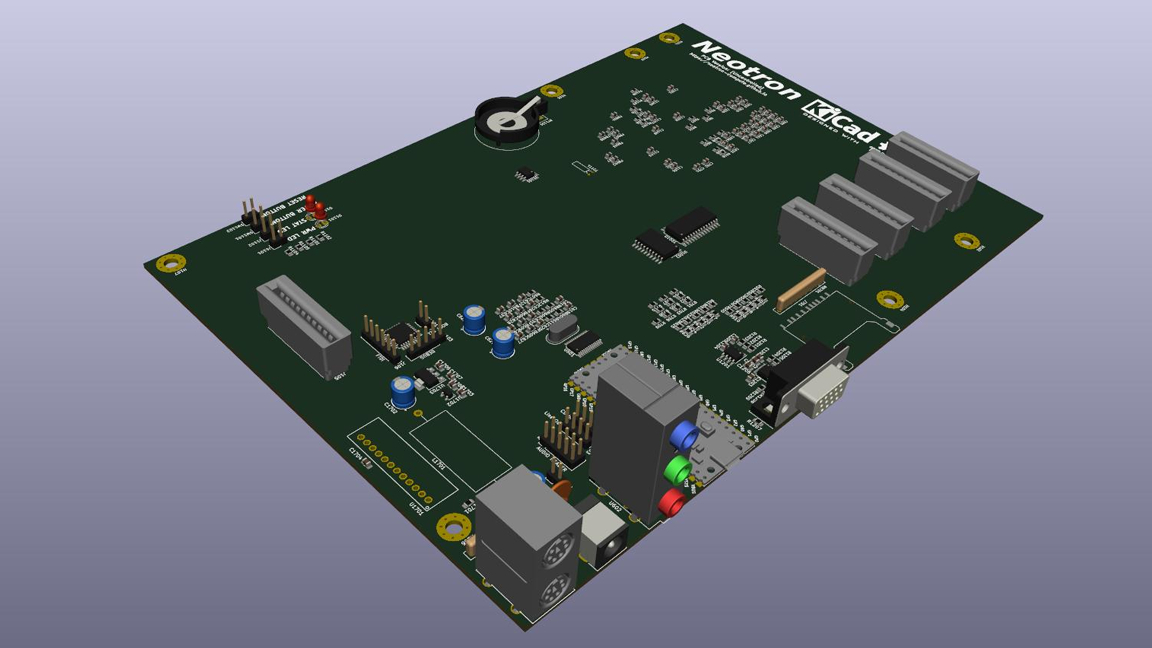
The Neotron dev team, consisting of makers Jonathan Pallant and Kaspar Emanuel, have created a custom PCB to carry our new favorite microcontroller—the Raspberry Pi Pico. The system is designed to resemble a retro-style computer you might find in the ’80s, albeit with a micro-ATX form factor.
The best Raspberry Pi projects don’t just draw inspiration from others, they add value and utilize the board to its fullest potential. The Neotron Pico is based off the team’s existing project, the Neotron 32, another ARM-based retro-style system using the same OS but the Pico adds a new dimension with room for expansion and a cheaper price point. The PCB was designed using KiCad, a free and open source electronics design application, and in the render we can see the Raspberry Pi Pico at the rear of the board, along with ports for PS/2 peripherals, sound, video and a DC barrel jack for power. An unpopulated SD card reader is also present to the right of the VGA connector, if the tracks exist on the board then adding an card reader should be relatively simple.
According to the project documentation, the board is able to output 12-bit Super VGA video using PIO state machines on the Pico. An SPI-to-GPIO expander is used to offer a total of eight IRQs and SPI chip-selects. Users can install up to eight peripherals or expansion slots.
Software-wise the board runs Neotron OS. This OS was written in Rust and is very similar to MS-DOS. You can read more about the PCB in detail and explore the code used in this project on the official Neotron Pico GitHub page.
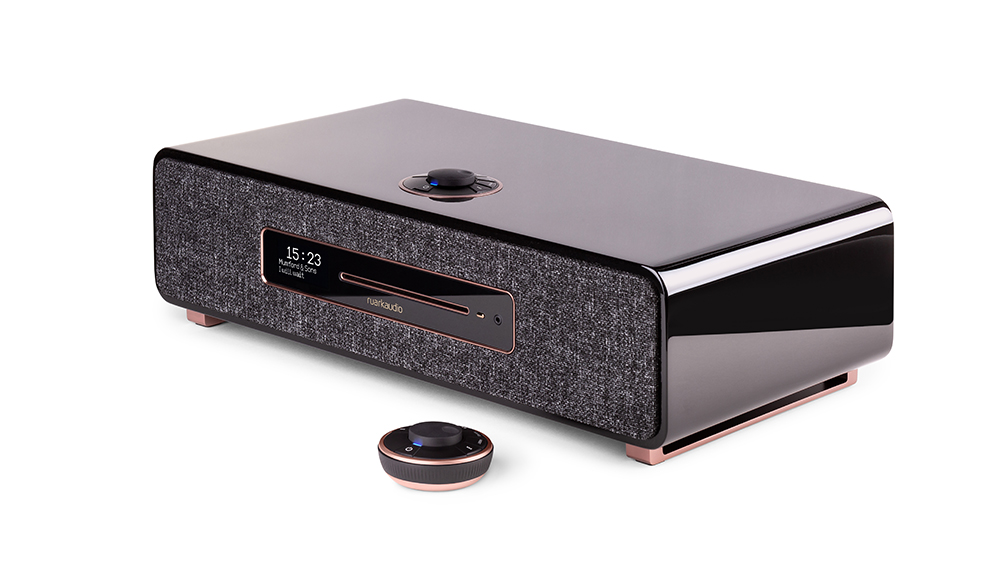
“… perhaps the most well-featured all-in-one desktop system you can buy right now,” is what we said of the Ruark R5 when we reviewed it in 2019, and that is no less true today. Now, Ruark has launched a special Signature Edition version that benefits from a performance boost and aesthetic upgrade.
For the Ruark R5 Signature, the signal paths have been revised and the cabling upgraded in an effort to make it sound cleaner than the standard R5. While the R5 comes in a a ‘rich walnut’ wood or light grey lacquer, the Signature model basks in a luxury piano lacquer finish with rose gold metal detailing.
Ruark says that each layer has been carefully built and hand sanded between coats. Once the final coat has been applied, the lacquer was wet sanded with a fine grit abrasive before being hand buffed and polished to a glass-like finish.
(Image credit: Ruark)
Of course, the Signature is just as well equipped as the original, featuring an integrated CD player, Spotify Connect, built-in access to other popular music services such as Amazon Music, Deezer and Tidal, Bluetooth, DLNA streaming and multi-room functionality.
We can also expect a sound that’s as likeably warm and organised (and hopefully clearer) than the R5, whose biggest talent is a lush and coherent midrange.
The Ruark R5 Signature will be available in a limited production run from June, priced £1250 (a not-insignificant premium over the £995 R5).
You’ve probably been caught off guard by videos that play automatically on Facebook, Twitter, or just across the internet in general. They begin playing as soon as you load a page or (if they’re more deviously implemented) when you start scrolling through a page.
Automatic video play is a feature that, while nice to have when it’s surfacing content that’s related to your interests, can be pretty annoying. Autoplay videos can be harmful, too, exposing you to violent, offensive, or otherwise unwanted content that you shouldn’t have to see by default.
Whether you just want to put an end to autoplay videos on social media platforms or are looking for a more comprehensive fix, we’ve got some tips. Keep in mind that you’ll need to adjust these settings for every device that you use, since your preferences on, say, your phone do not automatically push to your PC.
Illustration by James Bareham / The Verge
Facebook
If you’re using Facebook on your browser, you can turn off autoplay videos this way:
Go to the drop-down menu at the top right of the page.
Select “Settings & Privacy” > “Settings.”
Look for the “Videos” listing on the left-hand menu. Inside of that option is a toggle where you can turn off autoplaying videos.
Facebook has similar options available for its iOS and Android apps:
Using the iOS app
Click the menu button on the bottom of your screen.
Once you’re there, tap “Settings & Privacy,” then “Settings.”
Scroll down until you find “Media and Contacts,” then tap “Videos and Photos.”
Finally, once you find “Autoplay,” you can turn off the feature.
Using the Android app
Click the menu button at the top right of your screen.
Once you’re there, scroll down and tap “Settings & Privacy,” then “Settings.”
Scroll down until you find “Media and Contacts” and tap on it.
Tap on “Autoplay” and set it to “Never Autoplay Videos.”
Illustration by Alex Castro / The Verge
Twitter
Click on “More” in the left-hand menu, and then on “Settings and privacy.”
Select “Accessibility, display, and languages” > “Data usage”
Click on the “Autoplay” setting. You can then switch off the autoplaying of videos on your feed.
Using the iOS and Android apps
Click the profile picture at the top of your phone screen.
Select “Settings and privacy” in the menu.
Navigate to “Data usage,” tap on “Video autoplay” and set it to “Never.”
Instagram
Instagram doesn’t allow for autoplay videos to be turned off, so you’ll have to tread carefully here. Videos won’t autoplay with sound if you use Instagram on your browser. Stopping autoplay on mobile devices is possible, but a little roundabout.
Using a mobile app
Go to your profile page and tap on the three lines in the upper right corner
Go to “Settings” > “Account” > “Cellular Data Use”
For Android: toggle the “Data Saver” on and tap on “High Resolution Media.” If you then select “Never,” then media such as videos won’t load in advance.
For iOS: toggle on “Use Less Data”
Illustration by Alex Castro / The Verge
Reddit
Reddit, like most sites that host video, autoplays videos by default. However, it’s pretty easy to turn it off.
Using the newest design
Click your username in the upper-right corner and select “User settings” in the menu.
Select the “Feed settings” tab at the top of the page, and toggle off the “Autoplay media” switch.
Using the legacy version
Click “Preferences” next to your username in the top right of the window.
Under “Media,” look for and uncheck “Autoplay Reddit videos on the desktop comments page.”
You’ll need to hit “save options” at the bottom of the screen to put the changes through.
Using the mobile app
Tap the icon next to the search bar, then hit “Settings.”
You’ll see “Autoplay” near the top of the page, and you can easily choose to turn it off.
Photo by Amelia Holowaty Krales / The Verge
Desktop browsers
There are a variety of desktop browsers out there — some of which let you turn off video autoplay and some of which don’t.
Using Google Chrome
If you use Google Chrome and want to turn off video autoplay — you can’t. There used to be an experimental command-line flag that allowed you to turn them off (you can find the flags by typing chrome://flags/ into Chrome’s address field), but it’s disappeared.
You can turn the sound off (which might help a bit):
Tap on the three dots in the upper right corner
Select “Settings” > “Site settings” > “Sound”
Toggle sound off. You can add exceptions for specific sites here.
Using Microsoft Edge
Interestingly, Microsoft’s Edge browser, which is also based on the Chromium open-source design, does let you turn off — well, at least, limit — video autoplay:
Click on the three dots in the upper right corner and select “Settings.”
In the left-hand column, click on “Site Permissions,” and then scroll down to and select “Media autoplay.”
You can either allow audio and video to play automatically or limit it. According to the instructions, whether autoplay will work or not will depend on “how you’ve visited the page and whether you interacted with media in the past.”
Using Firefox
Firefox has a similar feature that lets you turn off autoplay, for the most part.
Click on the three lines in the upper right corner of the browser and select “Preferences.”
In the left-hand column, click on “Privacy & Security.”
Scroll down to the section headed “Permissions” and look for “Autoplay.” Click on the button marked “Settings.”
A drop-down menu will let you allow audio and video, block audio, or block audio and video. You can also specify sites that you want to differ from your defaults — for example, if you block audio and video as a default, but you want to allow it for, say, The Verge.
Using Safari
Safari makes it simple to disable autoplay. In fact, it assumes that you want the feature disabled to begin with. However, if it hasn’t been disabled — or if you want to make some exceptions to the rule — here’s what you do:
While in the app, go to Safari > Preferences in the top menu.
Click on “Websites” in the top menu.
Look for and select “Auto-Play” in the side menu.
Look for the drop-down menu at the bottom right of the window and select “Never Auto-Play.”
As with Firefox, you can whitelist any sites that you want to be an exception to the rule.
Update September 4th, 2020 5:11PM ET: This article was originally published on March 15th, 2019. Most of the entries have been updated.
Update April 15, 2021 5:30PM ET: Additional entries have been updated.
Audi has taken the wraps off its latest all-electric vehicle and the big news is it’s going to be powered by Sonos. Of course, being an EV it’s actually going to be powered by a battery, but the car’s sound system will be the first to be tuned by the multi-room audio maestros.
This brand new partnership will not only see Sonos feature in the Q4 e-tron, but it will also tune the systems for future A1, Q2 and Q3 models.
The Sonos set-up in the Audi Q4 e-tron is being billed as a “premium sound system” according to Audi’s press release. It’s going to be fitted as standard to Vorsprung versions and will be available in other variants of the car as part of the optional Comfort and Sound pack.
It uses the Sonoamic Panorama algorithm, developed by the Fraunhofer Institute in Germany, to process audio and distribute it to 10 speakers inside the cabin. The algorithm claims to “use stereo recordings to generate a three-dimensional surround sound, where it places the individual sound sources on a virtual U-shaped sound stage. This gives the listener the impression they are sitting in the middle of the orchestra or band”.
(Image credit: Audi)
The way the Sonos system is configured is as follows: four tweeters and a centre speaker are driven by a dedicated amplifier built into Audi’s MIB 3 digital architecture, while a separate eight-channel “booster” amp handles the four bass speakers and the subwoofer in the luggage compartment. With both amps combined, total power for the Sonos system weighs in at 580 watts. At this stage, there’s no news on whether we’ll be seeing any extra Sonos features or sound modes provided by the system, but presumably, you’ll see Sonos logos dotted around the cabin to mark its presence in your shiny new Q4 e-tron.
One question this new Sonos/Audi partnership does raise, is what does this mean for Audi’s current arrangement with Bang & Olufsen? In-car systems tuned by the Danish manufacturer already feature heavily as options throughout Audi’s current range of vehicles. Does this mean there’ll be a new direction for Audi’s sound, (pardon the pun)? Hopefully, we’ll be able to take a Q4 e-tron for a spin to find out…
MORE:
Naim for Bentley premium audio system (2020 Bentley Flying Spur) review
What is Apple CarPlay? How it works, the best apps and features
Behind the scenes with Bang & Olufsen and the Audi A8
With an expected price between $400-$450, the Biostar Z590 Valkyrie is up against stiff competition on Intel’s new Rocket Lake platform. But outside of a lack of integrated Wi-Fi and some teething issues, the Valkyrue ticks all the boxes.
For
+ Robust 90A VRMs
+ Two USB 3.2 Gen 2×2 ports
+ Three M.2 sockets
Against
– VRM fans loud under heavy load by default
– Poor memory performance
– Style may be polarizing
Features and Specifications
With Intel’s new Rocket Lake CPUs and new chipset hitting the scene, Biostar took the opportunity to step up its game developing new motherboards for Z590, including the Valkyrie that we have on the test bench for review. Expected to be an upper-midrange option, it comes with high-end power delivery, three M.2 sockets, along with several fast USB ports and a price tag somewhere between $400 and $450. A company rep told us US pricing still isn’t final yet.
Biostar’s current Z590 product stack isn’t as robust as most other board partners. Currently, it consists of three boards: the flagship Valkyrie we’re looking at here, the Z590I Valkyrie (ITX), and the more familiar and budget-oriented Z590GTA. In addition to these three, the company also has a B560 board, the B560GTQ, and two H5120 based boards in the H510MH/E 2.0 and H510MX/E 2.0. While Biostar doesn’t have as many SKUs as the competition, the company still provides mid-range, budget, and ITX-size options.
On the performance front, the Valkyrie was generally on the slower side of testing, albeit not by much in many tests. Our DDR4 3600 memory kit defaulted to Gear 2, which increases latency and reduces bandwidth. The latest BIOS at the time of this writing (5.19 according to CPUz) added the ability to switch gears. However, I could not quickly get our board to work at Gear 1 running DDR4 3600, as I could with ,ost other Z590 boards. Hopefully, another BIOS update will address the bandwidth/latency shortcomings and allow the board to get close to the expected memory bandwidth.
Early performance aside, Biostar brought a solid board to the table. From its flagship-class VRMs, three M.2 sockets and premium audio (albeit from the last generation), the Valkyrie is a step up from its Z490 offerings. Curiously, a Wi-Fi antenna is included, but the board does not come with Wi-Fi. You’ll need to add a card (up to 6E capability) or stick to Ethernet. There are plenty of USB ports on the rear IO, with six USB 3.2 Gen 2 or greater. We’ll cover all the features the Valkyrie has to offer below. But first, here are the full specifications from Biostar.
LED on/off, LN2 mode, BIOS switch, Start/Reset, Clear CMOS
SATA Controllers
✗
Ethernet Controller(s)
(1) Realtek RTL8125B (2.5 GbE)
Wi-Fi / Bluetooth
✗
USB Controllers
✗
HD Audio Codec
Realtek ALC1220
DDL/DTS Connect
✗ / ✗
Warranty
3 Years
Starting with accessories, Biostar includes what you need to get started and not much else. All that comes in the box along with the motherboard are four SATA cables, a DVD with drivers, a User Manual and Smart Connector.
User’s Manual
Driver DVD
(4) SATA cables
Smart Connector
Image 1 of 2
(Image credit: Biostar)
Image 2 of 2
(Image credit: Biostar)
In looking at the Z590 Valkyrie for the first time, the jet black PCB and overall styling give off a mid-range vibe with all the shrouds and neatly organized headers across the bottom. The left side of the socket behind the rear IO is covered by a large shroud reaching over the left VRM heatsink. A small heatsink covers the top set of VRMs, along with two tiny fans that actively cool the power bits underneath. Another pair of fans are hidden under the rear IO shroud as well.
The PCIe area is covered in heatsinks/shrouds, with only the three full-length PCIe slots poking through. There is red highlighting in this area that gives way to gold highlights on the chipset heatsink. A second RGB lighting zone illuminates the chipset heatsink and Valkyrie symbol/branding. Overall the motherboard looks good and has a unique color scheme. For the most part, users should have few issues working this board in with their builds, as the red and gold highlights don’t stick out too much. That said, at the expected price, there are more refined boards available.
(Image credit: Biostar)
Focusing on the top half of the board, we get a close-up look at the louvered shroud covering the rear IO and left VRM bank. The right side uses a piece of acrylic that the RGB lighting shines through brightly. Just above are two 8-pin EPS connectors (one required) for the CPU. To the right is the top VRM heatsink. To the right of the heatsink are the first two (of five) four-pin fan headers. CPU_Fan, CPU_OPT and SysFan1/2/3 support both three and four-pin fans. The manual doesn’t mention output, so it’s best to assume each supports 1A/12W.
Continuing right are four unreinforced DRAM slots supporting up to 128 GB of RAM. Biostar lists RAM speed up to DDR4 5000(OC), but as always, your mileage may vary. In our case, this board didn’t like to run our DDR4 3600 memory kit at 1:1 to the memory bus and was using Gear 2. I’m no memory overclocking expert, but if other boards are working 1:1 with DDR4 3600, there are few reasons this one shouldn’t be. We also had trouble running our DDR4 4000 sticks as well. But we’re still early days on this platform, and this board isn’t even available for sale in the US as of this writing, so we’re hopeful an update will improve these compatibility issues.
On the right edge are several items, including all three RGB lighting headers. The Valkyrie comes with two 3-pin ARGB headers and one 4-pin RGB header. Most boards come with four RGB headers (two of each), but I’d imagine few would run into problems with three. Below are three onboard buttons; Power, Reset and Clear CMOS, each backlit with red, orange and blue LEDs, respectively. Next is the 24-pin ATX connector that feeds power to the motherboard. Finally, just below that is the front panel USB 3.2 Gen2x2 header.
(Image credit: Tom’s Hardware)
One of the places Biostar upped its game is with power delivery. The Valkyrie sports a 20+1+1 phase (CPU, System Agent, Graphics) VRM designed to run Intel’s flagship CPUs. The two 8-pin connectors feed power to a Renesas ISL69269 multi-phase controller (X+Y=12) through 10 Renesas ISL6617A phase doublers on its way to 20 90A ISL99390B MOSFETs. Some quick math yields 1800A of total power for the CPU. You won’t have any concerns with power delivery when overclocking.
(Image credit: Biostar)
Moving on to the bottom half of the board, we’ll start by looking at the audio section on the left side. Hidden under a plastic shroud is the Realtek ALC1220 codec. While this is a premium audio codec that most find plenty acceptable, it isn’t the latest and greatest (4000 series) that many other Z590 based boards use. Poking through the shroud are four Chemicon brand audio capacitors. We don’t find any fancy opamps or other audio features, but most users should be happy with the sound output by this board.
In the middle of the board, we spot three reinforced full-length PCIe slots mixed in with three M.2 sockets. The top and second slot are both wired to the CPU, yielding a PCIe 4.0 setup on both. The top slot is x16, while the 2nd slot runs at a maximum of x8. When both slots are populated, they run at x8/x8 speeds. Biostar mentions AMD Crossfire support, but not SLI (even though they have the required amount of PCIe lanes). The bottom full-length slot is connected to the chipset with PCIe 3.0 x4 capabilities.
The Biostar Z590 Valkyrie has three M.2 sockets, all of which have heatsinks to help keep the modules underneath running cool. The top socket is CPU-connected, supporting up to PCIe 4.0 x4 drives up to 80mm. The bottom two M.2 sockets support PCIe (3.0 x4) and SATA-based modules up to 110mm. When using a SATA-based M.2 module on the middle socket, SATA_5 is disabled. When using the bottom M.2 socket with a SATA-based M.2 module, SATA_6 is disabled. In short, if you have two SATA-based M.2 modules, that still leaves four SATA ports available and the primary M.2 socket for PCIe-based modules if needed. RAID support for M.2 devices wasn’t listed.
To the right is the chipset heatsink, you’ll see the Valkyrie symbol and additional RGB lighting. On the right edge of the board is a USB 3.2 Gen 1 header, while just below that are the six SATA ports (supports RAID 0, 1, 5, and 10). Finally, just below that is a BIOS switch that swaps between the dual BIOS – an excellent value add for a board equipped for overclocking.
The bottom edge of the motherboard is usually a mess of headers and ports, and while the Valkyrie has those, all headers (that aren’t fans) have plastic around them, which cleans up the look quite a bit. Below is the complete list of headers and switches, in order from left to right.
Front Panel Audio
(3) System Fan headers
Thunderbolt
COM
(2) USB 2.0 headers
Front Panel
2-character debug LED
LN2 switch
TPM SPI header
(Image credit: Biostar)
On the USB front, there are a total of eight ports — enough for most users. One USB 3.2 Gen 2×2 Type-C, five USB 3.2 Gen 2, and two USB 3.2 Gen 1 ports. Just above the two USB 3.2 Gen 1 ports is the Realtek 2.5 GbE port. If you plan on using the integrated graphics, you have a choice between HDMI (2.0) and DisplayPort (1.4) connections. There is a combo keyboard/mouse PS/2 port if you’re still hanging on to PS/2 based peripherals as well. Finally, we see a gold-plated 5-plug plus SPDIF audio stack.
Last but certainly not least, the rear IO area. Biostar uses an integrated IO plate that gives the board a more premium look and feel. It’s black, along with the Valkyrie branding written in gold above the Wi-Fi antenna connections. There are also vents cut out designed to bring cool air through the IO plate and through the fans to cool the left VRM bank. Remember that this board does not include Wi-Fi out of the box, so if you just look at the pictures and not dig down in the specifications, you could easily be misled. In order to get Wi-Fi out of this board, you will need to purchase a Key-E Wi-Fi card.
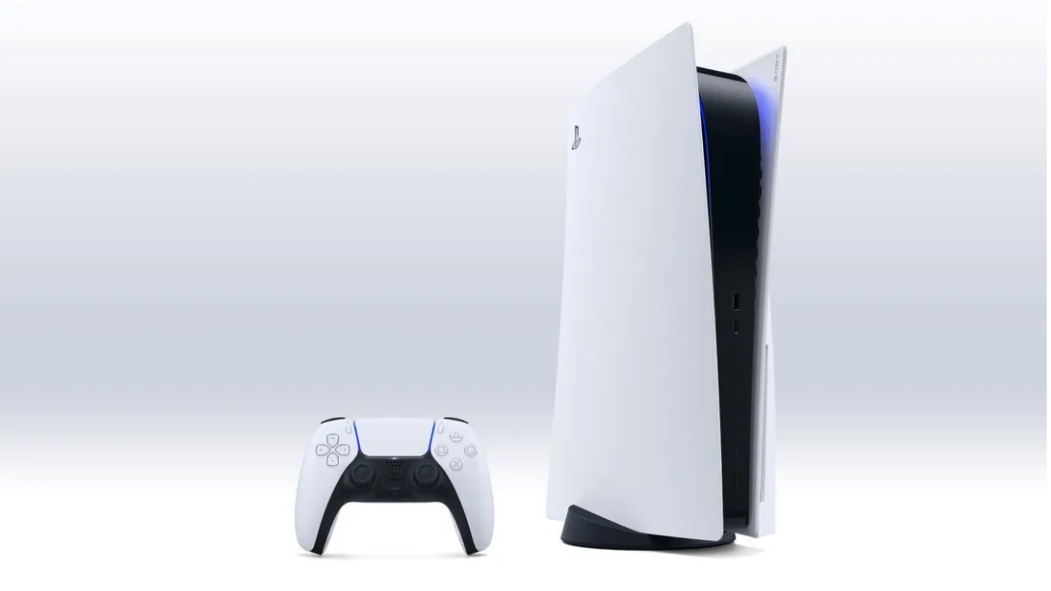
The PS5 got its first major software update yesterday – but it seems Sony forgot to mention the new “HDR: On When Supported” setting, reports FlatpanelsHD. Perhaps because it works well for games but not apps…
Let’s rewind for a moment. Sony designed the PS5 to output all content in High Dynamic Range (HDR) when connected to an HDR TV. HDR delivers higher contrast and therefore a wider colour and brightness range than Standard Dynamic Range (SDR).
Problem was, any games, movies and TV shows in SDR were all automatically upconverted to HDR, making them appear very different from how they were intended to look.
The PS5 April Update addresses this issue by allowing the PS5 to match the output of a game or video to either SDR or HDR, according to how it’s flagged. “It appears to work well for games,” FlatpanelsHD says. “PS5 automatically switches to SDR output when opening games like Crash Bandicoot or WRC9, and it automatically switches to HDR output when opening HDR-compatible games like Astro’s Playroom or Spider-Man.”
And apps? Not so much. The same publication claims that support is “inconsistent”, and that the Apple TV app and Netflix app both continue to run in “forced HDR mode” on PS5. The YouTube app also failed to work properly, while Disney+ delivered a blank picture when the new setting was enabled.
Want to try it for yourself? You’ll need to manually activate “HDR: On When Supported” in the PlayStation settings menu. Head to ‘Screen and Video’, ‘Video Output’, and finally ‘HDR’ and you should see the new setting the in ‘off’ position.
The new software brings a host of (more successful) upgrades including support for USB storage, a fix for the Samsung 4K 120Hz HDR issue and cross-generational Share Play mode, which lets you pass a virtual controller to a friend with a PS4 or PS5.
MORE:
Looking for a console? Here’s where to buy a PS5
Level-up your living room: How to get the best sound from your PS5
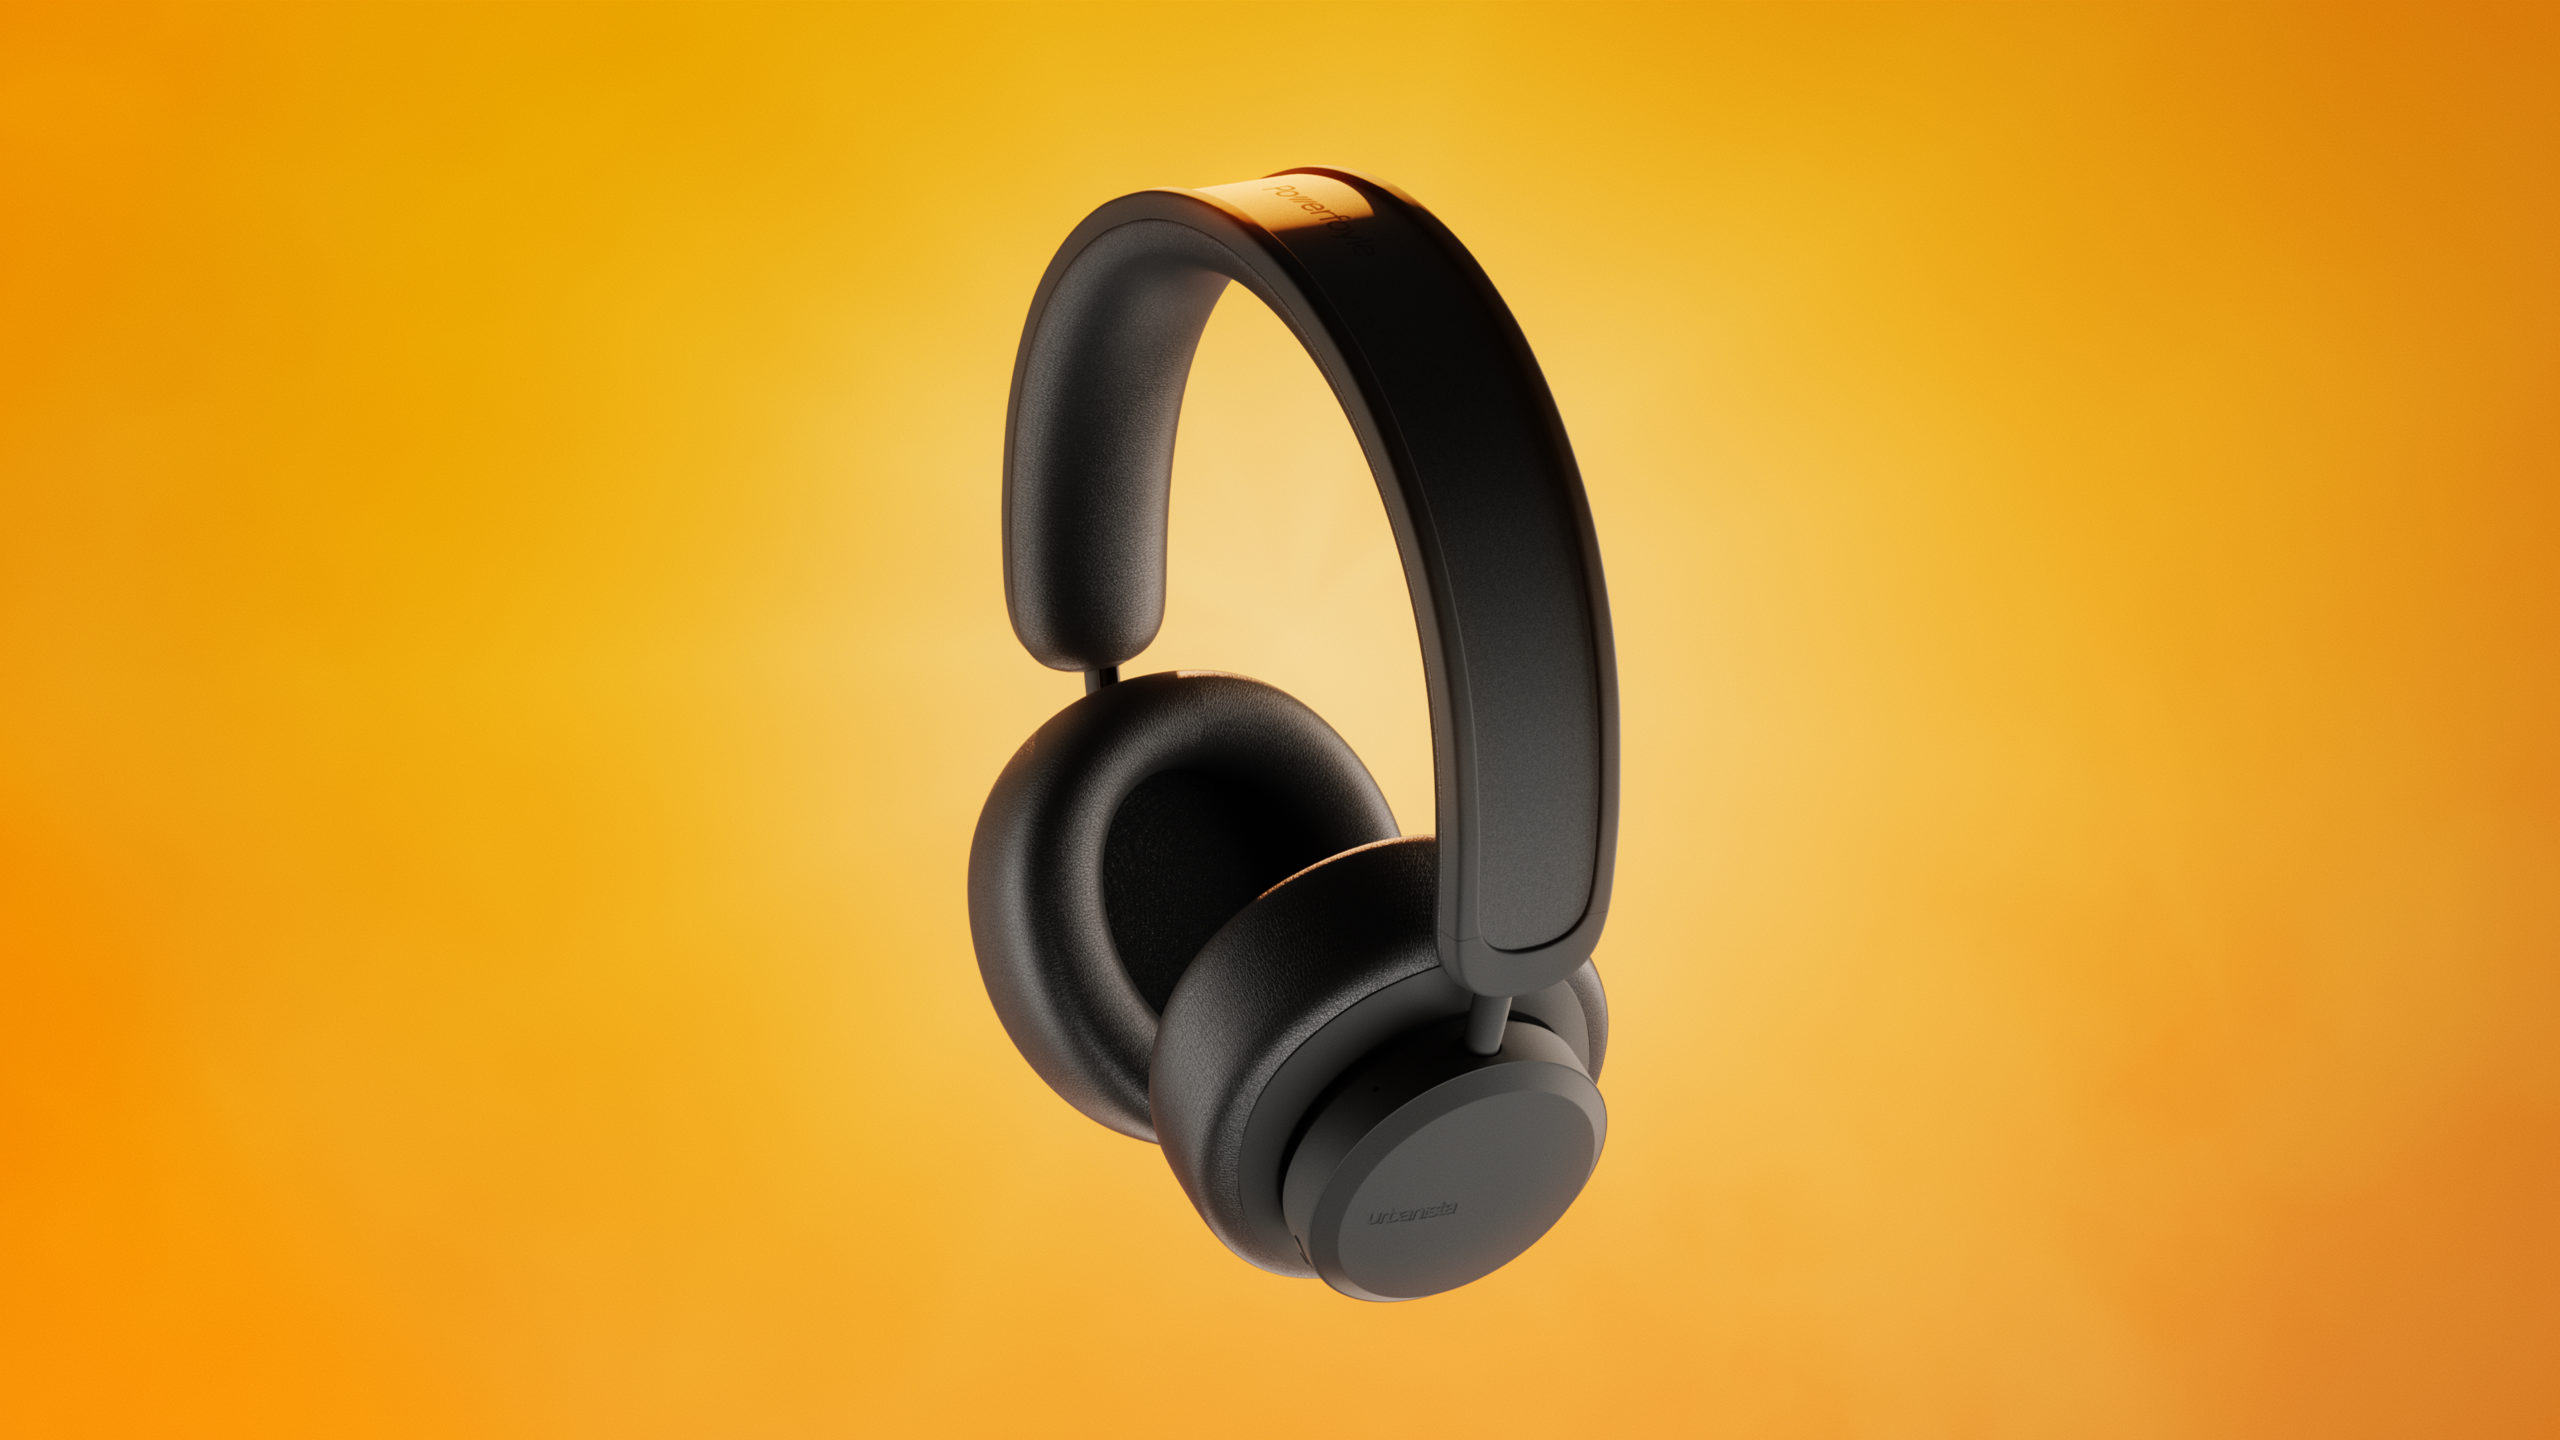
In the race to extend the battery life of wireless headphones to limitless proportions, Urbanista believes it has found a way to offer audio lovers “virtually infinite” playtime while helping the environment at the same time.
The Swedish audio brand has announced the release of the Los Angeles self-charging headphones using Powerfoyle solar cell technology (by fellow Swedish firm Exeger), which it says can convert both natural and artificial light into power.
Urbanista claims that the over-ears will constantly charge when exposed to light: an hour of sunlight will supposedly generate three hours of playtime, while even an hour in cloudy conditions will yield two hours of playback. They also have conventional USB-C charging and a hefty 50-hour battery reserve in the off chance you spend a lot of your time in the dark.
This isn’t the first time we’ve heard of a brand developing solar-powered headphones – JBL, Sola and Helios have all attempted crowdfunding campaigns for similar products.
The Los Angeles headphones have Bluetooth 5 connectivity and feature both active noise cancellation as well as an Ambient Sound Mode that allows you to stay more aware of your surroundings. On-ear detection pauses audio when the cups are removed and restarts it when they are put back in place, too.
The Urbanista Los Angeles wireless headphones cost £169 ($199).
MORE
Best wireless noise-cancelling headphones 2021
Best wireless headphones 2021
Why I will never own a pair of noise-cancelling headphones
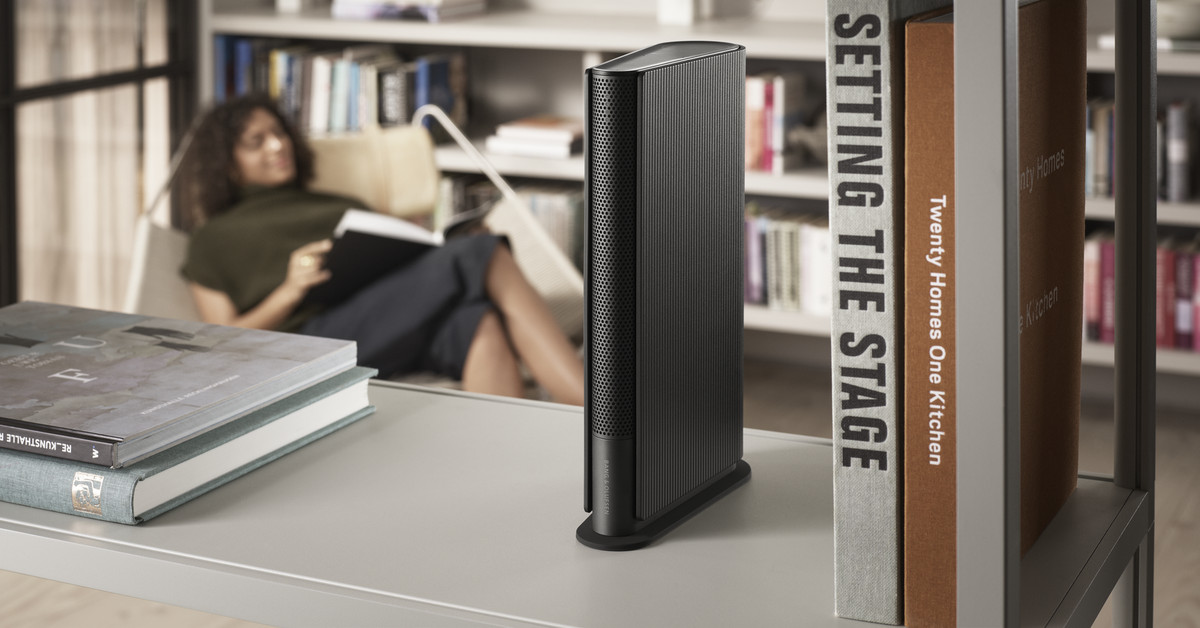
Bang and Olufsen’s latest connected speaker is the Emerge. Its thin form-factor should blend right in to most bookshelves, and that’s no accident. In a press release announcing the speaker, the company says its design was “inspired by the compact form factor of a book” with side panels that wrap around like a cover, and a logo on the front that’s meant to evoke a title printed on the spine.
It’s a nice contrast from some of Bang and Olufsen’s previous speakers, which have had huge, hulking form-factors that are hard to imagine in any normal home. Instead, the Emerge takes a similar approach to Ikea’s Symfonisk speakers, which have pulled double duty as lamps or shelving to help them blend in with the rest of your furniture.
Get it? Like a title on a book spine?Image: Bang & Olufsen
B&O says the Emerge speaker’s small form-factor shouldn’t make it a slouch in the sound quality department, however. “The vision for Beosound Emerge was to create the slimmest speaker possible that could still deliver full range, ultra-wide sound despite its size through its revolutionary driver configuration,” says the company’s head of product management Christoffer Poulsen. Internally there’s a triple-driver configuration consisting of a 4-inch woofer, a 1.45-inch mid-range, and a 0.6-inch tweeter.
In terms of connectivity, the Emerge supports all the standards you’d expect out of a modern connected speaker. There’s Spotify Connect support, Bluetooth 5.0, Airplay 2, and Chromecast streaming, as well as a built-in microphone with Google Assistant support. Physical connections include a line-in/optical jack, Ethernet, and a USB-C port for power. And yes, you can pair two Emerge’s together to create a stereo pair.
B&O says the speaker uses the same replaceable connectivity module that appeared in its recent Beosound Level, which will allow it to receive “new performance updates and features for years to come.” Eventually this module can be replaced if it gets outdated, B&O says.
The Bang and Olufsen Emerge is available in select European markets starting today, and will release globally this autumn. Pricing starts at £539 / €599 9around $717) for the black model, while the gold model which has an oak wood cover costs slightly more at £669 / €749 (around $879).
New York City’s days as one of the last remaining holdouts in the dockless electric scooter boom is finally at an end. The city’s Department of Transportation (DOT) announced the selection of Bird, Lime, and VeoRide as the participants in its inaugural e-scooter pilot.
The companies are expected to begin operations in the Bronx by early summer with 1,000 scooters each. The pilot is only expected to last for one year, but DOT has the option to renew the licenses at the end of the term. The department also said it expects most scooter rides to cost less than $5 for customers on average.
It’s been over a year since New York State finally lifted its ban on throttle-based electric bikes and scooters, removing the last obstacle that kept the scooter companies at bay from the largest and possibly most lucrative market in the country. Since 2017, companies like Bird, Lime, Spin, Scoot, and others have deployed hundreds of thousands of Chinese-made e-scooters in cities across the world — and yet New York City stubbornly remained scooter-free because of the state law barring their use.
At the time, legalizing e-scooters and e-bikes was seen as a huge boon for immigrant delivery workers who had been targeted in a crackdown by police for their use of e-bikes. Under the new rules, scooters would stay illegal in Manhattan, though the city could eventually overrule that provision. But the legalization also opened the debate over how New York City should regulate shared scooters on its streets.
Ultimately, the city landed on a one-year pilot with three companies in just one borough, the Bronx. After the first year, assuming everything goes well, the city will expand the service area to new neighborhoods and will allow the participating companies to increase their number of scooters in operation to 2,000 each.
The permit winners include two big names — Bird and Lime — and one smaller one, Chicago-based VeoRide, which offers both standing and sit-down versions of its scooters. All three will be barred from using “gig” labor to charge and rebalance their scooters under the rules of the pilot. The companies will also be prohibited from forcing customers to agree to terms of service that include binding arbitration or class action waiver provisions.
Despite these restrictions, the companies sound super pumped about their selection. All three companies used some variation of the word “honored” in their prepared statements. Next up is London, which is expected to soon announce the choices for its shared-scooter pilot.
We use cookies on our website to give you the most relevant experience. By clicking “Accept”, you consent to the use of ALL the cookies.
This website uses cookies to improve your experience while you navigate through the website. Out of these, the cookies that are categorized as necessary are stored on your browser as they are essential for the working of basic functionalities of the website. We also use third-party cookies that help us analyze and understand how you use this website. These cookies will be stored in your browser only with your consent. You also have the option to opt-out of these cookies. But opting out of some of these cookies may affect your browsing experience.
Necessary cookies are absolutely essential for the website to function properly. This category only includes cookies that ensures basic functionalities and security features of the website. These cookies do not store any personal information.
Any cookies that may not be particularly necessary for the website to function and is used specifically to collect user personal data via analytics, ads, other embedded contents are termed as non-necessary cookies. It is mandatory to procure user consent prior to running these cookies on your website.