Half of the reason to buy a Mac is to get native support for macOS, but that doesn’t mean Mac owners don’t also suffer from the grass-is-greener syndrome. While Apple’s operating system is known for being casual friendly and is also the OS system people who grew up on its products might be more familiar with, PC users are always quick to point out that the extra steps it adds to actions like installing programs can slow down more serious work. It’s currently possible to
emulate Windows for ARM
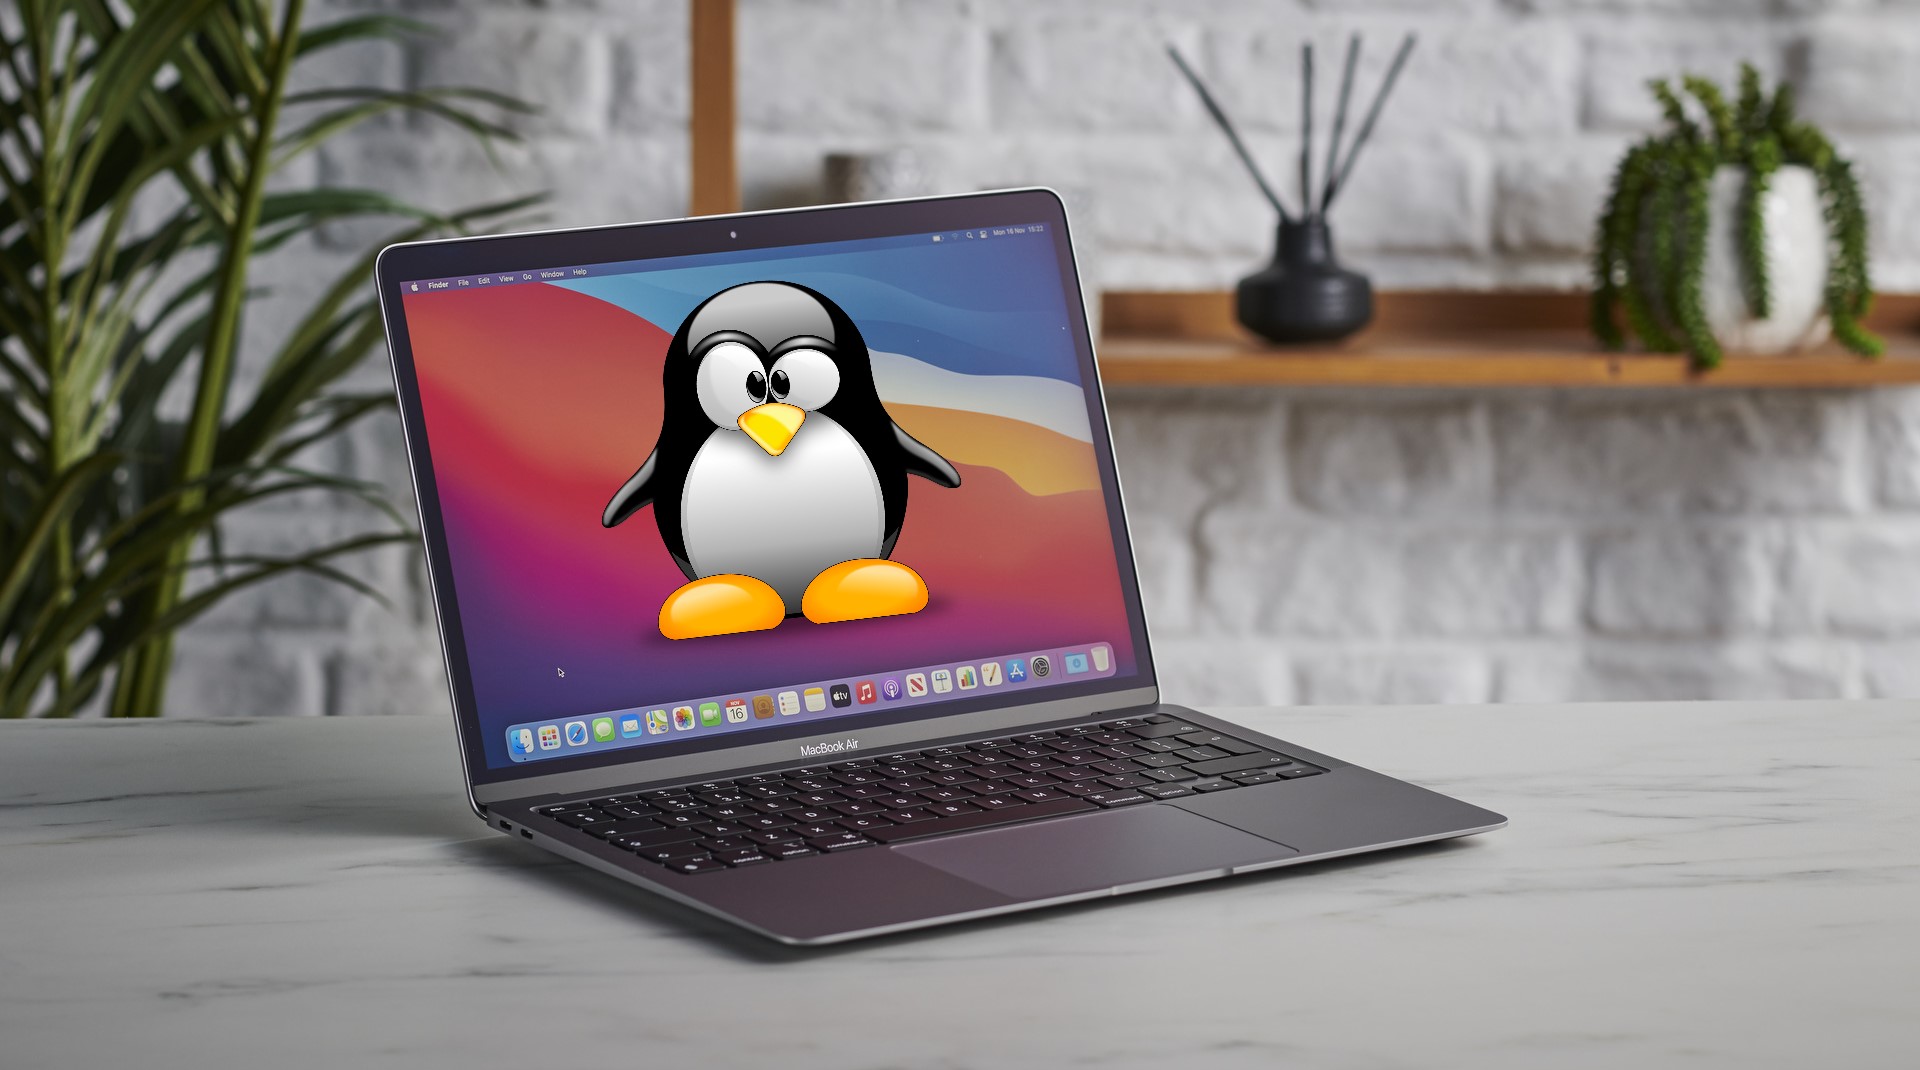
on Apple’s latest M1 Macs, but what if you want to take your power user cred a step further and use Linux on your new M1 Mac?
According to ARM-based Linux virtualization startup Correlium, now you can – but there’s a bit of a catch.
More to show that it’s possible than anything else, Correlium first posted hints of an M1 version of Linux to its Twitter account on January 15th.
We had some spare time today so we ported Linux to the M1. Releasing tomorrow #fridayfun pic.twitter.com/dCrXApyKefJanuary 16, 2021
Correlium CTO Chris Wade then made the beta build the group was using publicly available the following day but warned that it was for “advanced users only” as it didn’t have USB support at the time.
Now, the group has pushed a new release that adds AIC, UUART, and SMP support, with Wade promising that the group’s next goal is to add “DART, USB, and maybe PCIE (if time persists).”
This adds AIC, UART & SMP. We will push DART, USB and maybe PCIE (if time permits) next. It also looks like tomorrow you will also be able to boot Linux on the M1 with Pongo. Big thanks to the whole @CorelliumHQ team and to @never_released and @qwertyoruiopz for their assistance. https://t.co/tKscy0LUWeJanuary 19, 2021
What does all that mean? Well, now you can technically load Linux on an M1 Mac, though certain connection standards won’t be supported, and you also won’t be able to take advantage of the M1’s graphics. So while this is more versatile than the January 15th release, it’s still a long way from being as useful as Linux is on older, Intel-based Macs (which still isn’t saying much).
That’s to be expected from such a new chip, as even Windows running on M1 currently does so through emulation (though Apple is open to native support). Still, this marks a major step forward for the Linux on M1 and even Linux on ARM scene, particularly when it comes to Wade’s promise of PongoOS support.
So how will you boot third-party operating systems on arm64 Macs?You might have seen that pongoOS has been getting a ton of work in the recent past, and even more is coming. This work will allow us to support pongoOS as a second-stage bootloader for Apple Silicon-based Macs.November 13, 2020
PongoOS is essentially a pre-boot execution environment built with Apple Silicon in mind, with the intention of loading third-party operating systems on chips like M1. It’s been expected to pave the way for Linux on Apple Silicon since late last year, so it’s exciting to see that coming true, even if it’s still primitive.
As for why this is something you’d want to do, we find it best to refer to Linux creator Linus Torvalds.
“I’ve been waiting for an ARM laptop that can run Linux for a long time,” he wrote last November on the
Real World technologies
forum. “The new Air would be almost perfect, except for the OS.”
Despite not always having the absolute best hardware, Macs are still built to run consistently and feel premium. That’s valuable for a lot of users, including power users, especially those who grew up with the Mac.
“I have fairly fond memories of the 11″ Macbook Air (I think 4,1) that I used about a decade ago,” Torvalds explained. “But [I] moved away from because it took Apple too long to fix the screen – and by the time they did, I’d moved on to better laptops, and Apple had moved on to make Linux less convenient.”
Here’s hoping that, as developers get more familiar with them, Apple’s ARM-based laptops don’t follow the same path.
Amazon-backed electric vehicle startup Rivian has raised another $2.65 billion, bolstering its position as one of the most well-funded EV startups in the world.
The investment round was led by T. Rowe Price and included Amazon’s Climate Pledge Fund, Fidelity Management and Research Company, and investment firms Coatue and D1 Capital Partners, along with “several other existing and new investors,” according to the startup.
The new money arrives a mere six months after Rivian raised $2.5 billion, and about a year after it raised $1.3 billion. It has now raised more than $8 billion to date.
It’s hard to say exactly how much Rivian has in the bank, given that it has spent a lot already to hire a massive team while also developing at least three vehicles that we know of. But after this new funding round, the EV startup’s war chest likely rivals that of China’s Nio, which also has billions of dollars in the bank following a number of recent raises. (A direct comparison here is tough, though, since some Chinese startups like Nio have received government support.)
That money will be crucial as Rivian gets ready to release its first two electric vehicles later this year, the R1T pickup truck and the R1S SUV. Rivian is also working with Amazon on developing and deploying an electric delivery van, which recently was spotted in the wild.
Whats notable about Rivian’s ability to keep raising such enormous sums of money is that the startup is doing it while keeping the company private. There has been an incredible rush of new funding into the electric vehicle space over the last year, inspired in large part thanks to Tesla. But much of it has come through so-called SPAC (special purpose acquisition) mergers, where publicly-traded but mostly dormant investment funds have absorbed companies like Canoo and Fisker.
Rivian is also backed by BlackRock, Soros Fund Management LLC, and Ford, though the Detroit automaker has not been named in the previous two funding rounds. Rivian is working on an electric vehicle with Ford’s luxury marque, Lincoln, though an SUV collaboration was already shelved last year.
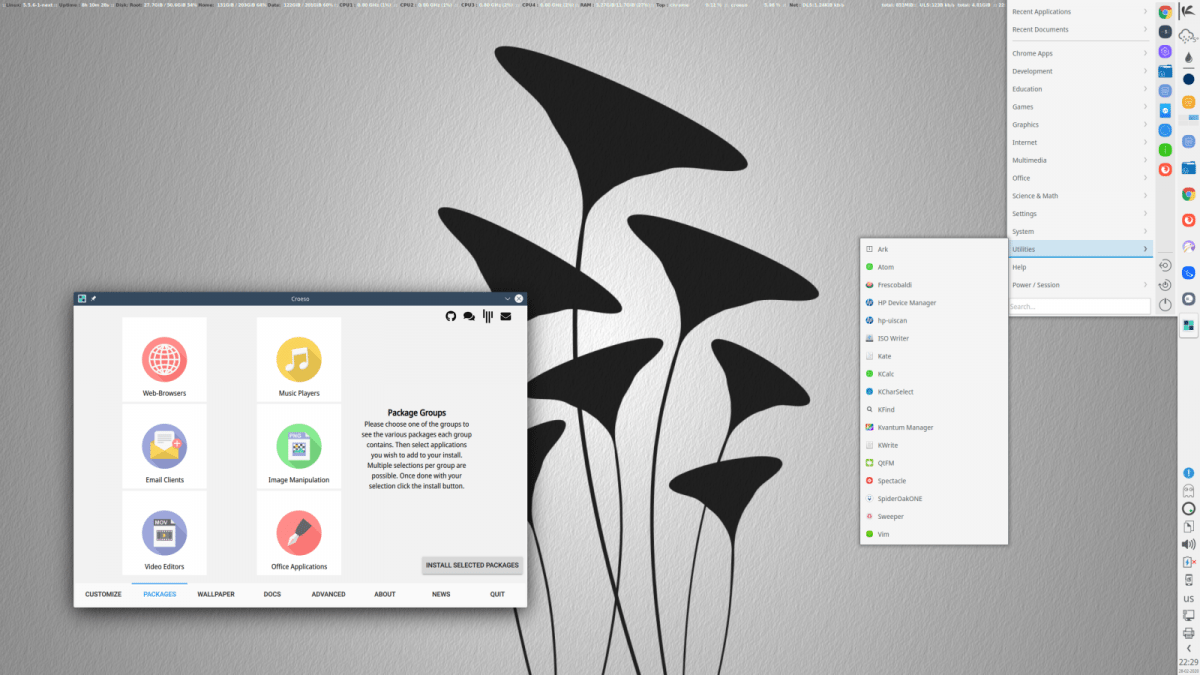
With the switch to version 6 of the application framework Qt, which is used for the cross-platform development of user interfaces, the KaOS developers are preparing their distribution for a change from the plasma desktop to the Qt 6 basis. A number of applications in KaOS are already based on Qt 6. For the first time on board are Stacer, a graphical tool for managing systemd services and IsoWriter as KaOS’s own start media producer.
The independent Linux distribution KaOS provides updates on an ongoing basis, usually according to the rolling release model. New packages are imported with the Pacman package manager known from Arch Linux. However, the developers publish snapshots in the form of ISO files at regular intervals to make the installation easier for newcomers.
Qt 6 and new applications On the KaOS website the project gives an overview of the innovations. The current KaOS snapshot contains the first applications that are based on the Qt 6 framework, for example the music player Strawberry forked by Clementine and the Qsynth synthesizer. In addition, the components of the PyQt stack, such as Sip 6, PyQt Builder and PyQt 6.0.0, are based on the new framework. The packages of the plasma desktop Plasma 5. 20. 5, Frameworks 5. 78. 0 and the KDE Application Suite 5. 15. 2 are all based on Qt 5. 15. 2. KaOS 2021. 01 comes with Linux kernel 5. 10. 6.
The new KaOS 2021. 01 has some new applications in its luggage, such as the matrix client NeoChat or the Barrier program, with which several systems in the network can be connected with a mouse and control keyboard. KaOS uses systemd-boot as a boot loader for UEFI installations. Stacer replaces systemd-kcm as a tool for the graphical administration of systemd services and also functions as a system monitor.
Stacer serves as a system monitor and can systemd – Manage services and startup programs.
New tricks when installing the system KaOS sets on the distribution-agnostic installer Calamares, whose partition module has mastered “Split Encryption” since version 3.2. 35. The feature allows users to encrypt the hard drive when installing KaOS, / boot but leave it unencrypted. The user module now offers a more detailed management of the user groups.
The in-house startup media producer IsoWriter can delete the partition data of a USB stick that has served its purpose as an installation medium. This should simplify the subsequent reformatting so that users can use the stick again for regular data transfer. If required, IsoWriter can check the integrity of the start medium by comparing the MD5 hashes of the ISO file and the written image. This verification can also be carried out via the context menu of the Dolphin file manager.
Clear objective According to its own presentation on the project page, the KaOS project does not pursue the goal of providing the widest possible range of software and desktop environments. Instead, the developers are “focusing on a DE (KDE Plasma), a toolkit (Qt), an architecture (x 86 _ 64) “.
The developers advise against this in the installation instructions to use the startup media creators Rufus and UNetbootin. In a short experiment, the ISO image could be written to a USB stick with Linux using the dd command or the Etcher tool. An installation of KaOS on systems with RAID is currently not possible. Those interested can find further innovations in the release announcement. KaOS 2021. 01 is available as a direct download on the project page.
João Silva 56 mins ago Featured Tech News, Software & Gaming
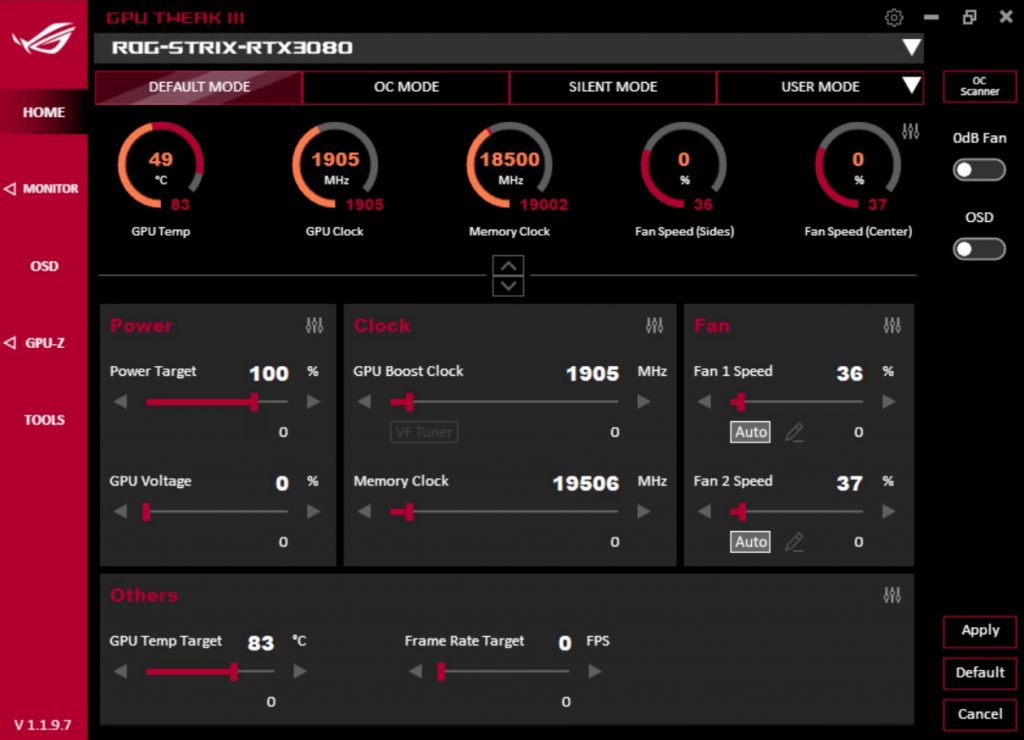
Asus is doing a massive update to its GPU Tweak app with the launch of the open beta of GPU Tweak III. Similar to MSI Afterbuner and EVGA PrecisionX, GPU Tweak III software allows users to monitor, tweak, and overclock their GPUs.
To the users coming from GPU Tweak II, the first major change to jump out will most likely be the interface redesign. Users will be able to choose from 3 different presets – Default Mode, OC Mode, and Silent Mode – but they will be also allowed to change the GPU settings themselves, including the power target, GPU voltage, GPU boost clock, memory clock, fans speed, GPU temperature target, and frame rate target. Similar to Afterburner, it now features OC scanner to automatically overclock the GPU beyond the OC Mode.
Built-on the users’ feedback, GPU Tweak III also features an integrated GPU-Z with a ROG theme, an OSD with multiple performance metrics displayed using Asus ROG font, and automatic profiles based on the games and applications running on the PC where it’s installed.
The extensive list of patch notes for GPU Tweak III version 1.2.1.1 can be found below:
Interface Changes:
The new Home Screen combines the elements of the GPU Tweak II Simple and Advanced modes. The one-click Default, OC, Silent, and User Mode presets of Simple Mode appear on the top, and the overclocking sliders of Advanced Mode are at the bottom.
A new Dashboard of several meters is between the presets and sliders. In GPU Tweak II, three meters appeared on the Simple Mode to show GPU frequency, memory frequency, and GPU temperature. GPU Tweak III includes several new meters, such as GPU Power, GPU Voltage, and meters for each controllable fan setting. A slider button allows users to either show all of them, or to hide them. These meters can be disabled and rearranged through a settings menu on the top-right of the Dashboard.
Both the main screen and the Monitor are scalable by dragging the sides or corners of the interface, so users can reshape it to fit their desktop space. When closed and reopened, the interface returns to the center of the main screen, but any size changes remain intact.
The main colors of the interface can be adjusted through the Settings > Interface screen. The color of the Monitor display can also be adjusted through the Settings > Monitor screen, and each graphics card in the system can be assigned a different color. A background wallpaper may also be added, but that function is still a work-in-progress.
Most elements of the UI appear as separate panels. Separate panels appear for the main/Home screen, the Monitor, Settings, OC Scanner, and GPU-Z. Each of these can be moved and closed independently.
The logo at the top-left changes based on the graphics card used. If the graphics card is from an ROG, TUF Gaming, or ASUS line, the respective logo will be shown. If the graphics card is non-ASUS, the GPU Tweak III logo will be shown. A future update will allow users to change that logo if desired.
Profile Changes:
Tuning and OSD profiles can be linked to games or applications and GPU Tweak III will automatically swap to those profiles when that program is opened. This feature can be accessed by clicking the “Connect” button in the User Mode dropdown. GPU Tweak III will attempt to find all installed games or apps on the computer, but if one is not detected, the .exe can be manually located with a Browse button.
The preset Default, OC, and Silent Modes are treated as profiles and can be connected to games and apps.
Fan settings are now saved as part of tuning profiles, so different fan curves and overclocking settings can be saved in the preset Default, OC, and Silent Modes.
Multiple OSD profiles can be saved, each with different settings tailored for particular games or apps. The Default OSD profile is initially set to the Classic Style as designed for GPU Tweak II, but can be changed to the GPU Tweak III style if preferred.
Settings for multiple graphics cards are saved into a combined profile that maintains all changes made.
Profiles can be exported and imported, so that they can be moved to other systems or preserved through a Windows reinstall. Imported tuning profiles must match one or more graphics cards that are currently installed in the PC, or the import will be unsuccessful.
On-Screen Display (OSD) Changes:
A completely new On-Screen Display (OSD) style has been added. The GPU Tweak III Style allows users to rearrange the information items, resize and realign columns in the display, and make them bold.
Text size and color can now be adjusted in both the GPU Tweak III Style and Classic Style.
Effects can be added to the OSD text and background. Text can now drop shadows behind it or have a slight glow. The background can be filled in by a panel with adjustable color or opacity to make it pop out against UI elements with minimal impact to in-game visibility.
A “Preview” button has been added to the OSD screen that allows users to see the OSD without opening another program. An option in the “Screen” subsection allows users to upload their own image to the Preview. This can be used to set a game screenshot into the UI and adjust the OSD around the UI elements.
Monitor Changes:
The Monitor now includes two views. The Line View is similar to the previous GPU Tweak II display, but the graphs can be widened for detailed examination by stretching the Monitor window. The Column View compresses the graphs into squares, and the number of graphs shown in each row adjusts to the width of the Monitor screen.
Monitor file size, log frequency, and session length can all be adjusted in the settings screen.
Monitoring graph snapshots can be saved and viewed later through use of the Export and Import Logs functions. This may be useful for comparing performance to a previous tuning session. Note that this function is still a work-in-progress and will be visually enhanced in the future.
When linked, the Monitor and main screen “Close” and “Minimize” buttons act on both parts, and any interactions with their icons in the tray affect both parts.
Other Changes:
Fan controls now include two new settings: fan speed update period, and temperature hysteresis. These can also be applied to external fans.
Additional settings allow users to adjust temperature scale (°C and °F), as well as time scale (12 hour and 24 hour).
“Gaming Mode” has been renamed to “Default Mode”. The functionality is the same.
Screenshots can now be taken in JPG format in addition to PNG format which was supported in GPU Tweak II. Users can choose their preferred format in Settings > Monitor.
Removed Functions
Some functions that existed in GPU Tweak II have been removed in GPU Tweak III, and they are listed here, along with our reason for removing them.
Always 3D Clock: Modern GPU APIs no longer allow external control of this function, so the feature is no longer supported.
Gaming Booster: The three sub-functions in Gaming Booster each had their own reasons for being phased out. Visual Effects were removed because modern games manipulate visual effects in-game to improve graphical performance, rather than at a system level. System Services were removed because Windows 10 updates have made service management far more efficient than before. Disabling services already has a chance of causing instability, and the performance uplift is usually small. System Memory Defragmentation was removed because solid-state drives have risen in popularity and it is not recommended to defrag SSDs.
Lock toggles next to tuning sliders: Misclicks on these locks led to user confusion over inability to adjust sliders.
Link between Power Target and GPU Temp Target: This was removed because the layout of the UI changed to distance these two items.
Live Update: This function is being reworked and will be included in a later version.
Monitor Startup Options: The Monitor and main screen have been reworked to behave as if they are one unit in most situations. Current settings affect both parts together.
User Interface Tooltips: These are being rewritten for the new functionality and a full set will be released in a later version.
Known Issues:
The Nvidia GeForce Experience overlay and the GPU Tweak III OSD conflict with each other and can prevent games from running when both are enabled. It is recommended to only run either the GeForce Experience overlay or the GPU Tweak III OSD.
The CPU Usage field in the OSD may show incorrect values.
When multiple programs are in the same place, the layering of different GPU Tweak III windows (main screen, Monitor, Settings, and OC Scanner) may be inconsistent, so some elements may fall behind other programs while others are in front.
Frame Rate Limit requires any running games or programs to be restarted before taking effect. Currently this function only extends to 255 FPS.
OSD fonts in GPU Tweak III style only allow for Calibri and Calibri Bold adjustment. Full font adjustment will be added in a later release.
GPU-Z clock values do not update in real time. To update the clock values, close and reopen GPU-Z.
Mouse step size controls have not been implemented yet.
Not all hotkeys are completely implemented at the moment. Notably, the Timer is visible but not working.
Screenshots will always be saved to the default folder, not personally selected folders.
The Default display wallpaper is just a blank black background.
Wallpaper transparency has not been implemented yet.
Fahrenheit temperature settings only affect the Monitor, not the other parts of the interface.
Some interactions with the OSD may cause an error to appear referring to “mFinitialize Fail”. This error does not affect operation.
Programs that have multiple different .exe files with the same names may not swap settings correctly and may use the wrong profiles. For now, set all related .exe files to the same settings for a smooth experience.
Game and application file names are not sorted properly in the Profile Connect window.
You can download and learn more about Asus GPU Tweak III HERE.
KitGuru says: Have you ever used a previous iteration of Asus GPU Tweak? What do you think of the changes made for GPU Tweak III?
Become a Patron!
Check Also
New PlayStation studio “assembled to expand upon existing franchises”
Back in 2018, Sony opened a new studio in San Diego with the intent of …
The French startup Yousign lands in Italy with its platform for electronic signature of documents, aimed at dematerializing processes and simplifying bureaucracy. The company aims to digitize 15 millions of documents by 2023
by Alberto Falchi published on 18 January 2021 , at 16: 16 in Innovation channel Yousign startup
Yousign is a startup born in France in 2013 which counts today 100 employees and 5. 000 customers and creates a platform for the digital signature of documents. The platform is accessible via app or integrated into more structured workflows through APIs, and simplifies the digital signature process of documents, an issue that with the spread of remote work is becoming increasingly important: ReportLinker estimates that this sector was worth 3 billions of euros in 2020 and could come to be worth 14 over 6 years . Yousign is now also available in Italy and aims to grow rapidly throughout Europe: the goal is to digitize 15 millions of documents by 2023 .
Why electronic signature is important
The electronic signature is not yet widespread in Italy, but the situation is destined to change quickly. On the one hand, more and more companies have understood the importance of digitizing and dematerializing documents, on the other hand the work is moving towards new forms of collaboration, accelerated by the pandemic that has given a shock and made people understand the advantages of smart working . With the fact that the office is no longer the center of the business, nor will it probably return once the emergency is over, it becomes important to have processes to authenticate documents in a streamlined and effective way, going beyond the autographed signature that accompanies us from a life, optimizing processes in this way.
According to Yousign estimates, digitally signing a document costs less than 50% compared to the autographed paper signature .
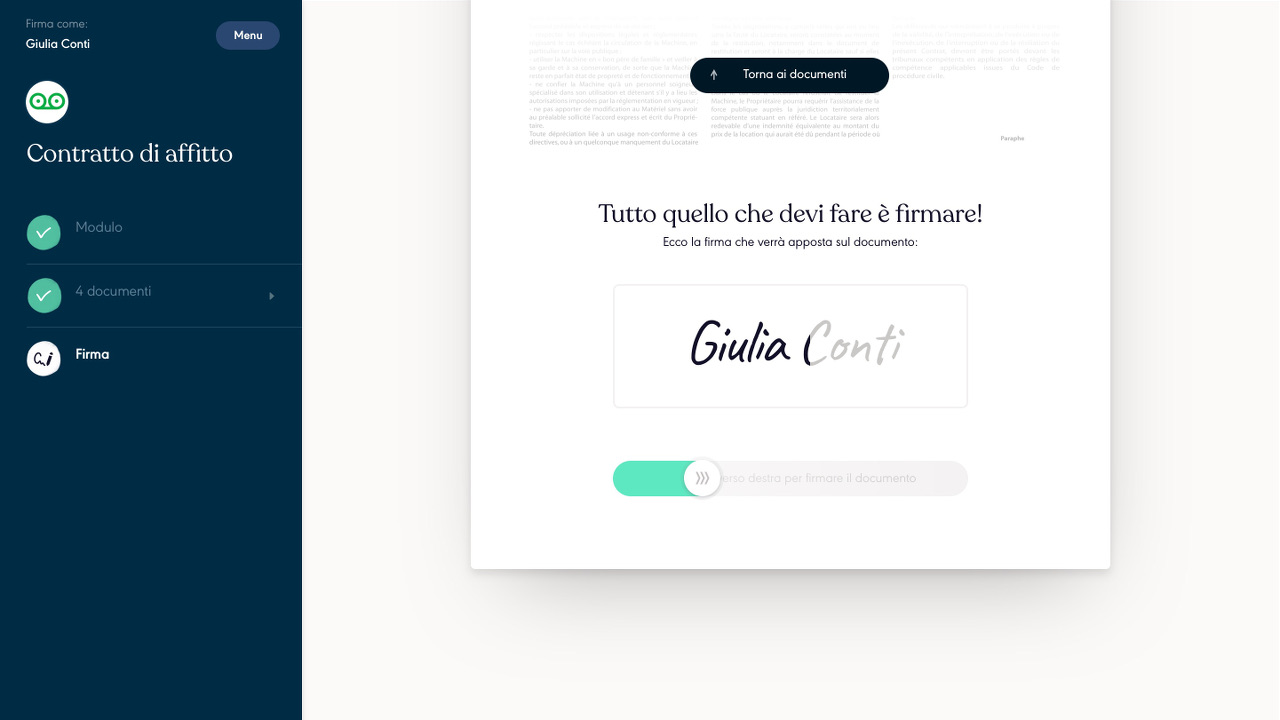
There is no shortage of electronic signature systems on the Italian market, but Yousign’s approach focuses on simplicity: to date the available Digital Signature solutions are rather complicated, and require you to rely on to physical tools, such as Smart Card readers or USB sticks, which certainly did not help their adoption. Yousign’s approach is much more immediate : upload the PDFs to the platform, select the approval flow and – again through the platform – the documents are sent to the signatory. All he has to do is click on the link received and “sign” it, authenticating it through an OTP (One Time Password) received via e-mail.
Security is guaranteed by a certified signature process thanks to multi-factor authentication (contact info, OTP code, identity verification ), guaranteed integrity (a signed document is sealed and cryptographically protected) and a time-stamped proof file (proof file generated and archived automatically).
“In Italy the advantages of the electronic signature are still little known, but the possibility of having documents signed completely online with a tool that ensures the legal validity of the signature becomes crucial for the digitization of the country “- explains Fabian Stanciu, Yousign Country Manager Italy – “ Yousign is a cloud solution designed specifically for the European market, which issues its own electronic signature certificates in compliance with the eIDAS regulation, holds the status of certification authority (Certification Authority) and is part of the exclusive list of Trusted Service Providers (TSP) drawn up by the EU. We aim to digitize and dematerialize all so-called “routine” documentation: quotes, orders, contracts, policies and insurance pre-contracts, brokerage mandates, hiring proposals, real estate sales mandates, rental contracts, privacy policies, letters of appointment and much other. The solution is fle ssible and adapts to many areas, from insurance to real estate, from human resources to banking, up to the activity of SMEs, startups, freelancers and freelancers. We have the mission to facilitate, in this way, the connection between companies, their customers, employees and partners, facilitating the growth and efficiency of the business “.
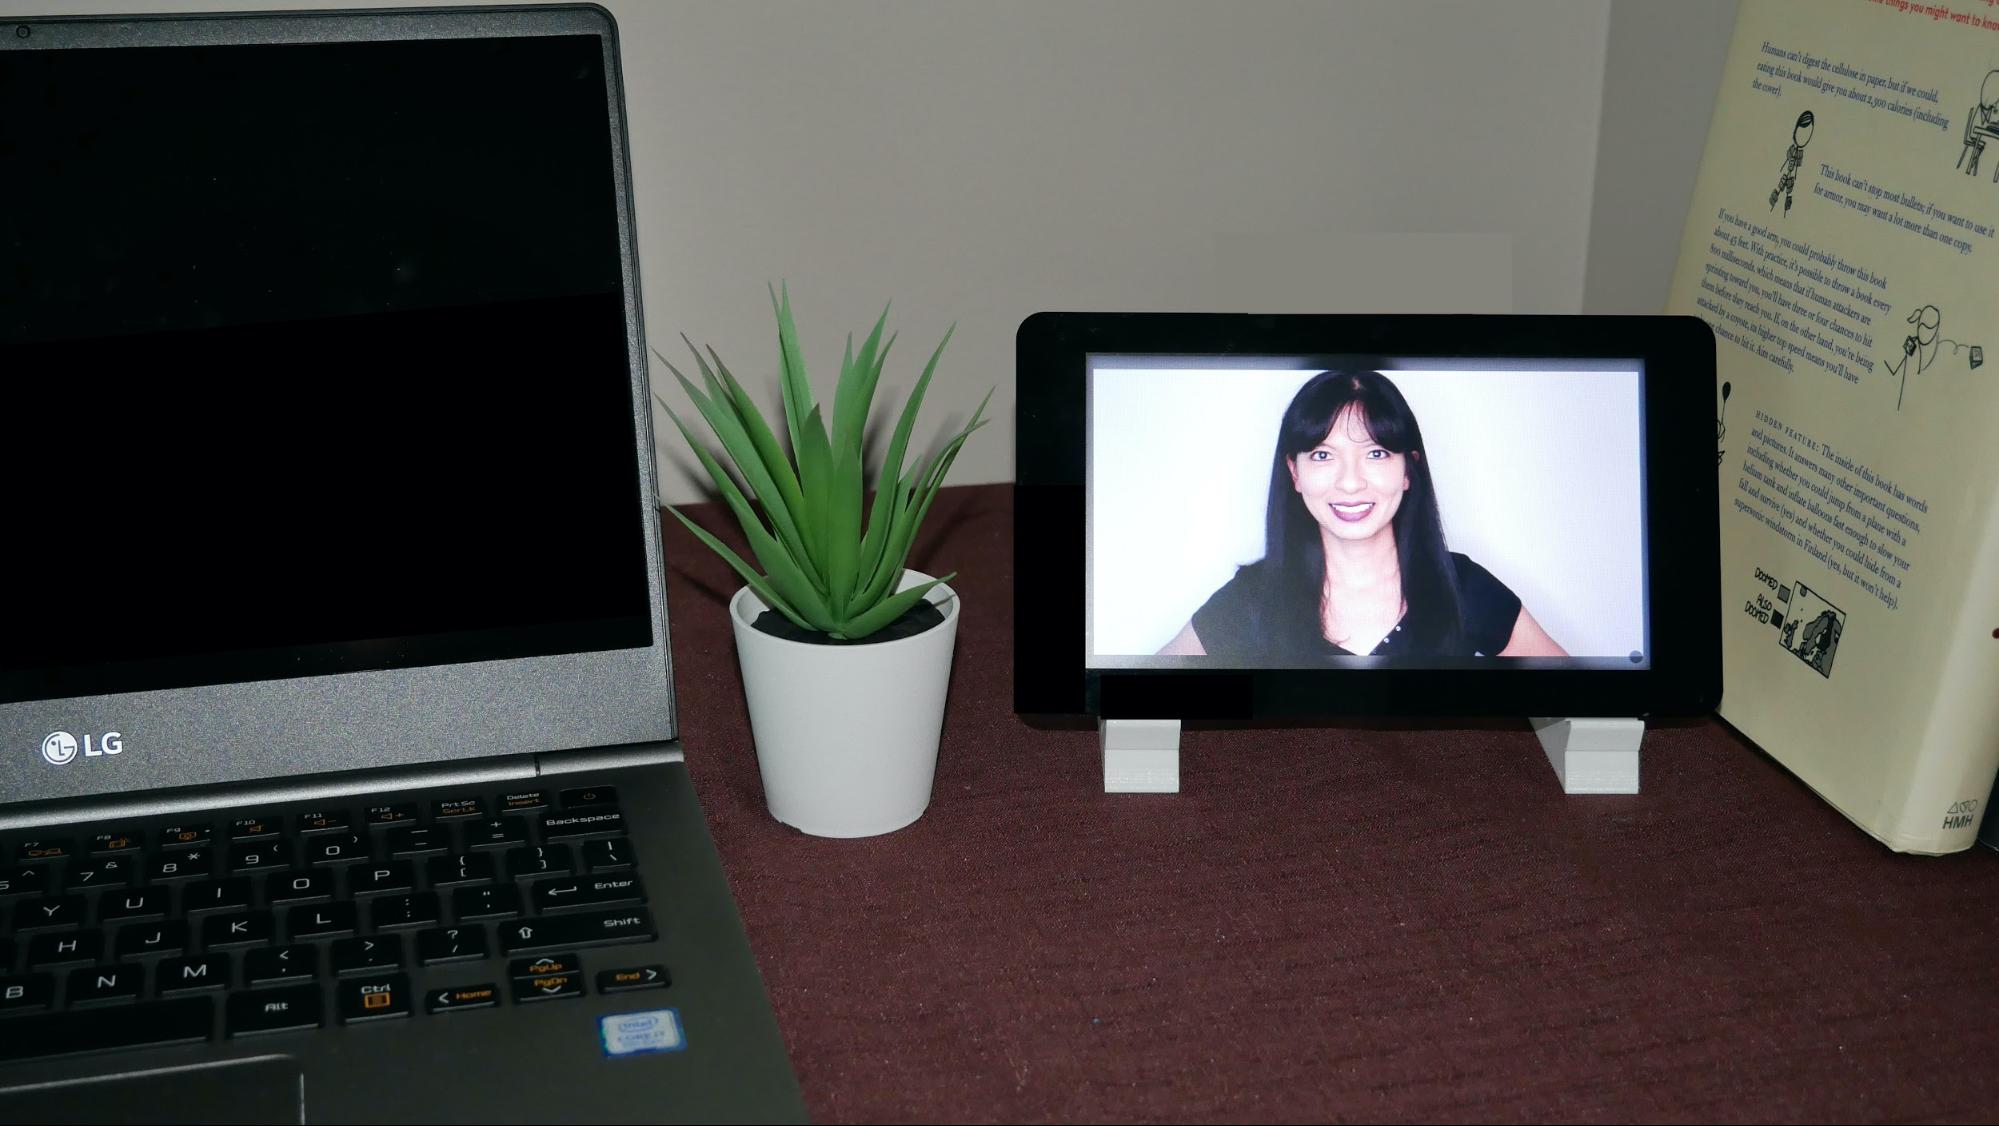
A digital photo frame is a small screen that can sit on your desk in your office or in your kitchen displaying your favorite pictures, changing at regular intervals. The first commercial digital photo frame was introduced in the 1990s shortly after the digital camera. Digital photo frames made a comeback in popularity during 2020, perhaps because people were staying at home more.
In this tutorial, we’ll turn our Raspberry Pi into a digital photo frame using MagicMirror and the GooglePhotos module. Please note, we will skip installation of the 2-way mirror in the original Magic Mirror project. Consider this project, “Magic Mirror, without the mirror.”
What You’ll Need
Any Raspberry Pi 4 or Raspberry Pi 3B+, or the new Raspberry Pi 400. Raspberry Pi Zero W is not supported.
8 GB (or larger) microSD card (see best Raspberry Pi microSD cards) with a fresh install of Raspberry Pi OS with Desktop. Raspberry Pi Lite is not supported.
Power supply/Keyboard/Mouse/Monitor/HDMI Cable (for your Raspberry Pi)
HDMI monitor, 7” Raspberry Pi Touchscreen, or 3.5” or 5” TFT screen.
Stand for your Touchscreen or TFT screen. Here’s one I 3D printed for this project.
Your Gmail account.
Timing: Plan for a minimum of 1 hour to complete this project.
The majority of this tutorial is based on terminal commands. If you are not familiar with terminal commands on your Raspberry Pi, we highly recommend reviewing 25+ Linux Commands Raspberry Pi Users Need to Know first.
Setting up Your Google Photos Album
To get started with this project, you’ll need to set up a Google Photo Album. We suggest that you create a new Photo Album and add 5 to 10 photos. You can add more photos later. The more photos in your album, the longer your Raspberry Pi digital photo frame will take to load.
On your preferred browsers on your existing laptop or desktop computer, navigate to https://photos.google.com/
In the left menu column, click Albums.
ClickCreate Album.
Name your album something easy to remember. I recommend “MagicMirror” for your album name.
Once you have created your album, add 5 to 10 photos to your MagicMirror photo album. You can drag and drop to upload new photos or select from your existing photos to add.
Basic Magic Mirror Install on Raspberry Pi
1. Connect your screen, mouse and keyboard to your Raspberry Pi.
2. Boot your Raspberry Pi. If you don’t already have a microSD card see our article on how to set up a Raspberry Pi for the first time or how to do a headless Raspberry Pi install.
3. Update Raspberry Pi OS. Open a terminal and enter:
sudo apt-get update && sudo apt-get upgrade
(Image credit: Tom’s Hardware)
4. Perform a basic installation of Magic Mirror on our Raspberry Pi with the instructions from the official Magic Mirror page. The commands should execute fairly quickly with npm install taking the longest depending on your Raspberry Pi model and internet speed. On a Raspberry Pi 4 with high speed internet, npm install took approximately 5 minutes to execute.
Your Raspberry Pi screen should now be filled with the default Magic Mirror screen.
(Image credit: Tom’s Hardware)
5. Hit Ctrl-M to minimize and return to the Pi desktop.
6. Press Ctrl-C to stop Magic Mirror. This step is necessary to install the module that will show our Google Photos.
(Image credit: Tom’s Hardware)
Google Photos Installation on Magic Mirror
1. In the Pi terminal, install the Google Photos module.
cd ~/MagicMirror/modules
git clone https://github.com/eouia/MMM-GooglePhotos.git
cd MMM-GooglePhotos
npm install
2. Open your Chromium browser and navigate to Google API Console. Login with your gmail account credentials. Full Link: https://console.developers.google.com/
3. Create a new project with a name of your choice. I named my project ‘MagicMirror123’.
4. Click ‘+ Create Credentials’ and select ‘OAuth client ID’.
(Image credit: Tom’s Hardware)
5. For Authorization Type, select ‘TVs and Limited Input devices’ from the dropdown menu
(Image credit: Tom’s Hardware)
6. Click ‘Create’ to create your OAuth client ID.
(Image credit: Tom’s Hardware)
7. Click ‘OK’ to return to the main Credentials page for your project.
(Image credit: Tom’s Hardware)
8. On the OAuth 2.0 Client ID you just created, click the down arrow to download your credentials.
(Image credit: Tom’s Hardware)
(Image credit: Tom’s Hardware)
9. Open your File Manager from your Raspberry Pi desktop, navigate to Downloads and rename the file you just downloaded from ‘client_secret-x.json’ to ‘credentials.json’.
(Image credit: Tom’s Hardware)
10. Move your newly renamed ‘credentials.json’ file to your MagicMirror/modules/MMM-GooglePhotos folder.
11. In your Terminal, run the following command to authenticate your Pi.
cd ~/MagicMirror/modules/MMM-GooglePhotos
node generate_token.js
12. Select your account when Google prompts you to authorize your device.
(Image credit: Tom’s Hardware)
13. Scroll down, click ‘Advanced’ and then ‘Go to MagicMirror (unsafe)’.
(Image credit: Tom’s Hardware)
(Image credit: Tom’s Hardware)
14. Grant MagicMirror permissions on the following screens by clicking ‘Allow’ for each prompt.
(Image credit: Tom’s Hardware)
(Image credit: Tom’s Hardware)
(Image credit: Tom’s Hardware)
15. Copy your Success code and paste it into your terminal. Press Enter.
(Image credit: Tom’s Hardware)
(Image credit: Tom’s Hardware)
16. Open your File Manager and navigate to /home/pi/MagicMirror/modules/MMM-GooglePhotos or type ‘ls’ in your Terminal (within the MMM-GooglePhotos directory) to view all files. If you see token.json as a file within this folder, you have successfully authorized your device to access your Google Photos.
(Image credit: Tom’s Hardware)
17. Open the config.js file for editing in the /home/pi/MagicMirror/config folder.
(Image credit: Tom’s Hardware)
18. In your config.js file, comment out all modules except for notifications by adding ‘/*’ before the Clock module and ‘*/’ after the Newsfeed module.
(Image credit: Tom’s Hardware)
(Image credit: Tom’s Hardware)
19. Add the code for MMM-GooglePhotos into the modules section of your config.js file.
{
  module: "MMM-GooglePhotos",
  position: "fullscreen_above",
  config: {
		albums: ["MagicMirror"], // Set your album name.
		updateInterval: 1000 * 60, // minimum 10 seconds.
		sort: "random", // "new", "old", "random"
		uploadAlbum: null, // Only album created by `create_uploadable_album.js`.
		condition: {
			fromDate: null, // Or "2018-03", RFC ... format available
			toDate: null, // Or "2019-12-25",
			minWidth: null, // Or 400
			maxWidth: null, // Or 8000
			minHeight: null, // Or 400
			maxHeight: null, // Or 8000
			minWHRatio: null,
			maxWHRatio: null,
		},
		showWidth: 800, // Set this to the resolution of your screen width
		showHeight: 480, // Set this to the resolution of your screen height
		timeFormat: "YYYY/MM/DD HH:mm", // Or `relative` can be used.
  }
},
20. In the config section of MMM-GooglePhotos, enter the name of the album you created at the beginning of this project in the ‘albums’ parameter.
(Image credit: Tom’s Hardware)
21. Set the order in which you wish to view your photos in the ‘sort’ parameter.
New = latest images will display first
Old = images will display from oldest to newest
Random = images will display in random order
22. Set the frequency to change the images in the ‘updateInterval’ parameter. The default is 60 seconds.
23. Set the resolution of the screen that you are using in the parameters ‘showWidth’ and ‘showHeight’. The default resolution for the 7” Raspberry Pi screen is 800 x 480.
(Image credit: Tom’s Hardware)
24. Save your changes in config.js.
25. In your terminal, run the command ‘npm run start’ to restart your Magic Mirror. There will be a 30 second or more delay while your Pi pulls images from your Google Photos album. Your Pi will need to stay connected to the internet to display your images.
(Image credit: Tom’s Hardware)
26. To stop Magic Mirror, press Ctrl-M followed by Ctrl-C in the terminal. You can continue to make adjustments in your config.js file until you are happy with the way that your images are displayed.
27. At this point, you can start adding more images to your Google Photos album. Your Raspberry Pi Magic Mirror digital photo frame should automatically update with any new images.
Launch Magic Mirror on Boot
If you reboot your Pi, you’ll need to enter the command ‘npm run start’ each time you want to start your digital photo frame. Let’s set our Raspberry Pi to display our digital photo frame on boot.
1. Install PM2 by running the following commands in your Raspberry Pi terminal. PM2 is a daemon process manager to keep your applications running continuously. In this project we will utilize PM2 to continuously run Magic Mirror for our digital photo frame.
sudo npm install -g pm2
pm2 startup
(Image credit: Tom’s Hardware)
2. Your terminal will provide the next command. Copy and paste the command into your terminal.
sudo env PATH=$PATH:/usr/bin /usr/lib/node_modules/pm2/bin/pm2 startup systemd -u pi --hp /home/pi
(Image credit: Tom’s Hardware)
(Image credit: Tom’s Hardware)
3. Create a shell script named mm.sh.
cd ~
nano mm.sh
(Image credit: Tom’s Hardware)
4. Within mm.sh enter the commands to start Magic Mirror.
cd ./MagicMirror
DISPLAY=:0 npm start
(Image credit: Tom’s Hardware)
5. Press Ctrl-X to exit, ‘y’ to Save mm.sh, and Enter to return to the Terminal.
(Image credit: Tom’s Hardware)
6. Make mm.sh an executable file with the chmod command.
chmod +x mm.sh
(Image credit: Tom’s Hardware)
7. Start your Magic Mirror with PM2.
pm2 start mm.sh
(Image credit: Tom’s Hardware)
Your Magic Mirror should automatically start running again. You can test your auto start functionality with a reboot now.
(Image credit: Tom’s Hardware)
Disable Screen Blanking
You may find that after setting up your automatic digital photo frame that your Raspberry Pi screen goes blank after 10 minutes. In this case, you can disable screen blanking.
1. Navigate to the Raspberry Pi Configuration menu. From your Raspberry Pi start menu, click ‘Preferences’ and select ‘Raspberry Pi Configuration’.
(Image credit: Tom’s Hardware)
2. Toggle Screen Blanking to Disable on the Display tab. Select the ‘Display’ tab. For ‘Screen Blanking’ select Disable. Click OK.
In order to promote the development of its own electric car, Apple allegedly also had talks with the startup Canoo: In several meetings in the first half of the year 2020 various options have been explored – from an investment to a takeover, as The Verge reports with reference to informed persons.
Chassis for electric cars Canoo, the was founded by former top managers of German car manufacturers, develops a platform for electric vehicles (“skateboard”) and recently introduced the battery-powered MPDV delivery van. Canoo was probably primarily concerned with an injection of funds from Apple, because money had become tight after the development of the prototype of a planned electric van, notes The Verge . The talks with Apple ultimately fizzled out. Canoo also had talks with other companies from the USA and China.
In February 2020 Hyundai and Canoo have announced a partnership in the development of an electric car, the South Korean auto giant has been the first major customer to order an EV skateboard from Canoo. There have recently been several reports of a collaboration between Hyundai and Apple to develop a car, Hyundai only confirmed talks with the iPhone company, only to row back a short time later.
Electric multifunction delivery van Canoo MPDV (01 Pictures) (Image: Canoo
) Apple Car – only when? It is currently expected that Apple still needs several years to implement an Apple Car. Production in partnership with Hyundai could begin 2020 in the USA, it was said recently, but Apple wanted to do so first already offer a “beta version” of the vehicle. An Apple car has been under discussion for several years, since 2014 the manufacturer has been researching vehicles and autonomous systems – a three- to four-digit number of employees seem to be involved in the secret project, including many specialists from the automotive industry.
Nuvia made headlines last fall when it announced that the company’s Arm-based Phoenix core would hit both competing Arm and x 86 cores from the board.
System circuit giant Qualcomm has decided to start the year 2021 with an acquisition. The company announced yesterday that it would buy the startup company Nuvia for just over 1, 15 billion euros. The transaction will, of course, require the approval of the competition authorities.
Nuvia is 2018 a technology startup founded by former Apple processor designers, among others, that is developing its own Arm-based Phoenix core from a clean slate. Last August, the company announced that its kernel would crush current competition in the 1- to 4.5-watt power consumption class per core, compared to Apple’s and Qualcomm’s Arm kernels and AMD’s and Intel’s x 86 kernels.
According to a Qualcomm press release, the company has turned a blind eye specifically to Nuvia’s processor cores, although naturally the engineering skills behind it are also a welcome addition to the house. Qualcomm previously designed its own Arm cores, but has since moved to more moderately custom Cortex-A series cores. According to the release, Qualcomm will replace existing Cortex-A-based processor cores with Nuvia processor cores across the company’s product line.
The American electronics fair CES, together with the Berlin IFA, has become an important place of pilgrimage for gadget fans. With the pandemic, the happening was pushed into virtual space. But that now enables interested parties from Japan to introduce themselves to the world without much travel. Nippon’s foreign trade organization Jetro managed to steer more startups onto the global tech stage than ever before.
53 Companies now presented their ideas digitally at CES, twice as many as a year earlier. And with its own “Japan Session”, Jetro put the offensive into a larger framework: Japan’s companies, so the idea, transform the super-aging into a super-smart society with new visions and solutions.
Furry creature The action was at least partially successful. The startup Vanguard Industries received a “Best Innovation Award” for its hand-sized, furry robot creature “Moflin”, which can beep and respond to touch. The creator Masahiko Yamanaka promises a companion who can learn and develop thanks to artificial intelligence.
The machine pet had already made it into the top in its crowdfunding campaign on the Kickstarter platform – 10 Robot projects completed. Yamanaka was already getting a proud price from his investors: 41. 800 Yen, always 330 Euro – or a good one Euro for one gram of “live weight”.
The award-winning startup was by no means the only company that advertised itself with robots. South Korea’s electronics company Samsung sent in a trio: a robot vacuum cleaner JetBot 90 AI +, which can detect the type of obstacle; the communication robot Samsung Bot Care, which is supposed to talk to people, and the robot butler Samsung Bot Handy, which uses its robotic arm to load the dishwasher and pour wine.
First drone from Sony Other major topics from Asian manufacturers were televisions, which, thanks to the pandemic, are enjoying great popularity just like notebooks and computers. Sony also used the exhibition to present its venture into the air: the first drone from the new Airpeak brand. This is a fairly large device that generates enough lift with four wings to let one of Sony system cameras fly next to cars at high speed.
Japan has always tried everything possible with electronics – and often the impossible. Every Thursday our author Martin Kölling reports on the latest trends from Tokyo.
Another highlight was Sony’s the real remote control of a virtual three-dimensional avatar. The application was supplied by the owner of film and music studios at the same time: The electronics and entertainment company explained how it recorded a virtual concert with the American singer Madison Beer in which the 21 – year olds moved their digital counterparts on a digital stage, where the audience can choose their own perspective.
This opens the door to Sony new real-virtual hybrid experience that fits particularly well with this pandemic period of popular amusement. Sony’s rival Panasonic also provided a glimpse into the future of virtual reality (VR) – with VR glasses that are a bit reminiscent of glacier glasses.
The company even proved that it was involved in one point can keep up with the Japanese robot startup. The Sound Slayer gaming speaker also received an innovation award from the trade fair. Like the pet robot, the award also fits in with the new everyday life in the pandemic. The device promises that thanks to the surround sound from the flat, compact loudspeaker, video players can lose themselves even more in their dream worlds than before. (bsc)
Qualcomm on Wednesday said that it had agreed to acquire Nuvia, a small yet ambitious microprocessor startup. The takeover of Nuvia will get Qualcomm a high-performance CPU design along with a proven CPU and system architecture design team, something that could give a strong boost to the company’s mobile and PC system-on-chip (SoC), and eventually server SoC businesses.
“CPU performance leadership will be critical in defining and delivering on the next era of computing innovation,” said Gerard Williams, CEO of Nuvia. “The combination of Nuvia and Qualcomm will bring the industry’s best engineering talent, technology and resources together to create a new class of high-performance computing platforms that set the bar for our industry. We couldn’t be more excited for the opportunities ahead.”
Qualcomm Gets New CPU Technology
Under the terms of the agreement, Qualcomm will pay $1.4 billion for Nuvia. It will get Nuvia’s CPU designs and technologies. Furthermore, the founders of Nuvia will join Qualcomm’s team, including John Bruno, Manu Gulati, and Gerard Williams III, who previously worked on CPUs and system architectures at Apple, AMD, Arm, and Google.
(Image credit: Qualcomm)
Qualcomm says that Nuvia’s CPU technology will be used for its Snapdragon SoCs for smartphones and next-generation always-connected PCs (ACPCs) running Microsoft’s Windows or Google’s Android. In addition, the same technology will be used for Qualcomm’s platforms for self-driving cars. As Qualcomm plans to address smartphones and PCs with Nuvia’s technologies, it expects to become a much stronger rival for companies like AMD, Apple, Intel, and Nvidia if the latter succeeds in taking over Arm.
“Creating high performance, low-power processors and highly integrated, complex SoCs are part of our DNA,” said Jim Thompson, Chief Technology Officer of Qualcomm. “Adding Nuvia’s deep understanding of high-performance design and integrating Nuvia CPUs with Snapdragon – together with our industry-leading graphics and AI – will take computing performance to a new level and drive new capabilities for products that serve multiple industries.”
Meanwhile, Qualcomm did not disclose whether it has plans to use Nuvia’s processors for SoCs aimed at datacenters that could succeed the company’s ill-fated Centriq CPUs.
All major partners of Qualcomm, including Microsoft, Google, Samsung, Acer, Bosch, HP, Lenovo, LG Electronics, Renault, and numerous others have already endorsed the acquisition of Nuvia and expressed excitement about the prospects.
Ambitious Plans
John Bruno, Manu Gulati, and Gerard Williams III founded Nuvia back in 2019 with a plan to disrupt the cloud server market with a system-on-chip that would offer a significantly higher performance at a fraction of the power of x86 CPUs.
(Image credit: Nuvia)
Nuvia’s very first server SoC that the company described last year is called Orion, and it is based on custom Phoenix cores. The latter is believed to be based on Arm’s Armv9 architecture yet features a revamped pipeline designed to enable the core to scale from power/thermally constrained designs to machines designed for unconstrained performance.
Last year, Nuvia demonstrated its Phoenix core’s simulated performance compared to Apple’s Lightning and Vortex, Intel’s Sunny Cove and Skylake, AMD’s Zen 2, and Arm’s A77 cores in Geekbench 5. Based on the numbers showcased by Nuvia, its Phoenix could deliver at least 50% higher peak performance (2000 points vs. 1300 points) than AMD’s Zen 2 and Intel’s Sunny Cove at 1/3 of power (4.50W vs. 14.80W) or around 2.5 times higher per-core performance at the same (4.50W) power.
Nuvia never announced that it had taped out its Orion SoC or Phoenix core, so nobody outside of the company understands the design’s readiness.
Phoenix to Meet Snapdragon
Assuming that Nuvia’s Phoenix is ready now, it could be used for Qualcomm’s Snapdragon SoCs that will be released sometime in 2022 at the earliest. That said, it will have to compete against Apple’s, AMD’s, and Intel’s cores due in the coming years. Therefore, it remains to be seen how competitive the core will be against next-generation rivals.
(Image credit: Qualcomm)
Historically, Qualcomm has developed its custom Arm cores called Kryo, but they are largely based on Arm’s off-the-shelf designs and do not offer tangibly higher performance than the standard Cortex-A series. With a full-custom core design, Qualcomm will likely be able to offer considerably higher performance, which might make smartphones and laptops running next-generation Snapdragon SoCs more competitive against handsets powered by Apple’s SoCs or notebooks based on processors from AMD or Intel.
What is particularly important is that original designers of the new core will join Qualcomm and will continue to develop their Phonix core architecture, which pretty much guarantees steady performance gains in the coming years, making Qualcomm’s SoCs considerably more competitive going forward.
General Motors announced Tuesday it will be spinning out a new delivery and logistics business called BrightDrop, the first products of which will be an electrified pallet and delivery van. Both vehicles, which will be powered by GM’s Ultium battery platform, are slated for release this year.
The announcement of the new logistics business comes as GM is undergoing a massive, $27 billion pivot to the business of designing and manufacturing electric vehicles. For example, the company, which is the largest automaker in North America, just unveiled a new logo as part of an overall brand redesign. GM has been nipping at the heels of Tesla and other EV makers as it attempts to convince its investors that it has a firm grasp on the future of electric-powered transportation.
BrightDrop will be a key piece of that pivot, in which hundreds of thousands of electric delivery vehicles are expected to hit the road in the years to come. GM envisions the new company “creating a one-stop shop, a complete ecosystem” for electric-powered delivery, including vehicles, software, and other services, said Pamela Fletcher, VP of GM’s global EV program.
The first vehicle to roll out with the BrightDrop branding will be a delivery pallet called EP1. The pallet, which can be used to transport packages from a delivery vehicle to a customer’s front door, will have an Ultium-powered electric propulsion that will allow a top speed of 3 mph. Packages can be secured within the EP1 pallet, which comes with adjustable shelving and lockable cabinet-style doors. In addition, EP1 can carry up to 23 cubic feet of cargo and will have a payload capacity of 200 pounds.
Fletcher says that the EP1 is meant to address the problem seen with package delivery today, in which “packages are often strewn on city sidewalks,” haphazardly and unsecured. “We saw this as a solution to create a completely different environment for delivery,” Fletcher continued, “really to help package touch points, reduce errors, reduce physical strain on those delivering the goods, help optimize curb time, and help reduce overall operational costs for businesses.”
GM partnered with FedEx Express on a pilot last year to test out the EP1. Using the electric pallet allowed FedEx workers to handle 25 percent more packages a day, Fletcher said.
The EP1 will go into production in “early 2021,” Fletcher said. Following that will be the EV600, a 250-mile range delivery van with 600 cubic feet of cargo space and a gross vehicle weight rating of 10,000 pounds. It will have a peak charge rate of up to 170 miles per hour when hooked up to a 120kW DC fast charger. That vehicle will go into production in late 2021, with the first vehicles to be delivered by the end of the year.
The BrightDrop EV600 will include a security system with motion sensors to help keep the cargo area secure. Other features include front sliding pocket doors, wide cabin walkways, and a large auto-open cargo bulkhead door. The commercial vehicles will come with a number of advanced driver assist features, including blind spot detection, lane keep assist, and front and rear parking assist. A fairly sizable 13.4-inch digital infotainment screen is sure to be the centerpiece of the interior.
FedEx has expressed interest in buying an unspecified number of EV600 delivery vans, said Fletcher, who also alluded to several other unnamed interested customers. “We have letters of intent signed from a number of other customers, and we want to be talking to you about those in the not too distant future,” she said. Fletcher declined to reveal the suggested retail price for the EP1 and EV600.
BrightDrop is also offering a range of software to customers who purchase its new commercial vehicles. This will enable customers to track the location of each EP1 pallet, remote lock and unlock each pallet, and monitor battery status. EV600 will also get battery status and location monitoring features, as well as driver safety coaching and incident recording, remote diagnostics, safety alerts and predictive maintenance insights, and over-the-air updates.
Rumors of a GM-made electric delivery van, nicknamed “BV1,” first surfaced last year, after the company unveiled its Ultium EV platform along with plans to roll out two dozen new electric vehicles over the next few years.
GM has found success with its Chevrolet Express and, to a lesser extent, GMC Savana cargo vans. But it’s far from the only company working on an electric van. Mercedes-Benz is making an electric version of its popular Sprinter van, while Ford recently revealed the E-Transit with 126 miles of range and a $45,000 price tag. Amazon is working on an all-electric delivery vehicle with the EV startup Rivian. Two other startups recently unveiled electric vans: Bollinger with its Deliver-E and Canoo with its scalable vehicle, both due in 2022.
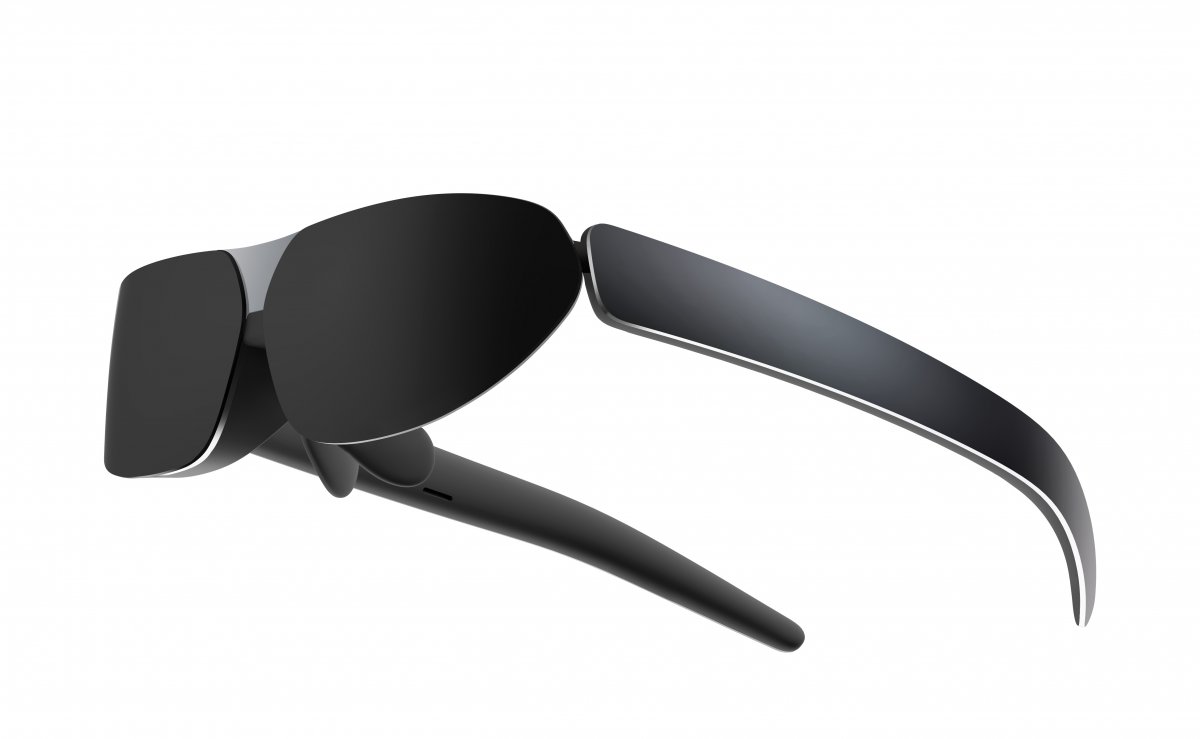
Anyone who has recently looked around at the booths of the Chinese electronics company TCL has almost always found display glasses somewhere. As part of the exclusively digital CES, the group has now announced the market launch of the wearable display for this year. The group also wants to make offers for tablet fans.
Cinema on the nose The wearable display is not a smart pair of glasses, but rather a cinematic experience to take with you. TCL has transplanted two mini OLED displays onto the inside of the glasses, each showing full HD. According to TCL, this corresponds to the viewing experience one has when viewing a film on one 65 four inch screen Meters away. TCL specifies the pixel density with 49 pixels per degree (PPD).
(Image: TCL)
The glasses themselves only house the two displays and are dependent on an external player to play media – even games can be displayed on them. This can be a laptop or a smartphone that outputs display signals via USB-C. According to Stefan Streit, General Manager of Global Marketing at TCL, the transmission works exclusively via cable. When asked, he did not provide any specific information on prices and availability. However, the market launch “in a bundle” should be this year. The US startup Avegant had already shown its Glyph video glasses at CES 2017. Royole also pursued the concept of mobile cinema with the Moon.
LCD panel like paper? TCL
The also presented Nxtpaper tablet is supposed to combine the advantages of IPS and e-ink displays. In contrast to conventional LCD displays, TCL does not have a backlight on the 8-inch Nxtpaper. Instead, a special layer below the pixel level should reflect the ambient light and thus enable a representation almost as if it were printed. The display does not suffer from the slow image build-up that is typical for e-inks, so that films can also be played on it. According to TCL, the display should be up to 24 percent more contrast than E-Inks and 65 Consume percent less electricity than conventional LCD displays. Unlike this, however, the Nxtpaper display depends on ambient light. According to TCL, the display can also handle pen input.
TCL equips the tablet with a 5500 – mAh battery off, which should allow 10 hours of continuous use. The Android – – Tablet comes with a MediaTek MT 8768 E, which is usually found in entry-level devices. The 64 GByte memory can be expanded. The market launch is announced for April, TCL calls for the device 140 Euro.
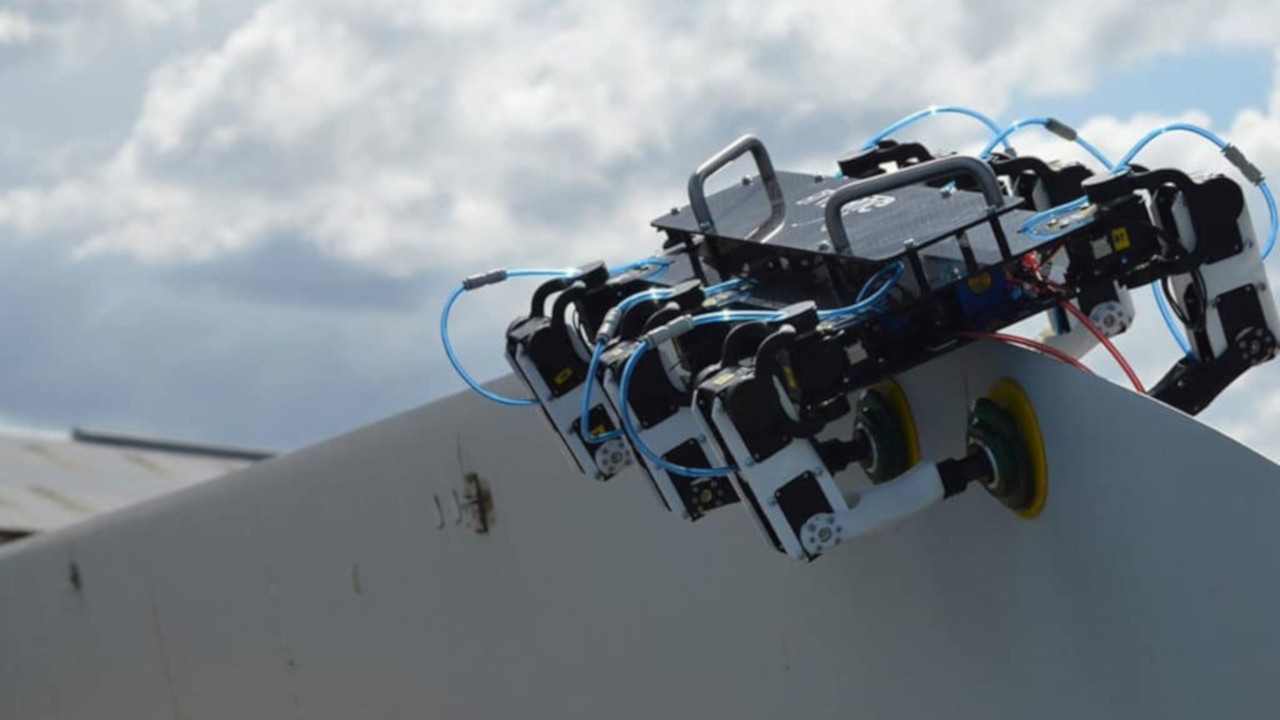
BladeBUG, this is the name of the startup British company that developed the robot of the same name: shapes similar to those of an insect and designed to inspect, maintain and make small repairs on wind turbine blades especially in particular service conditions such as offshore
by Carlo Pisani published 10 January 2021 , at 19: 01 in the Science and Technology channel
BladeBUG , this is the name of the startup British who developed the robot of the same name: forms similar to those of an insect and thought to inspect , maintain and make minor repairs on the blades of wind turbines especially in particular service conditions such as offshore.
The idea came from the founder and CEO of BladeBUG Chris Cieslak , who, in the course of his work experience, has also had to do with the design of blades for wind turbines, identifying a gap in the market or that of machines designed to preserve these components in excellent condition, with the ultimate aim of optimize maintenance downtime and in general the efficiency of the entire system .
The result is the robot you see in the video proposed here, equipped with six legs with suction cups at the ends which can change shape while s they triss along the blades to ensure the best possible grip in all conditions. On board the BladeBUG there are several cameras designed to provide images to the operator who controls remote operations, as well as different types of sensors developed to find damage or any surface imperfection that hinders the efficiency of the object wind turbine inspection.
Click to enlarge
The BladeBUG was funded by Industrial Strategy Challenge Fund , an industrial innovation program of the British government, and appears to have already partnered with the Offshore Renewable Energy Catapult , the UK’s leading technology innovation center for offshore wind, wave and tidal energy.
In October 2020, the robot BladeBUG has already walked with success on an offshore wind turbine in Scotland, in 2021 will continue development and related commercial trials while aiming to 2022 as the year of its effective availability on the m global market ; for more images and information about it, please visit the official company page.
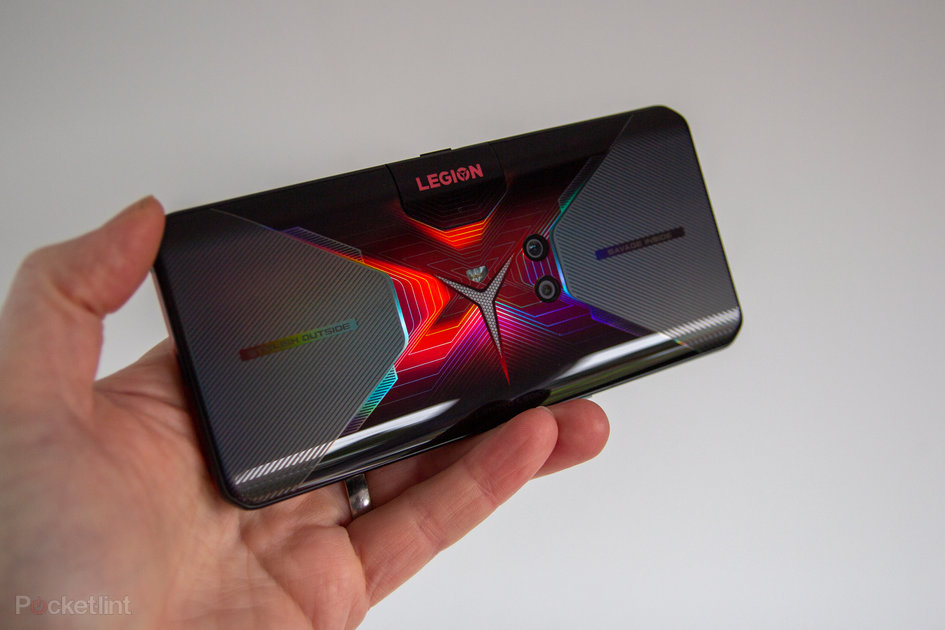
(Pocket-lint) – Lenovo’s Legion brand is a regular on the PC gaming front, so it’s perhaps no surprise that the company set forth under these auspices with its dedicated gaming phone.
It’s a segment of the market that’s seen plenty of activity in recent years, with Asus using its ROG brand to the same end, and Razer, Black Shark and Red Magic all attempting the same thing.
But can the Lenovo Legion dominate the gaming battleground?
Designed for gaming
Dimensions: 169.2 x 78.5 x 10mm / Weight: 239g
In-screen fingerprint scanner
Pop-up side camera
Stereo speakers
Rear RGB logo
There’s nothing subtle about the Legion Phone. Lettered with the words “stylish outside, savage inside” the complex finish to the exterior of the phone is designed to catch the eye. It shimmers when the light catches it, centred around a central LED decoration, much in the same way as a gaming PC flaunts its wares with RGB lighting.
Pocket-lint
The Legion branding can be set to illuminate and that rear logo can be set to pulse when gaming, as a notification or when charging. Thankfully, you get full control, so you can turn off the red flashing when charging at night.
The Legion is a big phone, with a flat display and healthy bezels, giving you somewhere to grip without obscuring the display and risking accidental touches, while the front-facing camera is a pop-up unit on the landscape side of the phone. Yes, to save you from notches or punch-holes – and to ensure face time in-game – the camera has moved completely.
There’s some texture to rear sections of the phone to provide a modicum of grip, while the cameras, again, sit in the centre of the rear rather than at the top. That means you’re not putting your fingers all over them when gaming.
From a design point of view, therefore, this phone was built to serve people who spend most of their time playing games in landscape orientation.
Pocket-lint
Many of these decisions serve that market in a way that other phones cannot: there’s no camera bump to get in the way; the wide speakers at either end of the display are hard to obscure with a hand; and there’s even a charging port on the side so you can charge and play at the same time.
And much about this we love. We spend several hours of every day gaming, so many of these things appeal directly to us. The Legion Phone feels clean to hold and play, there’s grip, the sound quality and volume is excellent. Normal phones compromise on gaming, but this device does not.
But there’s a cost to this gaming-specific design and that’s in the day-to-day experience. The other 7 or 8 hours of the day when you’re not head-down in the latest shooter, you have to live with compromises that have been made to support gaming.
Those rear cameras that are out of the way when playing are covered by your hands the rest of the time. Open the camera to take a shot and invariably you’ll have a hand in the way. The same applies to the pop-out front camera – if you’re gripping the phone and want to take a selfie, it opens into your fingers or hand.
Pocket-lint
There’s also no denying that this is a hefty phone at 236g and pretty chunky by design too. It’s bigger and heavier than the Samsung Galaxy S20 Ultra – but the Samsung phone has a larger display. Again, some of the Legion’s additional bodywork can be a bit of a drawback during daily use, even if it will be acceptable to seasoned gamers.
Performance was put at the fore of the Legion Phone experience and that explains many of the decisions behind this phone. But while there have been moves made to accommodate higher demands, it doesn’t hang together quite as well as you might think.
At the heart of this phone is the Qualcomm Snapdragon 856 Plus, 5G enabled, with 16GB RAM and 512GB storage. It’s a monster loadout and given how much phone you’re getting, it’s good value for money compared to a lot of the rest of the market.
Pocket-lint
And we can’t fault much of the performance, although we’re not convinced by the heat dissipation and cooling system. Lenovo has talked this up a lot, but you can feel the heat from the Snapdragon 865 under your fingertips towards the centre of the phone. Having come from reviewing the Sony Xperia 5 II and the Samsung Galaxy S20 FE, both on Snapdragon 865 and both subjected to similar long periods of gameplay, the Legion Phone feels noticeably hotter under load.
That makes us question how much is really effective here and how much is just part of the marketing package to push the gaming angle. Certainly, the in-game experience isn’t hugely different from a performance point of view when put alongside rival flagship devices.
Lenovo does have more accessories for the Legion phone, including a cooling unit, but do you really want to add more weight? At the same time, that sense of heating might just be down to the fact that your fingertips are always resting on the hottest part of the phone.
Pocket-lint
The huge 5000mAh battery capacity is appreciated too. It’s split into two cells, the sell here being that you can charge super-fast – at 90W using the two USB inputs at the same time. There’s a charger in the box that will give you two USB connections too, so you don’t need two separate chargers (although that also works). When connected you’ll get one or two charging logos appear depending on how you’ve hooked it up and we have to say the charger on the side is convenient for charging while playing games or watching movies.
But the battery life isn’t hugely strong. It’s driving a big display, it’s driving up to 144Hz refresh rate too, there’s big volume and brightness, so there’s plenty to drain the battery. It’s not hugely different to the S20 Ultra in that sense (also a 5000mAh cell), but we’ve had smaller devices offer better overall endurance.
Pocket-lint
Step out of gaming and yes, it will get you through the day easily enough, but this is still a big phone and it can suffer from big phone problems. With all that said, the Legion Phone is very much on a par with other Snapdragon 865 devices – it’s fast and fluid, with very little sign of any slowdown.
Display
6.65-inch AMOLED, 2340 x 1080 resolution
144Hz refresh rate, 240ms response
Lenovo’s big play with the display is offering a 144Hz refresh rate – the same as you’ll find on many gaming PCs. Smartphones have been pushing faster refresh rates – 90Hz, 120Hz – but 144Hz is less common. Is it a big difference? Not really, but it’s there for bragging rights.
What you also need to consider is the games you’re playing, as not all support those higher frame rates. Some, like Real Racing 3, will run at 144Hz – and looks glorious – but PUBG Mobile is 40Hz, while Call of Duty Mobile is 60Hz (even though it’s available at higher frame rates on other devices).
Pocket-lint
What’s more encouraging is that you can check the refresh rate you’re getting thanks to Lenovo’s software and make sure that when you make changes to the game’s settings, you’re actually getting that performance.
Step aside from that and the 1080p resolution isn’t a surprise given that frame rate is the target rather than absolution resolution, not that Full HD+ on a 6.5-inch display is bad per se. The display itself is bright and vibrant – everything you expect from an AMOLED panel – and that plays through into other content too, like watching movies.
Pocket-lint
Overall, it’s hard to fault the display’s performance. Although there is one quirk: the display settings page was completely blank. It’s not the end of the world as you can adjust the brightness from the quick settings and you can adjust the frame rate within the Legion Realm settings – but it’s one of a number of cracks in Lenovo’s software that shows it’s not on a par with the experience offered by, say, Samsung or OnePlus.
Cameras
Dual rear camera:
Main: 64-megapixel, f/1.9 aperture
Wide: 16MP, f/2.2
20MP front camera, f/2.2
There are two cameras on the rear of the Legion Phone, a 64-megapixel main camera and a 16-megapixel ultra-wide camera. It’s nice that Lenovo has spared us the trash lenses that are so common – there’s not a depth sensor, monochrome sensor or macro camera in sight (although there is a macro mode on the main camera that works better than any dedicated macro lens we’ve seen elsewhere.)
That gives a couple of sensible cameras, the main 64-megapixel pixel combining to give 16-megapixel results. It’s actually a capable camera, able to give some great shots, but it favours good lighting, unable to lift the images as you might get from something like the Google Pixel when the light drops.
Samsung’s new TV tech, ZTE Axon 20 5G reviewed and more – Pocket-lint Podcast 85
1/3Pocket-lint
That said, there is a night mode that enables longer exposures and it works well enough. Photography isn’t this phone’s primary focus, but you don’t have to feel left out, because in most cases you’ll get a decent photo.
There’s an AI mode that will add HDR contrast and boost colours to give more pleasing shots, and the portrait mode works pretty well too.
There’s one slight fiddle, which is the zoom button. It jumps from 1x to 2x (entirely digital), then back to 1x and then to 0.6x (the ultra-wide angle) on repeated presses. How anyone thought this was a good user experience escapes us. We’d much prefer a 0.6x button all the time to access that lens. You can of course pinch to move through the entire range from 0.6x out to 8x digital zoom.
The front camera can be a bit of a fiddle when it comes to selfies because it needs to deploy pushes you toward landscape orientation – so portrait selfie fans might find it’s just a little odd on the side of the phone. There’s some beauty treatment that’s on by default and needs turning off as it strips out contrast, resulting in lacklustre images. It’s also worth finding the camera’s watermark feature and turning it off unless you’re really keen on pushing the fact you’re using the Legion Phone Duel.
1/6Pocket-lint
We also have doubts about the long-term reliability of the front camera. Throughout the time we’ve been using the phone, we’ve found dust getting in and around that camera is a common thing. We’ve also had the camera fail on one occasion, opening and trying to take a picture, but then making a few griding noises and crashing the camera without saving the image.
Software for gaming and life
Android 10 with ZUI
Legion Realm
The Legion Phone Duel runs Google Android 10, at the time of writing, but is skinned with Lenovo’s ZUI. That’s something we see less often in the US and Europe where Lenovo phones are now rare – and Motorola’s phones (the company also owned by Lenovo) shipping with a close-to-stock Android offering.
Much of what you get in ZUI is themed to suit the Legion Phone. There’s the choice of an aggressive gaming theme or Android theme that you’re presented with on startup – but the Android theme, in our opinion, doesn’t ever get close enough to a stock experience. There’s some fun animated wallpapers, some meaty sound effects to match the flashing lights on the rear, to round out the sense that this device is something special.
The software is a little hit and miss, with some oddities. For example, most of the time the phone seems to wake with the lockscreen in landscape, even when you’re holding it in portrait. There’s very little home screen control either – you can’t stop new app icons being added and creating new pages as a result, and we’ve had Google Discover appear and disappear from the slot to the left of the home page as if it’s got a mind of its own.
Pocket-lint
We mentioned the blank display settings page previously and if it wasn’t for duplication of settings in the Legion Realm app – or the option to change some settings via the quick settings panel – then you’d be stuck.
You also have to be really careful to accept permissions you’re asked for – because much of the Legion Realm experience, like the swipe-down in-game control panel, will just vanish if you don’t grant permission the first time you encounter it (seriously, we spent several weeks wondering why it wasn’t there until we reset the phone and tried again).
There aren’t many additions and very little duplication of apps, with the mainstay of the additions here to add to the gaming options. The aforementioned swipe-down panel gives you access to features like power boost, brightness controls, screenshots and recording, as well as stats at a glance – like the frame rate and temperature, with a swipe down from the top of the screen.
Pocket-lint
Thanks to these details, you can see what frame rate you’re actually getting compared to what you expect – and you can see how much the phone is warming up. It’s interesting to note that many games vary the refresh rate between lobby and in the game itself.
The Legion Realm app automatically adds games and runs when you start those games, allowing you to define some parameters – you can disable auto-brightness, for example, you can block calls and notifications and other options for games.
The good thing that Legion Realm does is provide tighter control of gesture navigation, needing a double swipe upwards from the bottom to exit a game. That’s great, because it avoids the accidental swipes that can sometimes see you leave a game on other phones.
Unfortunately, Legion Realm is really guessing when it comes to adding apps – like Google Lens or the Alexa app appearing – and think they are games. When Realm mis-identifies a game, it means you then need to double swipe to exit something like Alexa. You can manually remove those apps, but we found they creep back in again, so it seems an ongoing problem.
One of the abilities you have is to deploy the front camera while you’re gaming and have your face in the game. You can blur out the background, apply masks, hats and other fun stuff. It’s pitched as a streamer mode, but it doesn’t actually record. You can access the built-in screen recorder, however, with a simultaneous press of standby and volume up if you want to record it, as below.
There are various other in-game options, like back record, which will let you save recent clips, so you can save your memorable moments, as well as the Y Triggers on the top of the phone. These are pressure sensitive areas that you can use to launch Legion Realm, like a shortcut to the games, and can also be mapped to locations on the screen.
Like shoulder buttons on console controllers, the Y Triggers could be used as main controls, perhaps for acceleration and brake, to keep your fingers off the display or for other controls. Of course, you’ll have to adapt to using them which is our biggest barrier – you have to overcome muscle memory for those games you’ve already put a lot of time into, so you might never use them.
Verdict
The Lenovo Legion Duel is very good at what it sets out to do. The combination of a big display, specific gaming features and amazing sound quality make for a phone that’s excellent at gaming.
There are some quirks – it seems to get hotter than it’s rivals – and there are some software oddities around the gaming feature. But on the whole it’s a great experience when playing.
Where the phone really struggles is in the everyday job of being just a phone. It’s bulky, it has a preference for landscape orientation use, and we’re not convinced the pop-up camera will be totally reliable – which is going to be a downside for those wanting a phone to last them the next couple of years of daily use.
Ultimately, however, the Legion Duel offers a lot for your money. There are downsides, but there are decisions to be made: if you spend most of your time gaming, there’s a lot here for you; if you’re a more casual gamer then there are lighter phones with more software refinement and just as much power.
Jim Keller, a famed chip architect with notable stints at Intel, AMD, and Tesla, has joined AI chip startup Tenstorrent as President, CTO, and board member. Keller previously worked with Tenstorrent founder Ljubisa Bajic at AMD and personally provided the first funding for the startup.
Keller is known as a leader of transformational efforts during his storied past at several leading semiconductor firms, with his most recent position at Intel following the same trajectory. Keller joined Intel in 2018 and, in tandem with Raja Koduri and Murthy Renduchintala, was responsible for designing a new six pillar strategy meant to help the company recover from an extended period of roadmap delays.
In a move seen by many as a sign that Intel’s efforts to get back on track had stalled, Keller left Intel for personal reasons in June 2020 with plans to serve a six-month stint as a consultant to help the company transition to a new leadership team. Shortly thereafter, Intel announced that its 7nm process was delayed to such an extent that, for the first time, the company might have to turn to outside foundries to help produce its core logic devices. Keller’s former boss, Murthy Renduchintala, was ousted a few days later.
With Keller’s six-month consulting agreement with Intel now apparently over, he has now joined the Tenstorrent team. The AI chip startup, based in Toronto, Canada, is designing new Grayskull inference processors for image recognition and voice processing tasks. Tenstorrent’s approach melds high-performance inference processors with a new approach that uses AI to optimize low-level software functions, thus unlocking higher levels of speed and efficiency in an approach known as Software 2.0.
“Software 2.0 is the largest opportunity for computing innovation in a long time. Victory requires a comprehensive re-thinking of compute and low level software,” Keller said. “Tenstorrent has made impressive progress, and with the most promising architecture out there, we are poised to become a next gen computing giant.”
Keller had previous jobs at Tesla, where he served as the Vice President of Autopilot and Low Voltage Hardware, helped architect the Zen microarchitecture while he was AMD’s corporate vice president and chief cores architect, and is also famous for designing AMD’s successful K7 (Athlon) and K8 architectures. AMD’s canceled K12 uArch was another of Keller’s more famous projects, and he has also worked for Apple, helping develop the A4 and A5 processors.
Keller is known for relatively short tenures at companies, typically leading turnaround efforts for roughly three years before moving on to other challenges. His time at Intel, where he served as Intel’s senior vice president in the Technology, Systems Architecture and Client Group and general manager of the Silicon Engineering Group, was notably shorter at roughly two years.
We use cookies on our website to give you the most relevant experience. By clicking “Accept”, you consent to the use of ALL the cookies.
This website uses cookies to improve your experience while you navigate through the website. Out of these, the cookies that are categorized as necessary are stored on your browser as they are essential for the working of basic functionalities of the website. We also use third-party cookies that help us analyze and understand how you use this website. These cookies will be stored in your browser only with your consent. You also have the option to opt-out of these cookies. But opting out of some of these cookies may affect your browsing experience.
Necessary cookies are absolutely essential for the website to function properly. This category only includes cookies that ensures basic functionalities and security features of the website. These cookies do not store any personal information.
Any cookies that may not be particularly necessary for the website to function and is used specifically to collect user personal data via analytics, ads, other embedded contents are termed as non-necessary cookies. It is mandatory to procure user consent prior to running these cookies on your website.