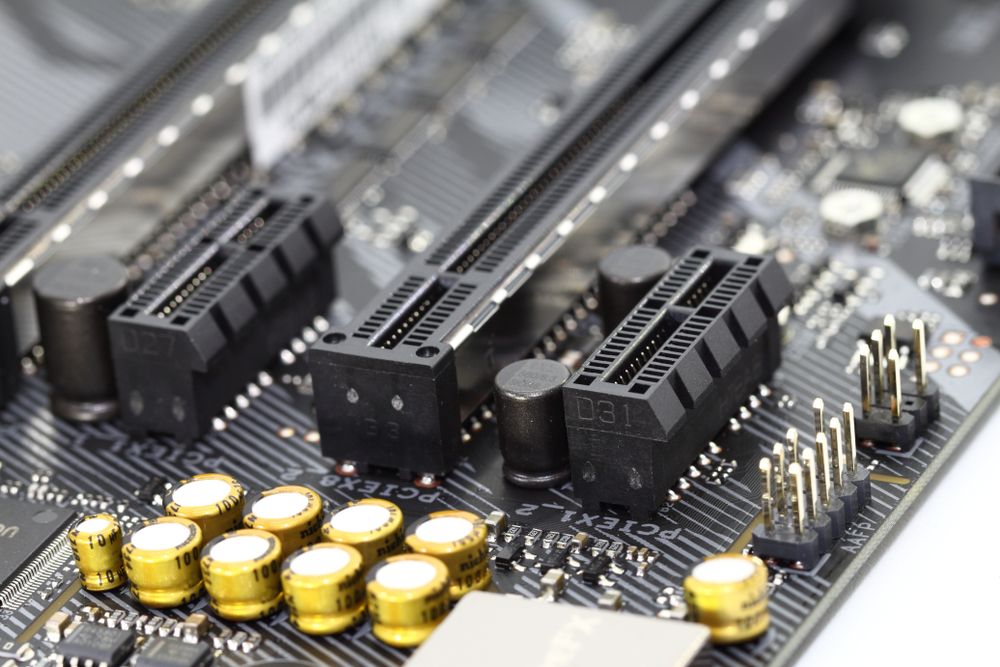
PCIe (peripheral component interconnect express) is an interface standard for connecting high-speed components. Every desktop PC motherboard has a number of PCIe slots you can use to add GPUs(aka video cards aka graphics cards), RAID cards, Wi-Fi cards or SSD (solid-state drive) add-on cards. The types of PCIe slots available in your PC will depend on the motherboard you buy.
PCIe slots come in different physical configurations: x1, x4, x8, x16, x32. The number after the x tells you how many lanes (how data travels to and from the PCIe card) that PCIe slot has. A PCIe x1 slot has one lane and can move data at one bit per cycle. A PCIe x2 slot has two lanes and can move data at two bits per cycle (and so on).
(Image credit: Erwin Mulialim/Wikimedia Commons)
You can insert a PCIe x1 card into a PCIe x16 slot, but that card will receive less bandwidth. Similarly, you can insert a PCIe x8 card into a PCIe x4 slot, but it’ll only work with half the bandwidth compared to if it was in a PCIe x8 slot. Most GPUs require a PCIe x16 slot to operate at their full potential.
PCIe Generations Compared
Bandwidth
Gigatransfer
Frequency
PCIe 1.0
8 GB/s
2.5 GT/s
2.5 GHz
PCIe 2.0
16 GB/s
5 GT/s
5 GHz
PCIe 3.0
32 GB/s
8 GT/s
8 GHz
PCIe 4.0
64 GB/s
16 GT/s
16 GHz
PCIe 5.0
128 GB/s
32 GT/s
32 GHz
PCIe 6.0
256 GB/s
64 GT/s
32 GHz
Current PCIe Generations
PCIe standards currently come in three different generations: PCIe 1.0, PCIe 2.0, PCIe 3.0 and PCIe 4.0. Bandwidth doubles with each generation.
How do you know what performance you’ll get with a PCIe expansion card? Your PCIe card will run at the lowest generation present. So if you put a PCIe 2.0 card in a PCIe 3.0 slot, you’ll get PCIe 2.0 performance.
PCIe 4.0
The PCIe 4.0 standard debuted in 2017 and offers 64 GBps of throughput. It’s available for enterprise-grade servers, but only became usable with SSDs in 2019. The AMD Ryzen 3000-series CPUs that debuted in July 2019 were the first desktop CPUs to support PCIe 4.0 x16 out of the box. For full support, users will need new motherboards running theX570 chipset.
To learn more about PCIe 4.0, check out our article What We Know About PCIe 4.0 So Far.
Future PCIe Generations: PCIe 5.0 and PCIe 6.0
PCIe 5.0
The official PCIe 5.0 standard came out in May 2019. It will bring 128 GBps of throughput. The specification is backwards compatible with previous PCIe generations and also includes new features, including electrical changes to improve signal integrity and backward-compatible CEM connectors for add-in cards. The first PCIe 5.0 devices are expected to debut in for enterprise customers in 2022, with consumer offerings to follow.
PCI-SIG, which defines PCIe standards, expects PCIe 4.0 and PCIe 5.0 to co-exist for a while, with PCIe 5.0 used for high-performance needs craving the most throughput, like GPUs for AI workloads and networking applications. So, PCIe 5.0 will mainly be used in data center, networking and high-performance computing (HPC) enterprise environments, while less-intense applications, like those used by desktop PCs, will be fine with PCIe 4.0.
PCIe 6.0
PCIe 6.0 spec (Image credit: PCI-SIG)
In June 2019, PCI-SIG said it will release the standards for PCIe 6.0 in 2021 (the spec is currently in revision 0.7) . We don’t expect to see products until at least the end of 2022, if not 2023.
PCIe 6.0 will double the bandwidth of PCIe 5.0 to 256 GB/s among the same maximum number of lanes, 16. Data transfer rate will hit 64 GT/s per pin, up from PCIe 5.0’s 32 GT/s. PCIe 6.0 is also expected to be backwards compatible with previous PCIe generations.
This article is part of the Tom’s Hardware Glossary.
Further reading:
Dissecting the Modern Motherboard: Connectors, Ports & Chipsets Explained
Just when you thought PCIe 4.0 x4 SSD’s were fast with up to 8 GB/s of sequential read speed, PCIe 5.0 drives have emerged on the horizon that could come with up to 16 GB/s speeds.
Silicon Motion said this week that it would start sampling its enterprise-grade SSD controllers with a PCIe Gen 5.0 interface in the second half of next year, which means that they will debut commercially in 2022. This is one of the first times that an SSD controller maker has mentioned a chip with a PCIe 5.0 interface, and even though the controller will debut in the server space, models for consumers will inevitably follow.
No Rush for PCIe 5.0 SSDs?
The PCIe 5.0 interface will increase data transfer speeds to 32 GT/s per lane, which will increase the total bandwidth provided by a PCIe x16 slot to ~64 GB/s, whereas a PCIe x4 slot can transfer up to ~16 GB/s.
Increased transfer rates will be particularly beneficial for various bandwidth-hungry applications, like servers, high-end storage subsystems, and accelerators. Using the PCIe Gen 5 physical layer, various next-gen platforms will also support CXL and Gen-Z protocols designed specifically to connect CPUs with various accelerators and maintain memory and cache coherency at low latencies.
The first platforms to support a PCIe 5.0 interface are Intel’s 12th-Gen Alder Lake CPUs for client PCs, which are expected to debut in the second half of 2021, as well as the company’s 4th Generation Xeon Scalable ‘Sapphire Rapids’ for data centers and supercomputers that is projected to launch in early 2022. In addition to PCIe 5.0, Sapphire Rapids will also support the CXL 1.1 protocol.
So far, several companies have already announced the availability of PCIe 5.0 controllers and PHY IP, and some have demonstrated interoperability of their CXL-enabled PCIe 5.0 solutions with Intel’s Sapphire Rapids or verification equipment, whereas Microchip even announced its PCIe 5.0 retimers and switches.
However, as numerous developers of SSD controllers and platforms introduced their PCIe 4.0 platforms for servers in the second half of last year, including Kioxia, Microchip, Silicon Motion, SK Hynix, it doesn’t seem like they will roll out any new enterprise-grade solutions in the foreseeable future. Of course, some companies tend to introduce next-gen SSDs ahead of competitors, but it does not look like there will be too many PCIe 5.0-supporting enterprise drives available next year, so SMI will be on time with its PCIe Gen 5 controller.
The PCIe Gen 5 specification was finalized in mid-2019, around the same time when the first PCIe 4.0-supporting platforms, SSDs, and GPUs were launched. Back then, some thought that the PCIe 4.0 interface will have a short lifespan (because PCIe 5.0 was ‘already there’) and will not become truly popular particularly in the data center space, as back then, the only server platform to feature PCIe 4.0 lanes was AMD’s EPYC 7002-series ‘Rome’ that was not truly popular at the time. As it turns out, while PCIe 5.0 will debut later this year, it does not look that it will immediately replace PCIe 4.0.
SMI Mentions First PCIe 5.0 SSD Controller
“With our new PCIe Gen5 enterprise SSD controllers sampling in the second half of next year, we are not expecting our enterprise SSD controller to be a material contributor to our $1 billion sales objective,” said Wallace Kuo, chief executive of Silicon Motion, during a conference call with analysts and investors (via The Motley Fool). “We are planning on material enterprise SSD controller sales contribution only after 2023.”
Silicon Motion is a newbie on the market of enterprise SSD controllers. The company first entered China’s enterprise SSD market in 2015 after acquiring Shannon Systems, a supplier of enterprise-grade PCIe SSD and storage arrays to Chinese hyperscalers. So far, SMI’s enterprise SSD business has not really taken off and represents a fraction of its revenue. Still, the company clearly wants to be a part of the datacenter megatrend, so it will continue to invest in enterprise storage solutions.
“We are excited about enterprise-grade PCIe Gen5 controller, which we will have taped out early next year and sample in the second half of 2022,” said Kou. “We believe this will bring us a big momentum in coming to enterprise.”
The chief executive of Silicon Motion naturally did not touch upon technical specifications of the company’s upcoming PCIe 5.0 enterprise SSD controller, but its latest SM8266 SoC supports NVMe 1.4, three dual-core Arm Cortex-R5 complexes, 16 NAND channels, and configurable LDPC ECC.
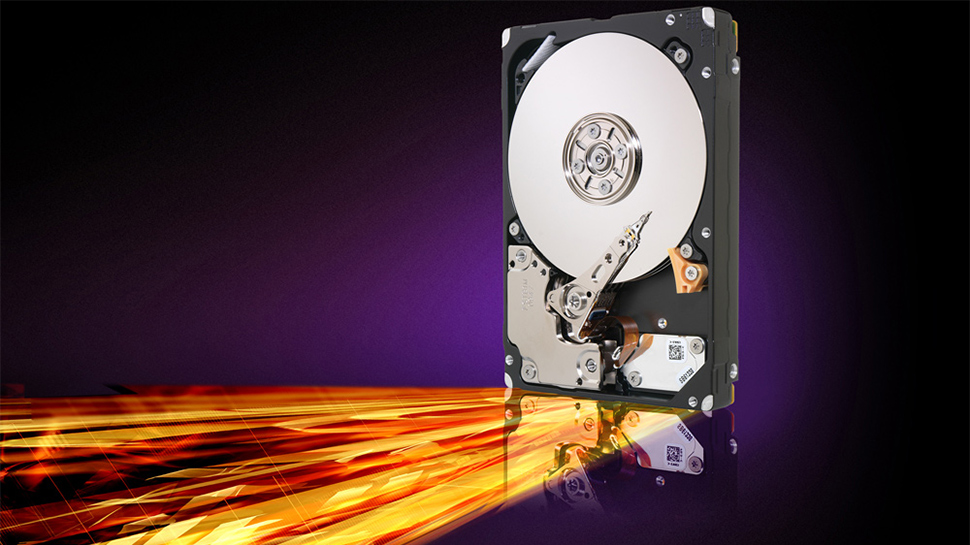
In a world where you cannot cram a hard drive into a modern thin-and-light laptop and a cheap high-capacity 2.5-inch SSD can replace an HDD in a desktop, you would expect consumer hard disk drives to go extinct. Yet, while their unit sales are dropping, sales are still strong at nearly 139 million units per year. In fact, capacities and exabytes shipments of client HDDs are setting records.
Unit sales of all hard drives for all kinds of applications totaled 259.81 million units in 2020, a 13.9% drop year over year, according to data from Trendfocus (via StorageNewsletter).
Despite the rapidly growing popularity of SSDs in the consumer PC space — particularly among enthusiasts — hard drives for desktops and notebooks represent the largest HDD category in terms of units sold. Last year the industry shipped 54.46 million hard drives for desktops as well as 84.42 million HDDs for notebooks. While unit sales of client PC HDDs are dropping, their average capacity is increasing, which is why the capacity of all client HDDs totaled 266 exabytes in Q4 2020.
(Image credit: Tom’s Hardware)
Seagate was the undisputed market leader last year with a 42.7% market share and 110.96 million HDDs shipped. Western Digital followed its rival with 96 million drives and 37% of the market, while Toshiba was a distant third with 20.3% of the market and 52.8 million units sold.
Since capacities of SSDs shipped in new PCs are sometimes insufficient, many people buy external direct-attached storage (DAS) devices with 2.5-inch or 3.5-inch HDDs inside. Such DAS devices are usually classified as consumer electronics (CE) drives, so they fall into the same category as game consoles and digital video recorders. In total, 49.05 million CE HDDs were sold last year, the data from Trendfocus shows. Unfortunately, it is unclear what exactly (apart from retail DAS and various DVRs) the company includes in the 3.5-inch CE category.
All the hard drives supplied by these three manufacturers in 2020 could store 1081.32 exabytes of data, which seems to be up compared to 2019 and 2018.
Speaking of exabytes. 3.5-inch hard drives for servers, enterprise, and nearline applications commanded over 62% of exabytes shipments last year. In total, the three manufacturers shipped 59.22 million of such HDDs last year, an increase of 11.8% year over year. Meanwhile, the 2.5-inch enterprise-grade hard drives market is dying. It dropped to 12.66 million units in 2020, a decline of 27.9% year-over-year.
The year 2020 brought no surprises to the HDD market. The general trend of lower unit sales and higher exabyte sales was set several years ago, and it continued in 2020. Meanwhile, many of HDD categories that exist today, including 2.5-inch HDDs for clients, servers, and CE, are set to either decline dramatically or actually cease to exist in the coming years as SSDs replace them.
I would like to thank ICY DOCK for supplying the sample.
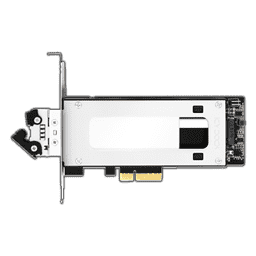
ICY Dock is known for its products geared towards workstation, enterprise, and government users. The ToughArmor series is their higher-end product tier focusing on a metal material mix and interfaces usually niche to their target audiences. The MB840M2P-B Is a PCIe adapter for M.2 NVMe drives and unique in that the installed drive is packed onto a sled accessible through the rear of the system.
Packaging
This device ships in simple brown packaging that seems to have undergone a few last minute changes. To better illustrate some of its advantages, corresponding icons have been put on the front. On the opposite side, you will find the product name in several languages, alongside a specification table in English. The PCIe card inside an anti-static bag has been placed in a foam cutout within the box.
The unit may also be used in low-profile enclosures as ICY DOCK provides a smaller backplate for such a scenario. On top of that, there is a single screw to secure the card. A basic but effective manual has also been included.
A Closer Look
The MB840M2P-B is essentially a souped up PCIe 3.0 x4 to M.2 NVMe interface card. This means you get all the same advantages of plugging the SSD directly into an appropriate slot on the motherboard. That said, ICY DOCK has engineered a housing and sled, which allows you to quickly pull out the drive and place another one. The PCB itself comes with a cutout, which is an interesting choice as I see no immediate benefit to the cutout besides a potential thermal angle.
Taking a closer look at the end of the device, you will find the classic M.2 PCIe connector and an LED that acts as an activity indicator. On the corner is also a dual-pin header for your case’s hard-drive activity LED, for example.
To unlock the sled, press the solid side of it down, which pops out the little handle—both of these parts are made out of steel. Once unlocked, you may just pull the whole thing out of the expansion card.
The sled also acts as a heatsink, and the whole contraption weights just over 50 grams, most of which is the actual heatsink itself. That means you should see a tangible temperature drop for your drive.
Assembly and Use
To add a drive to the sled, you do not need any tools. Simply press down on the metal cover to pop it off, which reveals a similar mounting mechanism as with other ICY DOCK products: a sliding bar that secures the M.2 NVMe drive. A thermal pad along the whole interior comes pre-applied, and the sled is long enough to accommodate even the extra-long 110 mm drive formats, which is important as enterprise-level units go beyond the standard 80 mm for consumer drives.
Corsair was kind enough to provide us with one of their MP400 SSDs to use inside the MB840M2P-B, which matches the PCIe 3.0 x4 interface perfectly. The retail package of the drive is bright yellow and has an image on the front and additional details on the back.
The MP400 itself comes with a branding sticker and memory ICs on only one side of the PCB. This benefits our current usage scenario as the filled side will attach to the thermal pad.
Installing the SSD is easy once the housing has been opened. Simply align the interface gap with the metal pin in the housing and slide the lock into place to keep the drive firmly in place and touching the thermal pad. Once done, you may put the steel cover back in place, which leaves only the contact pins of the drive exposed.
Sliding the drive in works as expected, and the sled locking mechanism for the expansion card functions the same way as with other ICY DOCK products—by pushing the lever down until it snaps into place.
When turned on, the green LED on the end of the card lights up to denote read/write activity, with its green glow funneled to the back of the system, next to your drive. There may be scenarios where you want a full tower with seven or eight of these in the PCIe slots, so having individual activity LEDs are certainly helpful.
Performance
As the card is essentially an interface of the same PCIe 3.0 x4 bandwidth between two physical formats, we expected the drive to perform just as it would when installed directly inside the system, and the numbers almost exactly match those advertised on the MP400 retail packaging.
For thermals, we ran DiskSpd on a 30 minute loop to generate sustained drive activity and were never able to push it beyond 48°C. As our test system was not mounted within a case, you should expect it to be a few degrees higher if the unit is sandwiched between other expansion cards, but even so, it is far from the 80°C threshold where most SSDs tend to throttle.
Conclusion
As with most of the brand’s products, the ICY DOCK ToughArmor MB840M2P-B is not meant for the mass market. If you are just an enthusiast who wants good cooling, simply go for a heatsink on your bare drive, for example. This is further underlined by the MSRP of US$84, as the MB840M2P-B is not cheap compared to the many simple, bare PCIe 3.0 x4 to M.2 NVMe adapters that sell for around US$15.
The MB840M2P-B is meant for those users who need quick access to their drives in a high-density environment while keeping their units cool under heavy, sustained loads. Eight of these could be paired with a workstation/server motherboard and appropriate 22110 length NVMe drives, for example. All while allowing for portability between multiple compatible infrastructures and ease of access for maintenance or emergencies. For those types of scenarios, the price for each of these is a no-brainer in the grand scheme of things.
Apple’s MacBook Pro with the new M1 processor is one of the best-performing laptops on the market in its price range. If you are interested in picking up the latest Apple laptop for a discount, Amazon, B&H Photo, and Best Buy are selling the base model, which includes 256GB of SSD storage, for $1,199, knocking $100 off its usual retail price of $1,299.
This is the lowest price we have seen this configuration going for, beating its previous best-ever price by $20.
Elgato’s Cam Link 4K, which launched in 2018, allows you to transform your DSLR or action camera into a 4K webcam. At $130, it does not come cheap, and rarely do we see this product go on sale. But currently, Amazon has the device for $107. If you want to pick one up at Best Buy, you can grab it for $109.
The Lenovo Chromebook Duet was our pick for the best-budgeted Chromebook last year. At its usual price of $299, it’s not a bad option for people who need a device for on-the-go work. But if you are looking to save even more money, Best Buy has knocked $50 off the device, bringing it down to just $249.
Lenovo Chromebook Duet
$249
$299
17% off
Prices taken at time of publishing.
The Chromebook Duet boasts long battery life and has a 16:10 aspect ratio display to fit more content on the screen at once. The Duet can be used as a tablet or a laptop. On the downside, it has just one USB-C port and no 3.5mm headphone jack.
$249
at Best Buy
Dell is getting a head start on its President’s Day savings. If you are in the market for a new gaming monitor, the company has a 32-inch HDR curved gaming monitor (model S3220DFF) on sale for just $360. Usually, this model costs $610, and it includes refresh rates up to 165Hz and supports AMD Radeon FreeSync.
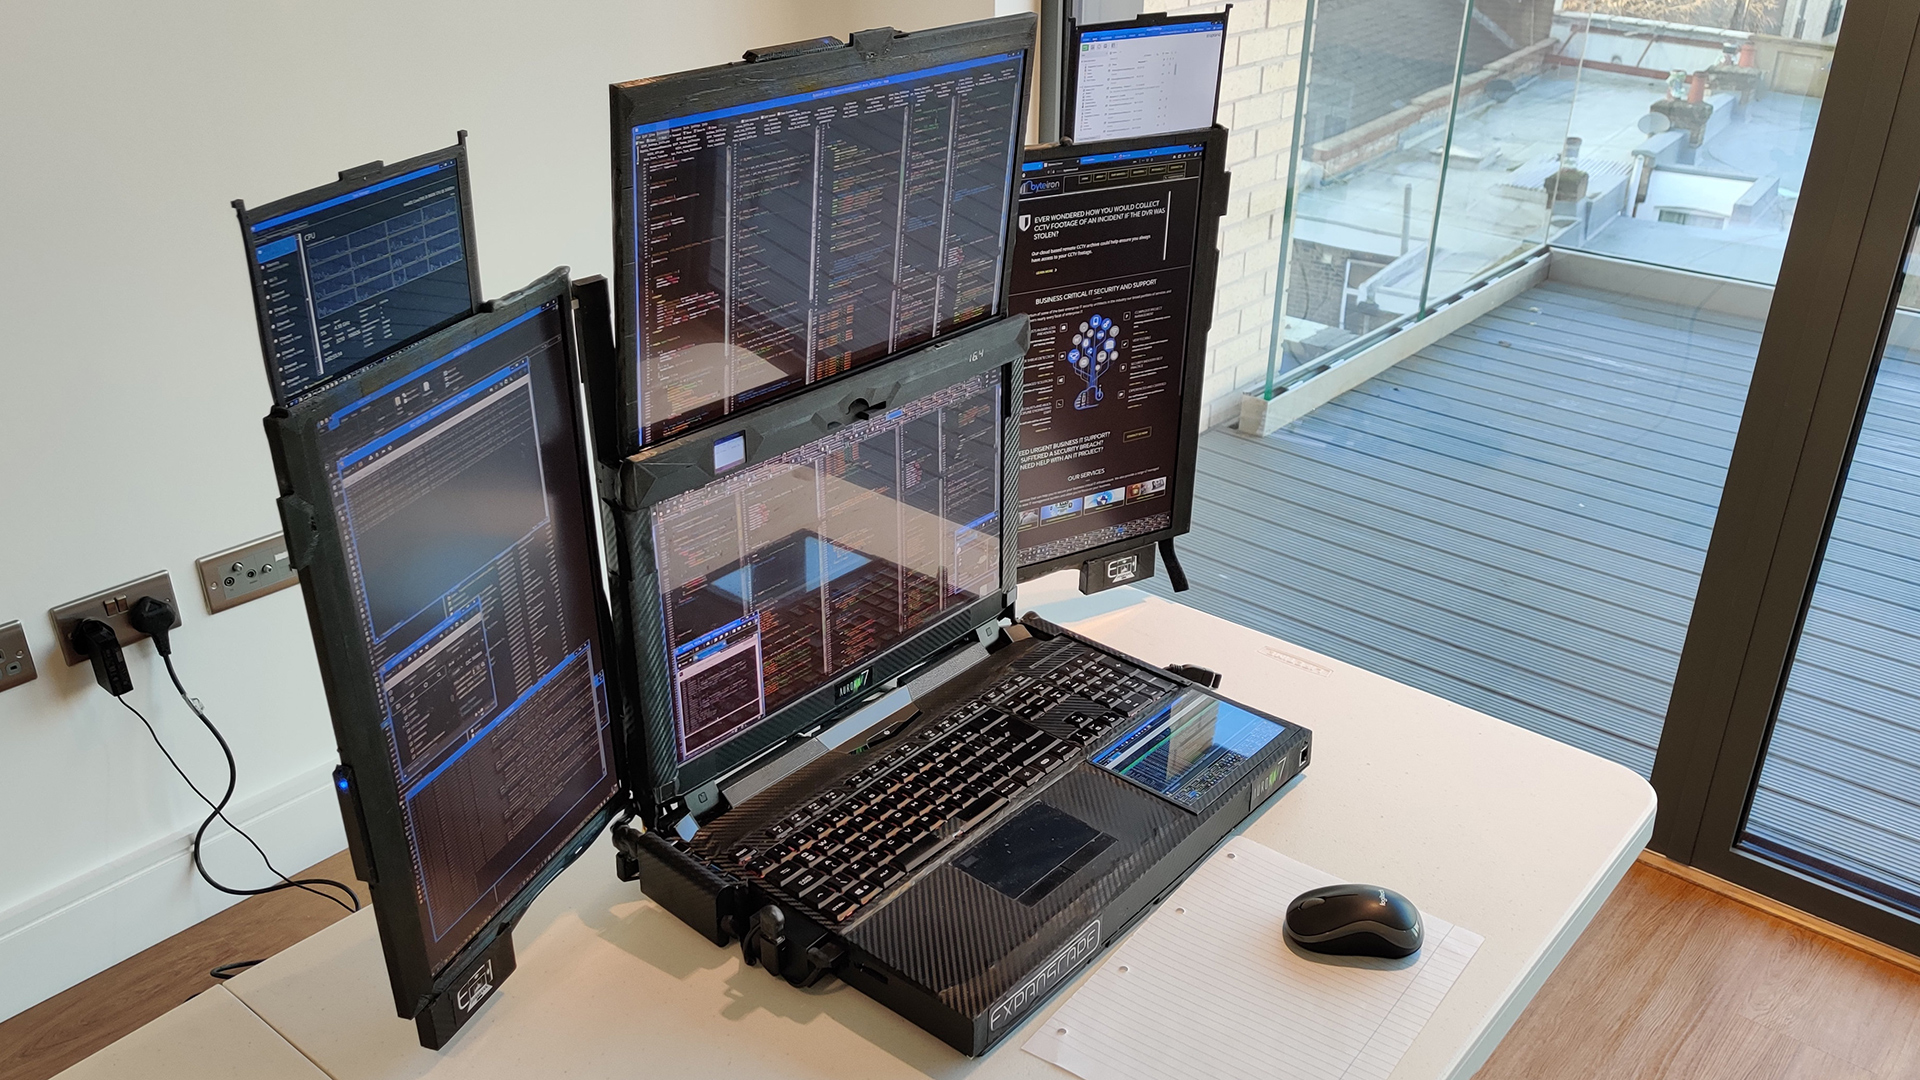
What if you need a mobile system with more than three screens? Well, Expanscape has developed a prototype of a laptop with as many as seven screens, and it is already selling the prototypes to interested customers. It also comes packed with an impressive amount of power on the compute side to match.
The Aurora 7 Prototype indeed comes with four 17.3-inch monitors featuring a 4K resolution (two working in landscape, two in portrait mode) as well as three auxiliary 7-inch screens featuring a 1920 x 1200 resolution. All the monitors fold or swivel out of the primary chassis, making it a transformer of sorts, and no on-site assembly before deployment is necessary. The whole system weighs around 12 kilograms, so it is not easy to carry, but it is naturally easier to transport than a laptop along with six extra displays.
Image 1 of 7
(Image credit: Expanscape)
Image 2 of 7
(Image credit: Expanscape)
Image 3 of 7
(Image credit: Expanscape)
Image 4 of 7
(Image credit: Expanscape)
Image 5 of 7
(Image credit: Expanscape)
Image 6 of 7
(Image credit: Expanscape)
Image 7 of 7
(Image credit: Expanscape)
With more of us working from home due to the pandemic, multi-display setups are becoming the norm and are widely used for a variety of applications. Setting a multi-monitor configuration at home or in an office is easy, and while attaching two more displays to a laptop is also possible, it gets slightly more complicated.
Expanscape’s Aurora 7 Prototype laptop computer is built for very particular applications and audiences in mind (such as security operations centers, data scientists, content creators) that traditionally use multi-display PCs, but who at times need to transport and deploy them quickly. The creators wanted their seven-screen laptop computer to be portable, structurally rigid, and capable of running demanding programs.
As far as internal hardware is concerned, the Aurora 7 is powered by Intel’s Core i9-9900K processor that is accompanied by 64GB of DDR4-2666 memory, Nvidia’s GeForce GTX 1060 graphics card, two PCIe 3.0 x4 M.2 SSDs, one 2.5-inch MLC SSD, and a 2TB 7200RPM hard drive. The PC has all modern connectivity technologies, including Bluetooth, GbE, Wi-Fi, and USB. Since the Aurora 7 uses a fairly spacious chassis, the developer says that it can use different platforms, including AMD’s Ryzen 9 3950X or Intel’s Core i9-10900K.
Among the impressive peculiarities of the Expanscape’s Aurora 7 Prototype are two internal batteries. The primary internal battery features an 82Wh capacity and powers the system itself. The secondary internal battery has a 148Wh capacity and is used to power the screens. The battery life for the whole system is about 2 hours 20 minutes, but at high clocks under high loads, it will get lower.
Technically, all of Expanscape’s seven-screen Aurora 7 machines are just prototypes that do not look or feel like commercial products, yet the company can build them to order and sell to interested parties who agree so sign a contract and pay a hefty sum of money.
Along with news, features, opinions, and tech reviews, video has become an increasingly important part of The Verge’s content. But to make great, involving videos, you’ve got to have staff with the expertise to create that video — along with the tools that allow those staff members to let their imaginations soar.
Alix Diaconis is one of the directors who helps make video magic for The Verge. We talked to Alix about what she does and what tools she uses.
Alix, what do you do for The Verge?
I’m one of the video directors for The Verge. I get to work every day with my three co-workers (but really, friends) to create the videos on The Verge’s YouTube channel. Sometimes deadlines are fast because tech and news are fast, but our team has been working together for years, so even live events feel seamless and fun. We each shoot, take photos, and edit; then the video gets treated by our sound and graphics wizards. Then bam, on to the next one!
What hardware and software tools are needed to produce a video for a site like The Verge?
It really varies video to video. For some videos, we’ll pull out all the stops, while for others, we need to do quick and light. Heck, I think we’ve shot videos with just a GoPro.
When we go to a press event, we’ll keep it very light with a monopod, lavalier microphone, and a camera we feel most comfortable with. And then I’ll edit at the event on my MacBook Pro.
But most of the time when we’re shooting on location, we’ll bring a bigger kit with an HD monitor, a slider (which helps you do tracking shots), maybe a drone. And when we’re making the big stuff, like a flagship phone review, we like to bring out everything, including a probe lens like the Venus Optics Laowa to make intro shots like this.
The opening shot on this video was created using a probe lens.
Since we’re uploading videos for our job, good internet upload speeds make life a lot easier. We also have a shared server so we have access to our terabytes and terabytes of footage at all times.
Oh, and also teamwork. Lots and lots of teamwork.
What specific hardware tools do you use for your work?
For shooting, I prefer to use the Canon EOS C200 — I think it looks really cinematic — and my preferred lens is the Canon EF 70-200mm (for B-roll at least). Sometimes I’ll use the Sony A7S II or III, which looks extra crisp, but I’m not a big fan of Sony menus. For sound, I’ll typically use a Sennheiser G3 lavalier or a Zoom H6 recorder. For photos, I use the Canon 50D.
For post-production in The Verge offices, I would edit on a 27-inch iMac, which is due for an upgrade. At home, though, I have a more powerful editing PC that my producer built for me. It has an AMD Ryzen 7 3700X 8-core processor, 2TB NVMe drive, a Radeon RX 580 series video card, 32GB RAM, and an Asus 28-inch 4K display. Of course, there are always technical issues — it’s part of editing — but the PC is the best editing machine I’ve personally owned. (Thank you, Phil!) I do miss the beautiful iMac display though.
Also, since video takes up a lot of space, I’ll sometimes use an additional SSD for projects. And as for headphones, I use the Sony MDR-7506, which are the only headphones I can wear comfortably all day.
And then there’s the fun, random gear: a GoPro Hero 8, an Insta360 panoramic video camera (which we recently used for this e-bike video), a Zhiyun Crane, a DJI Mavic Pro drone… and whatever else we can get our hands on.
This video was created using an Insta360 panoramic video camera.
What software tools do you use for your work?
All Adobe everything. Premiere Pro for editing, After Effects for basic graphics, and Photoshop for the video thumbnails. You can do a lot in Premiere, but it does have its bugs, and it’s not always optimized for Apple’s hardware.
What tools do you use for your own projects?
I’ve been teaching myself DaVinci Resolve to color footage. I still barely understand the program, but it makes footage look 100x better than coloring it in Premiere. And purely for fun, I shoot 35mm film on my dad’s old Minolta camera.
What hardware and software tools would you recommend for somebody just starting out?
Premiere is very common for editing. But if you want to try something free and you have an iPhone or iPad, there’s the Splice app. It’s really intuitive, but you’re limited to clips you have on your device. There’s also DaVinci Resolve, which is free and as advanced as most paid editing softwares.
As for cameras, just get one that you feel comfortable using! And for a computer, invest in a good one if you see yourself editing for a long time; iMacs and Windows PCs are both good, and the specs will just depend on how big your projects will be. I haven’t had a chance to use Apple’s new M1 MacBook Air or Pro yet, but both seem like good choices if you’d prefer a laptop.
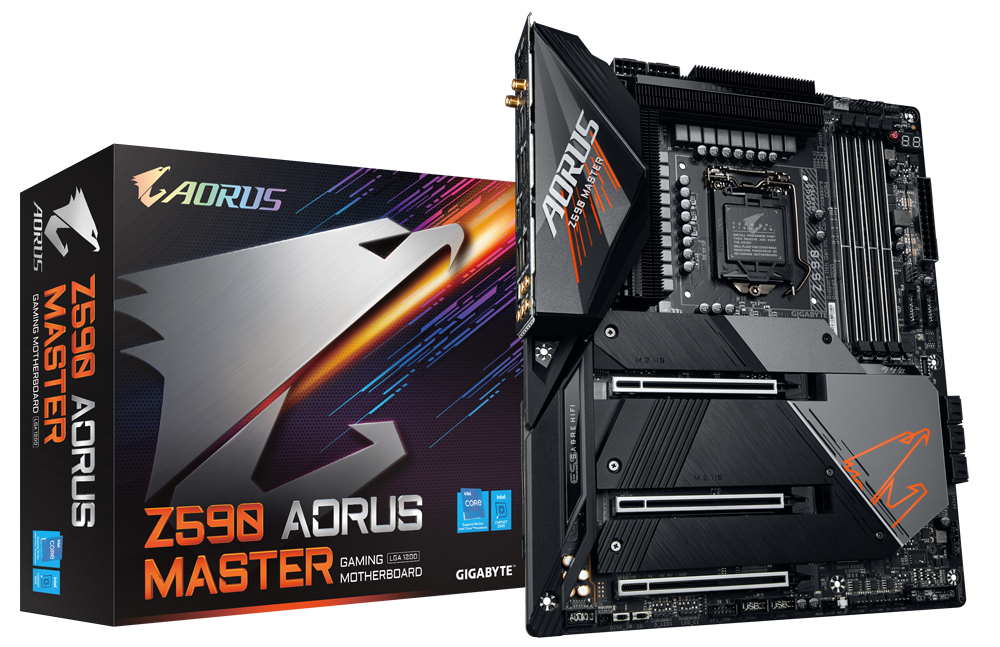
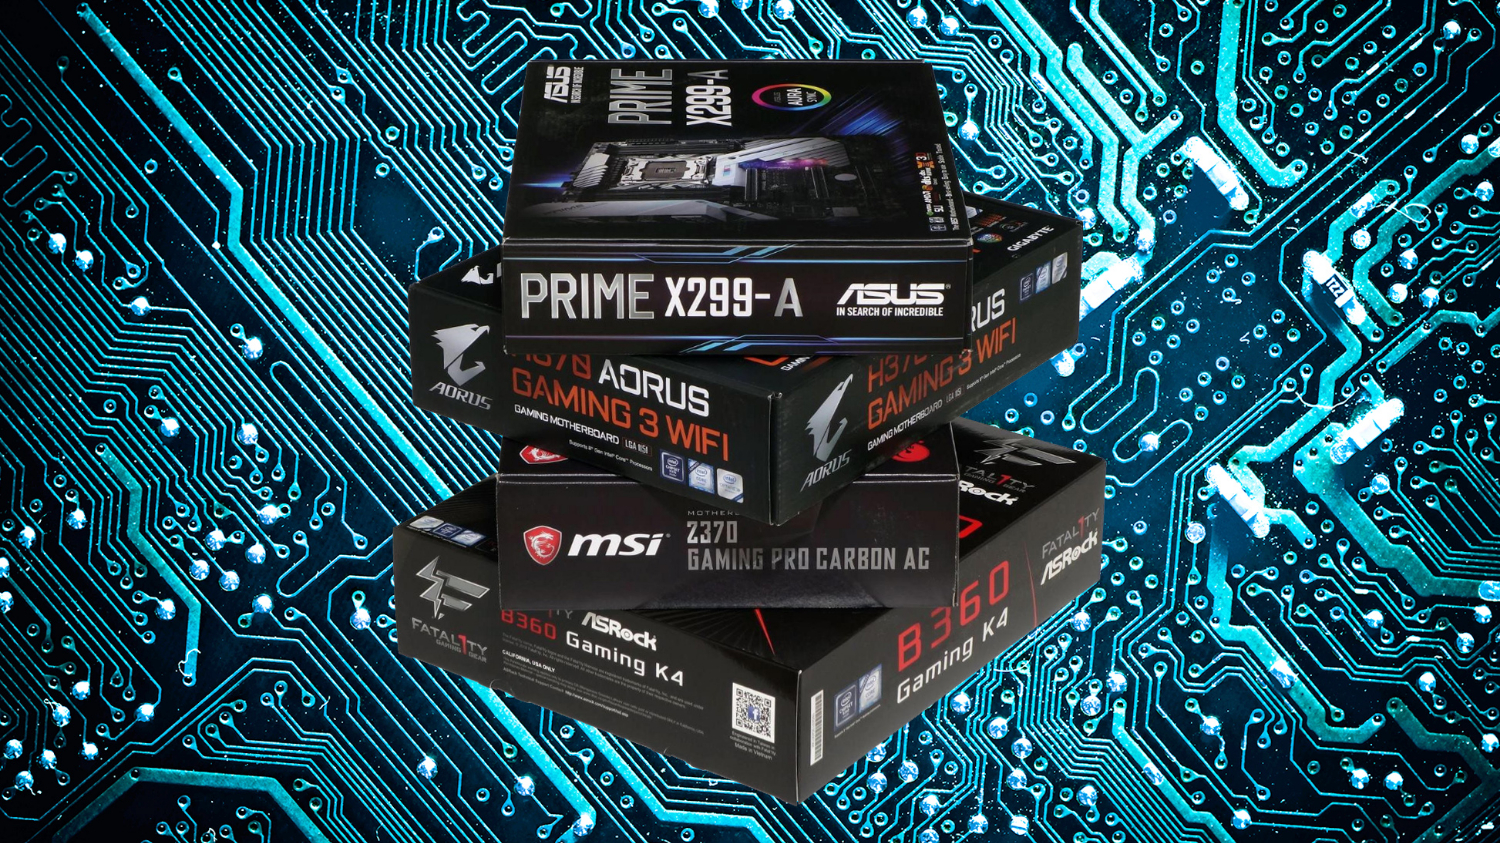
While we still don’t have an Intel Rocket Lake-S Core i9-11900K CPU to use for testing, the Intel Z590 motherboards are arriving in our labs and on store shelves. So while we await the ability to talk benchmarks, we’ll be walking in detail through the features of these brand-new boards. First up on our bench was the ASRock Z590 Steel Legend 6E Wi-Fi, and now we have the Gigabyte Z590 Aorus Master to dive into.
The latest version of this premium motherboard line includes an incredibly robust VRM, ultra-fast Wi-Fi and wired networking, premium audio, and more. While we don’t have exact pricing information at the time of this writing, the Z490 version came in just under $400, which is around where we expect the Z590 version to land, if not slightly higher.
Gigabyte’s current Z590 product stack consists of 13 models. There are familiar SKUs and a couple of new ones. Starting with the Aorus line, we have the Aorus Xtreme (and potentially a Waterforce version), Aorus Master, Aorus Ultra, and the Aorus Elite. Gigabyte brings back the Vision boards (for creators) and their familiar white shrouds. The Z590 Gaming X and a couple of boards from the budget Ultra Durable (UD) series are also listed. New for Z590 is the Pro AX board, which looks to slot somewhere in the mid-range. Gigabyte will also release the Z590 Aorus Tachyon, an overbuilt motherboard designed for extreme overclocking.
We’re not allowed to list any performance metrics for Rocket Lake (not that we have a CPU at this time) as the embargo wasn’t up when we wrote this article. All we’ve seen at this point are rumors and a claim from Intel of a significant increase to IPC, but the core count was lowered from 10 cores/20 threads in Comet Lake (i9-10900K) to 8 cores/16 threads in the yet-to-be-released i9-11900K. To that end, we’ll stick with specifications and features, adding a full review that includes benchmarking, overclocking and power consumption shortly.
The Z590 Aorus Master looks the part of a premium motherboard, with brushed-aluminum shrouds covering the PCIe/M.2/chipset area. The VRM heatsink and its NanoCarbon Fin-Array II provide a nice contrast against the smooth finish on the board’s bottom. Along with Wi-Fi 6E integration, it also includes an Aquantia based 10GbE, while most others use 2.5 GbE. The Aorus Master includes a premium Realtek ALC1220 audio solution with an integrated DAC, three M.2 sockets, reinforced PCIe and memory slots and 10 total USB ports, including a rear USB 3.2 Gen2x2 Type-C port. We’ll cover those features and much more in detail below. But first, here are full the specs from Gigabyte.
Specifications – Gigabyte Z590 Aorus Master
Socket
AM4
Chipset
Z590
Form Factor
ATX
Voltage Regulator
19 Phase (18+1, 90A MOSFETs)
Video Ports
(1) DisplayPort v1.2
USB Ports
(1) USB 3.2 Gen 2×2, Type-C (20 Gbps)
(5) USB 3.2 Gen 2, Type-A (10 Gbps)
(4) USB 3.2 Gen 1, Type-A (5 Gbps)
Network Jacks
(1) 10 GbE
Audio Jacks
(5) Analog + SPDIF
Legacy Ports/Jacks
✗
Other Ports/Jack
✗
PCIe x16
(2) v4.0 x16, (x16/x0 or x8/x8
(1) v3.0 x4
PCIe x8
✗
PCIe x4
✗
PCIe x1
✗
CrossFire/SLI
AMD Quad GPU Crossfire and 2-Way Crossfire
DIMM slots
(4) DDR4 5000+, 128GB Capacity
M.2 slots
(1) PCIe 4.0 x4 / PCIe (up to 110mm)
(1) PCIe 3.0 x4 / PCIe + SATA (up to 110mm)
(1) PCIe 3.0 x4 / PCIe + SATA (up to 110mm)
U.2 Ports
✗
SATA Ports
(6) SATA3 6 Gbps (RAID 0, 1, 5 and 10)
USB Headers
(1) USB v3.2 Gen 2 (Front Panel Type-C)
(2) USB v3.2 Gen 1
(2) USB v2.0
Fan/Pump Headers
(10) 4-Pin
RGB Headers
(2) aRGB (3-pin)
(2) RGB (4-pin)
Legacy Interfaces
✗
Other Interfaces
FP-Audio, TPM
Diagnostics Panel
Yes, 2-character debug LED, and 4-LED ‘Status LED’ display
Opening up the retail packaging, along with the board, you’re greeted by a slew of included accessories. The Aorus Master contains the basics (guides, driver CD, SATA cables) and a few other things that make this board a complete package. Below is a full list of all included accessories.
Installation Guide
User’s Manual
G-connector
Sticker sheet / Aorus badge
Wi-Fi Antenna
(4) SATA cables
(3) Screws for M.2 sockets
(2) Temperature probes
Microphone
RGB extension cable
Image 1 of 3
(Image credit: Gigabyte)
Image 2 of 3
(Image credit: Gigabyte)
Image 3 of 3
(Image credit: Gigabyte)
After taking the Z590 Aorus Master out of the box, its weight was immediately apparent, with the shrouds, heatsinks and backplate making up the majority of that weight. The board sports a matte-black PCB, with black and grey shrouds covering the PCIe/M.2 area and two VRM heatsinks with fins connected by a heatpipe. The chipset heatsink has the Aorus Eagle branding lit up, while the rear IO shroud arches over the left VRM bank with more RGB LED lighting. The Gigabyte RGB Fusion 2.0 application handles RGB control. Overall, the Aorus Master has a premium appearance and shouldn’t have much issue fitting in with most build themes.
(Image credit: Gigabyte)
Looking at the board’s top half, we’ll first focus on the VRM heatsinks. They are physically small compared to most boards, but don’t let that fool you. The fin array uses a louvered stacked-fin design Gigabyte says increases surface area by 300% and improves thermal efficiency with better airflow and heat exchange. An 8mm heat pipe also connects them to share the load. Additionally, a small fan located under the rear IO shroud actively keeps the VRMs cool. The fan here wasn’t loud, but was undoubtedly audible at default settings.
We saw a similar configuration in the previous generation, which worked out well with an i9-10900K, so it should do well with the Rocket Lake flagship, too. We’ve already seen reports indicating the i9-11900K has a similar power profile to its predecessor. Feeding power to the VRMs is two reinforced 8-pin EPS connectors (one required).
To the right of the socket, things start to get busy. We see four reinforced DRAM slots supporting up to 128GB of RAM. Oddly enough, the specifications only list support up to DDR4 3200 MHz, the platform’s limit. But further down the webpage, it lists DDR4 5000. I find it odd it is listed this way, though it does set up an expectation that anything above 3200 MHz is overclocking and not guaranteed to work.
Above the DRAM slots are eight voltage read points covering various relevant voltages. This includes read points for the CPU Vcore, VccSA, VccIO, DRAM, and a few others. When you’re pushing the limits and using sub-ambient cooling methods, knowing exactly what voltage the component is getting (software can be inaccurate) is quite helpful.
Above those on the top edge are four fan headers (next to the EPS connectors is a fifth) of 10. According to the manual, all CPU fan and pump headers support 2A/24W each. You shouldn’t have any issues powering fans and a water cooling pump. Gigabyte doesn’t mention if these headers use auto-sensing (for DC or PWM control), but they handled both when set to ‘auto’ in the BIOS. Both a PWM and DC controlled fan worked without intervention.
The first two (of four) RGB LED headers live to the fan headers’ right. The Z590 Aorus Master includes two 3-pin ARGB headers and two 4-pin RGB headers. Since this board takes a minimal approach to RGB lighting, you’ll need to use these to add more bling to your rig.
We find the power button and 2-character debug LED for troubleshooting POST issues on the right edge. Below is a reinforced 24-pin ATX connector for power to the board, another fan header and a 2-pin temperature probe header. Just below all of that are two USB 3.2 Gen1 headers and a single USB 3.2 Gen2x2 Type-C front-panel header for additional USB ports.
(Image credit: Tom’s Hardware)
Gigabyte chose to go with a 19-phase setup for the Vcore and SOC on the power delivery front. Controlling power is an Intersil ISL6929 buck controller that manages up to 12 discrete channels. The controller then sends the power to ISL6617A phase doublers and the 19 90A ISL99390B MOSFETs. This is one of the more robust VRMs we’ve seen on a mid-range board allowing for a whopping 1,620A available for the CPU. You won’t have any trouble running any compatible CPU, including using sub-ambient overclocking.
(Image credit: Gigabyte)
The bottom half of the board is mostly covered in shrouds hiding all the unsightly but necessary bits. On the far left side, under the shrouds, you’ll find the Realtek ALC1220-VB codec along with an ESS Sabre ESS 9118 DAC and audiophile-grade WIMA and Nichicon Fine Gold capacitors. With the premium audio codec and DAC, an overwhelming majority of users will find the audio perfectly acceptable.
We’ll find the PCIe slots and M.2 sockets in the middle of the board. Starting with the PCIe sockets, there are a total of three full-length slots (all reinforced). The first and second slots are wired for PCIe 4.0, with the primary (top) slot wired for x16 and the bottom maxes out at x8. Gigabyte says this configuration supports AMD Quad-GPU Cand 2-Way Crossfire. We didn’t see a mention of SLI support even though the lane count supports it. The bottom full-length slot is fed from the chipset and runs at PCIe 3.0 x4 speeds. Since the board does without x1 slots, this is the only expansion slot available if you’re using a triple-slot video card. Anything less than that allows you to use the second slot.
Hidden under the shrouds around the PCIe slots are three M.2 sockets. Unique to this setup is the Aorus M.2 Thermal Guard II, which uses a double-sided heatsink design to help cool M.2 SSD devices with double-sided flash. With these devices’ capacities rising and more using flash on both sides, this is a good value-add.
The top socket (M2A_CPU) supports up to PCIe 4.0 x4 devices up to 110mm long. The second and third sockets, M2P_SB and M2M_SB, support both SATA and PCIe 3.0 x3 modules up to 110mm long. When using a SATA-based SSD on M2P_SB, SATA port 1 will be disabled. When M2M_SB (bottom socket) is in use, SATA ports 4/5 get disabled.
To the right of the PCIe area is the chipset heatsink with the Aorus falcon lit up with RGB LEDs from below. There’s a total of six SATA ports that support RAID0, 1, 5 and 10. Sitting on the right edge are two Thunderbolt headers (5-pin and 3-pin) to connect to a Gigabyte Thunderbolt add-in card. Finally, in the bottom-right corner is the Status LED display. The four LEDs labeled CPU, DRAM, BOOT and VGA light up during the POST process. If something hangs during that time, the LED where the problem resides stays lit, identifying the problem area. This is good to have, even with the debug LED at the top of the board.
Across the board’s bottom are several headers, including more USB ports, fan headers and more. Below is the full list, from left to right:
Front-panel audio
BIOS switch
Dual/Single BIOS switch
ARGB header
RGB header
TPM header
(2) USB 2.0 headers
Noise sensor header
Reset button
(3) Fan headers
Front panel header
Clear CMOS button
(Image credit: Gigabyte)
The Z590 Aorus Master comes with a pre-installed rear IO panel full of ports and buttons. To start, there are a total of 10 USB ports out back, which should be plenty for most users. You have a USB 3.2 Gen2x2 Type-C port, five USB 3.2 Gen2 Type-A ports and four USB 3.2 Gen1 Type-A ports. There is a single DisplayPort output for those who would like to use the CPU’s integrated graphics. The audio stack consists of five gold-plated analog jacks and a SPDIF out. On the networking side is the Aquantia 10 GbE port and the Wi-Fi antenna. Last but not least is a Clear CMOS button and a Q-Flash button, the latter designed for flashing the BIOS without a CPU.
Firmware
The Z590 Aorus Master BIOS theme doesn’t look any different from the Z490 versions. The Aorus board still uses the black and orange theme we’re familiar with. We’ve captured a majority of the BIOS screens to share with you. Like other board partners, Gigabyte includes an Easy Mode for high-level monitoring and adjustments, along with an Advanced section. The BIOS is well organized, with many of the more commonly used functions easily accessible without drilling down multiple levels to find them. In the end, the BIOS works well and is easy to navigate and read.
Image 1 of 17
(Image credit: Tom’s Hardware)
Image 2 of 17
(Image credit: Tom’s Hardware)
Image 3 of 17
(Image credit: Tom’s Hardware)
Image 4 of 17
(Image credit: Tom’s Hardware)
Image 5 of 17
(Image credit: Tom’s Hardware)
Image 6 of 17
(Image credit: Tom’s Hardware)
Image 7 of 17
(Image credit: Tom’s Hardware)
Image 8 of 17
(Image credit: Tom’s Hardware)
Image 9 of 17
(Image credit: Tom’s Hardware)
Image 10 of 17
(Image credit: Tom’s Hardware)
Image 11 of 17
(Image credit: Tom’s Hardware)
Image 12 of 17
(Image credit: Tom’s Hardware)
Image 13 of 17
(Image credit: Tom’s Hardware)
Image 14 of 17
(Image credit: Tom’s Hardware)
Image 15 of 17
(Image credit: Tom’s Hardware)
Image 16 of 17
(Image credit: Tom’s Hardware)
Image 17 of 17
(Image credit: Tom’s Hardware)
Software
Gigabyte includes a few applications designed for various functions, including RGB lighting control, audio, system monitoring, and overclocking. Below, we’ve captured several screenshots of the App Center, @BIOS, SIV, RGB Fusion and Easy Tune.
Image 1 of 14
(Image credit: Tom’s Hardware)
Image 2 of 14
(Image credit: Tom’s Hardware)
Image 3 of 14
(Image credit: Tom’s Hardware)
Image 4 of 14
(Image credit: Tom’s Hardware)
Image 5 of 14
(Image credit: Tom’s Hardware)
Image 6 of 14
(Image credit: Tom’s Hardware)
Image 7 of 14
(Image credit: Tom’s Hardware)
Image 8 of 14
(Image credit: Tom’s Hardware)
Image 9 of 14
(Image credit: Tom’s Hardware)
Image 10 of 14
(Image credit: Tom’s Hardware)
Image 11 of 14
(Image credit: Tom’s Hardware)
Image 12 of 14
(Image credit: Tom’s Hardware)
Image 13 of 14
(Image credit: Tom’s Hardware)
Image 14 of 14
(Image credit: Tom’s Hardware)
Future Tests and Final Thoughts
With the release of Z590, we’re in a bit of a pickle in that we have boards in our hands, but not the Rocket Lake CPU designed for it. We know most of these boards should perform similarly to our previous Z490 motherboard reviews. And while there are exceptions, they are mostly at the bottom of the product stack. To that end, we’re posting these as detailed previews until we get data using a Rocket Lake processor.
Once we receive a Rocket Lake CPU and as soon as any embargos have expired, we’ll fill in the data points, including the benchmarking/performance results, as well as overclocking/power and VRM temperatures.
We’ll also be updating our test system hardware to include a PCIe 4.0 video card and storage. This way, we can utilize the platform to its fullest using the fastest protocols it supports. We will also update to the latest Windows 10 64-bit OS (20H2) with all threat mitigations applied, as well as updating the video card driver and use the newest release when we start this testing. We use the latest non-beta motherboard BIOS available to the public unless otherwise noted.
While we do not have performance results from the yet-to-be-released Rocket Lake CPU, we’re sure the 90A VRMs will handle the i9-11900K processor without issue. We quickly tested the i9-10900K and found the board quite capable with that CPU, easily allowing the 5.2 GHz overclock we set. For now, we’ll focus on features, price, and appearance until we gather performance data from the new CPU.
(Image credit: Gigabyte)
The Gigabyte Z590 Aorus Master is a well-rounded solution, bringing a lot of premium features to the table. Baked into the chipset is USB 3.2 Gen2x2 support, and on the network side, a 10 GbE port and Intel’s Wi-Fi 6E AX210 card are basically the best you can get out of the box. The 90A 18-phase VRM for the processor does not have any issues with an overclocked Comet-Lake CPU, so the new Rocket-Lake CPUs at the same TDP shouldn’t have a problem. This board can be used for sub-ambient overclocking (though the Gigabyte Z590 Tachyon is the purpose-built board by Gigabyte for such a thing).
Since Z590 added native PCIe 4.0 support (with Rocket Lake CPUs only) and additional PCIe lanes, we’ll see more boards with up to three M.2 sockets, just like the less-expensive Steel Legend has. The Aorus Master sports one PCIe 4.0 x4 (64 Gbps) slot and two PCIe 3.0 x4 (32 Gbps) slots. Add to that the six SATA ports and nearly everyone’s storage needs should be covered. The 10 USB ports on the rear IO include a USB 3.2 Gen2x2 Type-C port and should be plenty for most users.
If I had to pick out something that needs improvement, I would like to see more expansion slots. As it stands, there is only one full-length PCIe slot. The $400-plus price tag will also likely put off budget users. While Gigabyte hasn’t listed an exact price for the Aorus Master, the Z490 version came in at just under $400. We expect the Z590 version to be at that point or a little higher.
Compared to similarly priced peers (think ASRock Z590 Taichi, MSI MEG Z590 Unify and the Asus ROG Strix Z590-E Gaming WiFi ), the Gigabyte Aorus Z590 Master covers all the bases. If you prefer the latest audio codec and four M.2 sockets, instead of three, the Asus Z590-E Gaming has you taken care of. If you need ultra-fast networking, Gigabyte has you covered with its 10 GbE. All of the comparable boards are certainly capable and include quite a bit of features at this price point, so it comes down to the price, appearance, and features you need.
In the end, The Gigabyte Aorus Z590 Master is, like most Z590 motherboards, an iterative update from Z490. You get Rocket Lake support out of the box, superior power delivery, ultra-fast networking, and a premium appearance. If you’re looking for a Z590 motherboard around the $400 price point, The Z590 Aorus Master should be on your shortlist. Stay tuned for benchmarking, overclocking, and power results using the new Rocket Lake CPU short list.
Corsair is a US-based peripherals and hardware company founded in 1994. It is now one of the leading manufacturers for gaming gear, with a portfolio spanning nearly every component you need: DRAM memory modules, flash SSDs, keyboards, mice, cases, cooling, and much more.
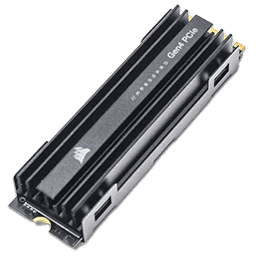
The Corsair MP600 Pro SSD is a high-end M.2 NVMe SSD that introduces support for the PCI-Express 4.0 interface. Internally, the MP600 Pro uses the new eight-channel Phison E18 controller paired with Intel 96-layer TLC flash. A Hynix DRAM chip provides 1 GB of storage for the mapping tables of the SSD.
The Corsair MP600 Pro comes in capacities of 1 TB ($225) and 2 TB ($435). Endurance for these models is set to 700 TBW and 1400 TBW respectively. There’s also a watercooled MP600 Pro Hydro X, which uses a waterblock instead of the metal heatsink and costs $460. Corsair provides a five-year warranty for the MP600 Pro.
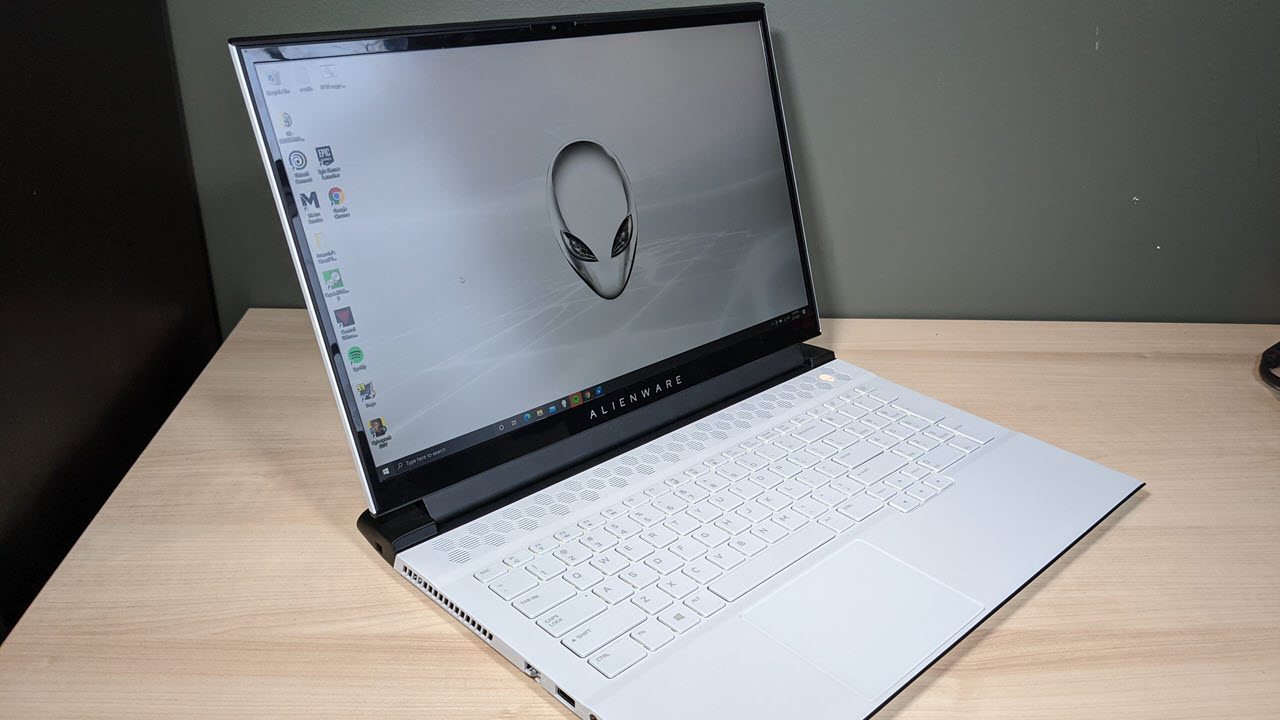
A speed demon that prioritizes raw performance, the Alienware m17 R4 puts plenty of pop into a sleek but bulky chassis.
For
Unrivaled performance
Snappy keyboard
Attractive design
At present, RTX 3080 is the fastest laptop graphics card around, but not all RTX 3080-powered laptops are created equal. Many vendors use Nvidia’s Max-Q technology, which prioritizes power efficiency and low fan noise over high performance. Alienware’s m17 R4, however, seeks to pump out every possible frame, deploying a special cooling system and eschewing Max-Q to make its top-of-the-line configuration one of the best gaming laptops,
But the Alienware m17 R4 is not just a speed demon. Starting at $2,106 ($3,586 as tested), this laptop has a snappy keyboard, a sleek sci-fi inspired design with plenty of RGB and an optional 360 Hz screen. You just have to live with a heavy chassis and the occasional bout of fan noise.
Editor’s Note: The Alienware m17 R4 review unit we tested came with a 512GB boot drive and 2TB RAID 0 storage drive. While this hardware is for sale, it is normally shipped to consumers with the 2TB RAID 0 drive as boot drive.
3x USB Type-A 3.2, 1x HDMI 2.2, 1x mini DisplayPort 1.4, 1x Thunderbolt 3, 1x microSD card reader
Camera
1280 x 720
Battery
86 WHr
Power Adapter
330W
Dimensions (WxDxH)
15.74 x 11.56 x 0.87 inches
Weight
6.6 pounds
Price (as configured)
$3,586
Design of the Alienware m17 R4
Image 1 of 5
(Image credit: Tom’s Hardware)
Image 2 of 5
(Image credit: Tom’s Hardware)
Image 3 of 5
(Image credit: Tom’s Hardware)
Image 4 of 5
(Image credit: Tom’s Hardware)
Image 5 of 5
(Image credit: Tom’s Hardware)
The Alienware m17 R4 has the same sci-fi inspired “Legend” design as both its immediate predecessor, the m17 R3, and its sibling, the Alienware m15 R4. Available in “lunar light: white or “dark side of the moon” (black), the m17 R4 looks like a giant starship, rocketing through space. The body (ours was white) has a black rear end that juts out like the jet engine on the back of an imperial cruiser. The number 17 on the lid appears in a sci-fi font that you might find adorning a secret warehouse at Area 51.
There’s a honeycomb pattern for the vents on the back, above the keyboard and on the bottom surface. We can only assume that Alienware aliens live in some kind of hive where they are all doing CUDA core calculations.
And, of course, there’s lots of RGB lights to brighten the mood in outer space. The keyboard has four-zone RGB and there are customizable lights on the back edge and in the alien heads on the back of the lid and the power button.
The chassis is made from premium materials: a magnesium alloy with matte white or black paint, covered by a clear coat for extra durability. The interior uses Alienware’s cryo-tech cooling technology which has 12-phase graphics voltage regulation, 6-phase CPU voltage regulation and a CPU vapor chamber.
At 6.6 pounds and 15.74 x 11.56 x 0.87 inches, the Alienware m17 R4 is not exactly light or thin, not that would you expect that from a 17-inch laptop with a Core i9 CPU and RTX 3080 graphics. By comparison, the Gigabyte Aorus 17G (5.95 pounds, 15.9 x 10.8 x 1.0 inches) and Razer Blade Pro 17 (6.1 pounds, 15.6 x 10.2 x 0.8 inches) are both significantly lighter, though the Aorus is thicker. The Asus ROG Flow X13, which we’re also comparing to the m17, is much thinner and lighter (2.87 pounds, 11.77 x 8.74 x 0.62 inches), because it’s a 13-inch laptop that gets its RTX 3080 graphics via an external dock.
The Alienware m17 R4 has plenty of room for ports. On the right side, there are two USB 3.2 Type-A ports, along with a micro SD card reader. The left side contains a Killer RJ-45 Ethernet 2.5 Gbps port, a 3.5mm audio jack and another USB Type-A port. The back holds a Thunderbolt 3 port, a mini DisplayPort 1.4, an HDMI 2.1 connection, Alienware’s proprietary graphics amplifier port and the power connector.
Gaming Performance on the Alienware m17 R4
Image 1 of 4
(Image credit: Tom’s Hardware)
Image 2 of 4
(Image credit: Tom’s Hardware)
Image 3 of 4
(Image credit: Tom’s Hardware)
Image 4 of 4
(Image credit: Tom’s Hardware)
Sporting an Nvidia RTX 3080 GPU and an Intel Core i9-10980HK CPU, our review configuration of the Alienware m17 R4 is as fast of a gaming laptop as you can get right now. Thanks to Alienware’s strong cryo-tech cooling solution and the company’s willingness to include a full version of the RTX 3080, rather than the Max-Q variants in some thinner notebooks.
When I played Cyberpunk 2077 at Ultra RTX settings, the game ranged between 61 and 72 frames per second, depending on how intense the action was at any given time. The frame rate improved to between 85 and 94 fps after I changed to Ultra settings with no RTX. In both cases, the fan noise was really loud by default. Changing the fan profile to quiet improved this somewhat while shaving only a couple of fps off, and only in intense scenes.
The Alienware m17 R4 hit a rate of 120 fps in Grand Theft Auto V at very high settings (1080p), eclipsing the Gigabyte Aorus 17G and its Max-Q-enabled RTX 3080 and Core i7-10870H CPU by 20%. The Asus ROG Flow 13 with its Ryzen 9 5980HS CPU and external RTX 3080 dock, was also a good 13% behind while the RTX 2080 Super-powered Razer Blade Pro 17 brought up the rear.
On the very-demanding Red Dead Redemption at medium settings, the m17 R4 achieved an impressive rate of 79.7 fps, besting the Aorus 17G and ROG Flow X13 by more than 20%. Saddled with last year’s card, the Razer Blade Pro 17 was a full 29 % behind.
Alienware’s behemoth exceeded 100 fps again in Shadow of the Tomb Raider, hitting 103 while the Aorus 17G and the ROG Flow X13 hovered in the mid 80s and 60s. On this test, surprisingly, the Razer Blade Pro 17 came close to matching the m17 R4.
Far Cry New Dawn at Ultra settings also provided a great example of the Alienware m15 R4’s dominance. It hit a full 105 fps where its nearest competitor, the Gigabyte Aorus 17G could only manage 92 fps with the Asus ROG Flow X13 and Razer Blade Pro 17 were both in the 80s.
To see how well the Alienware m17 R4 performs over the long haul, we ran the Metro Exodus benchmark at RTX, the highest settings level, 15 times at 1080p. The laptop was remarkably consistent, averaging 75.6 fps with a high of 76.2 and a low of 75.4. During that time, the average CPU speed was 4.19 GHz with a peak of 5.088 GHz. By comparison, the Gigabyte Aorus 17G, got an average frame rate of just 59.6 fps with an average CPU speed of 3.47 GHz and the Asus ROG Flow X13 managed a slightly-higher 65.2 fps with an average CPU speed of 3.89 GHz.
Productivity Performance of Alienware m17 R4
Image 1 of 3
(Image credit: Tom’s Hardware)
Image 2 of 3
(Image credit: Tom’s Hardware)
Image 3 of 3
(Image credit: Tom’s Hardware)
With its Core i9-10980HK CPU, 32GB of RAM and dual storage drives, which include both a 2TB RAID 0 PCIe SSD (2 x 1TB) and a 512GB SSD, and that RTX 3080, our review configuration of the Alienware m17 R4 can be a powerful work tool.
On Geekbench 5, a synthetic benchmark that measures overall performance, the m17 R4 got a single-core score of 1,318 and a multi-core score of 8,051, which wa slightly ahead of the of the Core i7-10870H-powered Gigabyte Aorus 17G on both counts but behind the Asus ROG Flow X13 and its Ryzen 9 5980HS on single-core performance while creaming the Razer Blade Pro 17, which we tested with a Core i7-10875H.
The storage in our review unit came misconfigured slightly, with a 512GB NVMe PCIe SSD as boot drive and a significantly faster 2TB RAID 0 drive made from two 1TB NVMe PCIe SSDs. Dell sells this hardware, but consumers receive units with the 2TB as boot and the 512GB SSD as a secondary, storage drive.
In our tests, copying about 25GB of files, the 512GB drive managed a mediocre 379.7 MBps, but the 2TB drive hit an impressive 1305.5 MBps, which beats the Aorus 17G (869 MBps), the ROG Flow X13 (779.5 MBps) and the Blade Pro 17 (925.2 MBps).
The Alienware m17 R4 took just 6 minutes and 44 seconds to transcode a 4K video to 1080p in Handbrake. That time is 21% faster than the Aorus 17G, 18% quicker than the Flow X13 and a full 29% ahead of the Blade Pro 17.
Display on Alienware m17 R4
(Image credit: Tom’s Hardware)
The Alienware m17 R4 comes with a choice of three different, 17-inch display panels: a 1080p panel with 144 Hz refresh rate, a 4K, 60 Hz panel and the 1080p, 360 Hz panel in our review unit. Our panel provided sharp images and accurate but mostly unexciting colors, along with smooth, tear-free gaming.
When I watched a trailer for upcoming volcano-disaster-flick Skyfire, the red-orange of lava bursts was lively and the green trees in a forest seemed true-to-life. Fine details like the wrinkles in actor Jason Isaacs’ forehead also stood out.
In a 4K nature video of a Costa Rican jungle, details like the scales on a snake and colors like the red on a parrot’s feathers were also strong, but not nearly as strong as when I viewed it on the 4K, OLED panel from the Alienware m15 R4 I tested recently. On both videos, viewing angles on the matte display were strong as colors didn’t fade even at 90 degrees to the left or right.
In Cyberpunk 2077, details like the threads on a rug or the barrel of a gun were prominent and colors like the red and yellow in the UI seemed accurate but didn’t pop.
The Alienware m17 R4’s display registered a strong 316.2 nits of brightness on our light meter, outpacing the Aorus 17G (299.6), the Razer Blade Pro 17 (304.4) and the Asus ROG Flow X13 (281.6). According to our colorimeter, the screen can reproduce a solid 80.6% of the DCI-P3 color gamut, which is about on par with the Aorus 17G and slightly behind the Razer Blade Pro 17, but miles ahead of the ROG Flow X13.
Keyboard and Touchpad on Alienware m17 R4
(Image credit: Tom’s Hardware)
With a deep, 1.7mm of travel, great tactile feedback and a full numeric keypad, the Alienware m17 R4 offers a fantastic typing experience. On the tenfastfingers.com typing test, I scored a strong 102 words-per-minute with a 3% error rate, which is a little better than my typical 95 to 100 wpm and 3 to 5% rate.
Not only does the keyboard have a full numeric keypad, but it also sports four customizable macro keys above the pad on the top row. The Alienware Command Center software allows you to set these to launch a program, enter text or use a pre-recorded set of keystrokes when you hit them. I found programming them very unintuitive, however.it. Alienware Command Center also allows you to set RGB colors or lightning effects for four different zones on the keyboard.
The 3.1 x 4.1 glass touchpad, which uses Windows precision drivers, offers great navigation with just the right amount of friction. Whether I was navigating around the desktop or using multitouch gestures such as pinch-zoom or three-finger swipe, the pad was always accurate and responsive.
Audio on Alienware m17 R4
(Image credit: Tom’s Hardware)
The Alienware m17 R4’s audio system outputs sound that’s loud enough to fill a mid-sized room and rich enough to dance to. When I played AC/DC’s “Back in Black” with the volume all the way up, the sound was mostly accurate, but some of the high-pitched percussion sounds were a little harsh. Earth, Wind and Fire’s bass-heavy “September” sounded great, with a clear separation of sound where instruments such as the horns section appeared to come from a different side of the notebook than, for example, the drums.
Gunshots and the sound of my NPC friend Jackie yelling at me to stay down sounded sharp and clear in Cyberpunk 2077. However, I had to turn the volume way up to compensate for the fan noise when the system was on high performance settings. Even on the “quiet” thermal setting, fan noise was quite prominent.
The preloaded Alienware Command Center app has an audio section that lets you tweak the sound settings and choose among profiles such as Music, Movie, Shooter and Role Play. I found that the default “Alienware” profile sounded about the same as the Music one, but disabling the audio enhancement definitely made the sound flatter.
Upgradeability of the Alienware m17 R4
(Image credit: Future)
The Alienware m17 R4 has three different M.2 SSD slots, all of which are accessible and user upgradeable. The first slot is an short 2230 length and the other two are both the normal 2280 size. Unfortunately, the RAM is soldered onto the motherboard and therefore not replaceable.
Opening the Alienware m17 R4 should be easy: there are eight Philips-head screws, some of which come out and the others of which you can just loosen, on the bottom panel. In our testing, getting the screws loosened was easy by prying off the bottom panel was challenging and required several minutes with a spudger. Once the panel is off, all three SSDs are visible, but are covered by copper heat sinks you can easily unscrew.
Battery Life on Alienware m17 R4
(Image credit: Tom’s Hardware)
Forget about using the Alienware m17 R4 without a power outlet for any length of time. The laptop lasted just just 2 hours and 5 minutes on our battery test, which involves surfing the web over Wi-Fi at 150 nits of brightness. That’s awful in comparison to all of its competitors as both the Gigabyte Aorus 17G and Razer Blade Pro 17 lasted for an identical 4 hours and 41 minutes. But this is a 17-inch, 6.6-pound laptop so portability isn’t a primary concern.
Heat on Alienware m17 R4
The main touchpoints on the Alienware m17 R4 stay relatively cool when you’re not gaming and remain warm but tolerable when you are. After we streamed a YouTube video for 15 minutes, the keyboard hit a reasonable 35.5 degrees Celsius (95.9 degrees Fahrenehitt), the touchpad was a chilly 26.2 degrees Celsius (79.3 degrees Fahrenheit) and the underside was just 36.6 degrees Celsius (97.9 degrees Fahrenheit).
After running the Metro Exodus benchmark for 15 minutes to simulate gaming, those temperatures were obviously higher. The keyboard hit 35.5 degrees Celsius (112 degrees Fahrenheit), the touchpad measured 35 degrees (95 degrees Fahrenheit) and the bottom hit 50 degrees (122 degrees Fahrenheit).
When I played Cyberpunk 2077, the area around the WASD keys measured about 40 degrees Celsius (105 degrees Fahrenheit) but the key caps themselves didn’t feel uncomfortably warm to touch. At performance settings, the fan noise was extremely loud.
Webcam on Alienware m17 R4
(Image credit: Tom’s Hardware)
The Alienware m17 R4’s 720p webcam is nothing special. Even when I shot it in a well-lit room, an image of my face was filled with visual noise and fine details like the hairs in my beard were blurry while colors such as the blue in my shirt and the green on the walls were muted. You’ll get by with this built-in camera if you need to, but you’d be better off springing for one of the best webcams.
Software and Warranty on Alienware m17 R4
Image 1 of 4
(Image credit: Tom’s Hardware)
Image 2 of 4
(Image credit: Tom’s Hardware)
Image 3 of 4
(Image credit: Tom’s Hardware)
Image 4 of 4
(Image credit: Tom’s Hardware)
The Alienware m17 R4 comes preloaded with a handful of useful first-party utilities.
Alienware Mobile Connect allows you to control your Android handset or iPhone from your laptop, taking calls and texts for the desktop.
Alienware Command Center lets you control all the RGB lighting effects, set keyboard macros, tweak audio settings and even modify the performance settings and thermals to go for better performance or quieter and cooler temps. You can even change the max frequency, voltage and voltage offset for the CPU manually if you have an unlocked CPU and want to try overclocking.
As with any Windows laptop, there’s also a small amount of preloaded bloatware, including a trial of Microsoft Office, links to download Photoshop Express and Hulu and free-to-play games like Roblox.
Alienware backs the m17 R4 with a standard one year warranty on parts and labor that includes in-home service (if there was already a remote diagnosis). You can pay extra to extend the warranty up to five years and you can add accidental damage protection with no deductible.
Configurations of Alienware m17 R4
When you purchase the Alienware m17 R4 from Dell.com, you can custom configure it with your choice of a Core i7 or Core i9 CPU, RTX 3070 or 3080 GPU, up to 32GB of RAM and up to 4TB of storage. You can choose white or blackcolor options and you can also pay extra to get per-key RGB lighting instead of the standard 4-zone lighting we tested.
You also get a choice of screens that includes 144 Hz and 360 Hz 1080p panels, along with a 4K, 60 Hz panel that promises to hit 100 % of the Adobe RGB color gamut. If you value image quality over fps, we recommend the latter, because the color on our 360 Hz panel was ok, but not exciting.
Our review configuration of the Alienware m17 R4 currently goes for $3,586.79. For that price, you get the Core i9-10980HK, RTX 3080 graphics, the 360 Hz display, 32GB of RAM and a combination of storage drives that includes two, 1TB M.2 PCIe SSDS in RAID 0 and a 512GB M.2 SSD by itself for a total of 2.5TB of storage. Dell lists the RAID drive as the boot drive in its store but our review model came with the 512GB drive as boot and the 2TB RAID drive as storage, which seems odd.
Bottom Line
(Image credit: Tom’s Hardware)
At this point, it’s hard to imagine someone making a gaming laptop that’s significantly more powerful than the Alienware m17 R4 we tested unless they use desktop parts. The RTX 3080 is currently the fastest mobile GPU around, especially since Alienware didn’t opt for Nvidia’s more power efficient Max-Q technologies.. Using a strong cooling system, pairing it with a Core i9-10980HK, and you have performance that’s often 20% faster than competitors that also use RTX 3080s.
In addition to its strong performance, the Alienware m17 R4 offers a deep, tactile keyboard and a unique, attractive design that’s all its own. The 360 Hz screen is more than capable, but unless you’re a competitive gamer, you can go with the default screen or, better yet, go for the 4K panel which promises much richer colors.
The biggest drawbacks for this epic laptop are those which are kind of inherent to any 17-inch laptop which turns the performance volume up to 11. It’s heavy, has short battery life, emits plenty of fan noise. It’s also quite expensive. It would be nice if, for this price, you got a better-than-awful webcam, but most laptop webcams are terrible.
If you want to save a few dollars or you need a little more battery life, consider the Gigabyte Aorus 17G, which goes for $2,699 with similar specs (but just 1TB of storage) to our Alienware m17 R4. The 17G lasts more than twice as long on a charge and weighs 0.65 pounds less than the m17, but its gaming performance isn’t as good.
If you don’t feel attached to the 17-inch form factor, consider the Alienware m15 R4, which has the same design and keyboard but is much more portable, albeit hotter. It also has an optional, 4K OLED panel which has incredibly vibrant output. However, if you want the ultimate 17-inch gaming rig right now, the Alienware m17 R4 is your best choice.
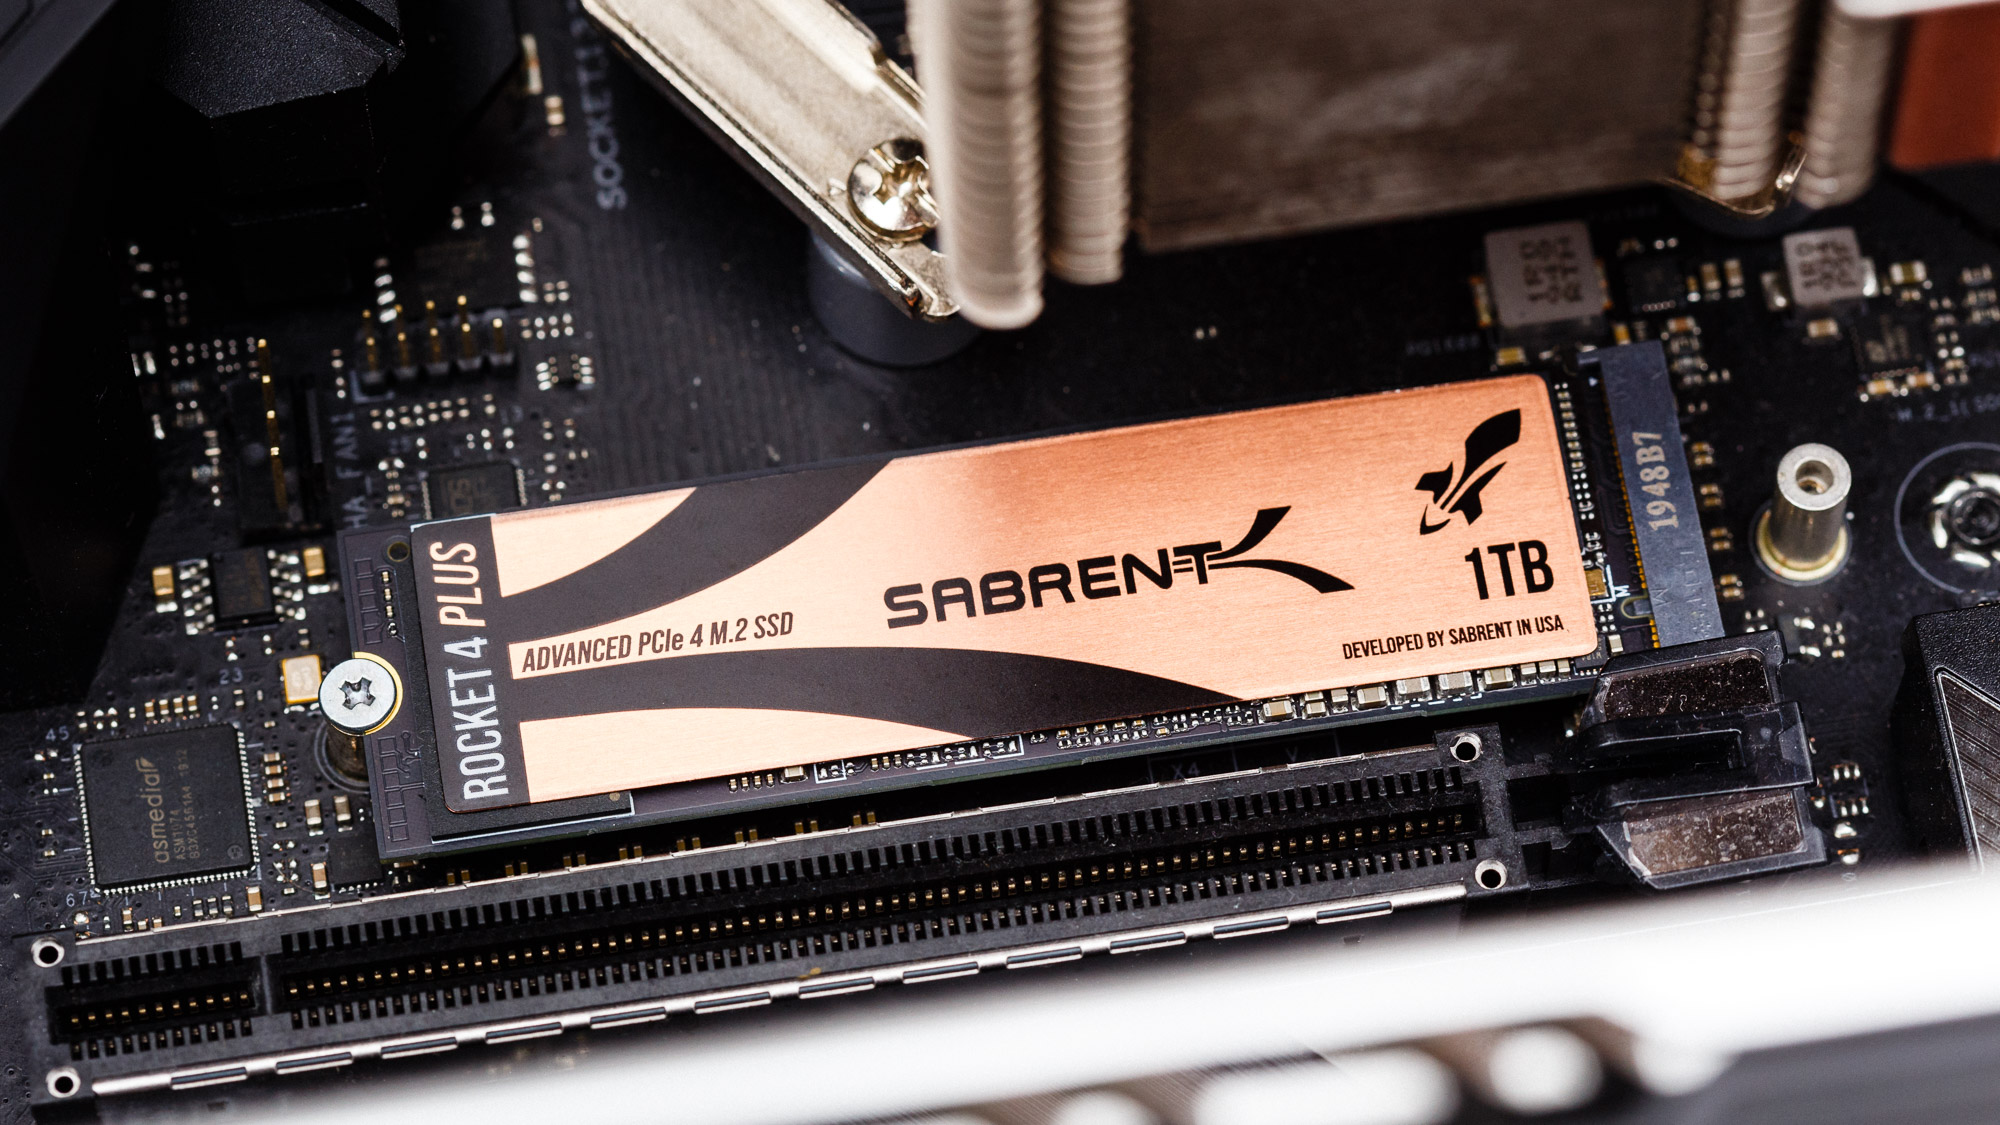
If you’re looking for one of the fastest PCIe 4.0 SSDs on the market, Sabrent’s Rocket 4 Plus has you covered. Though its warranty coverage is a bit of a pain, it still offers a lot of bang for your buck.
For
Fast sequential performance
Competitive pricing
Large and consistent dynamic cache
Attractive design
Up to 5-year warranty
Against
1-year warranty without registration
Not quite as responsive or efficient as Samsung / WD
No AES 256-bit encryption
Slow write speed after write cache fills
Features and Specifications
Sabrent has brought PCIe 4.0 storage to the masses and in more style than most of its competitors, flooding the market with affordable, performant storage. In contrast to our recent reviews of the company’s SSDs more value-focused offerings, today we take a look at Sabrent’s Rocket 4 Plus, a highly anticipated M.2 NVMe SSD that’s poised to take on the best. Sabrent’s Rocket 4 Plus is a viable alternative for those looking for Gen4 performance at a lower cost than WD’s Black SN850 or Samsung’s 980 Pro.
While Sabrent first announced the Rocket 4 Plus months ago in August, its release wasn’t fast enough to beat WD or Samsung to the market because Phison was a bit late to the party with the SSD controller that powers the Rocket 4 Plus. Last November, Phison sent us an engineering sample of the company’s newest creation, the Phison PS5018-E18 NVMe SSD controller. While the engineering sample’s performance left us with mixed thoughts, now it is in its retail form in the Sabrent Rocket 4 Plus. Like our engineering sample, Sabrent’s Rocket 4 Plus comes packed with Micron’s B27B 96L TLC NAND flash but differs in that it comes with revised firmware.
Specifications
Product
Rocket 4 Plus 1TB
Rocket 4 Plus 2TB
Pricing
$199.99
$399.99
Capacity (User / Raw)
1000GB / 1024GB
2000GB / 2048GB
Form Factor
M.2 2280
M.2 2280
Interface / Protocol
PCIe 4.0 x4 / NVMe 1.4
PCIe 4.0 x4 / NVMe 1.4
Controller
Phison PS5018-E18
Phison PS5018-E18
DRAM
DDR4
DDR4
Memory
Micron 96L TLC
Micron 96L TLC
Sequential Read
7,000 MBps
7,100 MBps
Sequential Write
5,300 MBps
6,600 MBps
Random Read
350,000 IOPS
650,000 IOPS
Random Write
700,000 IOPS
700,000 IOPS
Security
N/A
N/A
Endurance (TBW)
700 TB
1,400 TB
Part Number
SB-RKT4P-1TB
SB-RKT4P-2TB
Warranty
5-Years
5-Years
Sabrent’s Rocket 4 Plus is a PCIe 4.0 x4 M.2 NVMe SSD that currently comes in two capacities of 1TB and 2TB at street prices of $200 and $400, but a 4TB model has been spotted in the wild and will potentially be released alongside a 500GB model soon, too.
Sequential performance clocks in at up to 7.1/6.6 GBps read/write, and the SSD can deliver upwards of 650,000/700,000 random read/write IOPS. Like the Rocket NVMe 4.0, the Rocket 4 Plus comes with a large dynamic SLC cache that spans one-third of the device’s capacity.
The Rocket 4 Plus controller leverages Phison’s fourth-generation LDPC ECC engine, end-to-end data path protection, advanced wear-leveling, bad block management, SmartECC, and the SSD is overprovisioned by nine percent to aid in its ability to withstand years of abuse while maintaining high reliability and endurance.
Sabrent rates the Rocket 4 Plus to endure 700TB of writes per 1TB of capacity within its warranty period. Make sure you register your SSD with the company within 90 days for the full five-year warranty, though. If not, you will only receive a measly one-year warranty.
Software
Image 1 of 3
(Image credit: Tom’s Hardware)
Image 2 of 3
(Image credit: Tom’s Hardware)
Image 3 of 3
(Image credit: Tom’s Hardware)
Sabrent provides Acronis True Image for Sabrent software to its customers for free and simple cloning. The company also provides a download for Sabrent Rocket Control Panel to monitor the device and update the firmware, if applicable. It also has the Sabrent Sector Size converter, enabling users to re-format between either 512-byte or 4K-byte sector sizes.
A Closer Look
Image 1 of 3
(Image credit: Tom’s Hardware)
Image 2 of 3
(Image credit: Tom’s Hardware)
Image 3 of 3
(Image credit: Tom’s Hardware)
The Sabrent Rocket 4 Plus comes in an M.2 2280 form factor that is single-sided at 1TB and double-sided at 2TB and 4TB. With a slickly designed two-tone copper heat spreader overtop of a black PCB, the Sabrent Rocket 4 Plus is a looker for sure. Aesthetically, we think it is very appealing.
Image 1 of 2
(Image credit: Tom’s Hardware)
Image 2 of 2
(Image credit: Tom’s Hardware)
Phison’s PS5018-E18 powers the drive. The E18 is a top-of-the-line PCIe 4.0 x4 eight-channel NVMe 1.4 SSD controller manufactured on TSMC’s 12nm process for efficiency. It leverages five CPU cores in its design for high-speed address translation and optimized NAND control.
Three 32-bit Arm Cortex R5 CPU cores manage primary tasks, clocking in at 1GHz (36% faster than the Phison’s PS5016-E16’s cores) while the controller firmware offloads its proprietary Dual CoXProcessor 2.0 code to two lower-clocked cores to ensure consistent quality of service and efficiency. For further power management, the Rocket 4 Plus supports APST, ASPM, and the L1.2 standby power state as well as thermal throttling, currently with a 70 degrees Celsius hard limit.
Additionally, Phison’s E18 leverages a DRAM-based architecture to deliver responsive performance. For the task, Sabrent outfit the Rocket 4 Plus with SK hynix DDR4 DRAM ICs that operate at 1,600 MHz, the 1TB model having a single 1TB chip while the 2TB model comes with a 1TB chip on each side of the PCB.
(Image credit: Tom’s Hardware)
Sabrent opted to use Micron’s 512Gb 96L TLC NAND flash for the Rocket 4 Plus. This flash isn’t quite as fast as Micron’s new 176L flash, but it is still very responsive. While the company’s last-generation Rocket NVMe 4.0 leveraged the Phison PS5016-E16 and BiCS4 96L flash that operated at 800 MTps, Micron’s 96L B27B flash on the Rocket 4 Plus interfaces with the new PS5018-E18 at speeds of up to 1,200 MTps.
Other than increased interface speeds, Micron’s flash features double the plane count of BiCS4 flash that came on Sabrent’s Rocket NVMe 4.0. While quad-plane in design, optimal interleaving isn’t realized until the 2TB capacity. The 1TB model leverages sixteen 512Gb dies while 2TB uses 32 dies, attaining a higher level of parallelism for improved performance over the smaller capacity.
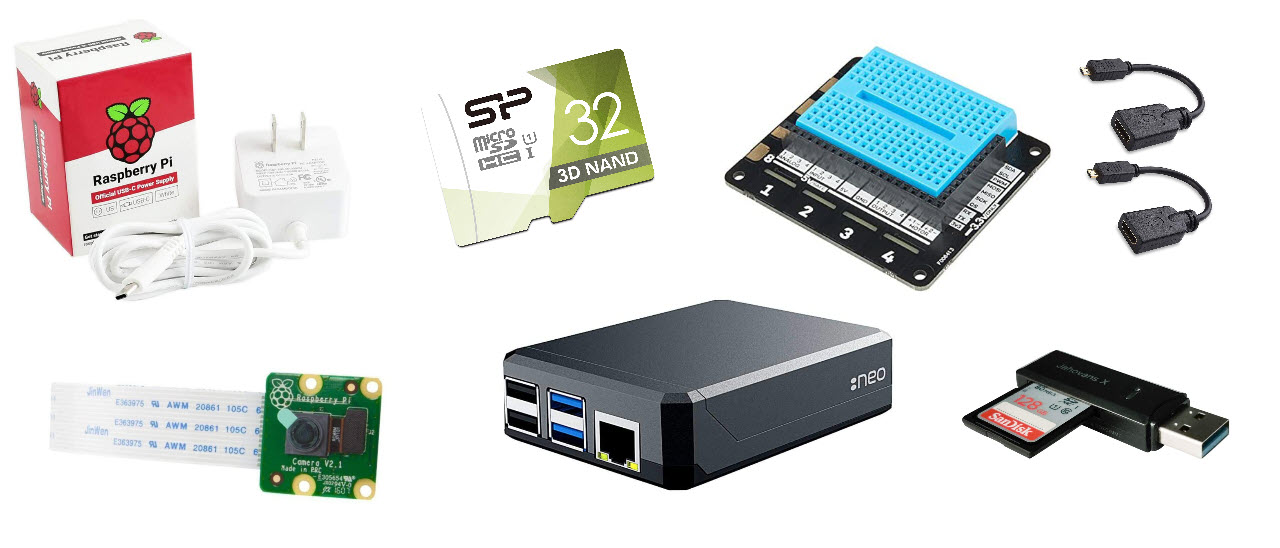
You can purchase a Raspberry Pi for as little as $5 (for the Raspberry Pi Zero) or more likely $35 (for the Raspberry Pi 4), but you’ll need a few extra products to make it run. And, beyond that, there’s a whole world of accessories that help you make the most of your Pi.
As with any computer, on the Raspberry Pi, you’ll need a way to enter data and a way to see the interface, which usually means getting a keyboard, a mouse and a monitor. .However, you can opt for a headless Raspberry Pi install, which allows you to remote control the Pi from your PC. In that case, the minimum requirements are:
microSD card of at least 8GB, but the best Raspberry Pi microSD cards have 32GB or more. When you first set up a Raspberry Pi, you need to “burn” the OS onto it by using a PC, another Raspberry Pi or even a phone with microSD card reader.
Power supply: For the Raspberry Pi 4, you need a USB-C power source that provides at least 3 amps / 5 volts, but for other Raspberry Pis, you need a micro USB connection that offers at least 2.5 amps and the same 5 volts.
In addition, there are a number of accessory and add-on types that protect your Pi, add new features and make everything a lot more useful and fun. These include:
Cases: The best Raspberry Pi cases give you style, functionality and durability.
HATs (aka add-on boards): The best Raspberry Pi HATs let you do everything from adding motors to creating LED light shows.
Breakout Boards: To breakout the GPIO for easier access or to use via a breadboard. Essential for the new Raspberry Pi 400.
Camera Modules: The Raspberry Pi has its own special camera port and there’s a whole ecosystem of compatible camera modules for it.
Cooling: Raspberry Pi 4 models in particular can get hot so fans and heatsinks help.
Electronic parts: You can make great projects and have a lot of fun with motors, sensors, transistors and other bits and bobs.
Overall, these are the best Raspberry Pi accessories. No matter what your needs or project, you’ll definitely need some of these.
The Best Raspberry Pi Accessories You Can Buy Today
(Image credit: Tom’s Hardware)
1. Argon Neo Case
Best Raspberry Pi Case
Attractive aluminum design
Easy access to GPIO pins
Passive cooling
Sliding magnetic cover
Must remove cover to get to pins
The top overall choice on our round-up of the best Raspberry Pi Cases, the Argon Neo combines great looks with plenty of flexibility and competent passive cooling. This mostly-aluminum (bottom is plastic) case for the Raspberry Pi 4 features a magnetic cover that slides off to provide access to the GPIO pins with enough clearance to attach a HAT, along with the ability to connect cables to the camera and display ports. The microSD card slot, USB and micro HDMI out ports are easy to access at all times.
With the cover on or off, the Argon Neo provides solid passive cooling capability as an included thermal pad connects the Raspberry Pi 4’s CPU to an aluminum plate to dissipate heat. You can also attach an optional fan HAT for active cooling. At just $15, this case is extremely affordable but cuts no corners.
(Image credit: Tom’s Hardware)
2. Raspberry Pi High Quality Camera
Best Raspberry Pi Camera
Great image quality
Interchangeable Lenses
Tripod mountable
Expensive
Doesn’t come with lens
It doesn’t come cheap, but the official Raspberry Pi High Quality camera offers the best image quality of any Pi camera by far, along with the ability to mount it on a tripod. The 12-MP camera doesn’t come with a lens, but supports any C or CS lens, which means you can choose from an entire ecosystem of lenses, with prices ranging from $16 up to $50 or more and a variety of focal lengths and F-stop settings.
The Raspberry Pi High Quality camera plugs into the same CSI port on the Raspberry Pi as any other Pi camera module, but unlike the others, this one has a ¼ inch screw hole that allows you to attach it to any standard tripod or camera mount. If you care about image quality, the Raspberry Pi High Quality Camera is a must-have.
Read: Raspberry Pi High Quality Camera review
(Image credit: Tom’s Hardware)
3. Raspberry Pi Camera Module V2
Best Affordable Raspberry Pi Camera
Good image quality
Affordable price
No tripod mounting
If you need a Raspberry Pi camera, but don’t want to spend more than $50 on the high quality module and then have to bring your own lens, the official Raspberry Pi Camera Module V2 is the one to get. This 8-MP camera uses a Sony IMX219 sensor that gives it really solid image quality, records video at up 1080p, 30 fps and is a big improvement over the 5-MP OmniVision OV5647 that was in the V1 camera.
There are a number of third-party Raspberry Pi camera modules on the market, with some costing around $10 or less. However, most of these use the older, OV5647 sensor which provides far worse image quality.
(Image credit: Tom’s Hardware)
4. Lenovo ThinkPad TrackPoint Keyboard II
Best Keyboard for Raspberry Pi
Best-in-class typing experience
Trackpoint for navigation
Both 2.4 GHz and Bluetooth wireless
Long battery life
Expensive
Whether you want to control your Raspberry Pi from the couch or you have it on a table and don’t want to waste space, getting one of the best wireless keyboards is a good idea. It’s particularly helpful to have a wireless keyboard with a pointing device so you don’t need to also drag around a mouse.
Lenovo’s ThinkPad TrackPoint Keyboard II is the best keyboard for Raspberry Pi thanks to its excellent key feel, multiple connectivity options and built-in TrackPoint pointing stick. The keyboard looks and types just like those on Lenovo’s ThinkPad line of business laptops, offering plenty of tactile feedback and a deep (for a non-mechanical), 1.8mm of key travel. The TrackPoint pointing stick sits between the G and H keys, allowing you to navigate around the Raspberry Pi’s desktop, without even lifting your hands off of the home row.
The Thinkpad TrackPoint II has both 2.4-GHz (via a dongle) and Bluetooth connectivity which you can toggle between using a hardware switch. So, if you have two Raspberry Pis or one Pi and one PC, you can switch back and forth with ease. Charging via USB-C, the keyboard promises up to two months of battery life on a charge.
Read: Lenovo ThinkPad TrackPoint Keyboard II review
(Image credit: Amazon)
Raspberry Pi 4 Official Power Supply
Best Raspberry Pi Power Supply
Provides just the right amount of power
Built for Pi
No on/off switch
Not the cheapest option
If you’re going to use a Raspberry Pi 4, you need a USB-C power supply that offers at least 3 amps of juice with a roughly 5-volt output. We’ve found that the best USB-C laptop chargers are capable of delivering this kind of power (albeit often with 4.8 – 4.9 volts, which still works), but if you don’t have a powerful charger handy or need one just for your Pi, the official Raspberry Pi power supply is your best choice.
Rated for 5.1 volts and 3 amps, the official Raspberry Pi 4 power supply has good build quality and a nice design. Available in black or white, it’s a small rectangle, emblazoned with the Raspberry Pi logo and a strong, built-in Type-C cable that’s 59 inches (1.5m) long. Unlike some third-party competitors, it doesn’t come with an on / off switch, but it is compatible with cheap on / off adapters you can attach to the end. You may find competitors for a few dollars less, but the official Raspberry Pi 4 power supply is a sure thing.
If you are shopping for any other Raspberry Pi, including the Raspberry Pi Zero or Raspberry Pi 3 or below, you’ll need a power supply that outputs to a micro-USB port and only requires 2.5 amps and 5 volts. There’s also an official Raspberry Pi charger for these older models.
(Image credit: Amazon)
6. Pimoroni Explorer HAT Pro
Best Raspberry Pi HAT
Analog to digital conversion
Motor controller
LED lights
Built-in breadboard
No pass-thru for other HATs
The Raspberry Pi’s 40 GPIO pins are arguably its most important feature. Using these pins (see our GPIO pinout), you can attach an entire universe of electronics, including motors, sensors and lights. There’s a huge ecosystem of add-on boards, appropriately called HATs (hardware attached on top) that plug directly into the GPIO pins and matching the same layout as the Pi. These add on boards give you all kinds of added functionality, from LED light matrixes to touch screens and motor controllers for robotics projects.
Sitting at the very top of our list of Best Raspberry Pi HATs, each of which has a different purpose, the Pimoroni Explorer HAT Pro provides a smorgasbord of features that you can use in a wide variety of projects. While the Raspberry Pi doesn’t come with an analog to digital converter like Arduino does (see Raspberry Pi vs Arduino), the Explorer HAT Pro provides four ADCs you can use with joysticks or potentiometers. It also packs two motor controllers, four colorful LED lights, four touch pads and four crocodile clips for attaching other electronics. Oh and it comes with a small breadboard you can stick on top and use for mounting and wiring electronics. Every serious Raspberry Pi fan should have one of these on hand.
(Image credit: Amazon)
7. Pimoroni Fan Shim
Best Cooling for Raspberry Pi
Great cooling
HATs go on top of it
Expensive in the US
If you’re using a Raspberry Pi 4, you definitely need some kind of cooling, whether it’s a heat sink, an aluminum with passive cooling built in or, best of all, a fan. The Pimoroni Fan Shim is powerful, easy-to-install and unobtrusive. You just push it down onto the left most side of your GPIO pin header and it does a fantastic job of cooling your Pi. You can even use a Pimoroni Fan Shim on a Raspberry Pi 4 that’s been overclocked all the way to 2.1 GHz, without seeing any throttling.
You can just let the Fan Shim run all the time or you can download Pimoroni’s software, which allows you to set temperature thresholds for it.
Read: Pimoroni Heatsink and Fan Shim Tested
(Image credit: Silicon Power)
8. Silicon Power 32GB 3D NAND microSD Card
Best Raspberry Pi microSD Card
Inexpensive
Leading performance
White surface you can write on
Slow boot times
Unless you’ve specifically configured yours to boot from an SSD (see our article on How to Boot Raspberry Pi from USB), every Raspberry Pi uses a microSD card as its primary storage drive. We maintain a list of the Best microSD cards for Raspberry Pi and have chosen the 32GB Silicon Power 3D NAND card as the top choice.
Unless you’re hosting a media server or have a ridiculous amount of ROMS on a game emulator, a 32GB microSD card provides more than enough storage for Raspberry Pi OS and a ton of applications. The operating system and preloaded applications take up far less than 8GB by themselves.
In our tests, the Silicon Power 3D NAND microSD card had the fastest application open times and the best combination of random reads and writes. Considering that it’s also less expensive than most 32GB cards and that its white surface provides a little room for you to write on it (with marker), this is currently the best card around.
(Image credit: Amazon)
9. GPIO Reference Board
Helpful Accessory
Helpful reference
Cheap
You can look this up online
Each of the Raspberry Pi’s 40 GPIO pins has a different function so it’s hard to keep track of which does what. For example, some of the pins provide I2C communication while others offer power and others are just for grounding. You can look at a GPIO pinout guide such as ours, but sometimes it’s just easier to put the list of functions right on top of the pins.
GPIO reference boards are tiny, non-electronic headers that you place on top of the pins to show you which one has which name. There are many different brands and models for sale and all do pretty much the same thing so there’s no need to be picky about which one you buy. Most have small holes on top that you can use to hang them on a keychain and take them wherever you go.
(Image credit: Amazon)
10. micro HDMI to HDMI Adapters
Must-Have for Pi 4
Very helpful and work well
You still need an HDMI cable
While most of the earlier Raspberry Pi models have a single, full-size HDMI port, the Raspberry Pi 4 has dual micro HDMI ports that can each output to a monitor at up to 4K resolution. While there’s a good chance you already have one or more HDMI cables lying around the house, most of us don’t have micro HDMI cables, because it’s a rarely used connector.
To connect the Raspberry Pi 4 to a screen, you’ll either need a micro HDMI to HDMI cable or a micro HDMI to HDMI adapter you can connect an existing cable to. Cable Matters, a well-known and reputable brand, sells a pair of such adapters for just $10. That’s much cheaper than a single micro HDMI to HDMI cable, which goes for $8 to 10 for just one. I’ve been using these Cable Matters adapters for more than a year now and they’ve worked really well.
(Image credit: Amazon)
11. Electronics Kit with Breadboard, Wires
Great for learning
Helpful for prototyping
No soldering necessary
You can use your Raspberry Pi as a game emulator, a server or a desktop PC, but the real fun begins when you start connecting electronics to its GPIO pins. Of course, to even get started playing with GPIO connectors, you need some interesting things to connect to them such as lights, sensors and resistors.
The market is filled with electronics kits that come with a slew of LED lights, resistors, jumper cables, buttons and other bits and bobs you need to get started. Most importantly, all of these kits come with at least one breadboard, a white plastic surface filled with holes you can use to route and test circuits, no soldering required.
There are plenty of good kits from no-name brands on Amazon, but the Freenove LCD 1602 Starter kit caught our eye, because it comes with an ADC chip for analog-to-digital conversion, an LCD text screen and a GPIO extension board you can use to route all your pins over to the breadboard at once.
(Image credit: Amazon)
12. USB 3 microSD Card Reader
Need it to read and write
PC with USB port quired
In order to write Raspberry Pi OS (or a different OS) to a microSD card, you’ll need some kind of microSD card reader that you can attach to your PC. Just about any make or model will do as long as it reads SDHC and SDXC cards and, preferably, connects via USB 3.0. I’ve been using the Jahovans X USB 3.0 card reader, which currently goes for $5.99, for almost a year now and it has worked really well.
You can also attach a microSD card reader to your Pi and use it to create a disk image backup of your Raspberry Pi.
(Image credit: Tom’s Hardware)
13. Raspberry Pi Zero Official Case
Best Case for Raspberry Pi Zero
GPIO Access
Camera Access
Official Pi design
Can’t have both GPIO and Camera at once
We’re not huge fans of the Official Raspberry Pi 4 case, because it covers the GPIO pins and camera slots. However, the Official Raspberry Pi Zero case is a completely different as it comes with three different covers: one which has a camera hole (so you can make a Raspberry Pi body camera), another which exposes the GPIO pins and a third which covers the whole thing. The official Raspberry Pi Zero case also has the official burgundy and white colors of the Raspberry Pi Foundation.
ADATA is Taiwan’s largest manufacturer of flash storage and DRAM memory for computers. They have been at the forefront of SSD development for many years, bringing us famous SSDs like the SX8200, SX900, and S510.
XPG is one of ADATA’s sub-brands and creates products optimized for the needs of gamers.
The Gammix S50 Lite is a mainstream M.2 NVMe SSD that brings support for the PCI-Express 4.0 interface to the masses at affordable pricing. Internally, the Gammix S50 Lite uses a four-channel Silicon Motion SM2267G controller paired with Intel 96-layer TLC flash. A 1 GB Micron DRAM chip provides 1 GB of storage for the mapping tables of the SSD.
The XPG Gammix S50 Lite comes in capacities of 1 TB ($140) and 2 TB ($260). Endurance for these models is set to 750 TBW and 1480 TBW respectively. ADATA provides a five-year warranty for the Gammix S50 Lite.
Specifications: ADATA XPG Gammix S50 Lite 2 TB SSD
Brand:
XPG / ADATA
Model:
AGAMMIXS50L-2T-C
Capacity:
2048 GB (1907 GB usable) No additional overprovisioning
Choosing the best motherboard is in many ways the most integral part of your PC build, although choosing the best graphics card and best CPU often get more attention. Every part of your PC plugs into the motherboard you choose. Its form factor dictates the size of your computer and how much you can plug into it, and the chipset / CPU socket define what kind of processor you can install.
Motherboards (Image credit: Tom’s Hardware)
Motherboards—particularly high-end models—are often made up of a confusing collection of features, and can range in price from sub-$60 (£50) budget boards to as much as $1,000 or more. We’re here to help untangle the complexities and make sure you pick the right model for your needs, without blowing too much of your build budget for other parts.
Speaking build budgets, if you’re looking to save some money while shopping , you should check out our feature about the eight features you probably don’t need on a motherboard.
And if you’re after a brand-new board from Intel’s new Z590 or AMD’s X570 linuep, note that motherboard prices for both platforms have increased over previous generations, at least in part due to support for PCIe 4.0. Just note that while AMD’s B550 boards support PCIe 4.0 now with a Zen 2/3-based processor, the Intel Z490 boards that list PCIe 4.0 support (and all new Z590 boards) will only activate that support when paired with a next-generation Rocket Lake-S CPU. Those processors aren’t quite here yet, but should arrive in the next few months.
TLDR
Get the right socket for your CPU: You can find great CPUs from either Intel or AMD, but whatever CPU you buy, make sure that your board has the correct socket to support it. The latest mainstream AMD chips use AM4 sockets while current Intel 10th and upcoming 11th Gen Core CPUs work in LGA 1200 sockets.
Smaller boards = fewer slots and features. Motherboards come in three main sizes, from largest to smallest: ATX, Micro-ATX and Mini-ITX (Yes, Mini is smaller than Micro). You can use a smaller chassis with the micro or mini boards, but you’ll have to settle for fewer PCIe slots, RAM slots and other connectors.
You can spend under $150: You can often find a decent motherboard for less than $150. But if you want to overclock an Intel chip, you want PCIe 4.0 or you need a lot of ports, you will have to spend more, often more than $200. High-end desktop chips like AMD Threadripper require expensive $200-plus motherboards.
Pay for built-in Wi-Fi, high-end ports only if you need them. Don’t spend extra for wireless if you are using a wired connection. You can futureproof your PC by getting USB 3.1 Gen 2 and / or Thunderbolt 3 support, as well as PCIe 4.0.
The Basics: Chipsets, Board Size, Connectors & Ports
If you’re after a refresher on motherboard basics, including the differences between chipsets, motherboard sizes, connector and port features, and RAM slots, you can find them in our Motherboard Basics feature. There we dive deep into the complexities of board design and features, so you’ll know exactly what to look for (or ignore) when shopping for a motherboard.
Motherboards
How much can you spend on a motherboard?
Prices range from below $50 (£40) on the low-end to above $1000 (£772) for premium boards that support HEDT (High-End Desktop) chips like Core X and Threadripper. Here’s roughly what you get at each price range:
Up to $100/£80: You can get overclockable boards for AMD chips (even with the premium, last-generation X370 chipset) in this range. But with Intel, you’re stuck with stock speeds (though that may change with Intel’s upcoming B560 and H570 boards). Depending on sale prices, you can get a host of features, including onboard Wi-Fi, although Wi-Fi-equipped boards usually start above $80/£60.
Sub $150/£140: Boards with Intel’s Z490 and chipset, which you’ll need for overclocking, start at the low end of this range. You also start to see more AMD boards with higher-end chipsets (X570) and premium features such as RGB lights lights and Wi-Fi. Note that, when we wrote this, pricing for the full range of Intel’s latest Z590 motherboards was still very much up in the air.
Sub $200/£180: As you start to climb into the premium tier, you’ll see more RGB lights, beefier heatsinks and better power phases and VRMs (voltage regulation modules)–which are important for competitive overclocking. You’ll also find a better selection of ports at this level, including a greater number of USB 3.0/3.1 Gen 2 connectors. The bulk of Intel’s Z490 boards also start in this range, right around or above $150.
$200/£180+: For mainstream platforms, before Z490 and X570, this was the truly premium price range, where you’d see the best board components, giant (often very stylized) heatsinks, and I/O covers designed to deliver a slick, premium look. Extreme overclocking features, which mainstream builders don’t need, are also often a key feature set.
For more recent chipsets like Z490 and Z590, the truly premium boards start above about $250.
Also in this price tier, you’ll find HEDT motherboards for CPUs with very high core counts (Intel Core X and AMD Threadripper). Threadripper boards in particular start at around $300 (£250).
What CPU are you using with your motherboard?
The CPU you’re planning on pairing with your board will narrow down your options, since the CPU socket on a given motherboard will only work with the chip line it was designed for.
For instance, if you’re buying an Intel 10th or 11th Generation Core processor, you’ll need a board with an LGA 1200 socket. Older 9th Generation processors need boards with an LGA 1151 socket. AMD makes this process a bit less confusing because (for now at least) the company uses the same AM4 socket for all of its mainstream current-gen chips, from Athlons all the way up to 16-core Ryzen 9 parts, although you may run into complications installing newer CPUs on previous-generation motherboards. Intel, on the other hand, has a tendency in recent years to switch sockets (or at least socket compatibility) from one generation to the next, although that’s not the case this generation, with Socket 1200 sticking around for two generations.
For the true high-end, both Intel (LGA 2066) and AMD (TR4) have different sockets to accommodate the larger size and power draw of their Core X and Threadripper processors. For more on processor considerations, see our CPU Buying Guide.
Sockets
Enthusiast/Mainstream
HEDT
Intel
LGA 1200
LGA 2066
AMD
AM4
TR4
What size motherboard do you want?
We’ve covered this in detail in our Motherboard Diagram feature. But most modern motherboards come in three sizes.
ATX is the de facto standard and offers the most space for plugs and slots.
Micro-ATX is 2.4-inches shorter, which means less room for expansion slots.
Mini-ITX can make for a tiny PC, but you’ll usually only have room for one add-in card (like a graphics card), and fewer connectors for storage and RAM.
What ports do you need?
It’s always important to check the I/O area on a motherboard to make sure it has the external connection options you’re after, but also check for USB headers on the motherboard. These will let you add more ports via front-panel connection on your PC case, or via inexpensive expansion slot brackets at the back.
Here’s a list of common ports, and our take on each:
USB 3 / USB 3.1 Gen1: You can never have too many of these, because they work with most peripherals.
USB 2: Slower than USB 3 / 3.1, but more than adequate for keyboards, mice and many other devices.
USB 3.1/3.2 Gen2: Not many peripherals take advantage of this standard yet, but it delivers 10 Gbps of bandwidth, which is double what you get with USB 3.1 Gen 1 / USB 3.0. USB 3.2 Gen2 2×2 doubles that bandwidth again, with two 10 Gbps lanes. You’ll often only find one of these ports on mid- and high-end boards.
USB Type-C: These ports could be either USB 3.1 Gen1 or USB 3.1 Gen2 compatible and are designed for newer devices such as phones. A few are also just USB 2.0, and often get labeled as Audio USB-C ports, aimed at connecting USB-C headsets.
HDMI / DisplayPort Video out: You only need these if you plan to use integrated graphics. Discrete cards have their own ports.
Audio ports: Important if you plan to connect analog speakers or headphones.
PS/2 ports: Give you compatibility with really old keyboards and mice.
Thunderbolt: Very rare to find this built into motherboards, but some boards support it through dedicated add-on cards. Provides the fastest possible connections, up to 40 Gbps.
While you may not need many USB 3.1 Gen 2 or Type-C ports today, they are good ways to future-proof your PC.
How many RAM slots do you need?
Most mainstream boards these days have four RAM slots, although compact Mini-ITX models often have just two, and high-end HEDT boards (like the one pictured below) frequently offer eight. The amount of slots of course limits the amount of RAM you can install.
But for mainstream tasks and games, 16GB is sufficient and 32GB is ample. And even with just two slots, you can install as much as 64GB of RAM. Note, though, that you will often pay a premium for denser 64 and 32GB kit that uses two sticks, rather than a kit that’s spread across four sticks.
What expansion slots do you need?
You’re most likely to come across just two types these days: the short PCIe x1 shot (often used for things like USB and SATA expansion), and the longer PCIe x16 slot (used for graphics cards, RAID cards, and extremely fast PCIe storage like Intel’s Optane 905 SSD). If you’re just planning on installing a single graphics card, a couple of SATA/M.2 drives, and perhaps a video capture or sound card, you should be fine with most ATX or Micro-ATX boards, which offer at least one x16 slot and one or two x1 slots.
But note that recent X570 and B550 as well as upcoming Intel Rocket Lake-S boards (and, confusingly, some previous-generation Z490 boards) also support PCIe 4.0 rather than the 3.0 that’s been standard for the past several years. PCIe 4.0 technically doubles the available bandwidth of every PCIe lane. But outside of PCIe 4.0 SSDs, most devices haven’t taken major advantage of PCIe 4.0 yet. So think of it as some future-proofing on your board.
However, figuring out how many drives and cards you can install is tricky, because no matter how many physical slots you have, there’s a limited number of HSIO (high-speed input/output) lanes and PCIe lanes that all of your components must share. We could spend 3,000 words trying to explain how these lanes work, but the bottom line is that many mainstream motherboards compensate for bandwidth limitations by switching some connections off when you install hardware in specific slots.
For example, adding a PCIe M.2 drive may disable some SATA ports, or installing a card in a third PCIe slot may disable a second (or third) M.2 slot, etc. These issues vary greatly by motherboard model, so you’ll need to consult online manuals before buying–especially if you’re planning on loading up your board with lots of components.
That said, if you are planning on plugging lots of drives and cards into your PC, it’s worth considering one of the high-end HEDT platforms, as they have more PCIe lanes to work with. All of AMD’s Threadripper processors have 64 lanes (60 from the CPU, 4 from the chipset), while Intel’s competing Core X platform provides up to 44 lanes, depending on the CPU, and up to 24 more from the chipset. So if you’re planning on plugging, for instance, multiple graphics cards and a RAID array of PCIe/NVMe storage, or other bandwidth-hungry hardware into your system, these higher-end platforms are definitely the way to go.
Which chipset should you get?
Your CPU choice will dictate your compatible chipset options, and if you opt for the highest-end consumer Intel or AMD chips (Core X or Threadripper), you’ll only have one choice (X299 for Intel or X399 for AMD). But for mainstream users who just want to install a single graphics card and a few drives, you can often get the features you’re after by opting for a chipset below Intel’s Z590 or X570 for AMD.
Previously, if you chose, say, an H470, B460, or H410 board on the Intel side, you’d lose the option to overclock, though only a handful of mainstream Intel chips are unlocked for overclocking anyway (those with product names that end in the letter “K”). But that looks to be changing with upcoming Intel 500-series boards. Stay tuned to our motherboard reviews for more info there as we get to test a new round of mainstream Intel boards.
On the AMD side, the B550/X570 (as well as older B450, B350 and B300) chipsets still support overclocking. Although you will lose some fast USB and SATA ports and PCIe lanes over the X570 chipset, enough of those connectivity options remain to support most mainstream computing tasks. If you need more ports and drives, stepping up to an X570 board is worth the money, especially considering that many higher-priced B550 boars are just as (if not more) expensive than many X570 offerings.
Do you plan to overclock?
As we noted in the chipset section above, if you plan to overlock on the Intel side, for older boards, you’ll need to opt for a Z490 chipset and a CPU with a “K” in its model name (like the Core i7-8700K), or step up to the high-end X299 platform and a Skylake X chip. It looks like lesser Intel 500 series boards will also make overclocking possible, though you’ll still need an unlocked “K” processor. On the AMD side, things are a lot simpler, with nearly all current-generation Ryzen chips supporting overclocking, and all but the lowest-end chipsets (A320 and A300) supporting overclocking as well.
But that doesn’t mean that mainstream users should overclock their processors. As we said in our CPU Buying Guide, in order to make your CPU achieve higher clock speeds than it’s rated for out of the box, you’ll likely spend extra on an enhanced cooling system and a high-end motherboard. By the time you factor in all these extra costs, you may be better off budgeting another $50-$100 (£40-80) for a CPU that comes with higher clock speeds out of the box.
Now, if you already have a top-of-the-line chip and want to push it even further, or you just enjoy the challenge, by all means, spend the extra money and time to squeeze out that extra speed.
What about audio?
Unless you’re a serious audiophile, you happen to get faulty hardware, or you opt for the lowest-end motherboard possible while still expecting exquisite sound, you should get by with on-board audio these days just fine.
Motherboard audio quality is primarily defined by the audio codec (aka the audio processing chip) a given board uses. So, if you’re a stickler for sound quality, you can look up the codec a given board uses before buying and see if it’s a mid-range or high-end model. Alternatively, you can, of course, still opt for a dedicated sound card, or USB speakers that move the DAC (digital-to-analog converter) hardware outside of the PC altogether, like the Audioengine A2+.
Given the sheer number of features that board makers sometimes slap on motherboards–particularly high-end models–it’s impossible to discuss them all. But here are a few to keep an eye on:
On-board on/off switches: These can be handy in the initial build process, or if your system is being housed in an open case for benchmarking/component testing. But for the average user, on-board buttons (which sometimes also include buttons to clear the CMOS or do basic overclocking) aren’t necessary.
LED diagnostic readouts: The tiny speaker that plugs into motherboard headers to provide diagnostic beeps when something goes wrong is going the way of the dodo. In its place, many mid-to-high-end boards now include a two-or-three-digit display for the same purpose, giving you an alpha-numeric code when something goes wrong. This can be a real help when building a PC or upgrading and you either forget to plug something in, something isn’t seated properly, or one of your components turns out to be faulty.
Wi-Fi Card: If you don’t have Ethernet near your computer, you want this. And if you plan on keeping your PC around for years to come, look into a board with Wi-Fi 6.
Dual Ethernet ports: A single Gigabit Ethernet port has plenty of bandwidth for Internet traffic, so this is helpful mainly if you plan to use the computer as a server and the board can aggregate the two connections into one. For those with heavy-duty wired network needs, look for a board with 2.5Gb or 10Gb Ethernet.
For more on what features you don’t need, see our 8 Motherboard Features You Probably Don’t Need.
How important are aesthetics to you?
If the only time you’re going to see your system’s innards is when it’s powered down with the side panel off, there’s no reason to opt for RGB lights or flashy I/O covers and heatsinks. However, if your case has a window, you should get a board that you like looking at–with lights if you like them.
Just keep in mind that, particularly if you’re a novice builder, a dark motherboard can make building or updating your system more difficult, as on-board labels will be harder to see. Also, if you are building a system that you want to look as clean as possible (that is, with few visible wires snaking around the motherboard), look for a board with its fan and USB headers placed around the edges, and SATA and USB 3 header ports that point to the side, rather than sticking up vertically. This will make accomplishing a clean build much easier.
MORE: Best Motherboards
MORE: All Motherboard Content
MORE: How to Sell Your Used PC Components
Want to comment on this story? Let us know what you think in the Tom’s Hardware Forums.
I would like to thank Asustor for supplying the review sample.
Asustor recently introduced the Lockerstor 4 NAS, a four-bay NAS with some interesting features. For starters, it uses a capable quad-core Intel Celeron processor for a NAS, with burst frequency of up to 2.7 GHz. Such a server has to strike a balance between power and energy consumption when it comes to the CPU since it operates continuously around the clock. A power-hungry CPU would increase the thermal load, which requires active cooling. Active cooling, on the other hand, is not as reliable as passive cooling and may get noisy. Keeping internal NAS temperatures low is of immense importance for other reasons as well—it ensures less storage-related issues over the long run. While aggressive fan-speed profiles will work, no one wants a noisy NAS at home.
Another interesting feature is the HDMI 2.0a port, which supports up to 4K resolution with a refresh rate of 60 Hz. In combination with the Asustor Portal applications, which include Plex, this NAS can be a powerful multimedia hub. Besides multimedia, there are other scenarios where an HDMI port may come in handy (e.g., surveillance). Below are a few more strong points that speak for the AS6604T.
Two 2.5 Gbit Ethernet ports
Pair of M.2 NVMe SSD ports (only be usable for cache purposes).
Upgradable RAM
Dual file-system support for internal storage (btrfs and EXT4)
Finally, if four bays are not enough for your needs some time down the line, you can easily expand your storage by connecting other Asustor NAS units over the bundled USB 3.2 ports.
Specifications
Asustor Lockerstor 4 (AS6604T) Specifications
Processor
Intel Celeron J4125 Quad Core 2.0 GHz (burst frequency of up to 2.7 GHz)
Operating System
Embedded Linux
Memory
4 GB SO-DIMM DDR4 (upgradable)
Flash Memory
8 GB eMMC
Storage
4x 3.5″https://www.techpowerup.com/2.5″ SATA II/III
M.2 Drive Slots (SSD Cache)
2x M.2 PCIe (NVMe) *M.2 2280
RAID Levels:
Single Disk, JBOD, RAID 0, 1, 5, 6, 10
Maximum Drive Bays with Expansion Unit
16
Maximum Internal Capacity (Raw)
72 TB (18 TB HDD x4, real capacity depends on the RAID type)
Maximum Capacity (Raw) with Expansion Units
288 TB (18 TB HDD x16, real capacity depends on the RAID types)
File System (Internal Drives)
EXT4, btrfs
File System (External Drives)
EXT4
EXT3
FAT32
NTFS
HFS+
exFAT
btrfs
iSCSI
Target & Initiator
Hot-Swap
4x
Networking
2.5 Gigabit Ethernet x2 (2.5G/1G/100M)
HDMI Output
1x HDMI 2.0a
Expansion
3x USB 3.2 Gen 1
IP Cameras
up to 40 (4x are included)
Dimensions
185.5 (H) x 170 (W) x 230 (D) mm
Weight
2.96 kg
Power Consumption
27.6 W (Operation) 12.6 W (Disk Hibernation) 0.75 W (Sleep Mode) (with Seagate Ironwolf 16 TB)
Power Supply
External, 90 W, 100–240 V (Delta DPS-90AB-3)
Fan
120 mm (FD121225HB)
Warranty
3 years
Price Excluding VAT (at the time of review)
$549
We use cookies on our website to give you the most relevant experience. By clicking “Accept”, you consent to the use of ALL the cookies.
This website uses cookies to improve your experience while you navigate through the website. Out of these, the cookies that are categorized as necessary are stored on your browser as they are essential for the working of basic functionalities of the website. We also use third-party cookies that help us analyze and understand how you use this website. These cookies will be stored in your browser only with your consent. You also have the option to opt-out of these cookies. But opting out of some of these cookies may affect your browsing experience.
Necessary cookies are absolutely essential for the website to function properly. This category only includes cookies that ensures basic functionalities and security features of the website. These cookies do not store any personal information.
Any cookies that may not be particularly necessary for the website to function and is used specifically to collect user personal data via analytics, ads, other embedded contents are termed as non-necessary cookies. It is mandatory to procure user consent prior to running these cookies on your website.